
Subscribe to Our Youtube Channel
Related Manuals for Mitsubishi RV-12SD Series


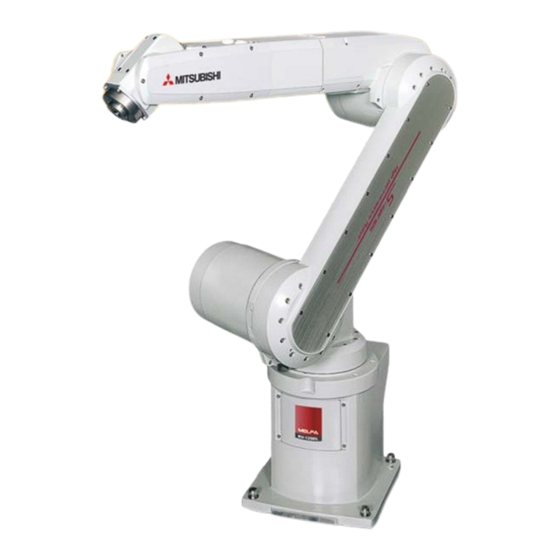
Summary of Contents for Mitsubishi RV-12SD Series
- Page 1 Mitsubishi Industrial Robot RV-12SD Series Standard Specifications Manual (CR3D-701M/CR3D-701 Controller) BFP-A8656...
- Page 3 Safety Precautions Always read the following precautions and the separate "Safety Manual" before starting use of the robot to learn the required measures to be taken. CAUTION All teaching work must be carried out by an operator who has received special training. (This also applies to maintenance work with the power source turned ON.) Enforcement of safety training CAUTION...
- Page 4 The points of the precautions given in the separate "Safety Manual" are given below. Refer to the actual "Safety Manual" for details. CAUTION Use the robot within the environment given in the specifications. Failure to do so could lead to a drop or reliability or faults. (Temperature, humidity, atmosphere, noise environment, etc.) CAUTION Transport the robot with the designated transportation posture.
- Page 5 CAUTION Do not stop the robot or apply emergency stop by turning the robot controller's main power OFF. If the robot controller main power is turned OFF during automatic operation, the robot accuracy could be adversely affected.Moreover, it may interfere with the peripheral device by drop or move by inertia of the arm. CAUTION Do not turn off the main power to the robot controller while rewriting the internal information of the robot controller such as the program or parameters.
- Page 6 ■ Revision history Date of print Specifications No. Details of revisions 2008-05-9 BFP-A8656 First print.
- Page 7 When creating these standard specifications, we have edited them so that the Mitsubishi robot's characteristics and specifications can be easily understood by users considering the implementation of robots. However, if there are any unclear points, please contact your nearest Mitsubishi branch or dealer.
-
Page 8: Table Of Contents
Contents Page 1 General configuration ..................................1-1 1.1 Structural equipment ................................1-1 1.1.1 Standard structural equipment ..........................1-1 1.1.2 Shipping special specifications ........................... 1-1 1.1.3 Options ....................................1-1 1.1.4 Maintenance parts ................................1-1 1.2 Model type combination of robot ............................1-2 1.2.1 Combinations of robot arms and controllers ...................... - Page 9 Page 3 Controller ......................................3-40 3.1 Standard specifications ..............................3-40 3.1.1 Standard specifications .............................. 3-40 3.1.2 Protection specifications and operating supply ....................3-42 3.2 Names of each part ................................3-43 3.3 Outside dimensions/Installation dimensions ......................3-46 3.3.1 Outside dimensions ..............................3-46 3.3.2 Installation dimensions ..............................
-
Page 10: General Configuration
1General configuration 1 General configuration 1.1 Structural equipment Structural equipment consists of the following types. 1.1.1 Standard structural equipment The following items are enclosed as a standard. (1) Robot arm (2) Controller (3) Machine cable (4) Robot arm installation bolts (5) Arm fixing bolts (6) Safety manual, Instruction manual, CD-ROM (Instruction manual) (7) Guarantee card... -
Page 11: Model Type Combination Of Robot
1.2.1 How to identify the robot model RV-12SD L C -Sxx ( a ) ( b ) ( c ) ( d ) (a). RV-12SD......... Indicates the RV-12SD series. (b). L..........Indicates long arm type. Examples) Blank: Standard type. L: Long arm type. -
Page 12: Contents Of The Structural Equipment
1General configuration 1.5 Contents of the structural equipment 1.5.1 Robot arm The list of structural equipment is shown in Fig. 1-1. Vertical six-axis Machine cable multiple-jointed type (Standard product: 7m attachment) (RV-12SD/12SDL/12SDC/12SDLC) Machine cable extension (attached to the standard 7 m cable) ・... -
Page 13: Controller
General configuration 1.3.1 Controller The devices shown below can be installed on the controller. The controllers that can be connected differ depending on the model of the robot arm. Controller Caster type Teaching pendant (T/B) ・ CR3D-701M(IP54 仕様) controller R32TB または... -
Page 14: Contents Of The Option Equipment And Special Specification
1.4 Contents of the Option equipment and special specification A list of all Optional equipments and special specifications are shown below. Table 1-1 : The list of Option equipment and special specification Classificati Item Type Specifications Descripsion Note1) Stopper part Stopper for changing the 1S-DH-0 + side: +135, +90, or +45 deg. - Page 15 KU-AMB530 SANWA SUPPLY INC. (USB A type-USB mini B type) USB-M53 ELECOM CO., LTD. GT09-C20USB-SP MITSUBISHI ELECTRIC SYSTEM & SERVICE CO., LTD. MR-J3USBCBL3M MITSUBISHI ELECTRIC CO., LTD. USB adapter AD-USBBFTM5M ELECOM CO., LTD. (USB B type-USB mini B type) Caution Be careful to the USB cable to apply neither the static electricity nor the noise.
-
Page 16: Robot Arm
2Robot arm 2 Robot arm 2.1 Standard specifications 2.1.1 Standard specifications Table 2-1 : Tab Standard specifications of robot Item Unit Specifications Type RV-12SD RV-12SDC RV-12SDL RV-12SDLC 6-axis standard arm 6-axis long arm Type of robot Clean Clean Standard Standard (Special Specifications) (Special Specifications) Degree of freedom... -
Page 17: Definition Of Specifications
2 Robot arm 2.2 Definition of specifications The accuracy of pose repeatability mentioned in catalogs and in the specification manual is defined as follows. 2.2.1 Pose repeatability For this robot, the pose repeatability is given in accordance with JIS 8432 (Pose repeatability). Note that the value is based on 100 measurements (although 30 measurements are required according to JIS). -
Page 18: Rated Load (Mass Capacity)
2 Robot arm 2.2.2 Rated load (mass capacity) The robot's mass capacity is expressed solely in terms of mass, but even for tools and works of similar mass, eccentric loads will have some restrictions. When designing the tooling or when selecting a robot, consider the fol- lowing issues. -
Page 19: Relationships Among Mass Capacity, Speed, And Acceleration/Deceleration Speed
2 Robot arm 2.2.3 Relationships Among Mass Capacity, Speed, and Acceleration/Deceleration Speed This robot automatically sets the optimum acceleration and deceleration speeds and maximum speed, according to the load capacity and size that have been set, and operates using these automatically set speeds. To achieve that, it is necessary to correctly set the actual load data (mass and size of hand and work) to be used. -
Page 20: Protection Specifications And Working Environment
The IEC IP symbols define the degree of protection against solids and fluids, and do not indicate a protective structure against the entry of oil or water. The evaluation regarding oil mist specifications has been confirmed with Mitsubishi's standard testing methods using the cutting oils shown in Table 2-3 Table 2-3 :... - Page 21 2 Robot arm Also, if the cover and/or other parts are damaged by interferences caused by the peripheral devices and the robot, the protection specification (seal performance, etc.) may be degraded. Therefore, please pay extra attention when handling the robot. Refer to Page 91, "6.2 Working environment".
-
Page 22: Clean Specifications
* If any vacuum pump is prepared by the customer, assure on the vacuum side flow rate 30 liters/min.(ANR) or more . 3) When using the Mitsubishi standard option solenoid valve set, use the spare piping (Φ6 pneumatic hose) of the primary piping to exhaust the air. -
Page 23: Names Of Each Part Of The Robot
2 Robot arm 2.3 Names of each part of the robot Fore arm Elbow block + J4 axis J5 axis + + - - J3 axis - + J6 axis - Upper arm Mechanical interface + (Hand installation flange surface) -... -
Page 24: Outside Dimensions ・ Operating Range Diagram
2 Robot arm 2.4 Outside dimensions ・ Operating range diagram (1) RV-12SD/12SDC 4-φ14 installation hole 2-φ6 holes (prepared holes for φ8 positioning pins) 4-M6 screw, depth 9 +0.012 φ6H7 depth 9 (Installation) 6.3a φ25H7 +0.021 depth 9.5 φ50h8 depth 8 -0.039 View A: Detail of mechanical interface View D bottom view drawing : Detail of installation dimension... - Page 25 2 Robot arm P-point path: Reverse range (alternate long and short dash line) P-point path: Entire range (solid line) Flange downward limit line(dotted line) Restriction on wide angle in the rear section 200 or more P-point path Rear surface area wide angle, narrow angle limit *If the angle of axis J1 is -75deg <= J1 <= 75deg and the angle of axis J2 is -25deg <= J2 <...
- Page 26 2 Robot arm (2) RV-12SDL/12SDLC 4-φ14 installation hole 2-φ6 holes (prepared holes for φ8 positioning pins) +0.012 φ6H7 depth 9 4-M6 screw, depth 9 6.3a (Installation) φ25H7 +0.021 depth 9.5 φ50h8 depth 8 -0.039 View A: Detail of mechanical interface View D bottom view drawing : Detail of installation dimension 89 93 Screw holes for fixing...
- Page 27 2 Robot arm P-point path: Reverse range (alternate long and short dash line) P-point path: Entire range (solid line) Flange downward limit line(dotted line) 200 or more P-point path Rear surface area wide angle, narrow angle limit *If the angle of axis J1 is -75deg <= J1 <= 75deg and the angle of axis J2 is J2 < -25deg , then operating range is limited to J2 + J3 >= -155 degree.
-
Page 28: Tooling
2 Robot arm 2.5 Tooling 2.5.1 Wiring and piping for hand Shows the wiring and piping configuration for a standard-equipped hand. Secondary piping pneumatic hose (φ6) (customer-prepared) (1)φ6 quick coupling Solenoid valve set (option) * Use by connecting it with the hand output signal connector. -
Page 29: Internal Air Piping
2 Robot arm 2.5.2 Internal air piping (1) Standard type 1) The robot has two φ6 x 4 urethane hoses from the pneumatic entrance on the base section to the shoulder cover. 2) One hose is the primary piping for the pneumatic equipment.The remaining pipe is used for air exhaust. 3) The optional solenoid is provided with a maximum of eight couplings for the φ6 air hose. -
Page 30: Wiring And Piping System Diagram For Hand
2 Robot arm 2.5.6 Wiring and piping system diagram for hand Shows the wiring and piping configuration for a standard-equipped hand. Hand signal input connection connector 1-1318115-3 (Tyco Electronics AMP) Hand signal input connector (HC1 connector) 1-1717834-3 (Tyco Electronics AMP) White <+24V>... -
Page 31: Electrical Specifications Of Hand Input/Output
2 Robot arm 2.5.7 Electrical specifications of hand input/output Table 2-8 : Electrical specifications of input circuit Item Specifications Internal circuit Type DC input <Sink type> No. of input points Insulation method Photo-coupler insulation Rated input voltage 12VDC/24VDC Rated input current Approx. -
Page 32: Air Supply Circuit Example
2 Robot arm 2.5.8 Air supply circuit examplefor the hand Fig. 2-8 shows an example of pneumatic supply circuitry for the hand. (1) Place diodes parallel to the solenoid coil. (2) When the factory pneumatic pressure drops, as a result of the hand clamp strength weakening, there can be damage to the work. - Page 33 2 Robot arm 2.6 Options ■ What are options? There are a variety of options for the robot designed to make the setting up process easier for customer needs. customer installation is required for the options. Options come in two types: "set options" and "single options". 1.
-
Page 34: Machine Cable Extension
2 Robot arm (1) Machine cable extension ■ Order type : ● Fixed type 1S- □□ CBL-02 ● Flexed type 1S- □□ LCBL-02 Note) The numbers in the boxes □□ refer the length. ■ Outline This cable is exchanged for the machine cable (5 m) that was supplied as standard to extend the distance between the controller and the robot arm. - Page 35 2 Robot arm ■ Cable configuration The configuration of the flexible cable is shown in Table 2-12. Refer to this table when selecting the cable bare. Table 2-12 : Cable configuration Motor signal cable Motor power cable Ground cable Item 1S- □□...
-
Page 36: Changing The Operating Range
2 Robot arm (2) Changing the operating range ■ Order type: 1S-DH -01 ■ Outline The J1 axis operating range is limited by the robot arm's mechanical stopper and the controller parameters. If the axis could interfere with the peripheral devices, etc., and the operating range need to be limited, use this. -
Page 37: Solenoid Valve Set
2 Robot arm (3) Solenoid valve set ■ Order type: One set: 1S-VD01-01(Sink type)/1S-VD01E-01(Source type) Two sets: 1S-VD02-01(Sink type)/1S-VD02E-01(Source type) Three sets: 1S-VD03-01(Sink type)/1S-VD03E-01(Source type) Four sets: 1S-VD04-01(Sink type)/1S-VD04E-01(Source type) ■ Outline The solenoid valve set is an option that is used for controlling toolings when various toolings, such as the hand, are installed at the end of the arm. - Page 38 2 Robot arm 87.9 <7><8> 37.8 50.1 <9> <3> <6> <2> <1> <5> <4> <Sink type> <Source type> Connector name Connector name <GR1> <GR1> White White +24V (COM) 24V (RG) Reserve Reserve Black SOL1A SOL1A Black Black SOL1B SOL1B Black Black SOL2A SOL2A...
-
Page 39: Hand Input Cable
2 Robot arm (4) Hand input cable ■ Order type: 1S-HC25C-01 ■ Outline The hand input cable is used for customer-designed pneumatic hands. It is necessary to use this to receive the hand's open/close confirmation signals and grasping confirmation signals, at the controller. One end of the cable connects to the connector for hand input signals, which is in the wrist section of the hand. -
Page 40: Hand Output Cable
2 Robot arm (5) Hand output cable ■ Order type: Four sets:1S-GR35S-01 ■ Outline The hand output cable (solenoid valve connection cable) is an option that is used when an solenoid valve other than one of the solenoid valve set options, is used. One end of the cable has a connector that connects to the input terminal inside the robot. -
Page 41: Hand Curl Tube
2 Robot arm (6) Hand curl tube ■ Order type: Four set: :1N-ST0608C ■ Outline The hand curl tube is a curl tube for the pneumatic hand. ■ Configuration Table 2-22 : Configuration equipment Part name Type Qty. Remarks Hand curl tube (Four set: 8 pcs.) 1N-ST0608C 1 pc. -
Page 42: Maintenance Parts
Reduction gears of each axis As needed Mitsubishi Electric System & Service;Co.,Ltd. Lithium battery A6BAT In the battery cover 5 pcs. Note1)Confirm the robot arm serial No., and contact the dealer or service branch of Mitsubishi Electric Co., for the type. Maintenance parts 2-29... -
Page 43: Controller
3.1 Standard specifications 3.1.1 Standard specifications Table 3-1 : Standard specifications of controller Item Unit Specification Remarks Type CR3D-701/701M CR3D-701:RV-12SDC series CR3D-701M:RV-12SD series Number of control axis Simultaneously 6(Maximum) Memory Programmed positions and No. point 13,000 capacity of steps step... -
Page 44: Protection Specifications And Operating Supply
3Controller 3.1.2 Protection specifications and operating supply A protection method complying with the IEC Standard IP54(Closed type) is adopted for the controller. The IEC IP symbols refer only to the degree of protection between the solid and the fluids, and don't indicated that any special protection has been constructed for the prevention against oil and water. -
Page 45: Names Of Each Part
3 Controller 3.2 Names of each part < CR3D-700 > ⑯ ① < Operating panel < Operating panel > ⑧ ⑬ ② ⑥ ④ ⑤ ⑩ ⑫ ⑭ ⑪ ⑮ ⑦ ⑨ ③ Fig.3-1 : Names of controller parts ① POWER switch........ - Page 46 3 Controller ⑫ MODE key switch......This changes the robot's operation mode. AUTOMATIC........operations from the controller or external equipment are valid. Operations for which the operation mode must be at the external device or T/B are not possible. It is necessary to set the parameter for the rights of operation to connection between the operation panel and external equipment.
- Page 47 3 Controller CR3D-700 series R700CPUユニット ⑨BAT OPT1 (予約済) ⑩OPT2 ⑤SLOT1 ⑪MEMORY CASSETTE ③ ④ ② ① ⑥SLOT2 ⑫LAN1 ⑧RIO ⑬CNENC ⑦SLOT3 ① Emergency stop input(EMGIN)........... Connect the emergency stop switch to the robot. ② Emergency stop output(EMGOUT) ........The robot's error condition is outputted. ③...
-
Page 48: Outside Dimensions/Installation Dimensions
3 Controller 3.3 Outside dimensions/Installation dimensions 3.3.1 Outside dimensions <CR3D-700> (55) Eye bolt 2-M10 (35) (35) EMG.STOP CHANG DISP DOWN STATUS NUMBER MODE SVO ON START RESET SVO OFF STOP RS-232 2×2-φ15 hole (40.5) (79.5) (15) (15) ←(When caster specification) 図... - Page 49 3 Controller <CR3D-700M> Exhaust Suction Exhaust CN2 CN1 (7,000) (380) (Back drawing) (Right side drawing) Fig.3-5 : Outside dimensions of controller (CR3D-700M Supplement) <CR3D-700> Exhaust Suction Exhaust CN2 CN1 (380) (7,000) (Right side drawing) (Back drawing) 図 3-6 : Outside dimensions of controller (CR3D-700 Supplement) Outside dimensions/Installation dimensions 3-36...
-
Page 50: Installation Dimensions
3 Controller 3.3.2 Installation dimensions <CR3D-700/700M> ( Anchor bolt installation: 4 places) <CR3D-700M> <CR3D-700> Note1) Note1) Side Side Side Side Approx. Approx. Approx. Approx. Controller Controller (upside) (upside) Maintenance area Maintenance area ( ) ( ) View from upside View from upside Note1) The controller sucks in the outside air and discharges the inside air after cooling. - Page 51 3 Controller <CR3D-700/700M> Capcon installing panel STATUS NUMBER EMG.STOP CHANG DISP DOWN MODE SVO ON START RESET φ28 TEACH AUTO AUTO REMOVE T/B (Op.) (Ext.) SVO OFF STOP φ34 □40×90 Left side drawing Front drawing Right side drawing <figure is CR3D-711M> Cable lead in port Enlarged view of A section (1) Left surface input power supply...
-
Page 52: External Input/Output
3 Controller 3.4 External input/output 3.4.1 Types (1) Dedicated input/output.......These inputs and outputs carry out the robot remote operation and status display. (2) General-purpose input/output....These are inputs and outputs that the customer can program for peripheral device control. (3) Hand input/output .........These are inputs and outputs related to the hand that the customer can program. -
Page 53: Dedicated Input/Output
3 Controller 3.5 Dedicated input/output Show the main function of dedicated input/output in the Table 3-3. Refer to attached instruction manual "Detailed explanations of functions and operations" in the product for the other functions. Each parameter indi - cated with the parameter name is used by designated the signal No., assigned in the order of input signal No. and output signal No. - Page 54 3 Controller Input Output Parameter Note1) name Name Function Level Name Function PRGSEL Program selection Designates the setting value for input signal the program No. with numeric value E None input signals. OVRDSEL Override selection Designates the setting value for input signal the override with the numeric value E...
-
Page 55: Connection Of The External Emergency Stop
3 Controller Note1) The level indicates the signal level. L: Level signal → The designated function is validated when the signal is ON, and is invalidated when the sig - nal is OFF. E: Edge signal → The designated function is validated when the signal changes from the OFF to ON state, and the function maintains the original state even when the signal then turns OFF. - Page 56 3 Controller <CR3D-700/700M> Safty unit 安全ユニット(R700SFT) EMGOUT EMGOUTコネクタ 30cm以内 EMGIN EMGINコネクタ ferrite core フェライトコア Cable 非常停止配線ケーブル Pin allotment of EMGIN and the EMGOUT connector is shown in Page 44, "Fig.3-10 : External emergency stop connection". Fig.3-9 : Emergency stop cable connection( CR3D-700) Emergency stop input and output etc.
- Page 57 3 Controller Internal circuit structure (Customer) (Customer) (Controller) EMG. stop EMG. stop EMGOUT1 EMGIN1 +24V Short Robot error output External emergency input Mode output Relay (prepare by customer) Add. axis contacts Short control output (AXMC1) 24GND +24V Door switch input Relay (prepare by customer) +24V...
- Page 58 3 Controller CAUTION Please install the emergency stop switch to the place which is easy to operate it, and when the robots are the abnormalities, stop the robot immediately. CAUTION Be careful of the short circuit with the next terminal at the time of connection of the electric wire to the EMGIN connector.
- Page 59 3 Controller CR3D-700 Safty unit 安全ユニット(R700SFT) Special stop connector 専用停止入力コネクタ(SKIP) SKIP Electric wire plug area(AWG#24-18) Minus driver plug area 電線差込口(AWG#24-18) マイナスドライバ差込口 <The connector connection method> The electric wire skins covering 7mm. In the condition that the minus driver is inserted, insert the electric wire, and remove the minus driver.
-
Page 60: Door Switch Function
3 Controller 3.6.3 Door switch function This function retrieves the status of the switch installed on the door of the safety fence, etc., and stops the robot when the door is opened. This differs from an emergency stop in that the servo turns OFF when the door is opened and an error does not occur. - Page 61 A maximum of eight axes of servo motors can be controlled at the same time by connecting a general-purpose servo amplifier (MR-J3-B series) that supports Mitsubishi's SSC Net Ⅲ . Refer to the separate "Additional axis interface Instruction Manual" for details on the additional axis function.
- Page 62 3 Controller <CR3D-700/700M> EMGOUT Servo amplifier Servo amplifier R700CPU OPT2 SSCNETⅢcable SSCNETⅢcable CN1A connector CN1A connector OPT connector CN1B connector CN1B connector Magnetic contact *It cannot communicate, if connection of CN1A and CN1B is mistaken. Fig.3-13 : Example of addition axis connection (CR3-700/700M) Additional Axis Function 3-49...
- Page 63 3 Controller 3.8 Magnet contactor control connector output (AXMC) for addition axes When an additional axis is used, the servo ON/OFF status of the additional axis can be synchronized with the servo ON/OFF status of the robot itself by using the output contact (AXMC) provided on the rear or inside of the controller and configuring a circuit so that the power to the servo amplifier for the additional axis can be turned off when this output is open.
- Page 64 3 Controller <CR3D-700/700M> Safty unit(R700SFT) EMGOUT EMGOUT connector Internal circuit EMGOUT1 EMGOUT2 EMGOUT1 Contactor control output for addition axes (AXMC1) EMGOUT2 Contactor control output for addition axes Electric wire plug area (AXMC1) Minus driver plug area AWG#24~#18 (0.2~0.75mm (Custmer) (Controller) Type :1-1871940-6 図...
- Page 65 3 Controller Magnet contactor control connector output (AXMC) for addition axes 3-52...
-
Page 66: Options
3 Controller 3.9 Options ■ What are options? There are a variety of options for the robot designed to make the setting up process easier for user needs. User installation is required for the options. Options come in two types: "set options" and "single options". 1.... -
Page 67: Teaching Pendant (T/B)
In ISO/10218 (1992) and JIS-B8433 (1993), this is defined as an "enable device". These standards specify that the robot operation using the teaching pendant is enabled only when the "enable device" is at a specified position. With the Mitsubishi Electric industrial robot, the above "enable device" is configured of an "Enable/Disable switch" and "Deadman switch". - Page 68 3 Controller 195.2 105.5 Enable/Disable switch Emergency stop Operetion key Body Enable switch Cable (with connector) <Back> <side> <Front> <Bottom> Fig.3-16 : Outside dimensions of teaching pendant ■ Installation method The teaching pendant is connected to the T/B connector on the front of the controller. Teaching pendant (T/B) 3-55...
- Page 69 3 Controller ■ Key layout and main functions ② ④ ① ③ ⑤ ⑤ ⑥ ⑥ ⑧ ⑦ ⑨ ⑩ ⑪ ⑰ ⑫ ⑱ ⑬ ⑭ ⑲ ⑮ ⑯ ⑳ 1) : [Emergency stop] switch....The robot servo turns OFF and the operation stops immediately. 2) : [Enable/Disable] switch....
- Page 70 3 Controller (2) Pneumatic hand interface ■ Order type: 2A-RZ365(Sink type) ■ Outline This interface is required to use the robot arm's hand output signals. This interface is pre-installed on the controller. ・ Up to eight hand output points can be used with this interface. ・...
-
Page 71: Pneumatic Hand Interface
3 Controller ■ Installation method This is mounted in the controller. Attach the pneumatic hand interface (2A-RZ365) to the CNHNDOUT/CNHND connector of the hand interface relay card (2D-TZ315) securely. Refer to separate "Instruction Manual/ Controller setup, basic operation, and maintenance" for details on the installing method. <CR3D-700/700M>... - Page 72 3 Controller (3) Parallel I/O interface ■ Order type : ● 2D-TZ368 (Sink type) ■ Outline This is used to expand the external inputs and outputs ・ The connecting cable with external equipment is not attached. Since we are preparing the external input-and-output cable (2D-CBL05 or 2D-CBL15) as the option, please use.
- Page 73 3 Controller Table 3-13 : Electrical specifications for the output circuits Specification Internal circuit Item Type Transistor output <Sink type> No. of output points +24V/+12V Insulation method Photo-coupler insulation 出力 Rated load voltage DC12V/DC24V Rated load voltage DC10.2 ~ 30V(peak voltage DC30V) range Max.
- Page 74 3 Controller <CR3D-700/700M> unit R700CPUユニット SLOT1 SLOT2 SLOT3 Fig.3-19 : Parallel I/O interface installation position (CR3D-700/700M) Parallel I/O interface 3-61...
- Page 75 3 Controller ■ Pin layout of connector Connector<2> Output 16 to 31 Input 16 to 31 (when station number 0) Connector<1> Output 0 to 15 Input 0 to 15 (when station number 0) Fig.3-20 : Pin layout of connector ■ Connector pin No. and signal assignment The station number is fixed by the slot to install and the allocation range of the general-purpose input-and- output signal is fixed.
- Page 76 3 Controller Table 3-15 : Connector<1> pin assignment list and external I/O cable (2D-CBL**) color(SLOT1) Function name Function name Line color Line color General-purpose power supply, common General-purpose power supply, common 0V : For pins 5D-20D Black a 12V/24V : For pins 5D-20D Orange/Red Orange/ 12V/24V :...
- Page 77 3 Controller Table 3-16 : Connector<2> pin assignment list and external I/O cable (2D-CBL**) color(SLOT1) Function name Function name Line color Line color General-purpose power supply, common General-purpose power supply, common 0V : For pins 5B-20B Black a 12V/24V : For pins 5B-20B Orange/Red Orange/ 12V/24V :...
- Page 78 CTL+ (COM) Input 3.3K Input CTLG External power supply Table 3-17 : Connection with a Mitsubishi PLC (Example of sink type) *The input/output circuit external power supply (24 VDC) must be prepared by the customer. Parallel I/O interface 3-65...
- Page 79 3 Controller (4) External I/O cable ■ Order type : ● 2D-CBL □□ Note) The numbers in the boxes □□ refer to the length. (05: 5m、 15: 15m) ■ Outline This is the dedicated cable used to connect an external peripheral device to the con - nector on the parallel I/O interface.
- Page 80 3 Controller ■ Connections and outside dimensions The sheath of each signal cable (40 lines) is color indicated and marked with dots. Refer to the cable color speci - fications in "Table 3-29: Connector pin numbers and cable colors" when making the connections. (Eg.) Pin number: color indication 1...
-
Page 81: Parallel I/O Unit
3 Controller (5) Parallel I/O unit ■ Order type: 2A-RZ361(Sink type) 2A-RZ371(Source type) ■ Outline This is used to expand the external inputs and outputs. One one equal with this unit is built into the control unit among controllers the standard. ・... - Page 82 3 Controller Table 3-22 : Electrical specifications of input circuits Item Specification Internal circuit Type DC input <Sink type> Number of input points 24V/12V Insulation method Photo coupler insulation (COM) Rated input voltage 12VDC/24VDC Rated input current Approx 3mA/7mA Working voltage range 10.2 to 26.4VDC(Ripple factor should be less than 5%.) Input ON voltage/ON current...
- Page 83 3 Controller NETcable-1 (Network cable) Pin No. RIO1/2 RIO1/2 Pin No. Note 2) 1 TXRXH TXRXH 1 2 TXRXL TXRXL 2 3 SG(GND) SG(GND) 3 DCcable-2 (Power cable) Pin No. DCIN Note 1) 1 + 24V Power 2 24G(RG) - 3...
- Page 84 3 Controller ■ Installation method <CR3D-700/700M> R700CPU R700CPUユニット ③ ④ ② ① upside (40) (175) Wiring space 2-M5 screw <2A-RZ361> Control panel installation dimensions downside Installation dimensions of 2A-RZ361 (The controller outside installation.) Fig.3-23 : Installing the parallel I/O unit (CR3D-700/700M) Parallel I/O unit 3-71...
- Page 85 3 Controller <CR3D-700/700M> R700CPU unit Parallel I/O unit 1 . . . 6 Parallel I/O unit 7 Station No. setting Station No. setting 1 . . . 6 RIO1 Note) NETcable-1 cable <CN300> <CN300> <CN100> <CN100> RIO2 connector RIO1 connector RIO1 connector RIO2 connector DCIN...
- Page 86 3 Controller ■ Pin arrangement of the connector Channel No. setting LED display <CN300> Input 16 to 31 Output 16 to 31 <CN100> Input 0 to 15 Output 0 to 15 *2A-RZ361/2 A-RZ371 are 32/32 input-and-output units. (One-station occupancy) Fig.3-25 : Pin arrangement of the parallel I/O unit ■...
- Page 87 3 Controller ■ Parallel I/O interface (First expansion unit) Table 3-25 : Connector CN100pin No. and signal assignment list (2A-CBL □□ Function name Function name Line color Line color Dedicated/power supply, Dedicated/power supply, General-purpose General-purpose common common Orange/Red A Orange/Blue A Gray/Red A 0V:For pins 4-7, 10-13 Gray/Blue A...
-
Page 88: External I/O Cable
3 Controller (6) External I/O cable ■ Order type: 2A-CBL □□ Note) The numbers in the boxes □□ refer to the length. (05: 5m、 15: 15m) ■ Outline This is the dedicated cable used to connect an external peripheral device to the con - nector on the parallel input/output unit. - Page 89 3 Controller ■ Connections and outside dimensions The sheath of each signal cable (50 lines) is color indicated and marked with dots. Refer to the cable color speci - fications in "Table 3-29: Connector pin numbers and cable colors" when making the connections. (Eg.) Pin number: color indication 1...
-
Page 90: Personal Computer Cable
3 Controller (7) Personal computer cable ■ Order type: ● For PC/AT : 2D-232CBL03M ■ Outline This is the RS-232 interface cable used for connecting the controller with a personal com - puter. The personal computer on hand may be usable with the above interface cable. Con - firm the connection specifications when placing an order. -
Page 91: Cc-Link Interface
3 Controller (8) CC-Link interface ■ Order type: ● 2D-TZ576 ■ Outline The CC-Link interface is the optioninterface to not only add bit data to the robot controller. but also to add CC-Link field network function that allows cyclic transmission of word data. ■... - Page 92 3 Controller Table 3-33 : Specifications Item Specifications Remarks Communication function Bit data and word data can be transmitted. Word data are used by the registers. Note1) Station type Intelligent device station Support station Local station No master station function The version corresponding to CC-Link Ver.2 The extended cyclic setup is possible.
- Page 93 3 Controller ■ Functions (1) Communication function ・ The number of usable points is 126 points maximum for bit control and 16 points maximum for word control. ・ Up to 2,048 points of input bit data can be monitored by a unit being connected. (Input only, output is disabled.) ・...
-
Page 94: Extension Memory Cassette
3 Controller (9) Extension memory cassette ■ Order type: ● 2D-TZ454 ■ Outline Used to increase the total number of teaching points in the robot program. ■ Configuration Table 3-34 : Configuration device Part name Type Qty. Remarks Extension memory cassette 2D-TZ454 ■... - Page 95 3 Controller (10) RT ToolBox2/RT ToolBox2 mini RT ToolBox2 ■ Order type : ● *For windows CD-ROM : 3D-11C-WINE RT ToolBox2 mini ● *For windows CD-ROM : 3D-12C-WINE ■ Outline This is handy software that fully uses the personal computer functions. It can be used in various stages from the robot specifications study (tact study, etc.) to the design support (creation and editing of programs), start up support (execution, control and debugging of program), and maintenance (remote maintenance.)
- Page 96 3 Controller ■ Functions Table 3-37 : Functions Note1) Function Details Functional existence Compatible model ○ ○ Personal computer running Microsoft Windows2000/XP/Vista. Program editing Editing functions ・ MELFA BASIC Ⅴ language compatible functions ・ Multiple editing screen simultaneously display ・ Command input, comment writing ・...
-
Page 97: Instruction Manual(Bound Edition)
3 Controller (11) Instruction Manual(bound edition) ■ Order type : ● 5S-DC00-PE01 : RV-12SD/12SDL series ■ Outline This is a printed version of the CD-ROM (instruction manual) supplied with this product. ■ Configuration 表 3-38 : Product configuration(RV-12SD-SM/12SDL-SM series) Specifications Name Type Instruction Manual... -
Page 98: Maintenance Parts
Amplifier unit Mitsubishi Electric Sys - Converter unit tem Service;Co.,Ltd Fan (90 square) Control unit Filter Controller rear Note1)Confirm the robot arm serial No., and contact the dealer or service branch of Mitsubishi Electric Co., for the type. Maintenance parts 3-85... -
Page 99: Software
4Software 4 Software 4.1 List of commands The available new functions in MELFA-BASIC Ⅴ are given in Table 4-1. Table 4-1 : List of MELFA-BASIC Ⅴ commands Type Class Function Input format (example) Joint interpolation Moves to the designated position with joint interpolation. Mov P1 Linear interpolation Moves to the designated position with linear interpolation. - Page 100 4Software Type Class Function Input format (example) Subroutine Executes the designated subroutine. (Within program) GoSub 200 Returns from the subroutine. Return Executes the designated program. CallP "P10",M1,P1 Defines the program argument executed with the CALLP command. FPrm M10,P10 Executes the subroutine corresponding to the designated expression value. On M1 GOSUB 100,200,300 Interrupt Defines the interrupt conditions and process.
-
Page 101: List Of Parameters
4Software 4.2 List of parameters show the main parameter in the Table 4-2. Table 4-2 : List of parameters Parameter Details Standard tool coordinates. MEXTL Set the default value for the tool data. Unit: mm or deg. Standard base coordinates MEXBS Set the relation of the world coordinate system and robot coordinate system. - Page 102 4Software Parameter Details Hand type HANDTYPE Set the hand type of the single/double solenoid, and the signal No. (Single/double = S/D) Set the signal No. after the hand type. Example) D900 Stop input B contact desig - Change the dedicated input (stop) between the A contact and B contact. nation User-designated origin USERORG...
-
Page 103: Instruction Manual
5Instruction Manual 5 Instruction Manual 5.1 The details of each instruction manuals The contents and purposes of the documents enclosed with this product are shown below. Use these documents according to the application. Instruction manuals enclosed in dashed lines in the list below are for optional products. For special specifications, a separate instruction manual describing the special section may be enclosed. - Page 104 5Instruction Manual The details of each instruction manuals 5-91...
-
Page 105: Safety
6Safety 6 Safety 6.1 Safety Measures to be taken regarding safety of the industrial robot are specified in the "Labor Safety and Sanitation Rules". Always follow these rules when using the robot to ensure safety. 6.1.1 Self-diagnosis stop functions This robot has the self-diagnosis stop functions shown in Table 6-1 and the stop functions shown in Table 6-2... -
Page 106: External Input/Output Signals That Can Be Used For Safety Protection Measures
6Safety 6.1.2 External input/output signals that can be used for safety protection measures Table 6-3 : External input/output signals that can be used for safety protection measures Signal Command Functions Usage method External emer - Terminal This servo power is shut off, and the robot Externally installed emergency stop switch. -
Page 107: Safety Measures For Automatic Operation
6Safety 6.1.4 Safety measures for automatic operation (1) Install safety fences so that operators will not enter the operation area during operation and indicate that automatic operation is in progress with lamps, etc. (2) Create signals to be given when starting operation, assign a person to give the signal, and make sure that the operator follows the signals. -
Page 108: Examples Of Safety Measures
6Safety 6.1.7 Examples of safety measures Two emergency stop input circuits are prepared on the user wiring terminal block of the controller. Create a cir - cuit as shown below for safety measures <Case 1> : Input the emergency stop of peripheral equipment into the robot. Emergency stop input Connection External emergency stop... - Page 109 6Safety <Case 2 > : Two robot controller linkage. External power supply use. The door switch, enabling device connection Emergency stop input Connection External emergency stop ○ input Door switch input ○ Enable input ○ Error output Additional axes contactor control output Mode output External relay wiring ○...
- Page 110 6Safety <Case 3 > : Use the mode output of the robot controller. Emergency stop input Connection External emergency stop ○ input Door switch input ○ Enable input ○ Error output Additional axes contactor control output Mode output ○ External relay wiring Robot controller EMGIN1/2 OP emergency...
- Page 111 6Safety <Case 4 > : Use of the error output Emergency stop input Connection External emergency stop ○ input Door switch input Enable input Error output ○ Additional axes contactor control output Mode output External relay wiring ○ Peripheral equipment Robot controller #1 EMGIN1/2 OP emergency...
- Page 112 6Safety <Case 5 > : The synchronization with the servo amplifier for addition axes Emergency stop input Connection External emergency stop ○ input Door switch input Enable input Error output Additional axes ○ contactor control output Mode output External relay wiring Peripheral equipment Robot controller EMGIN1/2...
- Page 113 6Safety [Caution] The emergency stop input(terminal block) on the user wiring in the controller can be used for safety measures as shown in Fig. 6-1. Note that there are limits to the No. of switch contacts, capacity and cable length, so refer to the following and install. ・...
-
Page 114: Working Environment
6Safety 6.2 Working environment Avoid installation in the following places as the equipment's life and operation will be affected by the ambient environment conditions. When using in the following conditions, the customer must pay special attention to the preventive measures. (1) Power supply ・... -
Page 115: Precautions For Handling
For the replacement of the resin parts, please contact Mitsubishi or Mitsubishi's dealer. If the resin part is not replaced, the mechanism unit and the speed reducer may be damaged significantly when the axes collide with the mechanical stopper next or subsequent time. -
Page 116: 7Appendix
7Appendix 7 Appendix Appendix 1 : Specifications discussion material ■ Customer information Company name Name Address Telephone ■ Purchased mode Specification Type Standard specification □ RV-12SD □ RV-12SDL Clean specification □ RV-12SDC □ RV-12SDLC ■ Shipping special specifications (Settings can be made only at time of shipment) Item Standard specifications Special shipping specifications... - Page 118 HEAD OFFICE: TOKYO BUILDING, 2-7-3, MARUNOUCHI, CHIYODA-KU, TOKYO 100-8310, JAPAN NAGOYA WORKS: 5-1-14, YADA-MINAMI, HIGASHI-KU, NAGOYA 461-8670, JAPAN May ..2008 MEE Printed in Japan on recycled paper. Specifications are subject to change without notice.
Need help?
Do you have a question about the RV-12SD Series and is the answer not in the manual?
Questions and answers