Table of Contents
Advertisement
Quick Links
Advertisement
Chapters
Table of Contents

Related Manuals for Fiat 500 ABARTH CABRIO 2018


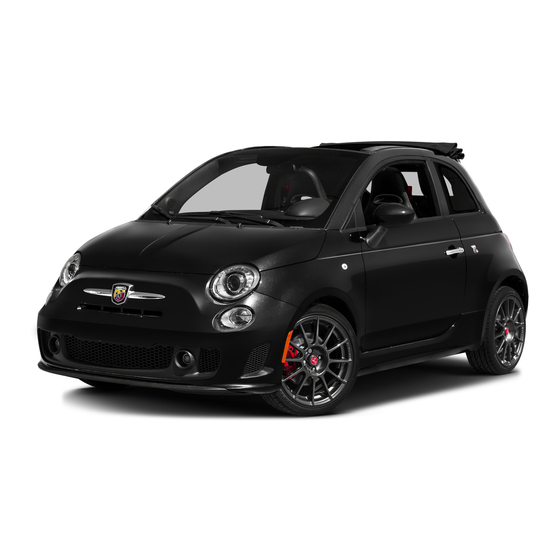
Summary of Contents for Fiat 500 ABARTH CABRIO 2018
- Page 1 2018 USER GUIDE FIAT 500 ABARTH ® and ABARTH CABRIO...
- Page 2 The driver’s primary responsibility is the safe operation of the vehicle. Driving while distracted can result in loss of vehicle control, resulting in a collision and personal injury. FCA US LLC strongly recommends that the driver use extreme caution when using any device or feature that may take their attention off the road.
- Page 3 Congratulations on selecting your new FCA US This User Guide has been prepared to help you For more detailed descriptions of the topics discussed in this User Guide, as well as informa- LLC vehicle. Be assured that it represents preci- quickly become acquainted with the important tion covering features and processes not covered sion workmanship, distinctive styling, and high...
- Page 4 HOW TO USE THIS MANUAL with the steering wheel on the right side, the “Warning Lights and Messages” in “Getting To position or construction of some controls is not Know Your Instrument Panel” for further infor- exactly mirror-like with respect to the figure. Essential Information mation on the symbols used in your vehicle.
- Page 5 GRAPHICAL TABLE OF CONTENTS GETTING TO KNOW YOUR VEHICLE GETTING TO KNOW YOUR INSTRUMENT PANEL SAFETY STARTING AND OPERATING IN CASE OF EMERGENCY SERVICING AND MAINTENANCE TECHNICAL SPECIFICATIONS MULTIMEDIA CUSTOMER ASSISTANCE INDEX...
- Page 7 GRAPHICAL TABLE OF CONTENTS GRAPHICAL TABLE OF CONTENTS INSTRUMENT PANEL ... . .6 INTERIOR ....7...
- Page 8 INSTRUMENT PANEL Instrument Panel 1 — Air Vents 4 — Uconnect System 2 — Uconnect Phone Controls 5 — Climate Controls 3 — Instrument Cluster...
- Page 9 INTERIOR Interior 1 — Steering Wheel 3 — Seats 2 — Glove Compartment 4 — Gear Selector...
-
Page 11: Table Of Contents
GETTING TO KNOW YOUR VEHICLE GETTING TO KNOW YOUR VEHICLE KEYS ..... .10 Headlights ....15 POWER SUNROOF. -
Page 12: Keys
KEYS To Unlock The Doors And Liftgate Opening Power Top Remote Function: Push and release the unlock button on the key OPEN — Push and hold the unlock button down Key With Remote Control fob once to unlock the driver’ s door or twice, on the key fob for a minimum of three seconds to The Remote Keyless Entry (RKE) key fob contains within five seconds, to unlock all doors, and the... -
Page 13: Vehicle Security Alarm
Programming Additional Key Fobs NOTE: 3. The horn will sound and the vehicle security Changes or modifications not expressly approved light in the instrument cluster will switch on Programming the key fob may be performed by by the party responsible for compliance could for approximately three seconds. -
Page 14: Seats
NOTE: Auto Door Locks WARNING! To prevent the key from being locked in the When enabled, the door locks will lock automati- • Be sure everyone in your vehicle is in a seat vehicle, the doors will automatically unlock if the cally when the vehicle’... -
Page 15: Manual Folding Rear Seat
NOTE: Push down the release button, located at the WARNING! Once a heat setting is selected, heat will be felt outboard top of the seatback and move the or become a dangerous projectile in a sudden within two to five minutes. seatback to its folded-down position to provide a stop or collision. -
Page 16: Rear Head Restraints
seatback should be properly adjusted to an holes and push downward. Then adjust the head WARNING! upright position where the head restraint is restraint to the appropriate height. above prior to operating the vehicle or occu- positioned as close as possible to the back of your pying a seat. -
Page 17: Mirrors
This feature allows you to tilt the steering column MIRRORS upward or downward. The tilt control lever is located on the left-side of the steering column, Heated Mirrors — If Equipped below the turn signal controls. These mirrors are heated to melt frost Push down on the lever to unlock the column.With or ice. -
Page 18: Flash-To-Pass
Flash-To-Pass Deactivation Turn Signals Pull the multifunction lever toward the steering You can signal another vehicle with your head- Push the multifunction lever upward to signal a wheel and hold it for more than two seconds. lights by partially pulling the multifunction lever right turn or downward to signal a left turn. -
Page 19: Front Windshield Wiper Operation
Front Windshield Wiper Operation Low Speed CAUTION! There are four different modes of operation for Push the lever downward to the second detent. • Turn the windshield wipers off when driving the front windshield wipers. The wipers will operate at low speed. through an automatic car wash. -
Page 20: Rear Windshield Wiper
tion will continue until the lever is released.When CLIMATE CONTROLS the lever is released, the wipers will return to the The Climate Control System allows you to regu- off position and automatically shut off. late the temperature, air flow, and direction of air Rear Windshield Wiper circulating throughout the vehicle. -
Page 21: Automatic Temperature Control Overview
Automatic Temperature Control Overview Automatic Temperature Controls... - Page 22 Control Descriptions Icon Description A/C Button Push and release to change the current setting, the indicator illuminates when A/C is ON. Performing this function again will cause the A/C operation to switch into manual mode and the A/C indicator will turn off. Recirculation Button Push and release this button on the touchscreen, or push the button on the faceplate, to change the system between recirculation mode and outside air mode.
- Page 23 Icon Description Rear Defrost Button Rear Defrost Button — If Equipped Push and release the Rear Defrost Control button to turn on the rear window defroster and the heated outside mirrors (if equipped). An indicator illuminates when the rear window defroster is on. The rear window defroster automatically turns off after a short period of time.
- Page 24 Icon Description Bi-Level Mode Bi-Level Mode Air comes from the instrument panel outlets and floor outlets. A slight amount of air is directed through the defrost and side window demister outlets. To access this mode, press both the Panel and Floor Mode buttons. NOTE: Bi-Level mode is designed under comfort conditions to provide cooler air out of the panel outlets and warmer air from the floor outlets.
-
Page 25: Automatic Temperature Control (Atc) - If Equipped
Climate Control Functions Recirculation NOTE: • It is not necessary to move the temperature A/C (Air Conditioning) In cold weather, use of Recirculation mode may settings for cold or hot vehicles. The system lead to excessive window fogging. The Recircula- The Air Conditioning (A/C) button allows the automatically adjusts the temperature, mode, tion feature may be unavailable if conditions exist... -
Page 26: Operating Tips
Operating Tips Window Fogging Outside Air Intake Vehicle windows tend to fog on the inside in mild, Make sure the air intake, located directly in front Summer Operation rainy and/or humid weather. To clear the win- of the windshield, is free of obstructions such as The engine cooling system must be protected dows, select Defrost or Mix mode and increase leaves. -
Page 27: Auto-Down
Auto-Down POWER SUNROOF The window switches have an Auto-Down fea- The power sunroof switch is located in the ture. Push the window switch for approximately overhead console. one second, release, and the window will go down automatically. To cancel the Auto-Down move- ment, operate the switch in either the up or down direction and release the switch. -
Page 28: To Open
fully, then stop automatically.This is called “Express Sun Shade — If Equipped WARNING! Open”. During Express Open operation, any For vehicles equipped with either a power sun- particularly unattended children, can be- movement of the sunroof switch will stop the roof or a fixed glass roof, there is a sun shade that come entrapped by the power sunroof sunroof. -
Page 29: Power Convertible Top
POWER CONVERTIBLE TOP NOTE: Manual Open • The power top buttons will operate when the For manual open, push and hold the open button On vehicles equipped with a power convertible ignition switch is turned to the MAR (ACC/ON/ until desired roof position or until spoiler posi- top, the power convertible top switch is located RUN) position. -
Page 30: Power Convertible Top Relearn Procedure
Manual Close Power Convertible Top Relearn Procedure WARNING! For manual close, push and hold the close button If your power convertible top does not operate occupants in a collision. Therefore, it is impor- until desired position until one-quarter open in the Auto Opening/Closing mode (automatically tant that all occupants wear their seat belts at position. -
Page 31: Wind Stop
This will confirm that the relearn procedure was Closing successful. WARNING! Auto open/close will now be functional, as well as trunk lid operation, and remote keyless power top Be sure the hood is fully latched before driving function. your vehicle. If the hood is not fully latched, it could open when the vehicle is in motion and NOTE: block your vision. -
Page 32: Internal Equipment
To open the liftgate, squeeze the liftgate release Power is available when the ignition switch is in WARNING! handle and pull the liftgate open with one fluid the ON/RUN or START position. Insert the cigar • If you are required to drive with the liftgate motion. - Page 33 CAUTION! • Many accessories that can be plugged in draw power from the vehicle's battery, even when not in use (i.e., cellular phones, etc.). Eventually, if plugged in long enough, the vehicle's battery will discharge sufficiently to degrade battery life and/or prevent the engine from starting.
- Page 35 GETTING TO KNOW YOUR INSTRUMENT PANEL GETTING TO KNOW YOUR INSTRUMENT PANEL INSTRUMENT CLUSTER DISPLAY..34 WARNING LIGHTS AND MESSAGES. . .35 ONBOARD DIAGNOSTIC SYSTEM — OBD II .....43 Instrument Cluster Display Control Buttons .
-
Page 36: Instrument Cluster Display
INSTRUMENT CLUSTER Instrument Cluster Display Control Buttons DISPLAY Push and release the MENU button briefly to access the instrument cluster display. Push and Your vehicle may be equipped with an instrument hold the MENU button (approximately one sec- cluster display, which offers useful information to ond) to return to the main screen. -
Page 37: Oil Change Reset
• Headlight Adjustment — If Equipped 2. Fully push the accelerator pedal slowly, three WARNING LIGHTS AND times within 10 seconds. • Trip B Data MESSAGES 3. Turn the ignition switch to the OFF position. • Audio Repetition — If Equipped The warning/indicator lights will illuminate in the NOTE: •... - Page 38 it will stay on until the fault is cleared. If the light The dual brake system provides a reserve braking Vehicles equipped with the Anti-Lock Brake Sys- tem (ABS) are also equipped with Electronic is either not on during startup, stays on, or turns capacity in the event of a failure to a portion of Brake Force Distribution (EBD).
- Page 39 — Battery Charge Warning Light If the light continues to flash when the vehicle is WARNING! running, immediate service is required and you This warning light will illuminate when the battery may experience reduced performance, an Continued operation with reduced assist could is not charging properly.
-
Page 40: Yellow Warning Lights
— Hood Open Warning Light — If unbuckled, a chime will sound and the light will as soon as possible. However, the conventional brake system will continue to operate normally, Equipped turn on. When driving, if the driver or front assuming the Brake Warning Light is not also on. - Page 41 • Each time the ignition is turned to ON/RUN or • Daytime Running Lights — Hill Holder Failure Warning Light MAR (ACC/ON/RUN), the ESC system will be • License Plate Lights This warning light will illuminate when the Hill on, even if it was turned off previously. Holder System is not functioning properly and The failure relating to these lights could be: •...
- Page 42 if the light stays on through several typical driving and the key is turned to MAR (ACC/ON/RUN), CAUTION! styles. In most situations, the vehicle will drive the word “Service” will appear on the display, economy and driveability. If the MIL is flashing, normally and will not require towing.
- Page 43 Please note that the TPMS is not a substitute for CAUTION! CAUTION! proper tire maintenance, and it is the driver’ s contact an authorized dealer as soon as pos- responsibility to maintain correct tire pressure, The TPMS has been optimized for the original sible.
-
Page 44: Yellow Indicator Lights
Yellow Indicator Lights — Front Fog Indicator Light — If CAUTION! Equipped — Icy Road Condition Indicator Light cleaners on the interior surface of the This indicator light will illuminate when the front — If Equipped window. Use a soft cloth and a mild fog lights are on. -
Page 45: White Indicator Lights
White Indicator Lights When these systems are operating properly, your Onboard Diagnostic System (OBD II) vehicle will provide excellent performance and Cybersecurity — Cruise Control ON Indicator Light fuel economy, as well as engine emissions well Your vehicle is required to have an Onboard within current government regulations. -
Page 46: Emissions Inspection And Maintenance Programs
Normally, the OBD II system will be ready. The turn OFF the ignition or start the engine. This WARNING! OBD II system may not be ready if your vehicle means that your vehicle's OBD II system is not • Access, or allow others to access, infor- was recently serviced, recently had a dead battery ready and you should not proceed to the I/M mation stored in your vehicle systems,... - Page 47 SAFETY SAFETY AUXILIARY DRIVING SYSTEMS ..46 Supplemental Restraint Systems (SRS) ..57 Exhaust Gas ....80 Child Restraints .
-
Page 48: Auxiliary Driving Systems
AUXILIARY DRIVING SYSTEMS The TPMS will warn the driver of a low tire drop to 20°F (-7°C) will decrease the tire pressure to approximately 23 psi (159 kPa). This pressure if the tire pressure falls below the low Tire Pressure Monitoring System (TPMS) pressure warning limit for any reason, including tire pressure is sufficiently low enough to turn on low temperature effects, or natural pressure loss... - Page 49 • The TPMS is not a substitute for proper tire • Four Tire Pressure Monitoring Sensors CAUTION! maintenance, and it is the driver’ s responsibility • Tire Pressure Monitoring System Warning Light market tire sealant it is recommended that to maintain correct tire pressure using an •...
- Page 50 an audible chime will be activated and the • If you install the compact spare tire in place of vehicle may need to be driven for up to a road tire that has a pressure below the 20 minutes above 15 mph (24 km/h) in order “Service Tire Pressure Monitoring System”...
- Page 51 four active road tires. In addition, the instrument Light will turn off. The vehicle may need to be 2. Installing aftermarket window tinting that con- cluster will display a low pressure text message driven for up to 20 minutes above 15 mph tains materials that may block radio wave and a graphic showing the low tire pressure tire (24 km/h) in order for the TPMS to receive this...
-
Page 52: Occupant Restraint Systems
• After driving the vehicle for up to 20 minutes 1. This device cause harmful Important Safety Precautions above 15 mph (24 km/h), the Tire Pressure interference. Please pay close attention to the information in Monitoring System Warning Light will flash on 2. -
Page 53: Seat Belt Systems
who do not use child restraints or belt- Enhanced Seat Belt Use Reminder System WARNING! positioning booster seats should ride properly (BeltAlert) buckled up in the rear seat of a vehicle with a • Never place a rear-facing child restraint in Driver and Passenger BeltAlert (if equipped) rear seat. - Page 54 BeltAlert Warning Sequence The outboard front passenger seat BeltAlert is The seat belt webbing retractor will lock only not active when the outboard front passenger during very sudden stops or collisions. This fea- The BeltAlert warning sequence is activated seat is unoccupied. BeltAlert may be triggered ture allows the shoulder part of the seat belt to when the vehicle is moving above a specified when an animal or other items are placed on the...
- Page 55 WARNING! WARNING! WARNING! • Do not allow people to ride in any area of • A seat belt that is worn under your arm is • A lap belt worn too high can increase the your vehicle that is not equipped with seats dangerous.Your body could strike the inside risk of injury in a collision.
- Page 56 Lap/Shoulder Belt Operating Instructions 3. When the seat belt is long enough to fit, insert the latch plate into the buckle until you hear a 1. Enter the vehicle and close the door. Sit back “click.” and adjust the seat. 2.
- Page 57 Lap/Shoulder Belt Untwisting Procedure dealer can provide you with a Seat Belt Extender. Seat Belts And Pregnant Women The Seat Belt Extender should be used only if the Use the following procedure to untwist a twisted existing seat belt is not long enough. When the lap/shoulder belt.
- Page 58 Seat Belt Pretensioner Switchable Automatic Locking Retractor (ALR) If the passenger seating position is equipped with an ALR and is being used for normal usage, only The front seat belt system is equipped with The seat belts in the passenger seating positions pull the seat belt webbing out far enough to pretensioning devices that are designed to re- are equipped with a Switchable Automatic Lock-...
-
Page 59: Supplemental Restraint Systems (Srs)
connecting wiring associated with the electrical WARNING! WARNING! Air Bag System Components.Your vehicle may be injury to a child 12 years or younger, includ- equipped with the following Air Bag System • The seat belt assembly must be replaced if ing a child in a rear-facing child restraint. - Page 60 Air Bag Warning Light the air bag system.The diagnostics also record the WARNING! nature of the malfunction. While the air bag The ORC monitors the readiness of the the air bag system to protect you in a collision. system is designed to be maintenance free, if any electronic parts of the air bag system whenever If the light does not come on as a bulb check of the following occurs, have an authorized dealer...
- Page 61 The first stage inflator is triggered immediately WARNING! during an impact that requires air bag deploy- ing death. Air bags need room to inflate. Sit ment. A low energy output is used in less severe back, comfortably extending your arms to collisions.A higher energy output is used for more reach the steering wheel or instrument severe collisions.
- Page 62 Because air bag sensors measure vehicle decel- WARNING! WARNING! eration over time, vehicle speed and damage by ally. You may damage the air bags and you themselves are not good indicators of whether or • Do not drill, cut, or tamper with the knee could be injured because the air bags may not an air bag should have deployed.
- Page 63 Supplemental Seat-Mounted Side Air Bags (SABs) When the SAB deploys, it opens the seam on the are located in the outboard side of the front outboard side of the seatback’ s trim cover. The seats. The SABs are marked with “SRS AIRBAG” inflating SAB deploys through the seat seam into or “AIRBAG”...
- Page 64 and seated properly, or if items are positioned in Side Impacts Side Air Bags are a supplement to the seat belt the area where the SABICs inflate. Children are restraint system. Side Air Bags deploy in less time The Side Air Bags are designed to activate in at an even greater risk of injury from a deploying than it takes to blink your eyes.
- Page 65 severity and type of collision. Vehicle damage by • Occupant Restraint Controller (ORC) WARNING! itself is not a good indicator of whether or not • Air Bag Warning Light Side Air Bags should have deployed. • Side Air Bags need room to inflate. Do not •...
- Page 66 If you do have a collision which deploys the air • Cut off battery power to the electric motor (If WARNING! Equipped) bags, any or all of the following may occur: Deployed air bags and seat belt pretensioners • The air bag material may sometimes cause •...
- Page 67 NOTE: Enhanced Accident Response System Reset Depending on the nature of the event the left After an accident, remember to cycle the ignition Procedure and right turn signal lights, located in the instru- to the STOP (OFF/LOCK) position and remove ment panel, may both be blinking and will con- After the event occurs, when the system is active, the key from the ignition switch to avoid draining...
- Page 68 Customer Will See Customer Action NOTE: Each step MUST BE held for at least two seconds Right turn light BLINKS. 6. Place turn signal in neutral state. Left turn light is OFF. Right turn light is ON SOLID. 7. Turn right turn signal switch ON. Left turn light BLINKS.
-
Page 69: Child Restraints
situations, such as an air bag deployment or hitting conditions and no personal data (e.g., name, WARNING! a road obstacle, data that will assist in understand- gender, age, and crash location) are recorded. structure, or add aftermarket side steps or ing how a vehicle’... - Page 70 almost large enough for an adult safety belt. NOTE: WARNING! Always check the child seat Owner’ s Manual to • For additional information, refer to http:// make sure you have the correct seat for your In a collision, an unrestrained child can become www.nhtsa.gov/parents-and-caregivers or call: child.
- Page 71 Infant And Child Restraints the child’ s back is against the seatback, they should WARNING! use a belt-positioning booster seat.The child and Safety experts recommend that children ride injury to a child 12 years or younger, includ- belt-positioning booster seat are held in the rear-facing in the vehicle until they are two years ing a child in a rear-facing child restraint.
- Page 72 Children Too Large For Booster Seats 3. Does the shoulder belt cross the child’ s shoul- the child closer to the center of the vehicle, or der between their neck and arm? use a booster seat to position the seat belt on the Children who are large enough to wear the child correctly.
- Page 73 Recommendations For Attaching Child Restraints Restraint Type Combined Weight of Use Any Attachment Method Shown With An “X” Below the Child + Child Re- LATCH – Lower An- Seat Belt Only LATCH – Lower An- Seat Belt + Top Tether straint chors Only chors + Top Tether An-...
- Page 74 Lower Anchors And Tethers For CHildren Your vehicle is equipped with the child restraint LATCH Positions For Installing Child Re- (LATCH) Restraint System straints In This Vehicle anchorage system called LATCH, which stands for Lower Anchors and Tethers for CHildren. The LATCH system has three vehicle anchor points for installing LATCH-equipped child seats.
- Page 75 Frequently Asked Questions About Installing Child Restraints With LATCH Do not use the seat belt when you use the LATCH anchorage system to attach a rear-facing or Can the LATCH anchorages and the seat belt be forward-facing child restraint. used together to attach a rear-facing or forward- Booster seats may be attached to the LATCH an- facing child restraint? chorages if allowed by the booster seat manufac-...
- Page 76 Locating The LATCH Anchorages Locating The Upper Tether Anchorages tether strap.The tether strap will have a hook at the end to attach to the top tether anchorage and The lower anchorages are round bars that There are tether strap anchorages behind a way to tighten the strap after it is attached to are found at the rear of the seat cushion where each rear seating position located on the back of...
- Page 77 1. Loosen the adjusters on the lower straps and 6. Test that the child restraint is installed tightly WARNING! by pulling back and forth on the child seat at on the tether strap of the child seat so that you can more easily attach the hooks or the belt path.
- Page 78 retract back into the retractor. If it is locked, the Lap/Shoulder Belt Systems For Installing WARNING! Child Restraints In This Vehicle ALR will make a clicking noise while the webbing the restraint. The child could be badly in- is pulled back into the retractor. jured or killed.
- Page 79 Frequently Asked Questions About Installing Child Restraints With Seat Belts What is the weight limit (child’ s weight + weight of Always use the tether anchor when using the seat the child restraint) for using the Tether Anchor belt to install a forward facing child restraint, up to Weight limit of the Child Restraint with the seat belt to attach a forward facing child the recommended weight limit of the child re-...
- Page 80 the retractor.As the webbing retracts, you will Installing Child Restraints Using The Top 1. Look behind the seating position where you hear a clicking sound.This means the seat belt Tether Anchorage plan to install the child restraint to find the is now in the Automatic Locking mode.
-
Page 81: Transporting Pets
SAFETY TIPS WARNING! • If your vehicle is equipped with a split rear seat, make sure the tether strap does not Transporting Passengers slip into the opening between the seatbacks NEVER TRANSPORT PASSENGERS IN THE as you remove slack in the strap. CARGO AREA. -
Page 82: Exhaust Gas
Exhaust Gas Whenever a change is noticed in the sound of the damaged (i.e., bent retractor, torn webbing, etc.). exhaust system, when exhaust fumes can be If there is any question regarding seat belt or WARNING! detected inside the vehicle, or when the under- retractor condition, replace the seat belt. - Page 83 Floor Mat Safety Information WARNING! WARNING! Always use floor mats designed to fit your installing any other floor mat. NEVER install trapped under accelerator, brake, or clutch vehicle. Only use a floor mat that does not or stack an additional floor mat on top of an pedals and could cause a loss of vehicle interfere with the operation of the accelerator, control.
-
Page 84: Periodic Safety Checks You Should Make Outside The Vehicle
Periodic Safety Checks You Should Make Lights Fluid Leaks Outside The Vehicle Have someone observe the operation of brake Check area under the vehicle after overnight Tires lights and exterior lights while you work the parking for fuel, coolant, oil, or other fluid leaks. controls. - Page 85 STARTING AND OPERATING STARTING AND OPERATING STARTING PROCEDURES ..84 MANUAL TRANSMISSION — IF To Deactivate ....90 EQUIPPED .
-
Page 86: Starting Procedures
STARTING PROCEDURES a clutch interlocking ignition system. It will not Cold Weather Operation start unless the clutch pedal is pressed to the To prevent possible engine damage while starting Before starting your vehicle, adjust your seat, floor. at low temperatures, this vehicle will inhibit engine adjust both inside and outside mirrors, and fasten cranking when the ambient temperature is less Automatic Transmission... -
Page 87: If Engine Fails To Start
If Engine Fails To Start After Starting While cruising, brief full-throttle acceleration within the limits of local traffic laws contributes to The idle speed is controlled automatically, and it a good break-in.Wide-open throttle acceleration WARNING! will decrease as the engine warms up. in low gear can be detrimental and should be Never pour fuel or other flammable liquids avoided. -
Page 88: Manual Transmission - If
MANUAL TRANSMISSION — IF Never drive with your foot resting on the clutch moved forward and rearward. This allows the pedal, and never try to hold the vehicle on a hill driver to manually select the transmission gear EQUIPPED with the clutch pedal partially engaged. This will being used. -
Page 89: Sport Mode
• The system will ignore shift commands that SPORT MODE would cause engine lugging or overspeed. An In Sport mode, the engine is more responsive to audible beep will sound if an inappropriate gear is requested. the accelerator pedal, and provides more power by increasing turbo boost. -
Page 90: Speed Control
2. Momentarily release the accelerator pedal. SPEED CONTROL NOTE: In order to ensure proper operation, the Speed 3. Press the accelerator pedal again to activate. When engaged, the Speed Control takes over Control system has been designed to shut down accelerator operations at speeds greater than 25 4. -
Page 91: To Set A Desired Speed
To Set A Desired Speed U.S. Speed (mph) ment Panel” in the Owner’ s Manual for more information. The speed increment shown is de- • Pushing the RES (+) button once will result in a Turn the Speed Control on.When the vehicle has pendent on the selected speed unit of U.S. -
Page 92: To Accelerate For Passing
To Accelerate For Passing To Resume Speed For further information, please refer to your Owner’ s Manual. Press the accelerator as you would normally. To resume a previously set speed, push the RES When the pedal is released, the vehicle will return (+) button and release. -
Page 93: Adding Fuel
• The soft button “Image defeat [X]” to disable CAUTION! WARNING! the image is pressed. camera is unable to view every obstacle or • Never have any smoking materials lit in or When enabled, active guidelines are overlaid on object in your drive path. near the vehicle when the gas cap is re- the image to illustrate the width of the vehicle •... -
Page 94: Materials Added To Fuel
NOTE: Materials Added To Fuel Indiscriminate use of fuel system cleaning agents should be avoided. Many of these materials • When the fuel nozzle “clicks” or shuts off, the Designated TOP TIER intended for gum and varnish removal may con- fuel tank is full. - Page 95 NOTE: Vehicles equipped with manual transmissions CAUTION! may be flat towed (with all four wheels on the When towing your vehicle, always follow appli- towing, make sure all drive wheels are OFF ground) speeds up to 65 mph (105 km/h), for any cable state and provincial laws.
- Page 97 IN CASE OF EMERGENCY IN CASE OF EMERGENCY BULB REPLACEMENT ... .96 Sealing A Tire With Tire Service Kit..103 GEAR SELECTOR OVERRIDE ..113 Replacement Bulbs .
-
Page 98: Bulb Replacement
BULB REPLACEMENT Replacement Bulbs Interior Bulbs Bulb Number Overhead Lamp Courtesy Lamp Rear Cargo Lamp Exterior Bulbs Bulb Number Front Low and High Beam Headlamp HIR2LL Front Parking/Daytime Running Lamps W21/5W Front Fog Lamps H11LL Front Side Marker Lamps Front Turn Signal Lamps WY21W Side Direction Lamps WY5W... -
Page 99: Fuses
Bulb Number License Plate Lamps LED (See Authorized Dealer) NOTE: Numbers refer to commercial bulb types that can be purchased from an authorized dealer. If a bulb needs to be replaced, visit an authorized dealer or refer to the applicable Service Manual. FUSES WARNING! WARNING! -
Page 100: Underhood Fuses
Cavity Vehicle Fuse Number Mini Fuse Description 10 Amp Red Diagnostic Socket,Vehicle Radio, Climate Control System 20 Amp Yellow Bi-Directional Washer 20 Amp Yellow Passenger Power Window 7.5 Amp Brown Left Low Beam, Headlamp Leveling 7.5 Amp Brown Airbag Vehicle Radio Switch, Climate Control System, Stop Light, 5 Amp Tan Clutch 5 Amp Tan... - Page 101 Cavity Maxi Fuse Mini Fuse Description 20 Amp Yellow – Radiator Fan - Single Speed 30 Amp Green – Radiator Fan - Low Speed 40 Amp Orange – Radiator Fan - High Speed 40 Amp Orange – Blower Motor – 10 Amp Red Powertrain –...
- Page 102 Cavity Maxi Fuse Mini Fuse Description 20 Amp Yellow – Cooling Pump – If Equipped – 10 Amp Red Transmission 30 Amp Green – Rear Defroster – 5 Amp Tan Rear Defroster – 5 Amp Tan Heated Mirrors – If Equipped...
-
Page 103: Tire Service Kit - If Equipped
TIRE SERVICE KIT — IF Tire Service Kit Components And Operation Using The Mode Select Knob And Hoses EQUIPPED Your Tire Service Kit is equipped with the follow- ing symbols to indicate the air or sealant mode. Small punctures up to 1/4 inch (6 mm) in the tire Selecting Air Mode tread can be sealed with Tire Service Kit. -
Page 104: Tire Service Kit Usage Precautions
Tire Service Kit Usage Precautions items. However, use only the Air Pump Hose (7) WARNING! and make sure the Mode Select Knob (5) is in • Replace the Tire Service Kit Sealant Bottle (1) – If you are unsure of the condition of the Air Mode when inflating such items to avoid and Sealant Hose (6) prior to the expiration the tire or the wheel. -
Page 105: Sealing A Tire With Tire Service Kit
(B) Setting Up To Use Tire Service Kit: • After pushing the Power Button (4), the sealant WARNING! (white fluid) will flow from the Sealant Bottle 1. Push in the Mode Select Knob (5) and turn to plenty of water and drink plenty of water. (1) through the Sealant Hose (6) and into the the Sealant Mode position. - Page 106 NOTE: If the tire does not inflate to at least 26 psi CAUTION! If the Mode Select Knob (5) is on Air Mode and (1.8 Bar) pressure within 15 minutes: the pump is operating, air will dispense from the • The metal end fitting from Power Plug (8) •...
- Page 107 If the tire pressure is 19 psi (1.3 Bar) or higher: NOTE: WARNING! When having the tire serviced, advise the autho- 1. Push the Power Button (4) to turn on Tire repaired or replaced. Failure to follow this rized dealer or service center that the tire has Service Kit and inflate the tire to the pressure warning can result in injuries that are serious been sealed using the Tire Service Kit.
-
Page 108: Tire Service Kit - If Equipped
7. Return the Tire Service Kit to its storage Tire Service Kit Components And Operation Using The Mode Select Knob And Hoses location in the vehicle. Your Tire Service Kit is equipped with the follow- ing symbols to indicate the air or sealant mode. TIRE SERVICE KIT —... -
Page 109: Tire Service Kit Usage Precautions
Tire Service Kit Usage Precautions items. However, use only the Air Pump Hose (5) WARNING! and make sure the Mode Select Knob (2) is in • Replace the Tire Service Kit Sealant Bottle (4) – If you are unsure of the condition of the Air Mode when inflating such items to avoid and Sealant Hose (3) prior to the expiration the tire or the wheel. -
Page 110: Sealing A Tire With Tire Service Kit
(B) Setting Up To Use Tire Service Kit: NOTE: WARNING! 1. Push in the Mode Select Knob (2) and turn to Manual transmission vehicles must have the plenty of water and drink plenty of water. the Sealant Mode position. parking brake engaged and the gear selector in Do not induce vomiting! Consult a physician NEUTRAL. - Page 111 2. Connect the Power Plug (7) to a different inflate the tire to the pressure indicated on the 3. Immediately disconnect the Sealant Hose (3) from the valve stem, reinstall the cap on the 12 Volt power outlet in your vehicle or tire pressure label on the driver-side latch another vehicle, if available.
- Page 112 If tire pressure is less than 19 psi (1.3 Bar): 6. Replace the Sealant Bottle (4) and Sealant WARNING! Hose (3) assembly at an authorized dealer as The tire is too badly damaged. Do not attempt to soon as possible. Refer to “(F) Sealant Bottle Tire Service Kit is not a permanent flat tire drive the vehicle further.
-
Page 113: Jump Starting Procedure
button, then push the bottle into the housing WARNING! by holding the button. An audible click will be heard indicating the bottle is locked into place. Do not attempt jump starting if the battery is Release the button. frozen. It could rupture or explode and cause personal injury. -
Page 114: Jump Starting Procedure
Jump Starting Procedure 4. Connect the opposite end of the negative (-) WARNING! jumper cable to a good engine ground (ex- • Batteries contain sulfuric acid that can burn WARNING! posed metal part of the discharged vehicle’ s your skin or eyes and generate hydrogen gas engine) away from the battery and the fuel which is flammable and explosive. -
Page 115: Gear Selector Override
2. Disconnect the negative end (-) of the jumper GEAR SELECTOR OVERRIDE 4. Press and maintain firm pressure on the brake cable from the negative (-) post of the pedal. If a malfunction occurs and the gear selector booster battery. 5. -
Page 116: Freeing A Stuck Vehicle
NOTE: NOTE: CAUTION! There are steps that you can take to slow down Push the "ESC Off" switch, to place the Electronic an impending overheat condition: Stability Control (ESC) system in "Partial Off" Driving with a hot cooling system could dam- mode, before rocking the vehicle. -
Page 117: Towing A Disabled Vehicle
CAUTION! CAUTION! CAUTION! transmission in NEUTRAL for at least one • When “rocking” a stuck vehicle by shifting ing and failure. It can also damage the tires. minute after every five rocking-motion between DRIVE/SECOND GEAR and RE- Do not spin the wheels above 30 mph VERSE, do not spin the wheels faster than (48 km/h) while in gear (no transmission cycles. -
Page 118: Automatic Transmission
ENHANCED ACCIDENT CAUTION! CAUTION! RESPONSE SYSTEM (EARS) require towing, make sure all drive wheels • Do not use sling type equipment when are OFF the ground. towing. Vehicle damage may occur. This vehicle is equipped with an Enhanced Acci- • Towing this vehicle in violation of the above •... - Page 119 SERVICING AND MAINTENANCE SERVICING AND MAINTENANCE SCHEDULED SERVICING ..118 TIRES ..... .123 Tire Chains (Traction Devices) .
-
Page 120: Scheduled Servicing
SCHEDULED SERVICING Your authorized dealer will reset the oil change Severe Duty All Models indicator message after completing the scheduled Change Engine Oil at 4,000 miles (6,500 km) if Your vehicle is equipped with an automatic oil oil change. If a scheduled oil change is performed the vehicle is operated in a dusty and off road change indicator system. -
Page 121: Maintenance Plan
Maintenance Plan Required Maintenance Intervals Refer to the Maintenance Plan on the following pages for required maintenance. At Every Oil Change Interval As Indicated By Oil Change Indicator System: Change oil and filter. Rotate the tires. Rotate at the first sign of ir- regular wear, even if it occurs before the oil in- dicator system turns on. - Page 122 Mileage or time passed (whichever comes first) Or Years: Or Kilometers: Additional Inspections Inspect the CV joints. Inspect front suspension, tie rod ends, boot seals, and replace if necessary. Inspect brake linings, replace if needed. Inspect parking brake function, adjust as necessary. Additional Maintenance Replace cabin/air conditioning filter.
- Page 123 WARNING! • You can be badly injured working on or around a motor vehicle. Do only service work for which you have the knowledge and the right equipment. If you have any doubt about your ability to perform a service job, take your vehicle to a competent mechanic.
-
Page 124: Engine Compartment - 1.4L Turbo
ENGINE COMPARTMENT — 1.4L TURBO 1 — Engine Coolant Reservoir Pressure Cap 6 — Air Cleaner Filter 2 — Engine Oil Dipstick 7 — Engine Oil Fill 3 — Brake Fluid Reservoir 8 — Engine Coolant Reservoir 4 — Power Distribution Center (Fuses) 9 —... -
Page 125: Raising The Vehicle
RAISING THE VEHICLE Tire Markings • European — Metric tire sizing is based on European design standards. Tires designed to In the case where it is necessary to raise the this standard have the tire size molded into the vehicle, go to an authorized dealer or service sidewall beginning with the section width. - Page 126 Tire Identification Number (TIN) The TIN may be found on one or both sides of the tire; however, the date code may only be on one side. Tires with white sidewalls will have the full TIN, including the date code, located on the white sidewall side of the tire.
- Page 127 Tire Terminology And Definitions Term Definition B-Pillar The vehicle B-Pillar is the structural member of the body located behind the front door. Cold Tire Inflation Pressure Cold tire inflation pressure is defined as the tire pressure after the vehicle has not been driven for at least three hours, or driven less than 1 mile (1.6 km) after sitting for a minimum of three hours.
- Page 128 Tire Loading And Tire Pressure This placard tells you important information about the: NOTE: 1. Number of people that can be carried in the The proper cold tire inflation pressure is listed on vehicle. the driver’ s side B-Pillar or the rear edge of the driver's side door.
- Page 129 exceed XXX kg or XXX lbs” on the Tire and passengers in your vehicle, the amount of NOTE: Loading Information placard. The combined available cargo and luggage load capacity is • If your vehicle will be towing a trailer, load from weight of occupants, cargo/luggage and trailer your trailer will be transferred to your vehicle.
-
Page 131: Tires - General Information
• Unequal tire pressure from side to side may WARNING! WARNING! cause the vehicle to drift left or right. • Underinflation increases tire flexing and can Overloading of your tires is dangerous. Over- Fuel Economy result in overheating and tire failure. loading can cause tire failure, affect vehicle •... - Page 132 • Inspect tires for signs of tire wear or visible Example: If garage temperature = 68°F (20°C) WARNING! damage. and the outside temperature = 32°F (0°C) then the cold tire inflation pressure should be in- High speed driving with your vehicle under CAUTION! creased by 3 psi (21 kPa), which equals 1 psi maximum load is dangerous.
- Page 133 • The puncture is no greater than a ¼ of an inch See the tire pressure monitoring section for more (6 mm). information. Consult an authorized tire dealer for tire repairs Tire Spinning and additional information. When stuck in mud, sand, snow, or ice conditions, Damaged Run Flat tires, or Run Flat tires that have do not spin your vehicle's wheels above 30 mph experienced a loss of pressure should be replaced...
- Page 134 wear patterns will reduce tread life, resulting in Replacement Tires It is recommended you contact an authorized tire the need for earlier tire replacement. dealer or original equipment dealer with any The tires on your new vehicle provide a balance questions you may have on tire specifications or •...
-
Page 135: Tire Types
Summer Or Three Season Tires — If Snow Tires WARNING! Equipped Some areas of the country require the use of overloading and failure.You could lose con- Summer tires provide traction in both wet and snow tires during the Winter. Snow tires can be trol and have a collision. -
Page 136: Spare Tires - If Equipped
While studded tires improve performance on ice, may be used in the tire rotation for your vehicle. WARNING! skid and traction capability on wet or dry surfaces If your vehicle has this option, refer to an may be poorer than that of non-studded tires. authorized tire dealer for the recommended tire Compact and collapsible spares are for tem- Some states prohibit studded tires;... -
Page 137: Wheel And Wheel Trim Care
Inflate collapsible tire only after the wheel is limited tread life. When the tread is worn to the WARNING! properly installed to the vehicle. Inflate the col- tread wear indicators, the temporary use full size inflation pressures listed on your Tire and lapsible tire using the electric air pump before spare tire needs to be replaced. -
Page 138: Tire Chains (Traction Devices)
or a stiff brush. They can damage the wheel’ s CAUTION! CAUTION! protective coating that helps keep them from products may damage the wheel's protective MILD SOAP AND WATER WITH A SOFT corroding and tarnishing. finish. Such damage is not covered by the New CLOTH. -
Page 139: Treadwear
All passenger vehicle tires must conform conditions on specified government test can lead to sudden tire failure. The grade to Federal safety requirements in addition surfaces of asphalt and concrete. A tire C corresponds to a level of performance, to these grades. marked C may have poor traction which all passenger vehicle tires must performance. - Page 141 TECHNICAL SPECIFICATIONS TECHNICAL SPECIFICATIONS WHEEL AND TIRE TORQUE SPECIFICA- FLUID CAPACITIES ... . .141 Chassis .....142 TIONS .
-
Page 142: Wheel And Tire Torque Specifications
WHEEL AND TIRE TORQUE Inspect the wheel mounting surface prior to WARNING! mounting the tire and remove any corrosion or SPECIFICATIONS loose particles. To avoid the risk of forcing the vehicle off the jack, do not tighten the lug nuts/bolts fully until Proper lug nut/bolt torque is very important to Tighten the lug nuts/bolts in a star pattern until the vehicle has been lowered. -
Page 143: Fluid Capacities
FLUID CAPACITIES U.S. Metric Fuel (Approximate) 10.5 Gallons 40 Liters Engine Oil with Filter 1.4 Liter Turbo Engine 4 Quarts 3.8 Liters Cooling System 1.4 Liter Turbo Engine (Mopar Antifreeze/Engine Coolant 10 Year/150,000 Mile 4.6 Quarts 4.4 Liters (240,000 km) Formula) — with Manual Transmission 1.4 Liter Turbo Engine (Mopar Antifreeze/Engine Coolant 10 Year/150,000 Mile 5.8 Quarts 5.5 Liters... -
Page 144: Chassis
CAUTION! CAUTION! CAUTION! compatible” coolant (antifreeze). If a non- not use additional rust inhibitors or antirust • Mixing of engine coolant (antifreeze) other OAT engine coolant (antifreeze) is intro- products, as they may not be compatible than specified Organic Additive Technology with the radiator engine coolant and may duced into the cooling system in an emer- (OAT) engine coolant (antifreeze), may re-... -
Page 145: Mopar Accessories
MOPAR ACCESSORIES • In choosing Authentic Accessories you gain far • For the full line of Authentic FIAT Accessories more than expressive style, premium protec- by Mopar, visit your local dealership or online at Authentic Accessories By Mopar tion, or extreme entertainment, you also benefit mopar.com for U.S. - Page 147 MULTIMEDIA MULTIMEDIA CYBERSECURITY ....146 IPOD/USB/MEDIA PLAYER CONTROL — Voice Text Reply (Not Compatible With iPhone) .....159 IF EQUIPPED .
-
Page 148: Cybersecurity
CYBERSECURITY most recent version of vehicle software (such as NOTE: Uconnect software) is installed. • FCA or your dealer may contact you directly Your vehicle may be a connected vehicle and may regarding software updates. be equipped with both wired and wireless net- WARNING! •... -
Page 149: Uconnect 3/3 Nav
UCONNECT 3/3 NAV Uconnect 3/3 NAV Radio 1 — On/Off Button — Volume Knob 7 — MORE Button 2 — Mute Button 8 — PHONE Button 3 — Screen Off Button 9 — COMPASS Button 4 — Settings Button 10 — MEDIA Button 5 —... -
Page 150: Clock Setting
NOTE: Speed Adjusted Volume CAUTION! In the Clock Setting Menu you can also select Press the “Speed Adjusted Volume” button on the Display Clock. Display Clock turns the clock Do NOT attach any object to the touch- touchscreen to select between OFF, 1, 2 or 3.This display in the status bar on or off. -
Page 151: Radio Operation
Radio Operation Radio Operation 1 — Radio Station Preset 5 — Station Information 2 — All Presets 6 — Direct Tune 3 — Seek Next 7 — Radio Band 4 — Audio Settings 8 — Seek Previous... -
Page 152: Voice Text Reply (Not Compatible With Iphone)
Store Radio Presets Manually Seek Next/Previous Buttons Here’s how: 1. Push the Uconnect Phone button • Press the up or down button to seek through The Radio stores up to 12 presets in each of the wait for the beep, then say “reply.” Uconnect radio stations in AM, FM or SXM bands. -
Page 153: Uconnect Settings
NOTE: 3. Make your selection highlighting the button. The system only recognizes time in increments of Depending on the vehicle’ s options, the following 5 (i.e. 5, 10, 15, 20, 25, 30, 45, 60). Only use the feature settings are available: numbers listed, otherwise the system may not •... -
Page 154: Radio Operation
The following describes the left-hand control IPOD/USB/MEDIA PLAYER To select a specific audio source, push the MEDIA button on the faceplate. To allow music to play operation in each mode. CONTROL — IF EQUIPPED from your portable device through the vehicle’ s Radio Operation speakers, press the “Source”... -
Page 155: Uconnect Phone
UCONNECT PHONE Uconnect Phone (Bluetooth Hands-Free Calling) Uconnect 3/3 NAV Phone Menu 1 — Call/Redial/Hold 7 — Uconnect Phone Settings Menu 2 — Mobile Phone Signal Strength 8 — Text Messaging 3 — Currently Paired Mobile Phone 9 — Direct Dial Pad 4 —... -
Page 156: Pairing (Wirelessly Connecting) Your Mobile Phone To The Uconnect System
The Uconnect Phone feature enables you to • U.S. residents visit UconnectPhone.com or Start Pairing Procedure On The Radio place and receive hands-free mobile phone calls. call 1-877-855-8400. Uconnect 3/3 NAV: Drivers can also place mobile phone calls using • Canadian Residents visit UconnectPhone.com their voice or by using the buttons on the call, 1-800-465-2001... - Page 157 Pair Your iPhone: Complete The iPhone Pairing Procedure: phones within range and will connect to the Uconnect system automatically when entering the vehicle. Only one mobile phone and/or one Bluetooth audio device can be connected to the Uconnect system at a time. If “No” is selected, simply select “Uconnect”...
- Page 158 3. Select Connections. Complete The Android Pairing Procedure: Select The Android Mobile Phone's Priority Level 4. Turn Bluetooth setting to “On.” When the pairing process has successfully com- • Ensure the Bluetooth feature is enabled. pleted, the system will prompt you to choose Once enabled, the mobile phone will begin whether or not this is your favorite mobile to search for Bluetooth connections.
-
Page 159: Common Phone Commands (Examples)
You are now ready to make hands-free calls. Press Phonebook • If you are listening to available voice command options, you do not have to listen to the entire the Uconnect “Phone” button on your The Uconnect system will automatically sync your list. -
Page 160: Incoming Text Messages
Incoming Text Messages 3. Select located under DEVICES next to 4. Turn “Show Notifications” to on. Uconnect. After pairing your Uconnect system with a • A pop up will appear asking you to accept 4. Turn “Show Notifications” to on. Bluetooth enabled mobile device with the Mes- a request for permission to connect to sage Access Profile (MAP), the Uconnect system... -
Page 161: Voice Text Reply (Not Compatible With Iphone)
Voice Text Reply (Not Compatible With for U.S. residents or, 1-800-465-2001 (English) / 2. Wait for the beep and say one of the pre- 1-800-387-9983 (French) Canadian iPhone) defined messages. (If you are not sure, you can residents. say “help”). Uconnect then reads the pre- NOTE: defined messages allowed. -
Page 162: Helpful Tips And Common Questions To Improve Bluetooth Performance With Your Uconnect System
NOTE: • Many mobile phones do not automatically re- • Up to 2,000 contact names with six numbers per contact will transfer to the Uconnect 3/3 connect after being restarted (hard reboot). The system only recognizes time in increments of NAV system phonebook. -
Page 163: Uconnect 3/3 Nav Voice Recognition Quick Tips
UCONNECT 3/3 NAV VOICE 2. Reduce background noise. Wind and passen- ger conversations are examples of noise that RECOGNITION QUICK TIPS may impact recognition. Introducing Uconnect 3. Speak clearly at a normal pace and volume while facing straight ahead.The microphone is Start using Uconnect Voice Recognition with positioned on the rearview mirror and aimed these helpful quick tips. -
Page 164: Radio
• “Repeat” to listen to the system prompts again TIP: At any time, if you are not sure of what to • “Change source to USB” say or want to learn a Voice Command, push the • “Play artist Beethoven”; “Play album Greatest Notice the visual cues that inform you of your VR button and say “Help.”... -
Page 165: General Information
radio, your system ready. Check 2. This device must accept any interference re- UconnectPhone.com for mobile phone compat- ceived, including interference that may cause ibility and pairing instructions. undesired operation. Push the Phone (if active) or VR button NOTE: . After the beep, say one of the following Changes or modifications not expressly approved commands: by the party responsible for compliance could... - Page 167 CUSTOMER ASSISTANCE CUSTOMER ASSISTANCE IF YOU NEED ASSISTANCE ..166 Customer Assistance For The Hearing Or REPORTING SAFETY DEFECTS ..167 Speech Impaired (TDD/TTY) ..166 In The 50 United States And Washington, D.C.
-
Page 168: If You Need Assistance
IF YOU NEED ASSISTANCE Any communication to the manufacturer's cus- In Mexico Contact tomer center should include the following infor- Av. Prolongacion Paseo de la Reforma, 1240 The manufacturer and its authorized dealer are mation: vitally interested in your satisfaction.We want you Sante Fe C.P. -
Page 169: Service Contract
conventional teletypewriter (TTY) in the United The manufacturer will not stand behind any WARNING! States, can communicate with the manufacturer service contract that is not the manufacturer's cancer and birth defects, or other reproduc- by dialing 1-800-380-CHRY. service contract. It is not responsible for any tive harm. -
Page 170: In Canada
Canadian government • The Owner's Manual and User Guide elec- tronic files are also available on the FIAT that a safety defect exists in a group of should contact Transport Canada, Motor website. - Page 171 INDEX Accessories ....143 Antifreeze (Engine Coolant)..141 Capacities, Fluid....141 Mopar .
- Page 172 Emission Control System Maintenance..44 Clock Setting ....148 Fluids And Lubricants ... . .141 Compact Spare Tire .
- Page 173 Turn Signal ....16 Passing ....15, 16 Latches .
- Page 174 New Vehicle Break-In Period ..85 Pretensioners Safety Checks Outside Vehicle ..82 Seat Belts ....56 Safety Defects, Reporting .
- Page 175 Wheel, Heated ....14 Jacking ....123 Heated ....12 Rear Folding .
- Page 176 Warranty Information ... . .167 Turn Signals ....15, 16, 42 USB ..... . .152 Washers, Windshield .
- Page 179 Manuals, Multimedia User Manual and other Warning Labels in your vehicle. Not all features shown in this guide may apply to your vehicle. For additional information on accessories to help personalize your vehicle, visit www.mopar.com (U.S.), www.mopar.ca (Canada) or your local FIAT ® Brand Dealer.
- Page 180 Whether it’s providing information about specific product features, taking a tour through your vehicle’s heritage, knowing what steps to take following an accident or scheduling your next appointment, we know you’ll find the app an important extension of your FIAT brand vehicle. Simply download the app, ®...
Need help?
Do you have a question about the 500 ABARTH CABRIO 2018 and is the answer not in the manual?
Questions and answers