
Related Manuals for Uniden DTL-8R-1


Summary of Contents for Uniden DTL-8R-1
- Page 1 User Operation Specification Cordless Phone for PBX DTZ-8R-1 Ver 0.02 APRVD CHECKED(E) CHECKED(S) CHECKED(M) ISSUED Copyright © 2014 Uniden. All rights reserved.
-
Page 2: Table Of Contents
3.3.4 PBX command from PBX Expansion board to the Base Station _______ 25 NEC PBX operation ____________________________________________ 26 3.4.1 Change wired phone and cordless phone (DTL-8R-1 Handset) ________ 26 3.4.2 Making call to other Expansion __________________________________ 26 3.4.3 Receiving a Call from other Expansion ____________________________ 29... - Page 3 3.4.4 Making call to outside line ______________________________________ 30 3.4.5 Receiving a Call from outside line (Depend on PBX line) _____________ 31 3.4.6 Finish Talk Mode ______________________________________________ 32 3.4.7 Training mode (entry) __________________________________________ 33 3.4.8 Training mode (Next (Softkey 1)key: select item) ___________________ 33 3.4.9 Training mode (Func(Softkey2) key: change each item setting) _______ 33 3.4.10...
- Page 4 3.16.25 Function Key Label(Name Edit) ________________________________ 55 3.16.26 Function Key Label(Delete Label) ______________________________ 55 3.17 Key Lock ___________________________________________________ 56 3.18 Virtual Function Key __________________________________________ 56 3.19 Base Key Option (Option) T.B.D ________________________________ 56 3.20 Speed Dial Settings (Option) T.B.D _____________________________ 57 4.
- Page 5 Revision History Issue Date Originator Description April 30, 0.01 Shitara Edition for NEC. This document is referred 2014 EXP10000 operation specification Rev. 1.1. June 06, 0.02 Shitara <Change Key assignment> menu àmenu/mute 2014 mute à speaker speaker à end <Add> Base key option ,Speed Dial option...
-
Page 6: Overview
1. Overview 1.1 Introduction DTL-8R-1 is the cordless phone that is adapted for digital PBX (Private Branch Exchange). It is usually used in the office environment. When this phone is connected to the digital PBX, it must have a digital PBX Expansion board inside the Base Station. -
Page 7: Features
2. Features Feature DTZ-8R-1 General Frequency 1.9G (1920 - 1930MHz) Audio Process Digital (ADPCM) Transmission TDMA/TDD Number of Channels ID No. About 130K combinations or more WiFi Friendly Number of RF Slot 12(6) Handset Expandability No/Yes (Option) Compatibility w/ other models Multi Base Multi Repeater Yes, up to 6... - Page 8 Feature DTL-8R-1 Handset Programmable Key (API) LCD Display 2 x 24 (10&16 digit mode adjustable) Standby Display Depend on Interface Board. There are no Display timeout and LED timeout on the Handset Line Status Display Display Language Only English Icon...
-
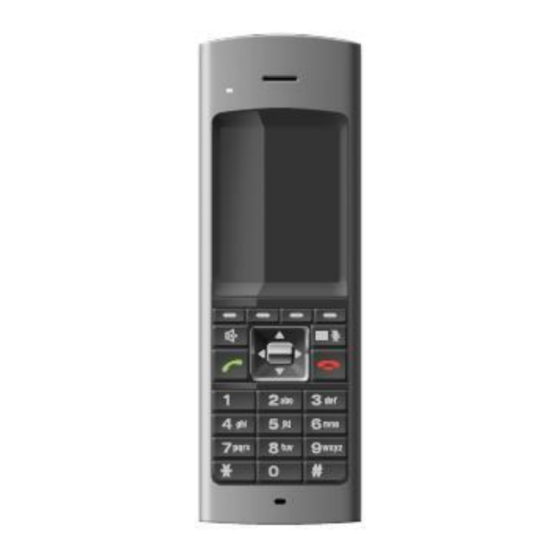
Page 9: Handset
Display Elements <Notes> 1) This image differs from the actual design. 2.1 Handset... -
Page 10: Base Station
2.2 Base Station... -
Page 11: Charge Unit
2.3 Charge unit... -
Page 12: Key & Sw
2.4 Key & SW 2.4.1 Handset talk key speaker key menu/mute key end key up key down key right key left key select key(center of navigation keys) dial (0~9、 Ú 、#) key Softkey (1~4)key <Notes> 1) If redial option is enable, Softkey4 key is used for redial key in Talk state. 2) If base key option enable, Softkey1 key is used for Base Left key in Function key state. -
Page 13: Tone Type And Volume
2.5 Tone Type and Volume 2.5.1 Frequency definition 3142Hz 2000Hz 1046Hz 494Hz 2637Hz 1900Hz 1000Hz 490Hz 2400Hz 1800Hz 831Hz 480Hz 2346Hz 1600Hz 800Hz 430Hz 2200Hz 1566Hz 700Hz 400Hz 2095Hz 1100Hz 500Hz 2.5.2 Handset tone types Bell Tone A Repeated Infinitely 48ms 48ms Bell Tone B... -
Page 14: Handset Volume
2.5.3 Handset volume Volumes for each tone are shown below. Tone Type Level Comment Key Touch Tone Error Tone HIGH Confirmation Tone HIGH Battery Low Alert Tone Used to warning for battery low Range Alarm Tone Used to warning for out of RF link range Beep Tone The PBX Expansion board requires this tone Bell Tone A-F... -
Page 15: Ring Cadence
2.5.4 Ring cadence When the PBX Expansion board send ring state command to the Base Station, it will be transmitted to the Handset and the Handset generates bell tone according to the cadence, which is given by PBX Expansion board. Cadence 1 2sec 4sec... -
Page 16: Base Station Tone
2.5.5 Base Station tone The Base Station doesn’t have any tone features 2.5.6 Charger The charger doesn’t have any tone features... -
Page 17: Display
2.6 Display 2.6.1 Handset LCD display 240 x 320 QVGA LCD Character code set:ISO/IEC 8859-1(Latin-1) -
Page 18: Message From Pbx Expansion Board
2.6.1.1 Message from PBX Expansion board When the Handset receives message from PBX Expansion board. Message is shown according to the followings. LCD is selectable 24x2line(48digits), 16x2line(32digits) or 10x2line(20digits), which is, determined when ID is written at factory. Message shall be shown with word wrapping (48digits, 32digits or 20digits). If Handset can not show word wrapping digits on one page because of word wrapping, then message shall be divided into 2 pages If message is shown on 2 pages, each page shall be automatically swap 2.5seconds... -
Page 19: Handset Lcd Icons
2.6.2 Handset LCD Icons Talk icon Handset Talk mode Other situation Battery Status Icon Battery Level (full) (Level2) (Level1) (Low) (Warning) Charge On <Notes> 1) When you get on the charger with battery full, battery status icon shows battery full. Antenna Level Icon Antenna Level Level... -
Page 20: Handset Led
2.6.3 Handset LED 1. Charge LED On Cradle (charging) OFF: Off Cradle (not charging) 2. Virtual Function LEDs All Function LEDs are controlled by PBX according to the PBX command the Base Station will set each LED to one of cadences bellow. Always off Always on Blinking 1... - Page 21 2) When the Handset is on charge, all Function LEDs will keep status even if it matches above condition. 3) If the user presses any key (include no valid key) or the user pick up the Handset from cradle or the user puts the Handset on cradle, LCD/Key Back Light is turned on. LCD/Key Back Light will be turned off after 10 seconds When no operation.
-
Page 22: Base Led
2.6.4 Base LED Power LED Base is powered on Base is powered off Registration mode blink Base Left LED Controlled by the PBX Expansion board. Base Right LED Controlled by the PBX Expansion board. 2.6.5 Charger LED There is no LED on charger. -
Page 23: Operation & Setup
Even if the Handset power is reinstated immediately after it is lost during Talk mode, the Handset will not return to Talk mode. (DTL-8R-1 does not support talk back function.) 3.2.2 Base Even if the Base power is reinstated immediately after it is lost during Talk mode, the... -
Page 24: Communication To The Pbx
UART (Universal Asynchronous Receive and Transmit) with 2400bps speed. 3.3.2 Local operation These operations are independent from the PBX Expansion board control. It is performed by the DTL-8R-1 itself. Key press detection and emit key touch tone RF link establishment Show “ACQUIRING LINK”... -
Page 25: Pbx Command From The Base Station To Pbx Expansion Board
3.3.3 PBX command from the Base Station to PBX Expansion board Value Additional Command Name Explanation (Hex) Data Button ID Button press Function (F1-F12) or dial (0-9, *, #) (1byte) button is pressed Button ID Button release Function (F1-F12) or dial (0-9, *, #) (1byte) button is released Talk button press... -
Page 26: Pbx Command From Pbx Expansion Board To The Base Station
3.3.4 PBX command from PBX Expansion board to the Base Station Value Additional Command Name Explanation (Hex) Data Enable DTMF If the Base Station receives this command send DTMF signal while dial button is pressed. LED ID (1byte) Change LED When the Base Station receives this LED State (1byte) state... -
Page 27: Nec Pbx Operation
3.4 NEC PBX operation This operation is one of examples for the DTL-8R-1 with NEC PBX. So it might be different from actual operation in detail. Operation of DTL-8R-1 in digital mode depends on each PBX specification. 3.4.1 Change wired phone and cordless phone (DTZ-8R-1 Handset) Press Base Left key to change to cordless phone (DTZ-8R-1 Handset) and press Base Right key to change to wired phone. - Page 28 Step 2 When connected, The Handset goes to Talk mode and Talk icon is turned on and shows current volume. Talk key Speaker key Step 3 If the user enters dial 1,2, 3 then LCD shows the dial number pressed as dial echo. Talk Speaker Step 4...
- Page 29 Step 5 When call partner answers call. The LCD shows this message to indicate phone is in Talk mode. Talk Speaker <Notes> 1) When Base Station is not connected to PBX, Handset shows message “DISCONNECT”. 2) When Handset cannot connect to Base Station, error tone will be emitted and “Out of Range”...
-
Page 30: Receiving A Call From Other Expansion
3.4.3 Receiving a Call from other Expansion Step 1 When incoming call is coming from the Expansion, The Handset goes to Incoming call Mode and shows this message to indicate Expansion call is coming. Step 2 If the user presses talk key or dial key (0-9, *, #) or the user picks up the Handset from cradle, Handset tries to connect Base Station and shows “ACQUIRING LINK”... -
Page 31: Making Call To Outside Line
3.4.4 Making call to outside line Step 1 Press the select key on the Handset and select F1. The Handset starts to establish RF connection with the Base Station. LCD is not changed. Step 2 When RF connection is established, the Handset goes to Talk Mode and Talk icon is turned on and current volume is shown on the LCD. -
Page 32: Receiving A Call From Outside Line (Depend On Pbx Line)
Step 3 If the user enters dial 1, 2, 3 then LCD shows the dial number pressed as dial echo. Talk Speaker 3.4.5 Receiving a Call from outside line (Depend on PBX line) Step 1 When incoming call from outside is coming, F1 LED is blinking. Step 2 If the user presses talk key or dial key (0-9, *, #) or the user picks up the Handset from cradle, Handset tries to connect Base Station and shows “Acquiring Link”... -
Page 33: Finish Talk Mode
Step 3 When RF connection is established. The Handset goes to Talk mode and turns on talk icon and shows current volume. 3.4.6 Finish Talk Mode The Handset keeps RF link for about 1 second after finish Talk mode. -
Page 34: Training Mode (Entry)
3.4.7 Training mode (entry) Press * and # at the same time then press talk key. The Handset emits confirmation tone and enters to training mode. This message is shown on the LCD and F1 LED is blinking. 3.4.8 Training mode (Next (Softkey 1)key: select item) To select item, press Next key Item changes as followings. -
Page 35: Training Mode (Exit(Softkey 4) Key: Exit From The Training Mode)
3.4.11 Training mode (Exit(softkey 4) key: exit from the Training mode) When Exit key is pressed anytime during training mode, key touch-tone will be emitted and “Training off” command is sent to the PBX Expansion board. The Handset will exit from the Training mode. -
Page 36: Channel Change
3.6 Channel change It changes channel automatically. 3.7 Auto Stand-by When the Handset is in these modes, which is shown below placing the Handset on the Charger will change it to Stand-by mode. At this time, confirmation tone is emitted. Ringer volume setting Menu setting Talk mode... -
Page 37: Out Of Range
3.9 Out Of Range When Standby Mode The Handset shows message “Searching” when the Handset cannot find the Base Station (Out of Range) in Standby Mode. When establish RF link If the talk, speaker key is pressed but the Handset cannot establish RF Link with the Base Station, Handset will sound error tone and shows message “Out of Range”. -
Page 38: Low Battery
3.10 Low Battery The Handset has visual and audible indicators to warn of low battery condition. In Standby mode Battery status Icon in the LCD will change to battery low. “Charge Battery” message blinks on the LCD (ON: 600msec, OFF: 600msec). In Talk mode Battery status Icon in the LCD will change to battery low. -
Page 39: Volume Setting
2) Insert Headset plug in Headset Jack when Hands Free condition. Hands Free icon will be not turned off. 3) Tone is output from speaker when Headset is connected. 3.14 Volume setting There are 3 volume settings. Talk mode, Hands Free Talk Mode and Headset condition have each volume. -
Page 40: Ring Volume Setting
3.15 Ring Volume Setting 3.15.1 Ringer volume selection Step 1 When up key is pressed in Standby mode, the Handset goes to Ringer volume setting mode and shows current setting. The Ring volume will be changed as following. àUp ßDown <Notes>... -
Page 41: Menu Setting Mode
3.16 Menu setting mode <Notes> 1) Press Exit key or end key in each menu setting mode. Then the Handset goes to standby mode. 2) The Handset keeps each menu setting mode for a while(depends on Menu timeout setting) without key operation. The Handset cancel menu setting and goes to Standby mode with Error tone. -
Page 42: Contacts(List)
3.16.2 Contacts(List) Step 1 Press the menu/mute key in standby mode. Then the LCD shows menu list mode. Step 2 Select “Contacts” and press select key. In this screen, following keys are available. <To Select Contact List> up/down key: Increment or Decrement Contact List Number. Left/Right key: Contact List number +5 or -5. -
Page 43: Contacts(Delete Contact)
3.16.4 Contacts(Delete Contact) In this screen, following keys are available. Yes key: Delete Contact with confirmation tone. After Delete contents, Back to Previous screen. No key: Back To previous screen. 3.16.5 Contacts(Edit/Add) Step 1 Enter Name for contact. Maximum 8 characters can be stored in each contact. In this screen, following keys are available. - Page 44 <Add: Edit New> Maximum 24 digits number can be stored in each contact. 16digits can be displayed in 1 line. Over 16digits, number displayed in 2 line. In this screen, following keys are available. Back Key: Back to previous screen Next Key: Go to Number edit screen Delete Key...
-
Page 45: Settings(List)
3.16.6 Settings(List) Step 1 Press the menu/mute key in standby mode. Then the LCD shows menu list mode. Step 2 Select “Settings” and press select key. In this screen, following keys are available. up/down key: Pointer moves select key: Select menu item and enter each menu setting 3.16.7 Settings(Menu Timeout) Step 1 Select “Menu Timeout”... -
Page 46: Settings(Power Save)
3.16.9 Settings(Power Save) Step 1 Select “Power save” and press select key. Then the LCD shows Power Save setting screen. Pointer is pointed to the current power save value. (Default value is On.) On: LCD goes to sleep mode with LCD backlight turn off. Off: LCD backlight dimly. -
Page 47: Settings(Key Lock)
3.16.11 Settings(Key Lock) Step 1 Select “Key Lock” and press select key. Then the LCD shows Key Lock setting screen. Pointer is pointed to the current Key Lock value. (Default value is Off.) On: Enable Key Lock Function Off: Disable Key Lock Function In this screen, following keys are available. -
Page 48: Sounds(Ring Tones)
3.16.13 Sounds(Ring Tones) Step 1 Select “Ring Tones” and press select key. Then the LCD shows Ring Tones setting screen. Pointer is pointed to the current Ring Tone. (Default value is Type A.) There are 6 types Ring tones(Type A – Type F) available. In this screen, following keys are available. -
Page 49: Sounds(Out Of Range Alert)
3.16.15 Sounds(Out Of Range Alert) Step 1 Select “Out Of Range Alert” and press select key. Then the LCD shows Out Of Range Alert setting screen. Pointer is pointed to the current Out Of Range Alert setting. (Default value is On.) On: Out Of Range Alert turns on Off: Out Of Range Alert turns off In this screen, following keys are available. -
Page 50: Language
3.16.17 Language Step 1 Press the menu/mute key in standby mode. Then the LCD shows menu list mode. Step 2 Select “Language” and press select key. Pointer is pointed to the current Language setting. (Default value is English.) There are 3 languages (English, French, Spanish) available. In this screen, following keys are available. -
Page 51: Administrator Setting (Registration)
3.16.19 Administrator Setting (Registration) Step 1 Press and Hold Base Station Left Key until Blue LED start blinking. (for 3seconds) Step 2 Select “Registration” and press select key. Then the LCD shows Registration screen. Start finding Base Station. In this screen, following keys are available. cancel key: Exit from registration mode Step 3 Handset find Base Station. -
Page 52: Administrator Setting (De-Registration)
3.16.20 Administrator Setting (De-Registration) Step 1 Select “De-Registration” and press select key. Then the LCD shows De-Registration screen. Display Available Handset number(Handset #1 only) As for Operating Handset, display ”[Using]” next of Handset #. In this screen, following keys are available. up/down key: Pointer moves (If the other handset registered) select key:... -
Page 53: Administrator Setting (Change Pin Code)
Step 3 Finish De-Registration. If the De-Registration failed, The Handset goes to Standby state after 5 seconds elapsed. In De-Register screen, following keys are available. Regist key: Start Registration 3.16.21 Administrator Setting (Change PIN code) Step 1 Select “Change PIN Code” and press select key. Then the LCD shows Change PIN Code screen. -
Page 54: Administrator Setting (Site Survey)
3.16.22 Administrator Setting (Site Survey) Step 1 Select “Site Survey” and press select key. Then the LCD shows Site Survey screen. In this screen, includes following contents. Band: Carrier Band of this Handset. (North America) Condition: good / Fair / Poor Clear Slot: number of Clear slot (total number of slot is 12) Number of Base: Number of Base that handset found. -
Page 55: Administrator Setting (Site Survey:sync Display Mode)
3.16.23 Administrator Setting (Site Survey:Sync Display mode) Step 1 To Start Sync Display mode, press Sync key.. Sync Display mode is activated Sync information display in each state. Sync display includes following contents. Ch: Current channel number. Slot: Current Slot number. RSSI: Current RSSI value. -
Page 56: Function Key Label(Name Edit)
3.16.25 Function Key Label(Name Edit) Step 1 Press the select key in Function Key Label list screen. Then the LCD shows Name Edit screen. In this screen, following keys are available. Maximum 8 characters can be stored in each label. 123/abc key(toggle) “123”... -
Page 57: Key Lock
3.17 Key Lock In standby state, If Key lock function is enabled, 15 seconds elapsed from last key operation, Key lock is activated. If Key is pressed while activating key lock, following screen appears. In this screen, following keys are available. * key(Press and hold 2 seconds): Key is unlocked for a while. -
Page 58: Speed Dial Settings (Option) T.b.d
3.20 Speed Dial Settings (Option) If Speed Dial setting option is On, In Virtual Function key screen, following keys are available. Dial1-0 key: Dialing from Contact list if it registered. Dial 1:Contact List 01 Dial 2:Contact List 02 Dial 0:Contact List 10 Other keys:Same as Virtual Function key mode... -
Page 59: Appendix
4. Appendix 4.1 Data Table 4.1.1 Factory Setting ITEM HANDSET BASE STATION Security Code 1234 Redial None One Touch Dial Number None Ringer Tone Tone A Ringer Volume High Ringer Mute Ear Speaker Volume Hands Free Volume Headset Volume Brightness Power Save Contact List None... - Page 60 The handset is designed for body-worn environment and conserving natural resources, operation and meets FCC RF exposure Uniden voluntarily participates in an RBRC® guidelines when used with any belt clip, carrying industry program to collect and recycle used Ni- case, or other accessory supplied with this MH batteries within the United States.
Need help?
Do you have a question about the DTL-8R-1 and is the answer not in the manual?
Questions and answers