
Subscribe to Our Youtube Channel
Related Manuals for Uniden DECT 3236


Summary of Contents for Uniden DECT 3236
- Page 1 DECT 3236 For more exciting new products please visit our website: Australia: www.uniden.com.au...
- Page 2 IMPORTANT SAFETY INSTRUCTIONS When using your telephone equipment, basic safety precautions should always be followed to reduce the risk of fire, electric shock and injury to persons, including the following: • This unit is NOT waterproof. DO NOT expose this unit to moisture. • DO NOT expose this unit to rain.
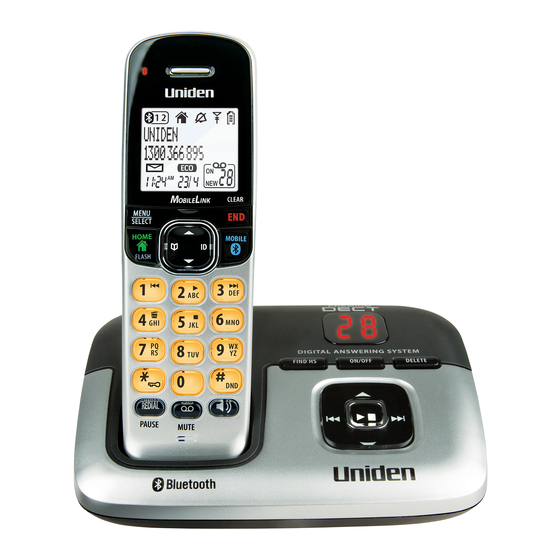
- Page 3 WHAT’S IN THE BOX? DECT 3236 base Accessory handset with answering and charger system and cordless handset Not Pictured: • Rechargeable battery (BT-694, BT- 694s or BT-694n) • AC adaptor (AAD-600S(M)) • Battery cover If you purchased You should Not Pictured: • Rechargeable battery...
-
Page 4: Table Of Contents
CONTENTS INSTALLING YOUR PHONE ..............5 Setting Up the MobileLink Bluetooth Connection ............6 GETTING TO KNOW YOUR PHONE ............8 Parts of the Handset ......................8 Parts of the Base ........................11 Using the Handset Menu ....................12 USING YOUR PHONE ................15 Using the Caller ID and Redial Lists ................. -
Page 5: Installing Your Phone
INSTALLING YOUR PHONE Charge the Battery 1. Unpack all handsets, battery packs, and battery covers. 2. If you need to remove a cover, press in on the notch and slide the cover down and off. 3. Line up the battery connector with the jack inside the handset;... -
Page 6: Setting Up The Mobilelink Bluetooth Connection
Bluetooth V2.1 handsfree profile. If you are not certain of the profiles supported by your Bluetooth phone or if you have difficulty pairing your phone to the DECT 3236 see the manual that came with your phone. - Page 7 MOBILE on the handset, the DECT 3236 asks which phone you want to connect to. If you are using the DECT 3236 to talk on one Bluetooth phone, the DECT 3236 will not ring if a call comes in on another phone. You can set a different ring tone for each paired mobile phone (see page 13).
-
Page 8: Getting To Know Your Phone
GETTING TO KNOW YOUR PHONE Parts of the Handset Earpiece MENU/ END/CLEAR SELECT HOME/ MOBILE FLASH PHONEBOOK DOWN 12-key dial pad #DND REDIAL/PAUSE SPEAKER Microphone MESSAGE/MUTE Charging contacts... - Page 9 Key Icon What it does • In standby or during a call: open the phonebook. PHONEBOOK • In the menu: go back to the previous screen. • When entering text: move the cursor to the left. SPEAKER Switch a normal call to the speakerphone (and back). • In standby: start a telephone call on your land line (get HOME/FLASH a dial tone).
- Page 10 Reading the Display The table shows the possible Status status icons and what they icons mean. Since the icons appear based on what the phone is Current doing, you won’t see all the call info icons at the same time. Time &...
-
Page 11: Parts Of The Base
Parts of the Base ON/OFF DELETE FIND HS REWIND PLAY/STOP DOWN Charging Contacts What it does FIND HS In standby: page all handsets ANS ON/OFF In standby: turn the answering system on or off. • While playing a message: restart the message. • In the first 2 seconds of a message: play the previous message. -
Page 12: Using The Handset Menu
Menu Option What it does Add Mobile Pairs mobile phone with base. Once a mobile has been paired with the DECT 3236, the following options are available. Make Call Use this option to make a call from the mobile phone line through the handset. - Page 13 Handset Setup Menu You can change these settings separately for each handset. Menu Option What it does T-coil Turn on T-coil mode to reduce noise on hearing aids equipped with a telecoil (T-coil) feature. T-coil mode shortens talk time, so keep your battery fully charged. Ringer Tones Choose this handset’s ring tone.
- Page 14 Global Setup Menu The settings on this menu affect all handsets. Only one handset at a time can change these menu options. Edit Voice Mail Enter, edit your voice mail access number (page 23) Edit Int’l No. Enter, edit or delete international numbers. The “+” in a phonebook entry will actually be dialled with this number.
-
Page 15: Using Your Phone
USING YOUR PHONE This section explains the most common functions on the phone. To... Earpiece Speakerphone Press HOME/FLASH. Press SPEAKER. make a call, dial the number, then Press HOME/FLASH. Press SPEAKER. answer a call Press END/CLEAR or place the handset in the hang up cradle. -
Page 16: Using The Caller Id And Redial Lists
Using the Caller ID and Redial Lists Caller ID (CID) is a service available from your telephone provider that shows the phone number (and sometimes the caller’s name) of incoming calls. Contact your telephone provider for more information. Caller ID list Redial list • The phone saves the information • Each handset remembers... -
Page 17: Using Call Waiting
Using Call Waiting • Call Waiting, a service available from your telephone provider, lets you receive calls while you are on another call. Caller ID on Call Waiting (CIDCW) service displays Caller ID information for a waiting call. • If you get a Call Waiting call, the phone can sound a tone and display any CID information received for the waiting call. - Page 18 Adding Phonebook Entries With the phone in standby, open the phonebook. Press MENU/SELECT and select Create New. Enter a name, number, and then assign a personal ring if desired. • Enter the phone number (up to 32 digits) exactly as you would dial it. • If you need the phone to wait before sending the next set of digits, press REDIAL/PAUSE to insert a 3-second pause.
-
Page 19: Using Special Features
USING SPECIAL FEATURES Power Failure Back Up System When a power failure occurs, the charged handset temporarily supplies power to the base unit. You can then make and receive calls using a handset. However, none of the keys on the base unit are functional during the power failure mode. -
Page 20: Dnd (Do Not Disturb) Mode
# You cannot operate the Answering System under the power failure back up system. DND (Do Not Disturb) Mode You can silence the ringers on the base and all handsets for a specific period of time; the answering system answers any incoming calls without playing anything through the speaker. -
Page 21: Conference Calling (1 Line)
Conference Calling (1 Line) • When an outside call comes in on the land line or the via a mobile, two handsets can join in a conference call with the outside caller. • To join a call that’s already in progress, just press SPEAKER on the base or HOME / FLASH... -
Page 22: Call Transfer
Call Transfer To... Press... Press MENU/SELECT and select Hold/Transfer. transfer a call The phone puts the call on hold and prompts you to select the handset you want to page. When the other handset accepts the call, you’ll be disconnected (press HOME/FLASH to rejoin the call). -
Page 23: Chain Dialing
Chain Dialing If you often have to enter a series of digits or a code number during a call, you can save that code number to a phonebook entry and use the phonebook to send the code number. 1. Enter the code number (up to 32 digits) into the phonebook just like a regular phonebook entry. -
Page 24: Using The Answering System
USING THE ANSWERING SYSTEM Answering System Options (Ans. Setup) You can set or change the answering system options from any handset. Just open the menu and select Answering Setup. Select one of the following: Menu Option What it does Security Code Enter a 2-digit PIN so you can access your answering system from any touch-tone phone (see page 27). -
Page 25: Personalizing The Greeting
Personalizing the Greeting Your personal outgoing message or greeting can be from 2 to 30 seconds long. If you don’t record a greeting, the system uses a pre-recorded greeting: Hello, no one is available to take your call. Please leave a message after the tone. -
Page 26: Getting Your Messages
Getting Your Messages From the base From a Handset Press PLAY/STOP Press MESSAGE/MUTE and select ‘Play Message’. play new messages The system announces the number of new & old messages, then plays each new message (followed by the day and time) in the order it was received. restart this Wait at least 5 seconds after the message starts message... - Page 27 Screening your Calls You can use the answering system for call screening. While the system takes a message, you can listen on the base speaker (if you turn on Call Screen) or from a handset. Only one handset can screen calls at a time. If another handset tries to screen calls, it beeps and returns to standby.
- Page 28 Dialing In to Your System 1. Call your phone number & wait until the system answers. (If the system is turned off, it answers after 10 rings & sounds a series of beeps.) 2. During the greeting or beeps, press “#” and immediately enter your security code.
-
Page 29: Important Information
IMPORTANT INFORMATION Solving Problems If you have any trouble with your phone, check this section first. If you need help, visit the customer support page of our website listed on the front cover. General Problems Possible Solutions • Check the telephone cord No handsets can make or receive connection. - Page 30 • Check for interference from There’s a lot of noise or static on appliances (microwave ovens, the line TVs, etc.) or wireless devices (baby monitors, WiFi equipment, etc.). Move the handset or base away from the interference source. • If you use a telecoil hearing aid, turn on T-coil mode (see page 13).
-
Page 31: Resetting Handsets
Installing a Line Filter or DSL Filter A telephone line filter or DSL filter prevents services that use the phone line from causing interference on your phone. To get a line filter, contact your service provider or look in an electronics store. Plug the filter into the telephone wall jack and plug the base into the filter. -
Page 32: Ac Adaptor And Battery Information
AC Adaptor and Battery Information AC Adaptor Base Charger Part number PS-S0635YL3 AAD-600S(M) Input voltage 100-240V AC, 50/60Hz 100-240V AC, 50/60Hz Output voltage 6V DC @ 350mA 9V DC @ 210mA • Use only the supplied AC adaptors. • Use the proper adaptor for the base and any chargers. • Do not place the unit in direct sunlight or subject it to high temperatures. -
Page 33: Wall Mounting The Base
Wall Mounting the Base This phone can be mounted on any standard telephone wall plate using the supplied wall-mount bracket. Route the telephone cord through the hole of the wall-mount bracket. Connect the AC adaptor and the telephone cords as shown. Line up the four tabs on the wall-mount bracket (two at the top and two at... - Page 34 6 Place the mounting slots over the pins on the wall plate. 7 Slide the base down to lock it into place. Wall plate (To AC outlet) Removing the wall-mount bracket At the bottom of the base, pinch the two “nose” of the wall-mount bracket as shown, and then slide the bracket away from the base.
-
Page 35: Index
INDEX Power Failure 19 Privacy Mode 22 Answer Machine 24 Any Key Answer 13 Auto Talk 13 Redial 9 Register a Handset 31 Resetting the Handset 31 Battery 32 Ringer 13 Caller ID 16 Voice Mail 23 Call Transfer 22 Call Waiting 17 Chain Dialing 23 Wall Mounting 33... -
Page 36: One Year Limited Warranty
(“Uniden Aust”). Terms of Warranty Uniden Aust warrants to the original retail purchaser only that the DECT 3236 (“the Product”), will be free from defects in materials and craftsmanship for the duration of the warranty period, subject to the limitations and exclusions set out below. - Page 37 Product does not conform with this warranty, you should deliver the Product, together with satisfactory evidence of your original purchase (such as a legible copy of the sales docket) to Uniden. Please refer to the Uniden website for address details. You should contact Uniden regarding any compensation that may be payable for your expenses incurred in making a warranty claim.
- Page 40 ©2015 Uniden Australia Pty Ltd Printed in Vietnam. U01UN609BZZ(0)
Need help?
Do you have a question about the DECT 3236 and is the answer not in the manual?
Questions and answers