National Instruments NI PXIe-8133 Installation Manual
Hide thumbs
Also See for NI PXIe-8133:
- User manual (92 pages) ,
- Installation manual (2 pages) ,
- User manual (91 pages)
Advertisement
INSTALLATION GUIDE
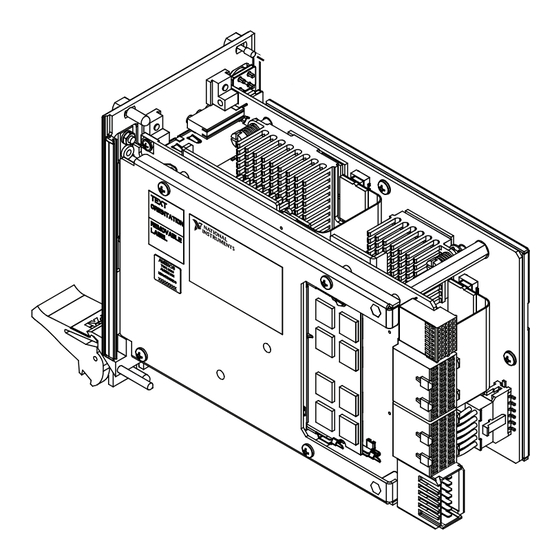
NI PXIe-8133
Installing the NI PXIe-8133
To protect both yourself and the chassis from electrical hazards, leave the chassis
Caution
powered off until you finish installing the NI PXIe-8133 module.
This document contains information about installing your NI PXIe-8133
controller in a PXI Express chassis. For complete configuration and
troubleshooting information (including information about BIOS setup,
adding RAM, and so on), see the NI PXIe-8133 User Manual. The manual
is in PDF format on the documentation CD included with your controller
and on the National Instruments Web site,
This section contains general installation instructions for the
NI PXIe-8133. Consult your PXI Express chassis user manual for specific
instructions and warnings.
1.
Plug in your chassis before installing the NI PXIe-8133. The power
cord grounds the chassis and protects it from electrical damage while
you install the module.
2.
Remove any panels blocking access to the system controller slot
(Slot 1) in the chassis.
3.
Touch the metal part of the chassis case to discharge any static
electricity that might be on your clothes or body.
4.
Remove the protective plastic covers from the four bracket-retaining
screws as shown in Figure 1.
5.
Make sure the injector/ejector handle is in its downward position.
Align the NI PXIe-8133 with the card guides on the top and bottom
of the system controller slot.
.
ni.com/manuals
Advertisement
Table of Contents

Related Manuals for National Instruments NI PXIe-8133


Summary of Contents for National Instruments NI PXIe-8133
- Page 1 PXI Express chassis. For complete configuration and troubleshooting information (including information about BIOS setup, adding RAM, and so on), see the NI PXIe-8133 User Manual. The manual is in PDF format on the documentation CD included with your controller and on the National Instruments Web site, ni.com/manuals...
- Page 2 14. Verify that the controller boots. If it does not boot, refer to the What If the NI PXIe-8133 Does Not Boot? section later in this guide. Figure 2 shows an NI PXIe-8133 installed in the system controller slot of a National Instruments NI PXIe-1082 chassis. NI PXIe-8133 Installation Guide ni.com...
- Page 3 1 NI PXIe-1082 Chassis 3 Injector/Ejector Rail 2 NI PXIe-8133 Controller Figure 2. NI PXIe-8133 Controller Installed in a PXI Express Chassis How to Remove the Controller from the PXI Express Chassis The NI PXIe-8133 controller is designed for easy handling. To remove the unit from the PXI Express chassis, complete the following steps.
- Page 4 For patents covering National Instruments products/technology, refer to the appropriate location: Help»Patents in your software, the patents.txt file on your media, or the National Instruments Patent Notice at ni.com/patents.
Need help?
Do you have a question about the NI PXIe-8133 and is the answer not in the manual?
Questions and answers