Table of Contents
Advertisement
Advertisement
Table of Contents

Related Manuals for AT&T TL8900


Summary of Contents for AT&T TL8900
- Page 1 User’s manual TL8900 DECT 6.0 accessory cordless headset...
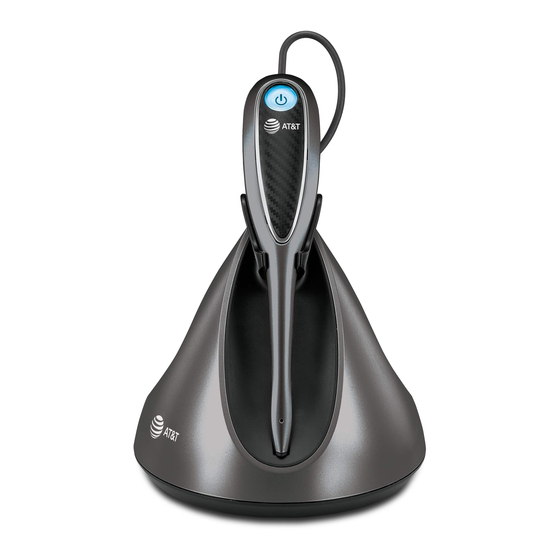
- Page 2 AT&T product. Enjoy up to 12 hours of hands-free talk time and crystal-clear sound quality with the AT&T TL8900 DECT 6.0 Accessory Cordless Headset. Pair it wirelessly with compatible AT&T DECT phones or other compatible DECT phones. Easy one-button answer, volume and mute controls enhance wireless freedom, while a range of up to 500 feet maximizes mobility.
- Page 3 Model number: TL8900 Type: DECT 6.0 accessory cordless headset Serial number: Purchase date: Place of purchase: Both the model and serial numbers of your AT&T product can be found on the bottom of the headset charger. Save your sales receipt and original packaging in case it is necessary to return this product for warranty service.
- Page 4 Parts checklist Check to make sure the headset package includes the following items. Save your sales receipt and original packaging in the event warranty service is necessary. User’s manual TL8900 DECT 6.0 cordless headset Headset charger Headset charger User's manual...
-
Page 5: Table Of Contents
User’s manual TL8900 DECT 6.0 accessory cordless headset Table of contents Getting started Over the head band ....20 Behind the neck band ... 23 Quick reference guide - headset ..........1 Operation Headset lights ......2 Headset operation ...... 26 Headset alert tones ....3 Power on/off the headset ... - Page 6 Precautions for users of implanted cardiac pacemakers ......... 39 Pacemaker patients ....39 For C-UL compliance ....40 Mesures de sécurité importantes .........40 FCC Part 68 and ACTA ....44 FCC Part 15 ........46 California Energy Commission battery charging testing instructions ........47 Limited warranty ......48 Technical specifications ....51 DECT 6.0 digital...
-
Page 7: Getting Started
Getting started Quick reference guide - headset MUTE (On/off button and light) Press to mute the Press to make, answer or microphone during a call end a call (page 26). (page 28). Earpiece Press to mute the ringer in the earpiece when there Battery with cover attached is an incoming call (page Remove to replace the... -
Page 8: Headset Lights
Getting started Quick reference guide - headset Headset lights Color Meaning LED light status Steady light on The battery is low and the headset is charging in the headset charger. Flash every 10 seconds The battery is low and the headset is not in the headset charger. -
Page 9: Headset Alert Tones
Getting started Quick reference guide - headset Headset alert tones Alert tone behavior Meaning One short beep every The microphone is muted. 30 seconds Two beeps Error alert tone. The speaking volume has reached its highest or lowest setting. Any key is pressed while the headset is out of range. -
Page 10: Quick Reference Guide - Headset Charger
Getting started Quick reference guide - headset charger Magnetic charging mount Place the headset here for charging. Power cord slot Route the power cord through the slot. Power jack... -
Page 11: Installation
Getting started Installation You must install and See pages 6-7 charge the battery for easy instructions. before using the headset. For customer service or product information, visit our website at https://telephones.att.com 1 (800) 222-3111 or call . In 1 (866) 288-4268 Canada, dial Avoid placing the charger too close to: Communication devices such as television sets, VCRs or other... -
Page 12: Battery Installation
Getting started Battery installation The battery is permanently attached to the battery compartment cover. Do not try to separate them from each other. After installing the battery, charge it for at least 15 minutes. You may be able to make and receive short calls. For optimal performance, charge the headset battery for at least three hours before use. -
Page 13: Headset Charger Installation And Battery Charging
Getting started Headset charger installation and battery charging After installing the battery, charge the headset by placing it in the magnetic charging mount, as shown below. The light turns on when the headset is charging. 1. Plug the small end of the headset charger power adapter into the power jack at the bottom of the headset charger. -
Page 14: Adding And Registering Headsets
Getting started Adding and registering headsets You must register your new TL8900 headset to one of the following devices before use: SynJ SB67138 base (see pages 9-10). A compatible AT&T DECT 6.0 telephone (see pages 11-12). https://telephones.att.com/headsets Visit for a list of compatible telephones. -
Page 15: Register A Headset To The Synj Sb67138 Base
Getting started Adding and registering headsets Register a headset to the SynJ SB67138 base 1. Place the headset in the headset charger and COVM allow it to charge for at least five minutes Speed dial setup before beginning registration. Make sure the Customer support Registration headset is out of the headset charger before... - Page 16 Getting started Adding and registering headsets Register a headset to the SynJ SB67138 base (cont.) If the registration was not successful, remove it from the headset charger and try the registration process again. If you have a dial tone but an extension number other than 0 displays on the telephone base, the headset is registered as a handset and will not function properly.
-
Page 17: Base
Getting started Adding and registering headsets Register a headset to an AT&T DECT telephone base 1. Make sure the battery is properly installed in the headset (see page 6). The light on the headset flashes slowly in red and blue to indicate the headset is not registered. -
Page 18: Register A Headset To An
Getting started Adding and registering headsets Register a headset to an AT&T DECT telephone base (cont.) It takes about 60 seconds to complete the registration process. light turns red when the headset is registered but not fully charged, or turns blue when it is registered and fully charged. To verify the registration, press the button on the headset and check for a dial tone. -
Page 19: Deregistering Headset
Getting started Deregistering headset You may need to deregister your headsets if: You have already registered the headset and now wish to register your headset to a different telephone base. -OR- You have registered the maximum number of headsets and need to replace one of them. - Page 20 Getting started Deregistering headset Deregister headset from the SynJ SB67138 base (Cont.) 5. The telephone base screen prompts if you Deregister want to deregister the headset. Press Headset 1? REP to exit or press SKIP to continue the deregistration. <=No >=Yes 6.
-
Page 21: Deregister All Devices From An At&T Dect Telephone
Getting started Deregistering headset Deregister all devices from an AT&T DECT telephone base Following the steps, as mentioned below, will deregister all the headsets and handsets registered to the telephone. 1. Press and hold /HANDSET LOCATOR or FIND HS on the telephone base for about 10 seconds until the IN USE light starts to flash, then release the button. -
Page 22: Headset Attachments
Getting started Headset attachments Over the ear hook There are four ear hooks and four earbuds provided. Choose the size that best fits your ear to attach to the headset. Follow the steps, as mentioned below, to attach an ear hook and earbud to the headset. - Page 23 Getting started Headset attachments To attach the ear hook to the headset: 1. Attach the desired ear hook to the headset, as instructed below. Rubber ring 2. Rotate it until it securely holds in place. NOTE: If you accidentally ripped off the rubber ring, use a spare rubber ring to replace it.
- Page 24 Getting started Headset attachments To attach your desired earbud to the headset. 1. Attach the desired earbud to the earpiece. Make sure the protruding bump is pointing towards your mouth when placed on your ear. The protruding bump on the earbud holds the headset securely in your ear.
- Page 25 Getting started Headset attachments To remove the earbud and ear hook from the headset: Remove the earbud and ear hook when you need to change to the over the head or behind the neck style. 1. Hold both sides of the earbud. Twist and pull the earbud until it separates from the earpiece.
-
Page 26: Over The Head Band
Getting started Headset attachments Over the head band To attach the head band to the headset: 1. With the headset at a vertical angle (microphone pointing down), insert the headset earpiece into the head band. 2. Rotate the headset to a horizontal direction until it holds into place. - Page 27 Getting started Headset attachments 3. Adjust the head band to fit your head. 4. Adjust and rotate the angle of the headset until the microphone is pointing towards your mouth. NOTES: To wear on the other ear, rotate the headset within the loop of the ear pad. Firmly grip the ear pad with one hand whenever adjusting the headset microphone up or down.
- Page 28 Getting started Headset attachments To remove the head band from the headset: 1. Rotate the headset to vertical direction. 2. Pull the headset until it separates from the head band.
-
Page 29: Behind The Neck Band
Getting started Headset attachments Behind the neck band By default, the ear pad on the neck band is positioned to be worn on the right ear. To attach the headset to the neck band: With the headset at a vertical angle (microphone pointing down), insert the headset earpiece into the neck band. - Page 30 Getting started Headset attachments 3. Place the neck band around your neck and over your ears. 4. Adjust and rotate the angle of the headset until the microphone is pointing towards your mouth.
- Page 31 Getting started Headset attachments To wear the headset on your left ear: 1. Remove the ear pad and supporting pad from the neck band by carefully pulling them up through the stems at the end of the neck band. 2. Snap the socket of the ear pad into the stem at the left end of the neck band.
-
Page 32: Operation
Operation Headset operation Power on/off the headset Power on the headset before use. To power on the headset: Place the headset in the headset charger. -OR- Press and hold for two seconds. light flashes blue three times. You hear three beeps when it is being powered on. -
Page 33: Headset Ringer
Operation Headset operation Headset ringer The headset charger and headset do not have external ringers. When you receive calls, the telephone and the headset earpiece rings. To change the volume of the earpiece ringer: Slide the volume switch at the top of the headset towards VOL+ or VOL- when the headset is not in use. -
Page 34: Options While On Calls
Operation Options while on calls Volume control To adjust the listening volume: While on a call, slide the volume switch at the top of the headset towards VOL+ or VOL- to adjust the listening volume. NOTES: Listening volume settings are independent for each headset. When the listening volume reaches the minimum or maximum setting, you hear two beeps. -
Page 35: Multiple Headsets Use
Operation Options while on calls Multiple headsets use If you have more than one headset registered to the same telephone base, when one of the headsets is on an external call, the other headset can join the call in progress. To join a call, press on the headset. -
Page 36: Appendix
Appendix Troubleshooting If you have difficulty with your telephone, please try the following suggestions. For customer service, visit our website at https://telephones.att.com 1 (800) 222–3111 or call 1 (866) 288-4268 In Canada, dial My headset doesn’t work at all. Make sure the power cord is securely plugged in. Make sure that the battery is securely installed in the cordless headset. - Page 37 Appendix Troubleshooting The battery does not charge. Make sure that the battery is securely installed in the cordless headset. If the cordless headset is in its headset charger but the light on the headset does not turn on, refer to The light on the headset is off while charging on page 34.
- Page 38 Appendix Troubleshooting I get noise, static, or a weak signal even when I’m near the telephone base. You may be able to improve the performance of your cordless headset by installing the telephone base at least one foot from any cordless telephone system. If separating them by one foot does not help, try moving the headset farther away.
- Page 39 Appendix Troubleshooting Other electronic products such as HAM radios and other DECT phones, can cause interference with your cordless headset. Try installing your telephone base as far away as possible from these types of electronic devices. Install the battery again, and then place the cordless headset in the headset charger.
- Page 40 Appendix Troubleshooting My calls cut in and out while I’m using my cordless headset. Other electronic products such as HAM radios and other DECT phones, can cause interference with your cordless headset. Try installing your telephone base as far away as possible from these types of electronic devices.
- Page 41 Appendix Troubleshooting Make sure the headset is sitting properly in the charger to charge. Unplug the unit’s electrical power. Wait for 15 seconds, then plug it back in. Allow up to one minute for the cordless headset and headset charger to reset. Clean the cordless headset and headset charger charging contacts each month using a pencil eraser or dry cloth.
-
Page 42: Maintenance
Appendix Maintenance Taking care of your headset Your cordless headset contains sophisticated electronic parts, so it must be treated with care. Avoid rough treatment. Place the headset down gently. Save the original packing materials to protect your headset if you ever need to ship it. Avoid water Your headset can be damaged if it gets wet. -
Page 43: Important Safety Information
Appendix Important safety information This symbol is to alert you to important operating or servicing instructions that may appear in this user’s manual. Always follow basic safety precautions when using this product to reduce the risk of injury, fire, or electric shock. Safety information •... -
Page 44: Especially About Cordless Headsets
Appendix Important safety information CAUTIONS: Use only the power adapter provided with this product. To obtain a https://telephones.att.com replacement, visit our website at 1 (800) 222-3111 1 (866) 288-4268 or call . In Canada, dial Use only the supplied rechargeable battery or replacement battery (model BT291665). -
Page 45: Precautions For Users Of Implanted Cardiac Pacemakers
Appendix Important safety information The RBRC Seal means that the manufacturer is voluntarily participating in an industry program to collect and recycle lithium-ion rechargeable batteries when taken out of service within the United States. These batteries may be taken to a participating local retailer of replacement batteries or recycling center. -
Page 46: For C-Ul Compliance
Appendix For C-UL compliance In compliance with the bilingual requirements for safety, caution, and warning markings of Canadian Federal and Provincial/Territorial statutes and regulations, the French version of Important safety information is included. Mesures de sécurité importantes Ce symbole vous alertera d’informations importantes ou d’instructions d’entretien pouvant apparaître dans ce guide d’utilisation. - Page 47 Appendix For C-UL compliance • Remplacez les piles uniquement tel que décrit dans votre guide d’utilisation (page 6). N’incinérez pas et ne percez pas les piles — elles contiennent des produits chimiques caustiques. • L’adaptateur de courant est conçu pour être orienté verticalement ou installé...
- Page 48 Appendix For C-UL compliance • Interférences potentielles aux téléviseurs: Certains casques d’écoute sans fil fonctionnent sur des fréquences pouvant causer des interférences aux téléviseurs et magnétoscopes. Pour réduire ou prévenir de tels parasites, ne pas déposer le socle du téléphone à proximité d’un téléviseur ou magnétoscope, ni directement sur celui-ci.
- Page 49 Appendix For C-UL compliance • N’incinérez pas les piles. Vérifiez auprès des autorités locales pour les instructions de mise aux rebus locales. Afin de prévenir les risques d’incendies, n’exposez pas ce produit à l’eau ou à l’humidité. • Veuillez respecter la polarité des piles et des bornes métalliques. •...
-
Page 50: Fcc Part 68 And Acta
Appendix FCC Part 68 and ACTA This equipment complies with Part 68 of the FCC rules and with technical requirements adopted by the Administrative Council for Terminal Attachments (ACTA). The label on the back or bottom of this equipment contains, among other things, a product identifier in the format US: AAAEQ##TXXXX. - Page 51 Appendix FCC Part 68 and ACTA If this product has memory dialing locations, you may choose to store emergency telephone numbers (e.g. police, fire, medical) in these locations. If you do store or test emergency numbers, please: Remain on the line and briefly explain the reason for the call before hanging up. Perform such activities in off-peak hours, such as early morning or late evening.
-
Page 52: Fcc Part 15
Appendix FCC Part 15 NOTE: This equipment has been tested and found to comply with the requirements for a Class B digital device under Part 15 of the Federal Communications Commission (FCC) rules. These requirements are intended to provide reasonable protection against harmful interference in a residential installation. -
Page 53: California Energy Commission Battery Charging Testing Instructions
Appendix California Energy Commission battery charging testing instructions This cordless headset is set up to comply with the energy-conserving standards right out of the box. These instructions are intended for California Energy Commission (CEC) compliance testing only. When the CEC battery charging testing mode is activated, all telephone functions, except battery charging, will be disabled. -
Page 54: Limited Warranty
Appendix Limited warranty The AT&T brand is used under license - any repair, replacement or warranty service, and all questions about this product should be directed to: In the United https://telephones.att.com States of America, visit or call 1 (800) 222-3111 1 (866) 288-4268 . - Page 55 Appendix Limited warranty 4. What is not covered by this limited warranty? This limited warranty does not cover: • PRODUCT that has been subjected to misuse, accident, shipping or other physical damage, improper installation, abnormal operation or handling, neglect, inundation, fire, water, or other liquid intrusion; or •...
- Page 56 Appendix Limited warranty 6. What must you return with the PRODUCT to get warranty service? You must: a. Return the entire original package and contents including the PRODUCT to the service location along with a description of the malfunction or difficulty; b.
-
Page 57: Technical Specifications
Experience the best in long-range coverage and clarity, provided by a unique antenna design and advances in noise-filtering technology. The TL8900 is a fully cordless DECT 6.0 headset offering a range of up to 500 feet. Open range test was performed by Wyle Laboratories, an independent commercial test facility. -
Page 58: Index
Index Index AC adapter 7, 51 Important safety Alert prompts 3 information 37–39 Alert tones 3 Installation Answer a call 26 battery 6 charger 7 Battery charging 7 Battery installation 6 Lights 2 Behind the neck band 23–25 Limited warranty 48–50 Call waiting 27 Magnetic charging mount 4 Charging cradle 4... - Page 59 Index Index Register a headset 8–11 Ringer 27 Technical specifications 51 Temporary ringer silencing 27 Troubleshooting 30–35 Volume control listening volume 28 ringer 27...
- Page 60 https://telephones.att.com © 2019 Advanced American Telephones. All Rights Reserved. AT&T and the AT&T logo are trademarks of AT&T Intellectual Property licensed to Advanced American Telephones, San Antonio, TX 78219. RBRC® and 1-800-8-BATTERY® are registered trademarks of the Rechargeable Battery Recycling Corporation. Printed in China.
Need help?
Do you have a question about the TL8900 and is the answer not in the manual?
Questions and answers