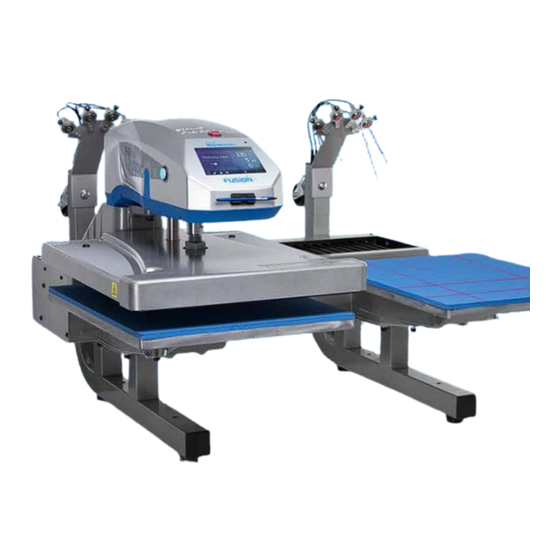
Hotronix DUAL AIR FUSION IQ Operator's Manual
Hide thumbs
Also See for DUAL AIR FUSION IQ:
- Operator's manual (16 pages) ,
- Operator's manual (16 pages)
Table of Contents
Advertisement
Advertisement
Table of Contents

Summary of Contents for Hotronix DUAL AIR FUSION IQ
- Page 1 DUAL AIR FUSION IQ ® OPERATOR’S MANUAL...
-
Page 2: Safety Instructions
13. Heat press should be placed on a sturdy, suitable stand at least 24"L x 36"W x 28"H with 30” height. 14. Work area must be kept clean, tidy, and free of obstructions. Important The Hotronix Dual Air Fusion IQ is equipped with a Quick Release Button located on top of the control housing. When pressed, ® ®... -
Page 3: Table Of Contents
Table Of Contents Safety Instructions Machine View Operating Instructions Connecting the System Start Up/Shut Down Home Screen Prepare to Print Touch Screen Guide 8-13 Setup Menu Password Setup Preset Setup Date & Time Setup Display Setup Auto On & Off Setup System Setup Calibration Updating Software... -
Page 4: Machine View
DUAL AIR HOTRONIX Machine View ® FUSION IQ ® Alignment Lasers Casters Print Button Lower Platen A Bellow Lower Platen B ON/OFF Switch Platen Release Lever Air Connect Air Hose Quick Release Button Touch Screen Stylus Pen Upper Platen Base... -
Page 5: Operating Instructions
300 V cord for replacement. Start Up/Shut Down To start up your heat press: Flip the power switch ON (2.1). A splash screen displaying the Hotronix ® logo and current software version is shown for several seconds. To turn your heat press off, flip the power switch OFF. -
Page 6: Home Screen
DUAL AIR HOTRONIX Operating Instructions ® FUSION IQ ® Home Screen Status bar provides Displays the selected helpful information preset. Touch and regarding heat press. hold to see application settings. NOTE: Holding down material Displays the current application name will display targeted temperature and time. -
Page 7: Prepare To Print
• Tack Mode On: press and hold both Print Buttons to start Print Cycle. Print Cycle completes when buttons are released • Tack Mode OFF: press and hold both Print Buttons to start Print Cycle. Print Cycle completes when countdown timer reaches 0. Pressing the print buttons a second time during the print cycle will interrupt it. WWW.HOTRONIX.COM... -
Page 8: Touch Screen Guide
DUAL AIR HOTRONIX Touch Screen Guide ® FUSION IQ ® Setup Menu Touch the Settings icon on the Home Screen (5.1) to configure your heat press. Managers can access all setup options, while Users can access a limited set (5.2). -
Page 9: Preset Setup
(7.7). Auto Shuttle can be disabled on individual preset stages for a heated post-cure useful in some applications, including Direct-To-Garment printing. This setting will override Shuttle settings on the Home Screen (3.2). WWW.HOTRONIX.COM... -
Page 10: Date & Time Setup
DUAL AIR HOTRONIX Touch Screen Guide ® FUSION IQ ® Date & Time Setup Touch the Settings icon on the Home Screen. • Touch Date & Time, information displays on right of screen (8.1). • Touch up/down arrows to select time zone. -
Page 11: System Setup
Select System, information displays on right of screen (11.1). • Touch Power Save and select time, then touch Check Mark icon on taskbar to save. • When enabled, your heat press will enter Standby Mode if it is not used for the specified number of hours. 11.1 WWW.HOTRONIX.COM... -
Page 12: Calibration
DUAL AIR HOTRONIX Touch Screen Guide ® FUSION IQ ® Calibration (Manager Level Only) Your heat press comes pre-calibrated from the factory. Calibration is only required after sensor or controller replacement. Incorrect calibration can result in poor print results or damage to your heat press which is not covered by warranty. -
Page 13: Laser Alignment Setup
Laser Alignment Setup Touch the Settings icon on the Home Screen. • Touch Laser Setup, information displays on right of screen (14.1). • Touch empty circled numbers 1-4 to toggle lasers ON or OFF on A and B platens 14.1 WWW.HOTRONIX.COM... -
Page 14: Connecting To The Iq ® Portal
® ® FUSION IQ ® Create Your Account • Using a phone or computer, visit iq.hotronix.com to create an account (15.1). • Enter your name, email, and password. • Click on the confirmation link in the email you receive. •... -
Page 15: Electrical Schematic
Proximity Switch 1 Proximity Switch 2 3500W Heater - 230/240V - 50/60Hz IEC Inlet Print Switch Black 14ga Ground Print Switch to Frame White 14ga Circuit Circuit Breaker Breaker A Platen Lasers ON/OFF Switch B Platen Lasers Black 14ga White 14ga WWW.HOTRONIX.COM... -
Page 16: Replacement Parts List
DUAL AIR HOTRONIX Replacement Parts List ® FUSION IQ ® ITEM # PART NAME PART # ITEM # PART NAME PART # Air Fusion Control Housing 1-2197 Screw, Sheet Metal Hex #8 x 1/2" 1-2421 Button, White, Print Switch 1-2319 Screw, M4x0.7 x 8 Pan Phillips... - Page 17 Parts Location Guide WWW.HOTRONIX.COM...
- Page 18 DUAL AIR HOTRONIX Replacement Parts List ® FUSION IQ ® ITEM # PART NAME PART # Dual Fusion Regulator Mount — Air Filter & Regulator 1-1215 Curtain Bellows 1-2335 Carriage Plate Keeper 1-2342 Back Cover (Part of Tin Assembly) Kit 1-2340...
- Page 19 Parts Location Guide WWW.HOTRONIX.COM...
-
Page 20: Contact
DUAL AIR HOTRONIX CONTACT US ® FUSION IQ ™ Stahls’ Hotronix ® One Industrial Park Carmichaels, PA 15320 U.S.A. Technical Support 800.727.8520 Speak with a representative 24 hours a day, 7 days a week, 365 days a year. Customer Service 800.727.8520...


Need help?
Do you have a question about the DUAL AIR FUSION IQ and is the answer not in the manual?
Questions and answers