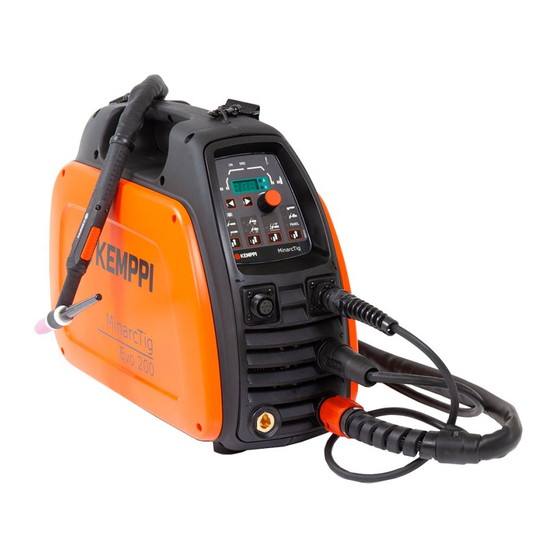
Kemppi MinarcTig EVO 200 Quick Manual
Hide thumbs
Also See for MinarcTig EVO 200:
- Operating manual (20 pages) ,
- Service manual (27 pages) ,
- Quick start manual (9 pages)
Advertisement
Quick Links
EN Quick guide
DA Kvik guide
DE Kurzanleitung
ES Guía rápida
FI Pikaohje
FR Guide de démarrage rapide
IT Guida rapida
NL Verkorte handleiding
NO Kom i gang
PL Szybki przewodnik
PT Guia de consulta rápida
RU Краткое руководство
SV Snabbguide
ZH 快速指南
MinarcTig
Evo 200, 200MLP
Quick
guide
Advertisement

Related Manuals for Kemppi MinarcTig EVO 200


Summary of Contents for Kemppi MinarcTig EVO 200
- Page 1 Quick guide EN Quick guide MinarcTig DA Kvik guide DE Kurzanleitung ES Guía rápida Evo 200, 200MLP FI Pikaohje FR Guide de démarrage rapide IT Guida rapida NL Verkorte handleiding NO Kom i gang PL Szybki przewodnik PT Guia de consulta rápida RU Краткое...
- Page 2 BETA 90 9873045 BETA 90A 9873046 BETA 90X 9873047 EN Check the package contents. EN You will also need. DA Kontroller pakkens indhold. DA Du får også brug for. DE Überprüfen Sie den Packungsinhalt. DE Außerdem benötigen Sie. ES Revise el contenido de la caja. ES También necesitará...
- Page 3 100 % Ar, 8 – 15 l/min EN Connect to the mains supply and switch on. EN Connect the shielding gas and set the flow rate. DA Slut maskinen til netforsyningen og tænd for den. DA Tilslut beskyttelsesgassen og indstil gasflowet. DE Schließen Sie das Gerät an den Netzstrom an und schalten Sie es ein.
- Page 4 EN Connect the TIG torch and torch switch connector. EN Connect the earth return cable to the + socket. DA Tilslut TIG-brænderen og dens styrekablet. DA Tilslut returkablet til + udtaget. DE Schließen Sie den WIG-Brenner und den Brennerschalter an. DE Das Massekabel an den Pluspol anschließen.
- Page 5 EN Select the TIG welding process. EN Select 2T function for basic TIG welding. DA Vælg TIG-svejseprocessen. DA Vælg 2T-funktionen til almen TIG-svejsning. DE Wählen Sie das WIG-Schweißverfahren. DE Wählen Sie die 2T-Funktion für einfache WIG-Schweißarbeiten. ES Seleccione el proceso de soldadura TIG. ES Seleccione la función 2T para la soldadura básica TIG.
- Page 6 EN Select HF ignition. EN Select panel control if no remote is connected. DA Vælg HF-tænding. DA Vælg panelbetjening, hvis der ikke er tilsluttet en fjernbetjening. DE Wählen Sie Hochfrequenzzündung. DE Wählen Sie das Bedienpanel, falls keine Fernbedienung angeschlossen ist. ES Seleccione el encendido HF.
- Page 7 EN Set parameters using the arrow keys and potentiometer. EN Set the welding current value. DA Indstil parametrene ved brug af piletasterne og potentiometret. DA Indstil svejsestrømværdien. DE Stellen Sie die Parameter mithilfe der Pfeiltasten und des Potentiometers ein. DE Stellen Sie den Wert des Schweißstroms ein. ES Fije los parámetros utilizando las teclas de dirección y el potenciómetro.
- Page 8 7990771 7990681 1.6 mm 7990682 2.4 mm 7990741 9876867 1.6 mm 9876868 2.4 mm 9873532 1.6 mm 9873533 2.4 mm 175 mm TTC 220 627022004 EN Connect the return lead and clamp – Enjoy MinarcTig Evo. EN TIG torch consumable parts. DA Tilslut returkablet og -klemmen –...
- Page 9 EN NOTE: Please read the full Operating manual on CD before use. DA BEMÆRK: Læs brugsanvisningen på CD, før udstyret tages i brug. DE HINWEIS: Lesen Sie die komplette Betriebsanleitung auf CD, bevor Sie das Gerät benutzen. ES NOTA: Lea completo el manual de instrucciones en el CD, antes de su uso.
Need help?
Do you have a question about the MinarcTig EVO 200 and is the answer not in the manual?
Questions and answers
Will not let the tig arc up stick switch all ok
The Kemppi EVO 200 TIG welder may not initiate the arc despite the stick switch being functional due to the following possible causes based on the context:
1. HF Ignition Disabled: If the HF (high-frequency) ignition is not enabled or the HF indicator is not lit, arc initiation will not occur automatically. In this case, contact ignition must be used by touching and lifting the tungsten electrode from the workpiece.
2. Improper Torch Switch Operation in 4T Mode: In 4T mode, the arc is established only after the torch switch is pressed and then released. If the switch is not operated correctly, the arc may not start.
3. Electrode Contact Issue: If using contact ignition (HF off), and the tungsten electrode is not properly contacting and then lifting off the workpiece, the arc will not initiate.
4. Gas Flow Issue: If shielding gas does not flow when the torch switch is pressed, the arc may not start properly.
5. Incorrect Settings: If upslope or current settings are not properly configured, the arc initiation process may fail.
Check HF ignition status, torch switch operation, electrode contact, gas flow, and settings to diagnose the issue.
This answer is automatically generated