Table of Contents
Advertisement
Quick Links
Advertisement
Table of Contents

Subscribe to Our Youtube Channel
Related Manuals for BCP SKY2365


Summary of Contents for BCP SKY2365
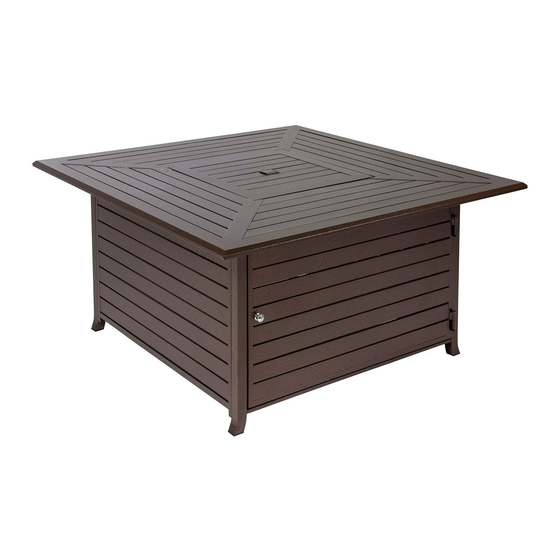
- Page 1 INSTRUCTION MANUAL Extruded Aluminum Fire Pit Table SKY2365 Ver. 2...
-
Page 2: If You Smell Gas
WARNING Do not use this product directly on a wood deck or near a side wall. IF YOU SMELL GAS • Do not attempt to light appliance. • Extinguish flames and disconnect tank. • Move people away from the immediate area. bestchoiceproducts.com... -
Page 3: California Proposition
NOTICE Please retain these instructions for future reference. • For outdoor use only; do not use in a building, garage, or any other enclosed area. • Only use this appliance on a hard and level surface such as concrete or rock. •... -
Page 4: Tools Required
PROPANE TANK WARNINGS • Make sure to organize fuel hose to prevent accidental tripping. • Only use standard 20-pound propane tanks. • Maximum gas supply pressure is 250 PSI. • Do not fill tank more than 80% of its capacity. •... -
Page 5: Product Assembly
PARTS DOOR PANEL LEFT PANEL RIGHT PANEL BACK PANEL 1 PC 1 PC 1 PC 1 PC TANK SEAT FRAME TABLETOP BURNER ASSEMBLY FIRE GLASS 1 PC 1 PC 1 PC 1 SET COVER 1 PC 1 PC PRODUCT ASSEMBLY Attach part A door panel to part B left panel and part C right panel with four part 1 screws and four part 4 washers. - Page 6 PRODUCT ASSEMBLY Route the part 6 tank strap through the part E tank seat frame. Open the door and attach the tank seat frame to the panels with four part 2 screws. NOTE: Align numbers on the tank seat frame with the corresponding numbers on the panels. Remove the screws/washers from the part G burner assembly and insert it into the part F tabletop.
- Page 7 PRODUCT ASSEMBLY Attach the tabletop to the panels with four part 3 screws and four part 5 washers. DIAGRAM BURNER GUARD CONTROL PANEL FUEL HOSE REGULATOR COUPLING NUT...
- Page 8 PLACING FIRE GLASS • Place fire glass in fire pit and spread them according to your preference. - You may place fire glass on burner but do NOT cover the guard. • Excessive fire glass will su ocate the flame. INSTALLING PROPANE TANK NOTE: Only use standard 20-pound propane tanks.
-
Page 9: Installing Battery
INSTALLING PROPANE TANK Attach fuel hose regulator to the output Turn release valve on tank counterclockwise of the tank by turning the coupling to release gas. nut clockwise. INSTALLING BATTERY Unscrew igniter button. Insert AAA battery with the positive side facing outwards. Replace igniter button. -
Page 10: Control Panel
CONTROL PANEL CONTROL KNOB IGNITER: Push to light burner IGNITE OPERATING INSTRUCTIONS NOTE: Before use, inspect burner, propane tank, and connectors for damage, debris, obstructions, or dirt. Do not operate if there is any blockage. Before first use (or after changing propane tanks), push and hold control knob for 2 minutes to expel air from fuel hose. -
Page 11: Troubleshooting
STORAGE • Allow fire pit to cool 10 minutes before storage. • Disconnect propane tank when putting fire pit in storage. Do not store propane tank in the vicinity of the fire pit. • Do not store propane tank in temperatures over 120°F. •... -
Page 12: Help Center
HELP CENTER Question about your product? We're here to help. Visit us at: help.bestchoiceproducts.com CHAT Chat Support Product Inquiry Orders FAQ Product Assembly Returns & Refunds PRODUCT WARRANTY INFORMATION All items can be returned for any reason within 60 days of the receipt and will receive a full refund as long as the item is returned in its original product packaging and all accessories from its original shipment are included.
Need help?
Do you have a question about the SKY2365 and is the answer not in the manual?
Questions and answers