Advertisement

Operating instructions
GK46TIMAS | GK46TIMPS | GK57TIMS
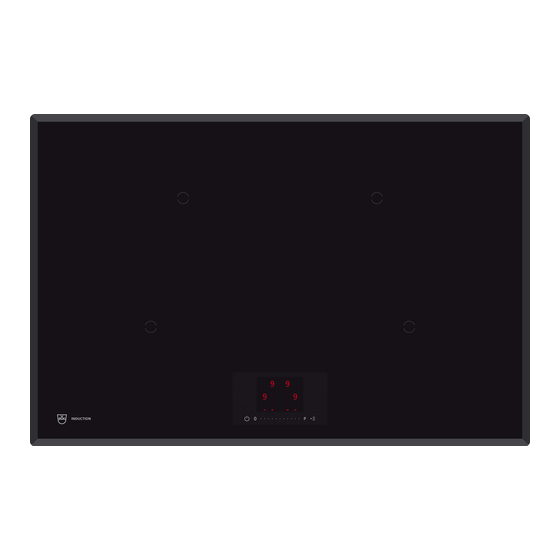
Induction hob

Advertisement

Table of Contents
loading

Summary of Contents for V-ZUG GK46TIMAS

  • Page 1 Operating instructions GK46TIMAS | GK46TIMPS | GK57TIMS Induction hob...
  • Page 2 The product family (model number) corresponds to the first alphanumerics on the identi- fication plate. These operating instructions apply to: Type Product family GK46TIMPSZ 31080 GK57TIMSZ, GK57TIMSZO 31082 GK46TIMASC, GK46TIMASCO, GK46TIMASZ, GK46TIMASZO 31091 Variations depending on the model are noted in the text. © V-ZUG Ltd, CH-6301 Zug, 2018...
  • Page 3: Table Of Contents

    Contents Factory settings.............   21 Safety precautions  4 Care and maintenance  21 Symbols used............ 4 General safety precautions........ 4 OptiGlass..............  22 Appliance-specific safety precautions .... 4 Trouble-shooting  23 Instructions for use.......... 5 Error messages.............   23 Using for the first time  7 Other possible faults ..........
  • Page 4: Safety Precautions

    Safety precautions Symbols used Cleaning and user mainten- ance shall not be undertaken Denotes important safety precau- tions. by children without supervi- Failure to observe said precautions sion. can result in injury or in damage to ▪ If an appliance is not the appliance or fittings! equipped with a mains cable Information and precautions that...
  • Page 5: Instructions For Use

    1 Safety precautions disconnect it from the mains ▪ Do not operate the appliance to avoid possible electric using an external time switch shock. or a separate remote control ▪ WARNING: The appliance system. and its accessible parts get Instructions for use hot during use.
  • Page 6 1 Safety precautions ▪ The heated surface will remain hot for ▪ Do not cut or prepare food on the sur- some time after it is switched off and face and avoid impact with hard ob- will cool down only slowly to room tem- jects.
  • Page 7: Using For The First Time

    Using for the first time The appliance must be installed and connected to the electricity supply in accord- ance with the separate installation instructions. Have a qualified fitter/electrician carry out the necessary work. During the first few hours of use, a cooking zone can give off an unpleasant smell. This is normal for brand new appliances.
  • Page 8: Operating And Display Elements

    3 Your appliance Operating and display elements Buttons ON/OFF button, pause function ▪ Appliance ON/OFF ▪ Pause cooking Multi-function button ▪ Operating time ▪ Timer ▪ Automatic boost ▪ Wipe protection ▪ Keeping warm, melting, simmering ▪ User settings Slider ▪...
  • Page 9: Pan Detection

    3 Your appliance If a large pan covers both circles, both heating zones can be switched on together with the bridging function. For even frying, the pan must be centred on The diameter of the base of the pan should not be greater than the diameter of the cooking zone.
  • Page 10: Optiglass

    4 Operating the appliance OptiGlass Applies to GK46TIMASCO, GK46TIMASZO, GK57TIMSZO Hobs with OptiGlass have an additional coating on the glass surface. This coating makes the surface harder, tougher and more scratch resistant than non- coated glass surfaces. Under normal circumstances, significantly fewer scratches should occur on the glass surface during cooking.
  • Page 11: Residual Heat Indicator

    4 Operating the appliance – If no other entry is made and the other cooking zones are switched off, the appli- ance switches off automatically after 10 seconds. Residual heat indicator After a cooking zone is switched off, remains illuminated in the display for the relev- ant cooking zone as long as there is a risk of burns.
  • Page 12: Melting, Keeping Warm And Simmering

    4 Operating the appliance Melting, keeping warm and simmering Melting With the melting function, butter, chocolate or honey, for instance, can be gently melted at approx.42 °C. Keep warm The keep warm setting keeps cooked food warm at approx. 65 °C. Simmering With the simmer function, sausages, dumplings and stuffed pasta, for instance, can be cooked just below boiling point at approx.
  • Page 13: Autocook

    4 Operating the appliance Switching PowerPlus on ▸ Use the slider to select the desired cooking zone. ▸ Touch P on the slider. – «P» illuminates in the display. – After 10 minutes it automatically switches back to power level 9. Removing the cookware interrupts PowerPlus.
  • Page 14: Operating Time

    4 Operating the appliance ▸ Use the slider to select – illuminates brightly and appears. AutoCook ▸ Touch the slider below – is displayed alternately with the power level set in the power level display. – When the Automatic boost duration finishes, the appliance automatically switches back to the previously set power level.
  • Page 15 4 Operating the appliance ▸ Touch or swipe the slider to set the operating time. To increase or decrease the operating time faster, long press the slider. To clear the operating time, press and hold «0» on the slider. ▸ Touch the slider below –...
  • Page 16: Timer

    4 Operating the appliance 4.11 Timer The timer functions like an egg timer (1 min.–9 h 59 min.). It can be used at any time and independently of all other functions. Setting the timer In order to set the timer, no cooking zone may be selected. ▸...
  • Page 17: Pause Cooking

    4 Operating the appliance Changing the duration remaining of the timer In order to change the duration remaining, no cooking zone may be selected. ▸ Touch the button. – The «Cooking zone dependent functions» menu appears. The duration remaining of the timer is displayed above function selection.
  • Page 18: Wipe Protection

    5 User settings Switching pause cooking off ▸ Briefly press the button. – All cooking zones switch back to the previous setting. – Operating times continue to run again. – All the buttons and the slider are active again. 4.13 Wipe protection This function prevents the power level from being changed accidentally, for instance when wiping the control panel with a cloth.
  • Page 19: Childproof Lock

    5 User settings ▸ Touch the slider below – The «User settings» menu appears. User settings Activating/deactivating function ▸ Use the slider to select a function. – The function illuminates brightly and appears. ▸ Touch the slider below – The function settings screen appears. The function is activated or deactivated. ▸...
  • Page 20: Loudness

    5 User settings ▸ Use the slider to select – illuminates brightly and appears. ▸ Touch the slider below – The «Individual settings» menu appears. Individual settings ▸ Use the slider to select ▸ Touch the slider below – The brightness settings screen appears. The level of brightness set is displayed.
  • Page 21: Button Signal

    6 Care and maintenance Button signal The button signal (single acoustic signal when a button/slider is pressed) can be switched on or off in the user settings. Switching the button signal on/off (see page 18) Recommended value for the timer The recommended value for the timer can be set in the user settings.
  • Page 22: Optiglass

    6 Care and maintenance ▸ Use only a soft cloth or sponge with water and a suitable detergent for cleaning every- day soiling. Always follow the detergent manufacturer’s instructions for use. Using a detergent with a protective additive is recommended. ▸...
  • Page 23: Trouble-Shooting

    7 Trouble-shooting Trouble-shooting You may be able to trouble-shoot the following errors yourself. If not, note down the error message in full and the serial number (FN), which can be found on the identification plate, and call Customer Services. Error messages Display Possible cause Solution...
  • Page 24 7 Trouble-shooting Display Possible cause Solution «E» and «8» flash al- ▪ An object (e.g. paper) under- ▸ Remove any objects in the ternately. neath the hob is obstructing drawer underneath the the air intake. hob. ▸ Touch any button to can- cel the error.
  • Page 25: Other Possible Faults

    8 Technical data If the error is only displayed in one or two cooking zones, the remaining cooking zones can still be used until repaired. Other possible faults Problem Possible cause Solution The appliance is not ▪ The fuse or circuit breaker for ▸...
  • Page 26 9 Disposal Model number GK 31091 Type designation GK GK46TIMASC, GK46TIMASCO, GK46TIMASZ, GK46TIMASZO Number of cooking zones Heating technology Induction cooking zone Dimensions of cooking zone 18×20 18×20 18×20 18×20 Energy consumption per cooking Wh/kg 177.5 183.6 180.1 210.2 zone Energy consumption of the entire Wh/kg 187.9...
  • Page 27 Index Appliance disposal .......... 26 Notes ..............29 Appliance overview ..........7 Appliance-specific safety precautions ................ 4 Operating and display elements...... 8 AutoCook Buttons.............. 8 Switching off before time ...... 14 Displays ............ 8 Automatic boost ..........13 Operating time..........14 Switching on .......... 13 Changing............
  • Page 28 Changing the duration remaining.....  17 Finished ............ 17 Setting............ 16 Switching off before time ...... 17 Type............... 2 User settings............. 18 Accessing............ 18 Using for the first time........7 Validity..............2 Wipe protection ..........18 Switching off before time ...... 18 Switching on ..........
  • Page 29 Notes...
  • Page 31 Your repair order Call the free service number 0800 850 850 to contact your nearest V-ZUG service centre. You can arrange an onsite visit by us by phone if you wish. General queries, accessories and service agreement V-ZUG will be happy to help you with any general administrative or technical queries, to accept your orders for accessories and spare parts and to inform you about our pro- gressive service agreements.
  • Page 32 – The cooking zone selected illuminates red. To switch the appliance off ▸ Hold the button depressed for 2 seconds. 1021055-R04 V-ZUG Ltd, Industriestrasse 66, CH-6301 Zug Tel. +41 58 767 67 67, Fax +41 58 767 61 61 info@vzug.com, www.vzug.com Service Centre: Tel. 0800 850 850...

Table of Contents