
Subscribe to Our Youtube Channel
Related Manuals for Leightronix LabVault-SD

Summary of Contents for Leightronix LabVault-SD
- Page 1 PRODUCT MANUAL Installation, Configuration, and Operation Instructions SPECIALIZED Video Solutions...
- Page 2 Support At LEIGHTRONIX, every customer of our standard product line receives technical support at no extra charge. There are no service contracts, no annual renewals, no allowances, no deductibles, and no exclusions. In addition to a 5 year hardware warranty, benefits include access to: •...
-
Page 3: Table Of Contents
LEDS ..................................3 DISPLAY ................................... 3 BACK PANEL ..........................4 ORIGINAL LABVAULT-SD BACK PANEL ......................... 4 VERSION 2 OF THE LABVAULT-SD BACK PANEL ....................4 SYSTEM INSTALLATION ........................ 5 INSTALLING THE LABVAULT-SD ..........................5 ENTERING NETWORK SETTINGS INTO LABVAULT-SD ..................6 WEB INTERFACE .......................... - Page 4 CHECKING LOG FILES ............................22 Open a Log File ..............................22 Search a Log File ............................. 22 Delete a Log File .............................. 23 MAINTAINING THE LABVAULT-SD ........................25 Update Firmware .............................. 25 Check Internal Hard Drive ..........................25 Reboot/Shut Down ............................25 CONTROL COMMANDS .......................
-
Page 5: About This Manual
LABvault’s internal hard drive, and accessing the system’s log files. One of the most powerful features of the LABvault-SD is its ability to be controlled by a wide variety of external sources. The most popular control interfaces include Crestron... -
Page 6: Important Safety Instructions
LABvault-SD Important Safety Instructions IMPORTANT SAFETY INSTRUCTIONS Read these instructions. Keep these instructions. Heed all warnings. Follow all instructions. Do not use this apparatus near water. Clean only with dry cloth. Do not block any ventilation openings. Install in accordance with the manufacturer’s instructions. -
Page 7: Front Panel
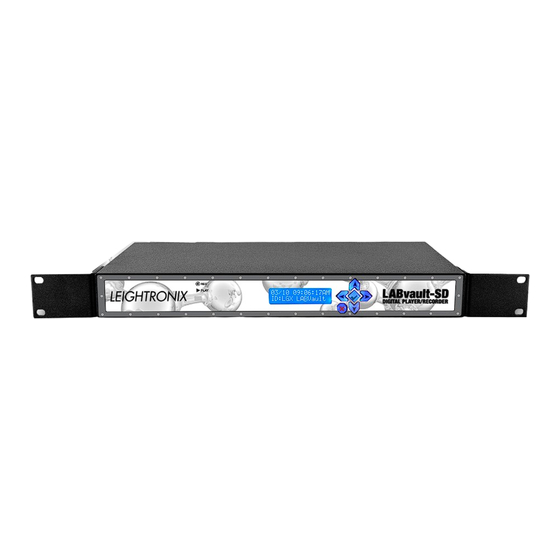
KEYPAD The four LABvault-SD arrow keys are used to display status information as well as for the entry of TCP/IP network addresses. If you hold down an arrow key for more than one second, it begins to scroll through all of the available options. -
Page 8: Back Panel
There are two versions of the LABvault-SD, which have different back panels, supported network connectivity speeds, and internal hard drive sizes. The original LABvault-SD, no longer available, has a back panel matching the first of the pictures shown below, supports 10/100 BASE-T Ethernet, and has a 120 GB internal hard drive. The current LABvault-SD model, version 2, has a back panel matching the second picture below, supports 10/100/1000 or gigabit BASE-T Ethernet, and has a 250 GB internal hard drive. -
Page 9: System Installation
Leave empty rack spaces above and below the LABvault-SD. The LABvault-SD should not have anything stacked on top of it. a. Insert the LABvault-SD into the rack, aligning the holes of the unit’s mounting bracket with those of the rack. b. Secure the LABvault-SD to the rack with user-supplied rack screws. -
Page 10: Entering Network Settings Into Labvault-Sd
From the front panel, enter your password by pressing the right arrow button to display the password entry screen and then the right arrow key five times. If the password is entered correctly, the LABvault-SD’s configuration menu will be displayed (see below). - Page 11 System Installation d. Optional: the LABvault-SD FTP buffer size setting helps to control the rate at which data is transferred to and from the LABvault. The buffer size defaults to 16 kilobytes, but may be adjusted down to 4 KB or up to 64 KB. If your network equipment can handle a higher rate, edit the setting to 32 or 64 KB for faster transfer times.
-
Page 12: Web Interface
Your LABvault-SD includes a Web interface, allowing any authorized user to conveniently set up and check on your LABvault from a local area network connection or the Internet. The LABvault-SD Web interface is compatible with Internet Explorer, version 8 and higher, Firefox, Safari, and Google Chrome. -
Page 13: Understanding Status Indicators On "System Dashboard" Screen
UNDERSTANDING STATUS INDICATORS ON “SYSTEM DASHBOARD” SCREEN Click the “Dashboard” button to display the “System Dashboard” screen. The Dashboard displays all of the currently configured settings for your LABvault-SD as well as the unit’s operational and storage status. “System Dashboard” Web Interface Screen... -
Page 14: Entering Labvault-Sd Settings
“LABvault-SD Time” shows the date and time currently on your LABvault-SD system. To change the LABvault-SD’s date/time, perform one of the following: • Sync your LABvault-SD system’s date and time to your computer’s current date and time by clicking the “Set” button next to the “Computer Time” field. -
Page 15: Web Interface Usernames And Passwords
LABvault-SD. Enter a username and password into the corresponding fields and then click the “Submit” button to add the account. To delete a remote user account, single click on the user’s name and then click the “Delete”... -
Page 16: Epro-Bus Setting
The serial port mode setting, accessed by clicking the “Serial Port” tab on the “System Management” screen, applies to the bottom serial port on the back panel of the LABvault-SD chassis. “Host” mode allows the LABvault-SD to receive serial control commands from supported, external devices connected to the bottom serial port. “Camera” mode is not currently supported. -
Page 17: Setting Up File Transfer Destination(S)
NEXUS Series Server (NEXUS/UltraNEXUS/UltraNEXUS-SDI) Send your LABvault-SD files to any of the storage volumes attached to your NEXUS series server. Enter your NEXUS server’s IP address, username, and password along with the name of the volume that you want to store the files. The names of your storage volumes can be viewed in the WinLGX “Storage Manager”... -
Page 18: Leightronix Streaming Video-On-Demand Web Site
Web Interface LEIGHTRONIX Streaming Video-on-Demand Web Site The “Internet VOD Streaming” option transfers files to a LEIGHTRONIX streaming video-on-demand Web site such as PEG Central. Complete the settings according to the labeled illustration below and click the “Apply Changes” button when you have finished. -
Page 19: Lgx-Svod Server
(green = on, red = off). Server with FTP Capabilities Push your files to another LEIGHTRONIX or third party video server with FTP capabilities. Enter your server’s IP address, username, and password along with the name of the destination path. Complete the remaining settings according to the labeled illustration below. -
Page 20: Recording
Click the “DESTINATIONS” button and then select the “Record Settings” tab. Enter the following record settings and then click the “Apply Changes” button to send the changes to your LABvault-SD or “Cancel” to abort. The settings will be applied to every recording session until they are changed. -
Page 21: Recording From The Web Interface
The “Good,” “Better,” and “Best” file record quality settings will be ignored. • “PEGcasting”: if you want your LABvault-SD files transferred to your NEXUS series server 15 seconds after the files begin recording, select the “Enable” “PEGcasting” option. To use the PEGcasting Next to Live autoplay feature for simulated live broadcasting, you must still complete the “PEGcasting N2L”... -
Page 22: Playing Files
PLAYING FILES Playback of your recorded files on a connected preview monitor may be initiated from the LABvault-SD web interface as well as a third party touch screen. To initiate playback of a file from the web interface, use one of the following control options: “MPEG Player”... -
Page 23: Mpeg Engine Control" Panel
Control” Panel Play Button 2. From the lefthand listing of files on the LABvault-SD’s internal hard drive, single click to select the file you wish to display. 3. From the “MPEG Engine Control” panel, start playing the file by clicking the play button. -
Page 24: Managing Files
The “File Management” screen displays a recorded file listing and transfer queue, allowing you to manually transfer files, stop file transfers, and manage any files stored on the LABvault-SD’s internal hard drive. Recorded files are stored on the LABvault’s internal hard drive if the “Automatic Delete”... -
Page 25: Manually Transfer Recorded Files
LABvault-SD Web Interface All” button or just right click on the file and select “Remove All Transfers” from the pop-up menu. Click “Yes” when prompted to delete the file(s) or “No” to abort. Popup Menu for “Video Files” Listing on the “File Management” Screen Manually Transfer Recorded Files Under the “Video Files”... -
Page 26: Checking Log Files
Web Interface CHECKING LOG FILES The LABvault-SD keeps track of everything done to or by it in internal log files which are accessible from the Web interface. Click the “LOGS” menu button to display the list of current LABvault-SD logs on the “Log Files”... -
Page 27: Delete A Log File
LABvault-SD operations, including recording sessions, file transfers, and LABvault-SD status. Single click either “EVENTS.LOG” to select the most current file of LABvault-SD actions or “OLDEVNTS.LOG” to view archived LABvault actions. When selected, both event logs display the screen shown in the “EVENTS.LOG”... - Page 28 Web Interface • Disk Diagnostics Log: the “scan_C.log” file displays information from the most recent LABvault-SD hard drive scan performed with the “Disk Diagnostics” utility. The “scan_C.log” file is automatically overwritten each time you run a drive scan. “scan_C.log” Selected on “Log Files” Web Interface Screen...
-
Page 29: Maintaining The Labvault-Sd
Reboot/Shut Down Click the “SYSTEM” button to display the “System Management” screen and then click the “Maintenance” tab. Click “Reboot” to power your LABvault-SD off and then back on or click the “Shutdown” button to only power off your LABvault. -
Page 30: Control Commands
Control Commands CONTROL COMMANDS The LABvault-SD is meant to be locally operated from a compatible, third party control system connected either directly to the LABvault via an RS-232 serial cable or through your network. This section provides the control commands needed to program your touch screen to operate your LABvault-SD. - Page 31 LABvault-SD Control Commands FUNCTION COMMAND DETAILS ASCII RESPONSE (Password) Login PASS <PASSWORD> Specifies password after • If successful: 230 User “USER” command has Logged in, proceed been completed. • If already logged in: 335 Already logged in • If not preceded by...
- Page 32 NOTE: For finalize to succeed, at least one destination must be configured and enabled via the LABvault-SD Web interface, otherwise the result will be fail. Ex.: FINALIZE BROOKS. Get File Dir GETMPEGDIR Gets the directory of the \ For each entry: Internal\mpeg\ dir.
- Page 33 LABvault-SD Control Commands FUNCTION COMMAND DETAILS ASCII RESPONSE Get Status GETSTAT Gets the current player 388 P <PLAYERFILE> and recorder status and <PH:PM:PS:PF> timecode. <LH:LM:LS:LF> R <RECFILE> Record Ex.: GETSTAT <RH:RM:RS:RF> recording file BROOKS. MPG, current record time • P: Player mode (0 =...
- Page 34 LABvault-SD Control Commands FUNCTION COMMAND DETAILS ASCII RESPONSE Rename File XRENAME <ORIG PATH\ Rename a file on the hard • If successful: 200 FILENAME> <NEW PATH\ drive. Command OK FILENAME> • If unsuccessful: 534 Ex.: XRENAME c:\mpeg\ Rename failed, (Error: origname.mpg c:\mpeg\...
-
Page 35: Specifications
SPECIFICATIONS In no event shall LEIGHTRONIX be liable for any damages whatsoever resulting from loss of use, data, or profits, whether or not advised of the possibility of damage, and on any theory of liability, arising out of or in connection with the use or performance of the LABvault-SD. - Page 36 LABvault-SD Specifications Internal Storage • Original LABvault-SD: 120 GB internal hard drive • Version 2 LABvault-SD: 250 GB internal hard drive provides 200 GB of digital media storage Internal MPEG The LABvault-SD creates industry-standard, MPEG-2 video files. The maximum Recorder (Encoder) recorded file length allowed by the LABvault-SD is 23 hours, 59 minutes, and 50 seconds.
-
Page 37: Product Warranty
The customer shall bear the cost of shipping products returned to LEIGHTRONIX for warranty repair. The cost for return shipment to the customer will be assumed by LEIGHTRONIX and shipped via an equal priority service shipper prepaid and insured. -
Page 38: Copyright Statements
LABvault-SD Copyright Statements COPYRIGHT STATEMENTS The LABvault-SD firmware contains portions of the software referenced in the following copyright statements. WHITSOFT SLIMFTPD Portions of the LEIGHTRONIX FTP Server are derived from WhitSoft SlimFTPd. Copyright (c) 2006, Matt Whitlock and WhitSoft Development All rights reserved. - Page 39 LABvault-SD Copyright Statements you may always continue to use it under the terms of that version. You may also choose to use such covered code under the terms of any subsequent version of the license published by the PHP Group. No one other than the PHP Group has the right to modify the terms applicable to covered code created under this License.
Need help?
Do you have a question about the LabVault-SD and is the answer not in the manual?
Questions and answers