Table of Contents
Advertisement
Available languages
Available languages
Quick Links
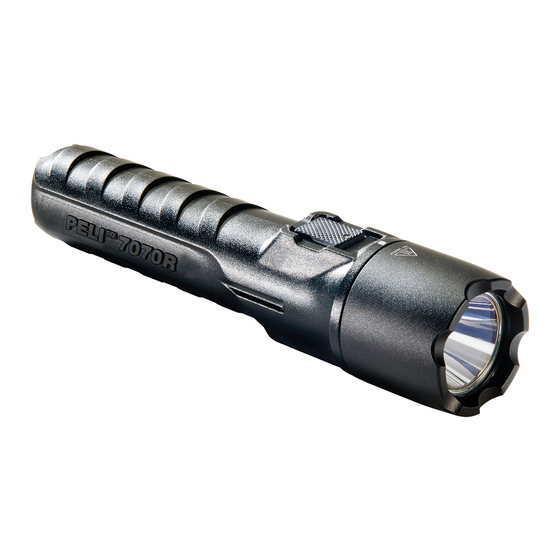
Manual 7070R
7070R
INSTRUCTIONS MANUAL
WARNING: Before disassembling any part of the 7070R
LED Torch, ensure that the Torch has not been operating for
five (5) minutes. During operation, the LED module can become
extremely hot and may cause injury if touched.
Torch Operation
The 7070R LED is a high performance Torch for use by
professionals. This Torch comes equipped with dual switches and
includes a high output pre-focused LED lamp that emits a strong
light beam of white light. There is no need to focus the 7070R LED.
DO NOT SHINE THIS Torch DIRECTLY INTO ANY PERSON'S
EYES: THIS MAY RESULT IN INJURY.
Your 7070R battery pack comes to you partially charged and needs
to be fully charged prior to use (see charging instructions below).
Momentary Activation
Partially depress either switch for momentary operation.
Constant Activation – Fully depress either switch (click), to lock in
the selected mode.
Bluetooth App Programming
Download the "Pelican Torch" app from either the Apple
or Android stores.
1. A ctivate the Pelican Torch app from
your smartphone. See Image #1
2. Turn on the Torch
3. S elect "Scan Pelican Products"
from the menu on your smartphone
and select your 7070R via the
identified serial number.
Your Torch will now show connected.
4. O nce connected you can select up to
5 different modes and the sequence of those modes as numbered in the app.
Each selected mode allows for varied light output and/or varied strobe speed.
See Image #2
Manual Programming
To select a program using the
manual input, select one of the
five pre-set program options.
Note, the 7070R is
pre-programmed with Program #1.
To change program, partially
depress either switch (momentary
press, do not click) the number
of times as indicated in the table
below and hold the last press until
you see the coordinating number
of confirmation flashes.
Each press needs to be within .5 seconds of each other.
Program 1 (default)
Program 2
Program 3
Program 4
Program 5
Mode Selection
Partially depress either switch within .5 second increments to select the desired mode.
Each press with provide the mode in its programmed sequence. Fully depress the switch
to lock in the desired mode.
Light Off
Fully depress either switch (click), to turn off
the light from any activated mode.
Charging:
1. A ttach the USB Charge Cord to the
bottom of the Charger Base. See Image #3
High > Strobe > Medium > Low
High Only
High > Medium > Low >
Low > Medium > High >
High >Low >
EN
Momentary
presses
8
10
12
14
16
1
2
Confirmation
flashes
*
**
***
****
*****
3
Advertisement
Table of Contents

Related Manuals for PELI 7070R


Summary of Contents for PELI 7070R
- Page 1 LED Torch, ensure that the Torch has not been operating for five (5) minutes. During operation, the LED module can become extremely hot and may cause injury if touched. Torch Operation The 7070R LED is a high performance Torch for use by professionals. This Torch comes equipped with dual switches and includes a high output pre-focused LED lamp that emits a strong light beam of white light. There is no need to focus the 7070R LED. DO NOT SHINE THIS Torch DIRECTLY INTO ANY PERSON’S EYES: THIS MAY RESULT IN INJURY.
-
Page 2: Charger Mounting
5. I f a secure attachment is required, push the light body back into the charger base and the light will lock into place. Charger Mounting: The charger base can be attached to any surface with (2) size 8 or size 10 screws (not included) through the mounting holes located in the back of the charger base. See Image #6. The charger base back will need to be pulled away from the charging cradle to gain access to the mounting holes. There is no need to fully discharge the 7070R before charging the battery. Charging can occur whenever required and the 7070R can be left indefinitely in the charger housing without fear of over-charging. Battery Level Indicator: The forward switch boot houses a built in battery level indicator LED. The indicator is illuminated whenever the light is activated. The battery level information is represented as follows: See Image #7 Green =... -
Page 3: Manuel D'instructions
émet un faisceau de lumière blanche intense. Il n’est pas nécessaire de focaliser la torche LED 7070R. NE PAS DIRIGER CETTE TORCHE DIRECTEMENT VERS LES YEUX D’UNE PER- SONNE : CELA RISQUERAIT DE BLESSER LA PERSONNE. Le bloc-piles de la torche 7070R est livré partiellement chargé et doit être entièrement chargé avant de pouvoir être utilisé (voir les instructions de chargement ci-dessous). Activation momentanée Appuyer légèrement sur l’un des interrupteurs pour une utilisation momentanée. -
Page 4: Remplacement De La Batterie
Extinction Appuyer à fond sur l’un des commutateurs (cliquer) pour éteindre la torche et désactiver tout mode. Chargement : 1. F ixer le cordon de charge USB au bas de la base-chargeur. (image 3) 2. B rancher la fiche USB dans une prise d’alimentation USB (sortie de 1 A minimum). Une fois le branchement à l’alimentation effectué, la LED d’état de charge s’allume en rouge en continu. (image 4) 3. G lisser la torche dans la base-chargeur en alignant les deux lignes indiquées. (image 5) 4. L a torche 7070R intègre un système de chargement sans fil sans contacts directs. Une fois l’alignement correctement effectué, une LED rouge clignote pour indiquer que le chargement est en cours. Une fois le chargement terminé, la LED rouge clignotante s’allume en vert en continu. La torche est également équipée d’un “Mode défaut “ qui indique une erreur, par exemple, en cas de tentative de chargement avec des piles CR123 jetables insérées. 5. S i une fixation sécurisée est nécessaire, enfoncer le corps léger de la torche ... -
Page 5: Programación Manual
Batteries rechargeables 1. L es agréments de sécurité de sites dangereux pour les environnements explosifs sont valables uniquement pour le bloc-pile Peli fourni avec le système d’éclairage. 2. P our remplacer le bloc-pile, utiliser uniquement un bloc-batterie Peli homologué pour le modèle du système d’éclairage utilisé. L’utilisation d’autres blocs-piles annulera l’agrément de sécurité. 3. L e système d’éclairage doit être rechargé uniquement dans un site non dangereux. 4. L e système d’éclairage doit être rechargé uniquement à l’aide de la base-chargeur Peli fournie avec le système d’éclairage. 5. L e système d’éclairage doit être rechargé et ne doit fonctionner que dans les plages de températures indiquées ci-dessous : Température de charge : -20 °C à 50 °C Température de fonctionnement : -20 °C à 50 °C. 6. N e pas recharger lorsque des piles alcalines sont installées dans le système d’éclairage. Dans le ... -
Page 6: Selección De Modo
(imagen n.° 4) 3. D eslizar la linterna en la base del cargador, alineando las dos líneas indicadoras.(imagen n.° 5) 4. E l modelo 7070R cuenta con un sistema de carga inalámbrico y no utiliza contactos directos. Una vez la linterna esté bien colocada, el indicador de carga mostrará un LED rojo intermitente. Una vez finalizada la carga, el LED rojo parpadeante cambiará a verde continuo. También se ofrece un “Modo de fallo” que indica un error, como un intento de carga con pilas CR123 desechables instaladas. 5. S i fuese necesaria una fijación segura, vuelva a colocar el cuerpo de la linterna en la base del cargador y la linterna se fijará en su posición. Nota: No es necesario que se descargue totalmente la linterna 7070R antes de cargar la batería. La carga se puede realizar siempre que se necesite y la linterna 7070R puede ... - Page 7 2. L a batería solo se debe sustituir por otra batería homologada por Peli para ese mismo sistema de iluminación. El uso de otras baterías anulará el certificado de seguridad. 3. No recargar las baterías en zonas peligrosas. 4. L as baterías solo se deben recargar con el cargador Peli que se suministra con el sistema de iluminación. 5. L as linternas deben cargarse y utilizarse respetando el rango de temperaturas que aparece ...
-
Page 8: Betriebsmodus Auswählen
“Fehlermodus“, der einen Fehler anzeigt, wenn zum Beispiel versucht wird, mit CR123 Einwegbatterien zu laden. 5. W enn eine sichere Befestigung erforderlich ist, das Lampengehäuse zurück in die Ladestation drücken bis die Lampe einrastet. Hinweis: Eine vollständige Entladung der 7070R ist vor dem Aufladen nicht notwendig. Die Taschenlampe kann je nach Bedarf aufgeladen werden. Außerdem kann die 7070R unbegrenzt lange im Ladegerät verbleiben, ohne dass ein Überladen befürchtet werden muss. Befestigung des Ladegeräts: Die Ladestation kann mit (2) Schrauben Größe 8 oder 10 (nicht im Lieferumfang enthalten) an jeder Oberfläche durch die Montagelöcher an der Rückseite der Ladestation befestigt werden. Die Rückseite der ... -
Page 9: Manuale Di Istruzioni
Durante il funzionamento, il modulo LED può diventare estremamente caldo e causare infortuni in caso di contatto. Funzionamento della torcia La 7070R LED è una torcia ad alte prestazioni per l’utilizzo da parte dei professionisti. Questa torcia è dotata di doppi interruttori e include una lampada LED con pre-messa a fuoco ad alta potenza che emette un forte raggio di luce bianca. Non occorre mettere a fuoco la 7070R LED. NON PUNTARE QUESTA torcia DIRETTAMENTE AGLI OCCHI DELLE PERSONE: PUÒ... -
Page 10: Programmazione Manuale
Programmazione con app Bluetooth Scaricare l’app “Pelican Torch” dagli store Apple o Android. 1. A ttivare l’app Pelican Torch dallo s martphone. Vedere l’immagine n. 1 2. Accendere la torcia 3. S elezionare “Scan Pelican Products” (Scansiona prodotti Pelican) dal menu sullo smartphone e selezionare la 7070R tramite il numero di serie identificato. La torcia sarà ora visualizzata come connessa. 4. U na volta connessa, è possibile selezionare fino a 5 modalità differenti e la sequenza delle modalità, come numerato nell’app. Ogni modalità selezionata consente una potenza luminosa diversa e/o una velocità strobo ... - Page 11 Smaltire sempre correttamente tutte le batterie presso un centro autorizzato al loro riciclaggio. TORCE/TORCE DA TESTA GARANZIA LIMITATA A VITA* Peli Products S.L.U. (“Peli”) garantisce a vita* le sue torce e torce da testa contro rotture o difetti di fabbricazione. La presente garanzia non copre le lampade o le batterie. Peli riparerà o, a sua esclusiva discrezione, sostituirà gli eventuali prodotti difettosi. Tutte le richieste di risarcimento in garanzia vengono bloccate, qualunque sia la loro natura, qualora il prodotto ...
-
Page 12: Выбор Режима
испускающей яркий световой луч белого света. Вам не потребуется фокусировать светодиодный фонарь модели 7070R. НИ В КОЕМ СЛУЧАЕ НЕ СВЕТИТЕ ЭТИМ ФОНАРЕМ ПРЯМО В ГЛАЗА ЛЮДЕЙ: ЭТО МОЖЕТ ПРИВЕСТИ К ТРАВМЕ. Батарейный блок для 7070R поставляется частично заряженным, поэтому перед использованием устройства блок следует полностью зарядить (см. инструкции по зарядке ниже). Кратковременная активация... -
Page 13: Замена Батарей
Если требуется замена литий-ионного аккумулятора, открутите футляр и достаньте модуль лампы / батарейный отсек от корпуса фонаря, чтобы получить доступ к батарее. Извлеките использованную батарею. Замените использованную батарею новой батареей. Батареи на замену доступны во всех точках продажи фонарей Peli, а также непосредственно у представителя отдела по работе с клиентами Peli Products. При недоступности аккумуляторных батарей фонарь модели 7070R может использоваться с 2 (двумя) литиевыми батареями CR123, которые вставляются в специальную трубку (входит в комплект). Примечание. Батареи CR123 не пригодны для зарядки. ПРИМЕЧАНИЕ. Утилизируйте тюбик с литий-ионной батареей надлежащим образом. ... - Page 14 ни было характера не принимаются, если изделие было модифицировано, повреждено, изменено либо подвергнуто ненадлежащему использованию, небрежному обращению или аварийному воздействию. * Бессрочная гарантия не используется в тех случаях, когда она запрещена законом. Все сведения о гарантии см. на веб-сайте: www.peli.com/peli-warranty 7070R-3110-000E 5-21384 REV A © 2018 Peli Products All trademarks and logos displayed herein are registered and unregistered trademarks of Peli Products, S.L.U. or Pelican Products, Inc. and others.
Need help?
Do you have a question about the 7070R and is the answer not in the manual?
Questions and answers