Table of Contents
Advertisement
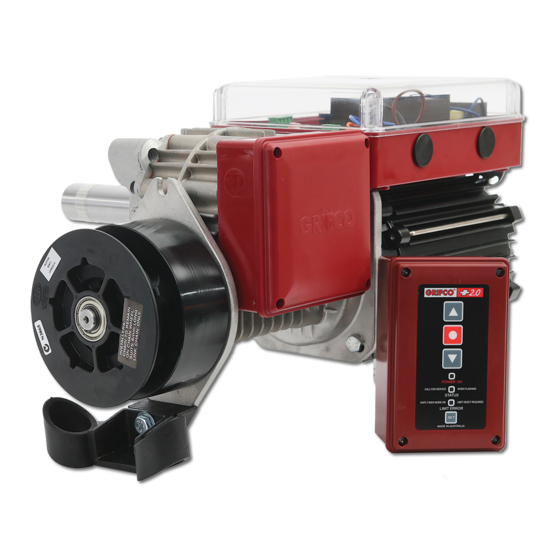
installation and users
manual for eDrive +2.0
commercial door opener
www.grifco.com.au
www.grifco.co.nz
D-M-RDO/006
Chamberlain Australia Pty Ltd
PO Box 1446, Lane Cove
NSW 1595, Australia
Phone toll free 1800 474 326
Chamberlain New Zealand Ltd
PO Box 100-221
North Shore 0745, New Zealand
Phone toll free 0800 653 667
413062
Advertisement
Table of Contents

Related Manuals for Grifco eDrive +2.0


Summary of Contents for Grifco eDrive +2.0
- Page 1 Chamberlain Australia Pty Ltd manual for eDrive +2.0 PO Box 1446, Lane Cove commercial door opener NSW 1595, Australia Phone toll free 1800 474 326 Chamberlain New Zealand Ltd PO Box 100-221 www.grifco.com.au North Shore 0745, New Zealand www.grifco.co.nz...
-
Page 2: Safety Instructions
Use the commercial door opener for its intended purpose. eDrive +2.0 openers are designed for operating spring balanced roller shutters, spring balanced roller doors and counterweighted bi-fold and vertical lift doors. -
Page 3: Table Of Contents
TABLE OF CONTENTS Safety instructions Introduction Identifying your eDrive +2.0 Planning Installation 6-10 Mounting the unit Installing hand chain Connecting power Controller Installing controller ACEM Setup and adjustment 11-13 Checking power Door direction ... -
Page 4: Introduction
New standard features include: Radio on Board With Radio on Board as standard, the new eDrive +2.0 no longer requires an additional Receiver Card for wireless accessory con- nectivity. Auto Close A built-in Auto Close feature can now be enabled with up to 10 - 300 seconds delay, adjustable in 10 second increments. -
Page 5: Planning
0.75 MH5102 0.75 Note: eDrive +2.0 openers are not recommended for use on residential garage doors. * Door size is stated as a guide only. Refer to "max door mass" to assess drive suitability. ** Maximum door mass is: - before spring balancing. Door must be spring balanced. -
Page 6: Installation
INSTALLATION SECTION Mounting the unit The eDrive +2.0 is typically flag mounted below the door drum so that the opener shaft points toward the door opening and lies beneath the sprocket of the door drum. For mounting you will need to either secure the opener to the roller shutter head plate with prepared holes or slots, or use a mounting plate that will need fixing via a wall angle or similar existing structure. - Page 7 WARNING When Securing the eDrive +2.0 opener with the 4 x M12 x 40mm long fasteners (based on a 8mm mounting plate) and spring washers provided, it is critical to ensure that the applied torque is between 80-90Nm. When mounting through thicker sections, ensure a minimum of 30mm of screw thread is engaged with the female thread.
-
Page 8: Installing Hand Chain
Installing Hand Chain (Use 5mm long link chain only) Ensure the mounting position allows the hand chain to hang free of obstructions. Ensure hand chain is not twisted when making the join! CAUTION Motor may become hot during operation. Appropriate clearance and/or shielding should be supplied by the in- staller to ensure any cabling, wiring and/or other items cannot come in contact with the motor. -
Page 9: Connecting Power
ELECTRICAL CONNECTION The eDrive + 2.0 opener must: be connected via an approved electrical isolation device be connected via a suitable circuit breaker that disconnects all live conductors be connected in accordance with the wiring rules of the country in which it is installed ... -
Page 10: Controller
Controller The eDrive +2.0 controller is the user interface for the opener. It consists of four buttons for control and setup, as well as three indicators to display the opener status. 1) UP - Moves the door upwards 2) DOWN - Moves the door downwards... -
Page 11: Setup And Adjustment
SETUP AND ADJUSTMENT Once the installation of the opener and controller is complete it is time to test the operation. Make sure the door is away from the ground or the top door stops (mid open position). This will prevent damage to the door in the event that the door direction is reversed in relation to the controller (see below changing door direction). -
Page 12: Setting Limits
READ CAREFULLY BEFORE SETTING LIMITS! (not applicable to roller shutters) The eDrive + 2.0 features a limit confirmation routine that occurs after a power outage upon the first push of any operate but- ton. By default, the routine will “jog” slightly downward in order to confirm door position before proceeding in the intended di- rection. -
Page 13: Optional Third Limit
Ensure power is shut off before using manual chain. Basic installation of the eDrive +2.0 Commercial Door Opener is now complete Please refer to the following pages for further installation instructions of optional eDrive +2.0 features and / or accessories... -
Page 14: Door Behaviour And Entrapment Protection Inputs
AS/NZS 60335-2-103. When using the Grifco® Protector System as part of the Entrapment Protection System, ensure it is installed to detect a 100mm high obstacle, ie; approx 80mm from the floor, and in accordance with installation directions supplied. -
Page 15: Installing Entrapment Protection Devices
Entrapment Protection Devices and monitored Bump Edges require one simulated obstruction to be learned by the opener. Once learned, latch closing will be allowed when set. Note: The eDrive +2.0 features “constant pressure to close”. This means that if an Entrapment Protection Device fails, the opener can still ‘inch down’ (unless an expansion board is used). -
Page 16: Typical Car Park Application (Example)
MCB via the quick connect pluggable terminal block (see diagram on page 17). Transmitter Management If transmitter management is required, you will need a Grifco® STAR1000EVO. This accessory will allow up to 1000 identified users to be individually added and deleted. Contact 1800 GRIFCO® for more information. -
Page 17: Main Control Board (Mcb) Layout
MAIN CONTROL BOARD (MCB) The MCB is the heart of the eDrive +2.0. The diagram below provides an overview of the major components and access points. Motor terminals ‘Learn’ and ‘Reset’ buttons Controller connection socket Mechanically interlocked contactors VDC out (24Vdc accessory power) -
Page 18: Accessories
ACCESSORIES - Call 1800 GRIFCO for assistance with any of the above accessories, or other enquiries -... -
Page 19: Auto Close & Wireless Accessory Set Up
POWER ON —Shows when the unit is mains powered STATUS —Shows the status of the unit LIMIT ERROR —When lit indicates limits are not set Controller Figure 2. Lower Right corner of eDrive +2.0 MCB Action Button Sequence SET AUTO TIMER TO CLOSE ( no... - Page 20 (the green light will go out indicating exit of learn mode) LEARN THE E840G WIRELESS Press and hold the SET button on the GRIFCO® controller, then KEYPAD FROM THE CONTROLLER While holding the SET button, press the STOP button 5 times (the green status light will light then continue flashing, indicating learn mode) ...
-
Page 21: Maintenance
Power MUST be turned off before servicing or adjusting the opener. Disconnect the supply when cleaning! The eDrive +2.0 is equipped with smart logic to indicate when your commercial door will require servicing. When the STATUS indicator flashes constantly please contact your commercial door dealer to arrange a routine door service. -
Page 22: Troubleshooting
If a problem is found with an installation, be sure to read the troubleshooting guide thoroughly. If the problem persists call Chamberlain for technical assistance on 1800 GRIFCO® or email customerservice@chamberlainanz.com in Australia or in New Zealand call 0800 653 667. - Page 23 Is there a solid orange (COMS) light on the Expansion Board? YES… MCB (Main Control Board) must be reset. Call Chamberlain (1800 GRIFCO) for resetting procedure NO… Make sure key is in correct position 8. Power light intermittently goes OFF and ON: ...
-
Page 24: Warranty
Chamberlain’s warranty Chamberlain warrants to the original purchaser of the Grifco product (Unit) that: 1 The Unit (excluding the electric motor) is free from defects in materials and workmanship for a period of 24 months from the date of purchase.
Need help?
Do you have a question about the eDrive +2.0 and is the answer not in the manual?
Questions and answers