Table of Contents
Advertisement
Advertisement
Table of Contents

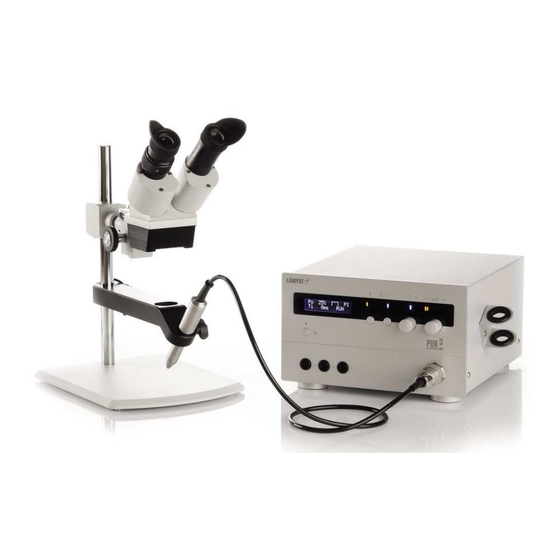
Summary of Contents for Lampert PUK 3 professional plus
-
Page 3: Operating Instructions
Safety Precautions Please retain these instructions for reference. Note on Symbol The equipment manufactured by “Lampert Werktechnik GmbH“ fulfil the standard requirements of CE certification and are manufactured according to VDE guidelines. Use original parts only for maintenance and updating. Our customer service department with expertly trained staff, suitable resources and equipment would be pleased to help you further. -
Page 4: Table Of Contents
TABLE OF CONTENTS SECTION SYMBOL USAGE attached SAFETY PRECAUTIONS - READ BEFORE USING FIELD OF APPLICATION INTRODUCTION GENERAL SAFETY INSTRUCTIONS - READ BEFORE USING General safety rules Personal body protection and dangers INSTALLATION Set-up rules Operations elements front side Operations elements rear side Starting up SETTING OF THE PARAMETERS AND OPERATION Adjustment of the Weldingparameter... -
Page 5: Field Of Application
SYMBOL USAGE Warning! “Warning!” indicates a potentially hazardous situation which, if not avoided, could result in death or serious injury. This signal word is not used for property damage hazards unless personal injury risk appropriate to this level is also involved. Caution! “Caution!”... -
Page 6: General Safety Instructions - Read Before Using
GENERAL SAFETY INSTRUCTIONS - READ BEFORE USING BEFORE USING - READ ALSO THE ATTACHED SAFETY PRECAUTIONS 3-1 SAFETY INSTRUCTIONS Opening the device is permitted only by trained experts. Remove the plug before opening the device and make sure that the device is without electrical power. Discharge all device components that may store electricity. -
Page 7: Personal Body Protection And Dangers
3-2 PERSONAL PROTECTION AND DANGER Wear protective gloves on both hands during welding, since sparks and splashes are unavoidable. The protection gloves may not contain a high portion of easy melting plastic fibers. Gloves will protect from harmful UV rays during welding. Wear appropriate clothes, with no synthetics. -
Page 8: Operations Elements Front Side
4-2 DESCRIPTION OF THE OPERATING COMPONENTS FRONT SIDE (Figure. 1) (1) STAND BY - SWITCH (2) LCD - DISPLAY (3) PROGRAMM KEY (only "PUK 3 professional plus") (4) MODE - CHANGE-OVER (5) IMPULSE LENGTH / WELDINGTIME (6) WELD POWER DIAL ADJUSTABLE WELDING DIAL... -
Page 9: Operations Elements Rear Side
(16) CONNECTION SOCKET FOR WELDING SHIELD To control eye protection of the welding safety shield (17) Connection for optional accessories (only "PUK 3 professional plus") (18) CONNECTION SOCKET FOR MICROSCOPE LIGHTING 12V / 2A (19) INERT GAS CONNECTOR For a Æ 6,0 mm pressure hose... - Page 10 (16) marked “SHUTTER” located on the back of the device and secure it with the nut. Warning! Only the Lampert - eye protection systems "MEZZO welding microscope" or "PUK optics unit" may be attached. Other eye protection systems are not permissible and may lead to health damage...
-
Page 11: Adjustment Of The Weldingparameter
Connect power supply: Connect mains lead to the back of the unit (15) and plug into the mains outlet. Switch the mains power switch (14) to „ON“ – the device will perform an automatic test. Note! Please read the instructions on the connected eye protection devices such as the PUK - optic unit (welding shield) or MEZZO microscope with (welding shield)! Caution! Clamps or pliers, which are attached to the PUK 3, could be conducting voltage, as... -
Page 12: Programming (Only "Puk3 Professional Plus")
5-2 Programming (Only "PUK 3 professional plus") Programmekey (3): There are 5 programme places available to store individual settings. By short pressing of the key (3) the individual programme places can be selected. -
Page 13: Instructions
INSTRUCTIONS 6-1 WELDING INSTRUCTIONS Connect the clamp to a blank metal location on the work piece Make sure there is good contact between work piece and welding table Touch the electrode tip to the spot to be welded until the welding is done without, or with minimum pressure to the electrode tip! The welding procedure is automatically done: Safety gas encases the welding spot... -
Page 14: Sharpening The Electrodes
Consider the thickness of the material when you choose the power level. Try to touch the work piece to be welded as precisely as possible. With just a little experience you will discover how the angle in which you touch the needle to the work piece will effect the flow direction of the welding point. -
Page 15: Technical Data
■ Main Voltage ~115 V / 50-60 Hz +/-15% ■ Mains fuse T 6,3 A ■ Power input "PUK 3 professional plus" 400 VA ■ Power input "PUK 3 professional" 350 VA ■ Operating voltage 20 – 43 V ■... -
Page 16: Trouble Shooting
TROUBLE SHOOTING ERROR CAUSE SOLUTION No welding power Power main switch on. Power connection interrupted Check power connection and main voltage Display stays off No welding power Power main switch on. Welding cable connection Check connectors interrupted Bad or no grounding Connect to work piece. -
Page 17: Spare Parts List
Ettlebener Str. 27, 97440 Werneck, Germany, declares that the product Precision Welding Device „PUK 3 professional“ & „PUK 3 professional plus“ conforms to the conditions set forth in the above-named guidelines, including any changes made up to the time of declaration. -
Page 18: Contact
11 CONTACT Lampert Tools USA, Inc 67 East Madison, #512 Chicago, IL 60603 Phone: 1-866-478-5111 Fax: 1-312-641-2678 info@lampertusa.com www.lampertusa.com...


Need help?
Do you have a question about the PUK 3 professional plus and is the answer not in the manual?
Questions and answers