Table of Contents
Advertisement
Quick Links
Advertisement
Table of Contents

Related Manuals for Lampert PUK D3


Summary of Contents for Lampert PUK D3
- Page 1 Operating manual PUK D3...
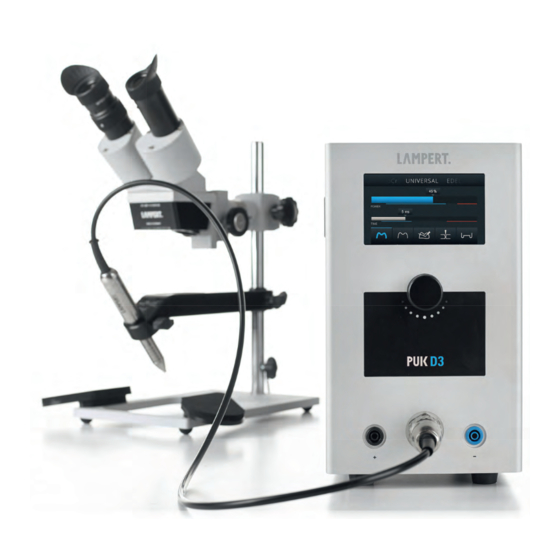
- Page 2 "PUK D3" with welding microscope "SM5" Dear Customer, This operating manual is intended to familiarise you with the commissioning process and operation of your PUK D3 as well as the associated SM5 welding microscope. Please read the operating instructions carefully and follow the advice given here diligently.
-
Page 3: Table Of Contents
“Note” identifies the product at risk from the hazard and possible damage to the equipment. Important! "Important!" designates user tips and other especially useful information. This is not a signal word for hazardous or dangerous situations. © Lampert Werktechnik GmbH 2017... -
Page 4: Field Of Application
WELDING EQUIPMENT! secured against being unintentionally restarted. ONLY USE THE SUPPLIED MAINS CABLE! THE PUK D3 IS A PIECE OF ELECTRICAL EQUIPMENT. NATIONAL REGULATIONS ON TESTING INTERVALS AND THE SCOPE OF REQUIRED RECURRING SAFETY-RELATED TESTS MUST BE OBSERVED. © Lampert Werktechnik GmbH... -
Page 5: Hazards Of Shielding Gas Cylinders
The Lampert eye protection systems with its integrated Particular regulations apply to fire and explosion LCD protective welding screen offers reliable protection endangered spaces. -
Page 6: Description Of The Rear Of The Device
(3) on the rear of the PUK welding WARNING! ONLY SUITABLE ORIGINAL EYE PROTECTION SYSTEMS FROM LAMPERT MAY BE CONNECTED TO THE WELDING SYSTEM! OTHER EYE PROTECTION SYSTEMS ARE NOT APPROVED AND CAN LEAD TO PERMANENT HEALTH DAMAGE OR DAMAGE TO THE WELDING DEVICE. -
Page 7: Inserting The Electrodes Into The Handpiece
You also have the support the microscope on your option of changing the angle of inclination for the working surface. microscope. In order to do so, release the locking screw © Lampert Werktechnik GmbH 2017... -
Page 8: Commissioning
(It jumps back to power automatically after 1 second) • Turning the controller to the left or the right changes the selected parameter. • Pressing the controller for longer time (> 1 second) switches to the next user level, see chapter 5.2. © Lampert Werktechnik GmbH 2017... -
Page 9: Description Of Menu Items
5.2 EXPLANATION / OVERVIEW OF MENUS (Fig. Schematic diagram of user levels) ONCE IT IS SWITCHED ON, THE PUK D3 STARTS UP IN ITS START LEVEL (MAIN MENU).THE FOLLOWING USER LEVELS CAN BE NAVIGATED AFTER PRESSING LONGER (> 1 SEC.) THE ROTARY CONTROLLER (25):... -
Page 10: Switching On The Device
5.4 ADJUSTING FOR THE CORRECT GAS FLOW The PUK D3 only works with shielding gas corresponding error message is shown in the display and connected and sufficient gas flow. If no shielding... -
Page 11: Selection Of The Welding Parameters And User Levels
With very thin materials or wires it is recommended to use 10 msec. a shorter welding time, primarily when welding near to © Lampert Werktechnik GmbH 2017... - Page 12 - prior to welding this SELECTION OF THE WELDING PARAMETERS ON THE PUK D3: The welding parameters are set in two stages: 1) In the upper area of the display, select the metal to be welded by sliding over the metal names.
-
Page 13: Expert Menu
All custom stored user level. In the upper display area on this user level, programs are select the relevant custom program by sliding to the left summarised in the or to the right. "Custom Programs" © Lampert Werktechnik GmbH 2017... -
Page 14: Fixation Welding
ELECTRODE! The PUK D3 is equipped with a function to prevent the electrode becoming welded to the workpiece by incorrectly pressing too hard. If a welding point has already been set and is pressed too hard to the workpiece when it comes into contact again, the welding point is not triggered;... -
Page 15: Welding With The Smoothing Mode
FOR INFORMATION ON RETENTION WELDING USING THE FOOT SWITCH, SEE ALSO CHAPTER 7.4.2. 7.4 WELDING WITH FOOT SWITCH With the PUK D3 switched off, connect the foot switch to safety prompt by pressing the rotary controller or touching the socket (4) marked with the blue foot switch symbol on the screen and wait for the self-test to conclude. -
Page 16: Retention Welding With Foot Switch
If the process passes off without the display of the PUK D3. Then connect the workpiece making a noise, then the connection is presumably of to an area of bare metal, using a connection terminal. -
Page 17: Care Of The System Components
Clean the outer surfaces. In doing so, breathe on them. glass in the same manner. Subsequently dry the lens with suitable cloth or paper for the purpose. Dry the lens with circular movements from © Lampert Werktechnik GmbH 2017... -
Page 18: Technical Data
Protection shade numbers in closed state Manufacturer identification code Optical quality Light scattering Homogeneity Angular dependence Number of the standard Notified body for CE testing of the LCD Shutter: DIN CERTCO, Alboinstrasse 56, 12103 Berlin © Lampert Werktechnik GmbH 2017... -
Page 19: Type Plate
Breathing welding fumes and gases can be hazardous to your health. Welding sparks, hot workpiece, and hot equipment can cause fires and burns. Arc rays from the welding process can burn eyes and skin. Electro-magnetic fields can affect pacemakers. © Lampert Werktechnik GmbH 2017... -
Page 20: Troubleshooting
-> avoid “electrostatic spot is not produced. discharges” against the handpiece or housing. Device begins to weld immediately Fault Immediately shut down the device, when touching the workpiece (no arrange for servicing. gas pre-flow) © Lampert Werktechnik GmbH 2017... -
Page 21: Microscope
The sight slides down Readjust the tension of the focusing knob REPAIR If the PUK D3 or the stereo microscope should require a recommend to first contact your dealer or an authorized repair or adjustment by qualified personnel, we always customer service. -
Page 22: Disposal Information
2012/19/EU regarding the disposal of 13. EC-DECLARATION OF CONFORMITY Please find enclosed to this shipment the separate document – Declaration of Conformity. Text and illustrations represent the technical status at the time of printing. Subject to change. © Lampert Werktechnik GmbH 2017... - Page 23 WORKSHOP NEWS You are interested in the possibilities of use of our fine-welding devices? Or you are searching for one or another tip on working with your PUK? Then just sign up for our newsletter on www.lampert.info! VISIT OUR SHOWROOM! Our video library is showing many applications from everyday goldsmith activities, our photo gallery various examples of use.
- Page 24 Born in Germany. Lampert Werktechnik GmbH Ettlebener Straße 27 D-97440 Werneck Tel. +49.9722.9459-0 mail@lampert.info www.lampert.info • • • • •...
Need help?
Do you have a question about the PUK D3 and is the answer not in the manual?
Questions and answers