
Related Manuals for Fairford agility Series


Summary of Contents for Fairford agility Series
- Page 1 Innovation in soft starter technology agility USER MANUAL MAN-AGY-001. Version 04...
- Page 2 agility Series Soft Start User Manual MAN-AGY-001. Version 04. 21/09/2018...
- Page 3 Enquiries about copyright of Fairford Electronics deliverables should be made to Fairford Electronics Ltd. If, by permission of the copyright owner, any part of this document is quoted, then a statement specifying the original document shall be added to the quotation.
-
Page 4: Table Of Contents
Contents Safety ..........................7 Mechanical Installation ....................8 Mounting ............................8 Requirements for an Enclosure ....................8 Enclosure Ventilation ........................8 Altitude Derate ..........................8 Dimensions ..........................9 Horizontal Mounting ......................... 10 Mechanical Specification ......................10 Electrical Installation ...................... 11 Warnings ............................ - Page 5 Trip and Fault Codes ......................36 Communication ....................... 39 Modbus RTU Serial Communications ..................39 Modbus RTU Communications Interface ................39 Modbus RTU Connections ......................39 Modbus Communications Configuration ................40 Transmission Modes ........................ 40 Message Structure For RTU Mode ..................40 Address .............................
- Page 6 Fuses ............................99 Rules for Specific Applications ....................99 High Inertia Loads ........................99 Frequent Starting ........................99 Soft-Stopping ..........................99 Reversing Configuration ......................99 Replacement of Fluid Couplings .................... 100 Two-speed Motor Applications ....................100 Overhauling Loads ........................100 Application Table ........................
- Page 7 Power Supply (AGY-020) ......................115 Connections ..........................116 Control Terminal ........................116 Functions ..........................116 3-Wire Control Using AGY-020 ....................117 2-Wire Control Using AGY-020 ....................117 Fan (AGY-030) ........................... 118 Remote Keypad (AGY-010) ...................... 119 Network Connection ....................... 119 Keypad Connection and Operation ...............
-
Page 8: Safety
Safety Important information Installers should read and understand the instructions in this guide prior to installing, operating and maintaining the soft starter. The following symbols may appear in this guide or on the soft starter to warn of potential hazards or to draw attention to certain information. Dangerous Voltage Indicates the presence of a hazardous voltage which could result in personal injury or death. -
Page 9: Mechanical Installation
Mechanical Installation Mounting Fix the unit to a flat, vertical surface using the mounting holes (or slots) on its base-plate. The mechanical outline diagrams, shown on Page 8, give the dimensions and mounting hole positions for each model. Ensure that: The orientation of the unit has the ‘TOP’... -
Page 10: Dimensions
Mechanical Installation (continued) Dimensions AGY-101 to AGY-113 [ ] = inch Weight 1.97kg (3.75lb) Fitting 75mm [2.95] 75mm [2.95] Air Flow agility Series Soft Start User Manual MAN-AGY-001. Version 04. 21/09/2018... -
Page 11: Horizontal Mounting
Mechanical Installation (continued) Horizontal Mounting The agility unit may be mounted horizontally if required. It will be necessary to apply a deration to the unit power in this instance – see Horizontal Rating Table (Page 13) Mechanical Specification Mechanical Specifications Model (AGY-) Frame Size Heat output (W) -
Page 12: Electrical Installation
Electrical Installation Warnings Isolation Caution: agility uses semiconductor devices in the main circuit and is not designed to provide isolation. For this reason isolation means must be installed in the supply circuit in accordance with the appropriate wiring and safety regulations Electrical Control Supply Requirements All electrical connections are made to power input and output terminals, control terminals and an earth stud. -
Page 13: General Specification
Electrical Installation (continued) General Specification Product Standard EN 60947-4-2: 2012 Rated operational voltages 200Vac to 600Vac (See Key to part numbers) Rated operational current See Rating Table Rating index See Rating Table Rated frequency/frequencies 50 - 60Hz ± 5Hz Rated duty Uninterrupted. - Page 14 Electrical Installation (continued) General Specification (continued) Control Supply input 0, 24V Kind of current, rated Standard supply frequency d.c. Rated voltage U 24Vd.c. Maximum power consumption 12VA Programmable opto-isolated Control inputs D1, D2 circuit Common input, marking Kind of current, rated frequency d.c.
- Page 15 Electrical Installation (continued) Rating Table – Vertical Mounting Trip Class 10 Trip Class Trip Class 30 : AC-53a: : AC-53a: : AC-53a: 230V 400V 500V 200V 208V 220-240V 440-480V 550-600V 3.5-17: 90-5 4-19: 90-5 4-29: 90-5 AGY-101 AGY-101 AGY-103 AGY-101 AGY-103 AGY-105 AGY-103...
-
Page 16: Short Circuit Protection
Electrical Installation (continued) Short Circuit Protection Type designation (AGY-) Rated operational current Rated conditional short circuit current Class J time-delay fuse Maximum rating Z UL Listed inverse-time delay circuit Maximum breaker rating Z Semiconductor fuse (class aR) Type Mersen 6,9 URD 30 _ duty ≤... -
Page 17: Electromagnetic Compatibility
Electrical Installation (continued) Electromagnetic Compatibility EMC Emission levels EN 55011 Class A EMC Immunity levels IEC 61000-4-2 8kV/air discharge or 4kV/contact discharge IEC 61000-4-3 10 V/m IEC 61000-4-4 2kV/5kHz (main and power ports) 1kV/5kHz (signal ports) IEC 61000-4-5 2kV line-to-ground 1kV line-to-line IEC 61000-4-6 NOTICE: This product has been designed for environment A. -
Page 18: Motor Overload Protection
Electrical Installation (continued) Motor Overload Protection agility provides full motor overload protection, configurable through the user interface. Overload trip settings are determined by the Motor Current setting and the Trip Class setting. Trip class choices are Class 10, Class 20, and Class 30. The agility soft starters are protected using full I T motor overload with memory. -
Page 19: Electrical Connections
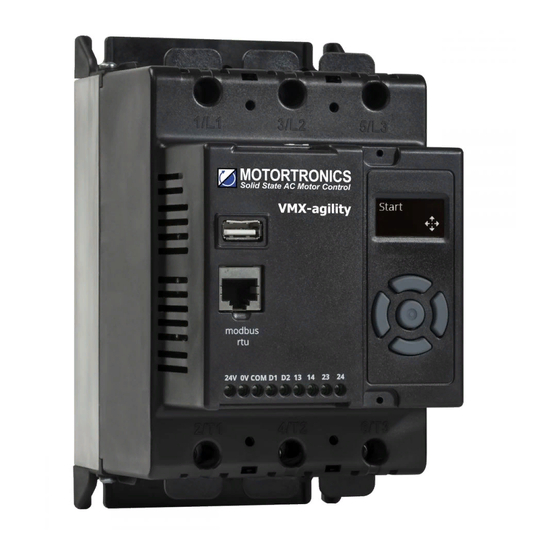
Electrical Installation (continued) Electrical Connections 3-Phase Electrical Supply Connections (L1, L2, L3) Connector RJ45 connector (Modbus RTU) Control Terminals AC Induction Motor Connections (T1, T2, T3) Main Circuit Wiring Diagram agility Series Soft Start User Manual MAN-AGY-001. Version 04. 21/09/2018... -
Page 20: Control Terminal Connection
Electrical Installation (continued) Control Terminal Connection Control Terminal Functions Terminal Description Function Note Selectable 24Vdc Control Supply +Us Control Supply -Us Digital Inputs Common Digital Input 1 Digital Input 2 13/14 Main Contactor Control (Run Relay) 21/22 Fault Relay #1 24V dc Specification: 24V 10VA, residual ripple < 100Mv, spikes/switching peaks < 240mv, #2 The voltage applied to the digital inputs D1 and D2 must not exceed 24V dc #3 230Vac, 1A, AC15. -
Page 21: 3-Wire Control Circuit Wiring Diagram
Electrical Installation (continued) 3-Wire Control Circuit Wiring Diagram 24Vdc Start Stop Note: 110 – 230V control supply possible with optional control supply module (AGY-020) 2-Wire Control Wiring Diagram 24Vdc Stop K2.2 Note: 110 – 230V control supply possible with optional control Start K2.1 supply module (AGY-020) -
Page 22: Configuration And Parameters
Configuration and Parameters Display and Controls READY Local Local Status messages Instantaneous motor current Control scheme: Local, Control terminal, Modbus RTU Keypad guidance wizard: Displays which keys are valid for specific menu items ... -
Page 23: Auto Setup Procedure (Auto App)
Configuration and Parameters (continued) Auto Setup Procedure (Auto App) Allows the user to change all of the parameters at once to settings that are typical for general applications. One or more parameters as can be adjusted to fine tune the settings for your specific application. Setup by Individual Parameter Settings (Advanced) Allows the user to change the parameter settings one at a time. -
Page 24: Operation Local Motor Start
Configuration and Parameters (continued) Operation Local Motor Start Ready Local Start Local Example Navigation Method Ready Quick Return to Status Screen Local Monitor I1 rms I2 rms I3 rms Overload Rotation Delay Angle Frequency Serial Number A1234567 Fire Mode Auto Application Setup Application Application Application... -
Page 25: Menu Structure
Menu Structure Local Level 0 Level 1 Level 2 Level 3 Monitor I rms I1 rms I2 rms I3 rms Overload Rotation HS Temp TempUnit Delay Angle Frequency RX Bytes TX Bytes RX Errors TX Errors StartsHr Initial Deg C Auto Setup Application Default... - Page 26 Menu Structure (continued) Advanced Start Param Start Time Initial Volts I Limit I Limit Start Limit Amps Limit Time Kick Start Kick Start Kick Time Kick Level Start Delay Stop Param Stop Time Limit I Limit Stop Limit Amps Limit Time Protection Motor Amps Overload...
- Page 27 Advanced Trips Trip Sens Phase Loss Sensor Loss Ph / SCR Hz HighLow I Low I Limit Start I Limit Stop Overload Shearpin Comms Remote CT Fault L1L2L3 L1L3L2 Operation 1 Operation 2 Input Cntrl Mode Cntrl Funct Output RelayFunct Save Log Trip Log Trip 0...
-
Page 28: Function Descriptions
Menu Structure (continued) Device Language Factory Rst Date DateFormat Time To USB From USB Screen Lock Enable Passcode Disp Time Scroll Firmware Version Update Network Address Parity Baud CommsTime Keypad Keypad Pwr Hardware AGY100 Ver AGY200 Ver AGY300 Ver AGY400 Ver ODB Type About Serial No... - Page 29 Address Sets the Modbus address number Application The unit has numerous pre-set applications built in as standard. Select the application best suited to the load. The selected application will automatically change several parameters and functions. Depending on the application loaded the “Trip Class" may also change Baud Sets the serial communications baud rate The available baud rates are 9600 19200 38400 57600 or 115200...
- Page 30 CT Fault Detects if the internal current sensors have failed or reading a very low level. Trip On: The unit will trip if the internal current sensors fail or the current measured falls to a very low level Trip Off: Will continue to operate even if the sensor has failed. Measurements and overload protection may be effected Date Enter current date...
- Page 31 I rms The RMS motor current Indicates average current of the 3 phases. I Start Displays the peak current during the last start. I Stop Displays the peak current during the last stop. I1 rms The RMS current on phase L1 I2 rms The RMS current on phase L2 I3 rms...
- Page 32 Modbus Enable Enable using Modbus On: The unit is enabled Off: The unit is disabled Modbus Reset Reset using Modbus On: The initial state required for a reset. Off: The final state required for a reset. To reset pulse high and then low Modbus Start Start / Stop using Modbus On: Starts the unit...
- Page 33 Overload Trip The unit has an "Overload" function that is an electronic equivalent to a thermal overload. Trip On: The unit will trip when the "Overload" capacity (Modbus PNU 27) exceeds 100% Trip Off: The unit will continue to operate regardless of motor current level Ovld Amps Determines the level in Amps at which the overload will start.
- Page 34 Save Log Download the full log file on to the USB stick The unit logs several parameters during normal and fault conditions Data is stored in CSV format. Please send all downloaded files to Fairford on request Serial No The device serial number stored at the point of manufacture Shear Amps The current in Amps that will cause a "Shear Trip"...
- Page 35 Store Param Saves all Read /Write parameters to non-volatile memory Yes: Parameters are permanently written No: Parameters remain changed until next power cycle System Detects if the Control Board has failed to operate normally Trip On: System Trip enabled. Trip Off: System Trip disabled. T Start Displays the time of the last start T Stop...
- Page 36 Trip 0 Displays the last Fault trip Trip 1 Displays the last Fault trip -1 Trip 2 Displays the last Fault trip -2 Trip 3 Displays the last Fault trip -3 Trip 4 Displays the last Fault trip -4 Trip 5 Displays the last Fault trip -5 Trip 6 Displays the last Fault trip -6...
-
Page 37: Trip And Fault Codes
Trip and Fault Codes Trip Code Trip Name Description 101-199 Ph Loss Input phase voltage missing or motor discontinuity at the instant of startup. Check all incoming and outgoing connections. If a main contactor is being controlled by a digital output check contactor delay is sufficient 201-299 Thermal... - Page 38 Trip and Fault Codes (continued) Trip Code Trip Name Description 1701-1799 Comms Communications failure The command or status PNU has not been polled in the time set in the "Timeout" period If the communication trip is disabled the Unit cannot be stopped in the communications fail 1801-1899 Bypass...
- Page 39 Trip and Fault Codes (continued) Trip Code Trip Name Description 13001-13099 Op2 Mon Fail Safe operation A process associated with the Control Board has been affected and is unable to recover automatically 14001-14099 Op2 Men Fail Safe operation A process associated with the Control Board has been affected and is unable to recover automatically 15001-15099 Op2 Keys...
-
Page 40: Communication
Communication Modbus RTU Serial Communications Modbus RTU Communications Interface All agility soft starts support Modbus RTU as standard. The RS-485 communications are accessible from the RJ45 connector (see below). RJ45 Socket Not connected 2: Not connected 3: Not connected 4: TXD1-B-OUT 5: TXD0-A-OUT 6: Reserved* 7: Reserved*... -
Page 41: Modbus Communications Configuration
Communication (continued) Modbus Communications Configuration The Modbus communication settings may be configured from the Device menu: Device >> Networks >> Modbus Network Settings >> Address (1 – 32) • Device >> Networks >> Modbus Network Settings >> Baud (9600 – 115200) •... -
Page 42: Crc
Communication (continued) The used method is the CRC-16 (Cyclic Redundancy Check). This field is formed by two bytes; where first the least significant byte is transmitted (CRC-), and then the most significant (CRC+). The CRC calculation form is described in the Modbus RTU protocol specification. Supported Functions Modbus RTU specification defines the functions used to access different types of data. -
Page 43: Write Multiple Registers
Communication (continued) Write Multiple Registers Description: writing register blocks of holding register type (block R/W limited to 8 registers). Function code: 16 example • Modbus Function 16 Transaction Table Query Response Field Hex Byte Field Hex Byte Slave address Slave address Function Function Address Hi... -
Page 44: Modbus Rtu Parameters
Modbus RTU Parameters PNU Name Description Options Words Type Units Detail Cntrl Selects the method for starting and 0=Local, Multiplier: 1 Mode controlling the motor 1=Remote, Divisor:1 Local : Control using the button on the 2=Modbus. Offset: 0 keypad Min: 0 Remote : Control using the terminals. - Page 45 Modbus RTU Parameters (continued) Name Description Options Words Type Units Detail Start Time allowed for external contactors to Multiplier: 1 Delay close. Divisor:1 Increase if contactors are driven by Offset: 0 buffer relays or motor trips on phase Min: 100 loss when start signal applied Max: 30000 Decrease if response to start signal...
- Page 46 Modbus RTU Parameters (continued) Name Description Options Words Type Units Detail Application The Unit has numerous pre-set See Table 1 Multiplier: 1 applications built in as standard. Divisor:1 Select the application best suited to the Offset: 0 load. Min: 0 The selected application will Max: 23 automatically change several...
- Page 47 Modbus RTU Parameters (continued) Name Description Options Words Type Units Detail Rated Unit Class20 / Class30 Current Rating Multiplier: 1 Amps Divisor:1000 Offset: 0 Min: 17000 Max: 66000 Default: 17000 Unit Amps Unit Class10 Current Rating Multiplier: 1 Divisor:1000 Offset: 0 Min: 17000 Max: 66000 Default:...
- Page 48 Modbus RTU Parameters (continued) Name Description Options Words Type Units Detail Overload The Unit has an "Overload" function that Multiplier: 100 is an electronic equivalent to a thermal Divisor:16384 overload. Offset: 0 Min: 0 Overload displays the overload capacity Max: 16384 which is a measure of how close the Unit Default: 0 to tripping on "Overload Trip"...
- Page 49 Offset: 0 normal and fault conditions Min: 0 Data is stored in CSV format. Please send Max: 1 all downloaded files to Fairford on request Default: 0 Date Enter current date Multiplier: 1 Date format can be set to either Divisor:1 dd/mm/yyyy or mm/dd/yyyy.
- Page 50 Modbus RTU Parameters (continued) PNU Name Description Options Words Type Units Detail Rotation Indicates the phase sequence of the 0=------, Multiplier: 1 incoming supply. 1=L1L2L3, Divisor:1 RYB = ABC = L1-L2-L3 2=L1L3L2. Offset: 0 RBY = ACB = L1-L3-L2 Min: 0 Max: 2 Default: 0 HS Temp C...
- Page 51 PNU Name Description Options Words Type Units Detail I2 rms The RMS current on phase L2 Multiplier: 1 Divisor:1000 Offset: 0 Min: 0 Max: 24 Default: 0 I3 rms The RMS current on phase L3 Multiplier: 1 Divisor:1000 Offset: 0 Min: 0 Max: 24 Default: 0...
- Page 52 PNU Name Description Options Words Type Units Detail Phase Loss Detects for various issues when the start 0=Trip Off, Multiplier: 1 signal is applied 1=Trip On. Divisor:1 Detects for input phase loss / input phase Offset: 0 relationship / motor side loss Min: 0 Trip On: Trips if there is an input phase loss Max: 1...
- Page 53 PNU Name Description Options Words Type Units Detail I Low This can be used to detect if the motor is 0=Trip Off, Multiplier: 1 running lightly loaded. 1=Trip On. Divisor:1 Offset: 0 Trip On: The Unit will trip. This feature is Min: 0 not active during soft start and soft stop.
- Page 54 PNU Name Description Options Words Type Units Detail Comms Detects if the communications bus has 0=Trip Off, Multiplier: 1 failed or become inactive. 1=Trip On. Divisor:1 To keep the bus active there must be at Offset: 0 least one Modbus read or write (any PNU) Min: 0 during the "Comms Time”...
- Page 55 PNU Name Description Options Words Type Units Detail Limit Amps The current in Amps at which the soft Start Multiplier: 1 ramp is held. Divisor:1000 Normally set to 350% of motor FLC. Offset: 0 Increase if motor fails to accelerate at Min: 0.5 x required rate PNU18...
- Page 56 PNU Name Description Options Words Type Units Detail Op Mode Allows the unit to operate with a single 0=3 phase , Multiplier: 1 phase motor 1=1 phase. Divisor:1 Offset: 0 3 phase: Set to control a three phase motor Min: 0 1 Phase: Set to control a single phase Max: 1 motor...
- Page 57 PNU Name Description Options Words Type Units Detail Trip 3 Displays the last Fault trip -3 See Table 3 Multiplier: 1 Divisor:1 Offset: 0 Min: 0 Max: 65535 Default: 0 Trip 4 Displays the last Fault trip -4 See Table 3 Multiplier: 1 Divisor:1 Offset: 0...
- Page 58 PNU Name Description Options Words Type Units Detail Trip 7 Displays the last Fault trip -7 See Table 3 Multiplier: 1 Divisor:1 Offset: 0 Min: 0 Max: 65535 Default: 0 Trip 8 Displays the last Fault trip -8 See Table 3 Multiplier: 1 Divisor:1 Offset: 0...
- Page 59 PNU Name Description Options Words Type Units Detail Kick Time Time that the torque pulse is applied to Multiplier: 1 load Divisor:1 Increase to provide more torque If the load Offset: 0 fails to break away. Min: 100 Decrease if the motor accelerates too Max: 2000 quickly.
- Page 60 PNU Name Description Options Words Type Units Detail I Start Displays the peak current during the last Multiplier: 1 start. Divisor:1 Offset: 0 Min: 0 Max: 528 Default: 0 T Start Displays the time of the last start Multiplier: 1 Divisor:1 Offset: 0 Min: 0...
- Page 61 PNU Name Description Options Words Type Units Detail Total Events The total number of events that have been Multiplier: 1 recorded in the log file Divisor:1 Offset: 0 Min: 0 Max: 65535 Default: 0 AGY200 Ver The hardware version for Main PCB Multiplier: 1 Divisor:1 Offset: 0...
- Page 62 Trip On: System Trip enabled. Min: 0 Trip Off: System Trip disabled. Max: 1 Default: 1 Rerate Key The Key issued by Fairford to re rate the Multiplier: 1 unit to a different current rating Divisor:1 Use this parameter to enter the key Offset: 0 manually.
- Page 63 PNU Name Description Options Words Type Units Detail Modbus Enable using Modbus 0=Off, 1=On. Multiplier: 1 Enable Divisor:1 On: The unit is enabled Offset: 0 Min: 0 Off: The unit is disabled Max: 1 Default: 0 Modbus Start / Stop using Modbus 0=Off, 1=On.
- Page 64 PNU Name Description Options Words Type Units Detail TempUnit Selects °C or °F for displayed temperatures 0=°C, 1=°F. Multiplier: 1 °C: All displayed temperatures are °C Divisor:1 °F: All displayed temperatures are °F Offset: 0 Min: 0 Max: 1 Default: 0 Disp Time Time for backlight on display Multiplier: 1 After the period set the back light on the...
- Page 65 PNU Name Description Options Words Type Units Detail Parity Sets the serial communications parity bit 0=Odd, Multiplier: 1 The available parity options are None Even 1=Even. Divisor:1 Offset: 0 Also sets the stop bits. No parity uses 2 Min: 0 stop bits.
- Page 66 PNU Name Description Options Words Type Units Detail RelayFunct Allows the n/c relay (21 -22) to be 0=22 = TOR, Multiplier: 1 reconfigured 1=22 = ERR. Divisor:1 Available options are 22 = TOR or 22 = Offset: 0 Min: 0 Max: 1 Default: 1 155 Reserved...
- Page 67 PNU Name Description Options Words Type Units Detail ODB Type Reserved for future use Multiplier: 1 Divisor:1 Offset: 0 Min: 0 Max: 65535 Default: 1 160 Patch Addr 1 Used to arrange the Modbus Parameters Multiplier: 1 into Groups Divisor:1 Refer to 'Special Modbus parameters' Offset: 0 document for more details...
- Page 68 PNU Name Description Options Words Type Units Detail 163 Patch Addr 4 Used to arrange the Modbus Parameters Multiplier: 1 into Groups Divisor:1 Refer to 'Special Modbus parameters' Offset: 0 document for more details Min: 0 Max: 65535 Default: 0 164 Patch Addr 5 Used to arrange the Modbus Parameters Multiplier: 1 into Groups...
- Page 69 PNU Name Description Options Words Type Units Detail 167 Patch Addr 8 Used to arrange the Modbus Parameters Multiplier: 1 into Groups Divisor:1 Refer to 'Special Modbus parameters' Offset: 0 document for more details Min: 0 Max: 65535 Default: 0 168 Patch Addr 9 Used to arrange the Modbus Parameters Multiplier: 1 into Groups...
- Page 70 PNU Name Description Options Words Type Units Detail Patch Addr Used to arrange the Modbus Parameters Multiplier: 1 into Groups Divisor:1 Refer to 'Special Modbus parameters' Offset: 0 document for more details Min: 0 Max: 65535 Default: 0 Patch Addr Used to arrange the Modbus Parameters Multiplier: 1 into Groups...
- Page 71 PNU Name Description Options Words Type Units Detail Patch Addr Used to arrange the Modbus Parameters Multiplier: 1 into Groups Divisor:1 Refer to 'Special Modbus parameters' Offset: 0 document for more details Min: 0 Max: 65535 Default: 0 Window 1 Used to arrange the Modbus Parameters Multiplier: 1 into Groups Divisor:1...
- Page 72 PNU Name Description Options Words Type Units Detail Window 4 Used to arrange the Modbus Parameters Multiplier: 1 into Groups Divisor:1 Refer to 'Special Modbus parameters' Offset: 0 document for more details Min: 0 Max: 65535 Default: 0 Window 5 Used to arrange the Modbus Parameters Multiplier: 1 into Groups Divisor:1...
- Page 73 PNU Name Description Options Words Type Units Detail Window 8 Used to arrange the Modbus Parameters Multiplier: 1 into Groups Divisor:1 Refer to 'Special Modbus parameters' Offset: 0 document for more details Min: 0 Max: 65535 Default: 0 Window 9 Used to arrange the Modbus Parameters Multiplier: 1 into Groups Divisor:1...
- Page 74 PNU Name Description Options Words Type Units Detail Window 12 Used to arrange the Modbus Parameters Multiplier: 1 into Groups Divisor:1 Refer to 'Special Modbus parameters' Offset: 0 document for more details Min: 0 Max: 65535 Default: 0 Window 13 Used to arrange the Modbus Parameters Multiplier: 1 into Groups Divisor:1...
- Page 75 PNU Name Description Options Words Type Units Detail Window 16 Used to arrange the Modbus Parameters Multiplier: 1 into Groups Divisor:1 Refer to 'Special Modbus parameters' Offset: 0 document for more details Min: 0 Max: 65535 Default: 0 Window 17 Used to arrange the Modbus Parameters Multiplier: 1 into Groups Divisor:1...
- Page 76 PNU Name Description Options Words Type Units Detail Window 20 Used to arrange the Modbus Parameters Multiplier: 1 into Groups Divisor:1 Refer to 'Special Modbus parameters' Offset: 0 document for more details Min: 0 Max: 65535 Default: 0 Window 21 Used to arrange the Modbus Parameters Multiplier: 1 into Groups Divisor:1...
- Page 77 PNU Name Description Options Words Type Units Detail Window 24 Used to arrange the Modbus Parameters Multiplier: 1 into Groups Divisor:1 Refer to 'Special Modbus parameters' Offset: 0 document for more details Min: 0 Max: 65535 Default: 0 Total Us On The total number of times the unit has Multiplier: 1 been powered up.
- Page 78 PNU Name Description Options Words Type Units Detail Total Stops The total number of successful stops / soft Multiplier: 1 stops Divisor:1 Offset: 0 Min: 0 Max: 65535 Default: 0 Total Trips The total number of trips Multiplier: 1 Divisor:1 Offset: 0 Min: 0 Max: 65535...
- Page 79 PNU Name Description Options Words Type Units Detail 213 Diagnostic 2 Used for diagnostic purposes only Multiplier: 1 Divisor:1 Offset: 0 Min: 0 Max: 65535 Default: 65535 214 Diagnostic 3 Used for diagnostic purposes only Multiplier: 1 Divisor:1 Offset: 0 Min: 0 Max: 65535 Default: 65535...
- Page 80 PNU Name Description Options Words Type Units Detail 217 Diagnostic 6 Used for diagnostic purposes only Multiplier: 1 Divisor:1 Offset: 0 Min: 0 Max: 65535 Default: 65535 Ovld Amps Determines the level in Amps at which the Multiplier: 1 overload will start. Divisor:1000 Normally set to 115% of the set "Motor Offset: 0...
- Page 81 PNU Name Description Options Words Type Units Detail L1L2L3 Determines if supply phase sequence is 0=Trip Off, Multiplier: 1 incorrect for motor rotation 1=Trip On. Divisor:1 On: Trips if the phase sequence is L1-L2-L3. Offset: 0 Off: The Unit will continue to operate Min: 0 normally Max: 1...
- Page 82 PNU Name Description Options Words Type Units Detail RX Errors Diagnostic parameter for Modbus Multiplier: 1 communications Divisor:1 Indicates whether the data has errors Offset: 0 Min: 0 Max: 65535 Default: 0 RX TMO Er Diagnostic parameter for Modbus Multiplier: 1 communications Divisor:1 Indicates a timing error...
- Page 83 Divisor:1 Indicates whether the data has errors Offset: 0 Min: 0 Max: 65535 Default: 0 StopCode Diagnostic parameter Multiplier: 1 File For Fairford use only Divisor:1 Offset: 0 Min: 0 Max: 65535 Default: 65535 StopCode Diagnostic parameter Multiplier: 1 File_1...
- Page 84 PNU Name Description Options Words Type Units Detail StopCode Diagnostic parameter Multiplier: 1 Pos_1 For Fairford use only Divisor:1 Offset: 0 Min: 0 Max: 65535 Default: 65535 Limit Amps The current in Amps at which the soft stop Multiplier: 1 ramp is not allowed to go above.
- Page 85 Must be turned "On" if the remote keypad Offset: 0 is connected Min: 0 Max: 1 Default: 0 Service No Diagnostic parameter Multiplier: 1 For Fairford use only Divisor:1 Offset: 0 Min: 0 Max: 65535 Default: 0 agility Series Soft Start User Manual...
- Page 86 Off: If the text is too long for the display the Max: 1 message will be truncated Default: 1 Reset Ovld Factory parameter 0=Off, 1=On. Multiplier: 1 Fairford use only Divisor:1 Offset: 0 Min: 0 Max: 1 Default: 0 StartsHr...
- Page 87 Table 2 Table 1 PNU 24 Value Status PNU 16 Value Auto Application Starting Default Fire Mode Heavy Limit Start Agitator Limit Stop Compressor 1 Stopping Compressor 2 Running Conveyor Loaded Ready Conveyor Unloaded Tripped Crusher Disabled Fan High Inertia Initialisation Fan Low Inertia Grinder...
- Page 88 Table 3 PNU 78 thru 85 Trip Status Ph Loss Thermal Ph / SCR Mot Side Freq Uc Low SCR Sen 1000 SCR S/C 1100 Low Amp 1200 Limit 1300 Overload 1400 Shear 1500 1600 External 1700 Comms 1800 Bypass 1900 FireMode 2000...
-
Page 89: Special Modbus Registers
Special Modbus Registers List of special Modbus registers, descriptions, and usage. Window registers section There is a section of Modbus registers that can be used for special (user programable) purposes. Register Name Reg ID Description Window View Selects what is viewed through the window 0 –... - Page 90 WORD(s) in the Window section (176 to 192) will mirror the data and function of that register. For example, if register 24 (Motor State) is set into register 160 (Patch Address 1) then the value report in 176 (Window 1) from then on. Register Register Register...
- Page 91 Modbus RTU Parameters (continued) 2) Log record access. Log record access is enabled when the Window View register (157) is set a to Log Records (1). The event log is a list of event records stored within a non-volatile store in the system. Register 158 (Window Code) can be set to one of the following values.
- Page 92 Modbus RTU Parameters (continued) Generic Word PNU Register number Data Description 176,177 Record Index number 178,179,180 Date and Time when the event was recorded. See date Time format. See appendix. Event type. See event type codes. See appendix. 181 to 199 Event data.
- Page 93 Modbus RTU Parameters (continued) Notes: Date/Time format. The Date and Time is recorded in three consecutive registers. This is true for Modbus registers Date, Time, Saved Date, Saved Time and the Time stamps shown in the Register Description Detail Bit Layout of each 16 bit words Ordinal Date Bits 0 - 4...
- Page 94 Modbus RTU Parameters (continued) Event Data. Initialise Power Off Start Dwell Stop Tripped Software Software Software Version Version Version Model Overload Model Number Number Rated Motor State Rated Amps Amps Motor Motor Amps Amps Unit Amps Rated Amps Trip Class Frequency Rotation Mean RMS...
-
Page 95: Modbus Pnu Alphabetical Cross Reference
Modbus RTU Parameters (continued) Modbus PNU Alphabetical Cross Reference Name Name Name Name Address Kick Level Patch Addr 8 Trip 0 AGY100 Ver Kick Start Patch Addr 9 Trip 1 AGY200 Ver Kick Time Ph / SCR Trip 2 AGY300 Ver L1L2L3 Phase Loss Trip 3... -
Page 96: Updating Firmware
. Other flash drives may not physically fit, or may not perform correctly. Available to purchase from Fairford Electronics Ltd. Download a new firmware zip file from: http://www.fairford.com/download/agility • firmware/ Copy the zip file into a suitable location on your PC that you can extract all of the firmware •... - Page 97 Updating Firmware (continued) Double click on the new directory and inside to display of the unit update files. Select all files and copy them to the route directory of the USB flash drive. Power down the agility unit and insert the USB stick with the upgrade files into the corresponding socket on the front panel.
-
Page 98: Applications
“Fairford System” of microprocessor-based optimising soft-starters which have been used world-wide in critical and non-critical systems. Since 1983, Fairford System soft- starters have successfully operated with almost every type of load and environment from the Antarctic to the Jungle. -
Page 99: Maximum Motor Cable Length
Applications (continued) Maximum Motor Cable Length The length of the cable between the output terminals of the starter and the motor should not normally be greater than 100 metres. Power Factor Correction Capacitors Power factor correction capacitors applied to a single motor MUST always be connected by a separate contactor placed on the SUPPLY side of the agility soft-start. -
Page 100: Eu Compliance With The Emc Directive
If this is not the case then a larger soft-start may be required. (Please refer to Fairford for further information.) Soft-Stopping Soft-stopping can reduce positive surge pressures in pipelines on shutdown. It is necessary to make sure that the ramp-down time is long enough to remove the energy from the fluid before the firing of the thyristors is stopped, otherwise the surge pressure may still be present. -
Page 101: Replacement Of Fluid Couplings
Applications (continued) Replacement of Fluid Couplings Soft-starters can replace fluid couplings yielding benefits of higher efficiency running and lower costs to the user. If the coupling is used to magnify the available breakaway torque, it may be necessary to replace the fitted motor with another of a larger size or one with a high starting torque characteristic before a soft-start can be employed. - Page 102 Applications (continued) Applications Breakaway Application Torque Remarks (%FLT) Agitator – Air compressor- rotary, unloaded 25–35 – start Air compressor- reciprocating, 50–100 – unloaded start Air compressor- screw type, Usually two-pole motor unloaded start Ball mill 30–50 Eccentric load, needs high starting torque motor Carding machine Often high inertia Centrifuge...
-
Page 103: Concepts And Principles Of Fixed-Speed Induction Motor Starting And Control
Applications (continued) Applications (continued) Table 8.2.1– Applications Breakaway Table 8.2.1– Applications Application Torque Remarks (%FLT) Rolling mill 30–50 – Saw, band 10–35 – Saw, circular 25–50 May be high inertia; Plug brake may be useful Screen, vibrating 30–60 – Transformers, voltage regulators Change firing mode Tumblers 30–100... - Page 104 Applications (continued) mechanical form, usually as a shaft rotating at a speed fixed by the frequency of the supply. The power available from the shaft is equal to the torque (moment) multiplied by the shaft speed (rpm). From an initial value at standstill, the torque alters, up or down, as the machine accelerates, reaching a peak at about two thirds full speed, finally to become zero at synchronous speed.
- Page 105 Applications (continued) The Induction Motor (continued) The acceleration of a motor-load system is caused by the difference between the developed torque (motor) and the absorbed torque (load), and is shown by the shaded area in the next figure: Torque/Speed Curve – Accelerating Torque Obviously, the larger the difference, the faster the acceleration and the quicker full speed is reached - and, coincidentally, the greater the stresses experienced by the supply and drive systems during the acceleration process.
-
Page 106: Starting Induction Motors
Applications (continued) Torque/Speed Curve – High Starting Torque Starting Induction Motors Starting a de-magnetised induction motor from standstill is a demanding and complex process. At the instant of switching all the energy necessary to magnetise the motor, to provide the acceleration force, and to supply the kinetic energy of the rotor and load, must be present together with the energy to overcome the mechanical and electrical losses. - Page 107 Applications (continued) reduced transmission equipment life and higher risk of motor failure, particularly when frequent starting and stopping is needed. In larger sized motors special strengthening is necessary, at higher cost, before they can be safely used with direct-on-line starting. However, the shortcomings of the direct-on-line starter have been recognised ever since motors have been used and alternative systems have been developed over the years to reduce the damaging effects of this form of control.
-
Page 108: The Semiconductor Motor Controller
Applications (continued) line). Combined with the severe effects of the re-switching surges, and the additional costs of bringing six conductors from the motor to the starter instead of only three, star-delta only offers an imperfect solution to the problem of starting the induction motor. Method C: Primary Resistance Starter It has long been recognised that the transition step in the star-delta system was a source of problems such as welded contactors, sheared drive shafts etc., and for many years a method of... -
Page 109: Running Induction Motors
Applications (continued) proportional to the square of the applied voltage, the starting torque follows the same pattern giving the characteristic smooth, stepless start of the soft-starter. Running Induction Motors Once a start has been completed the motor operating efficiency becomes of interest. When working at or near full load, the typical 3-phase induction motor is relatively efficient, readily achieving efficiencies of 85% to 95%. -
Page 110: Reliability Considerations
Applications (continued) normally associated with motor start-up; this happens every time. Lastly, there is the absolutely stepless starting process, found only with the primary resistance or reactance electromechanical starters - but without the wasted energy, and with the opportunity to control the maximum current allowed to flow during the starting process. - Page 111 Applications (continued) products when specifying equipment for future installations. A particular advantage of the use of the optimising soft starter is its impact on the maintenance requirements of associated electro- mechanical equipment. Optimising lowers the surface temperature of the motor by reducing the losses within the motor. This prolongs the motor life - and reduces heating of the surrounding atmosphere in the process.
-
Page 112: Electromagnetic Compatibility (Emc)
Electromagnetic Compatibility (EMC) As supplied, all agility Soft Starters meet the standards of emission and immunity levels defined in the IEC 60947-4-2 and EN 60947-4-2 product standards for AC Semiconductor Motor Controllers and Starters. However, the EMC performance of the controller can be significantly affected by the manner in which it is incorporated into the system in which it is intended to operate. -
Page 113: Emc Basic Criteria
EMC (continued) EMC Basic Criteria The electromagnetic compatibility of a product is defined by two criteria: Immunity to electromagnetic disturbances generated externally to the product. The type and amount of conducted and radiated electromagnetic emissions emanating from the product. Ascertaining the nature of the power supply is of primary consideration when deciding on appropriate EMC requirements. -
Page 114: Emissions - Radio Frequency (Rf)
Only non-triplen (integer multiples of the third harmonic), odd harmonic frequencies are created, starting with and diminishing rapidly from the fifth harmonic, and virtually disappearing by the nineteenth harmonic. Emissions - Radio Frequency (RF) Radio frequency emissions are propagated in two ways: Conduction along the leads supplying the soft starter. -
Page 115: Strategies For Attaining And Maintaining Emc Compliance
In the case of an isolated or high impedance grounded system, seek advice from your supplier before fitting a capacitive high frequency filter to a agility Soft Starter. It is essential that the specifying authority, user, or installer has a clear knowledge of the type of network to which the product is to be installed before making decisions as to which EMC strategy to adopt. -
Page 116: Accessories
Accessories Power Supply (AGY-020) AGY-020 is a dedicated mains power supply for the agility soft start. In addition to allowing for mains control voltage operation, the power supply also allows for mains voltage digital control (D1/D2). Fitting Ensure terminals 24V, 0V, COM, D1 and D2 are fully open before installing power supply as shown below: ... -
Page 117: Connections
Connections Control Terminal Terminal Description Function Note Selectable 24Vdc Control Supply +Us Control Supply -Us Digital Inputs Common Digital Input 1 Digital Input 2 13/14 Main Contactor Control (Run Relay) 21/22 Fault relay Functions #1 The voltage applied to the digital inputs D1 and D2 must be the same as the supply voltage. #2 230Vac, 1A, AC15. -
Page 118: Wire Control Using Agy-020
3-Wire Control Using AGY-020 110/230Vac Start Stop 110/230Vac 2-Wire Control Using AGY-020 110/230Vac Stop K2.2 Start K2.1 110/230Vac agility Series Soft Start User Manual MAN-AGY-001. Version 04. 21/09/2018... -
Page 119: Fan (Agy-030)
Fan (AGY-030) AGY-030 increases the number of starts to 40/hour. The fan operates automatically during a soft start or soft stop and will continue to run if the heatsink temperature is > 45 C. The fan stops when the heatsink temperature has fallen below 40 Fitting Step 1. -
Page 120: Remote Keypad (Agy-010)
Remote Keypad (AGY-010) The remote keypad (AGY-010) can be used to control, monitor and program up to 32 agility soft starters. The unit is powered from the host agility and requires an Ethernet cable for communication (Modbus RTU). As the remote keypad acts as the Modbus master, no additional master units must be placed within the network. -
Page 121: Operation
MAN-AGY-001 and MAN-AGY-002 (both may be downloaded from www.fairford.co.uk). However, specific steps must be taken to connect the Remote Keypad to one or more agility host units. -
Page 122: Selecting Units To Monitor/Configure
If any of the Modbus communication parameters are dissimilar on the host unit or remote keypad, communication will not be established. The keypad will display the following screen: Only Right key is active May show: Local, Remote or Modbus By pressing the Right key, the user will be taken directly to the Modbus address selection menu: Use UP / DOWN Press CENTRE key keys to select... - Page 123 Procedure: Modbus address of connected unit 1. Press the ‘Right’ key 2. Address selection screen will be shown . Press the ‘Centre’ key. Display will change mode 4. Use ‘Up’ or ‘Down’ keys to change address to the desired number (agility address).
-
Page 124: Keypad Installation
Keypad Installation Mounting Fix the unit to a flat, vertical surface using the mounting holes in the keypad enclosure. The orientation of the unit has the ‘TOP’ uppermost. • The location allows adequate front access. • The screen can be viewed •... -
Page 125: Sizing Guide
Sizing Guide agility Typical Applications Standard Duty Medium Duty Heavy Duty Agitator Compressor - Centrifugal Crusher Compressor - Rotary Vane Compressor - Reciprocating Shredder Compressor -Unloaded Compressor - Rotary Screw Wood Chipper Conveyor - Unloaded Ball Mill Fan - High Inertia or >85A Bow Thruster - Zero Pitch Bow Thruster - Loaded Fan - Low Inertia or <85A... -
Page 126: Key To Part Numbers
Motor Rating Select Model Select Model Select Model 230V 400V 500V 200V 208V 220-240V 440-480V 550-600V 5 starts/hour @ 40 5 starts/hour @ 40 5 starts/hour @ 40 Step 4 - Select your AGY-101 AGY-103 AGY-105 motor Voltage and AGY-103 AGY-105 AGY-107 Horsepower/kW... - Page 127 Electric current, Danger to life! Livsfara genom elektrisk ström! Only skilled or instructed persons may carry out the operations. Endast utbildade elektriker och personer som undervisats i elektroteknik får utföra de arbeten som beskrivs nedan. Lebensgefahr durch Strom! Hengenvaarallinen jännite! Nur Elektrofachkräfte und elektrotechnisch unterwiesene Personen dürfen die Vain pätevät sähköasentajat ja opastusta saaneet henkilöt saavat suorittaa im Folgenden beschriebenen Arbeiten ausführen.
Need help?
Do you have a question about the agility Series and is the answer not in the manual?
Questions and answers