Sign In
Upload
Download
Table of Contents
Contents
Add to my manuals
Delete from my manuals
Share
URL of this page:
HTML Link:
Bookmark this page
Add
Manual will be automatically added to "My Manuals"
Print this page
×
Bookmark added
×
Added to my manuals
Manuals
Brands
Vacon Manuals
Media Converter
CX Series
User manual
Vacon CX Series User Manual
Frequency converters
Hide thumbs
1
Table Of Contents
2
3
4
5
6
7
8
9
10
11
12
13
14
15
16
17
18
19
20
21
22
23
page
of
23
Go
/
23
Contents
Table of Contents
Bookmarks
Table of Contents
Table of Contents
1 General
2 Specifications
3 Modbus
General
Modbus Frames
Modbus Functions
Error Detection
Exception Responses
4 Installation
VACON CX Modbus User's Manual
5 Connections
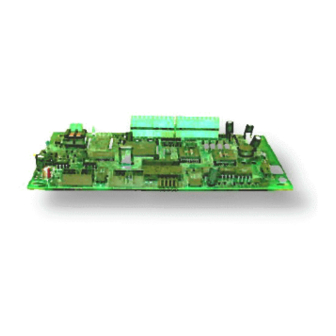
Board Layout
Modbus Connections
I/O-Control Connections
6 Commissioning
7 Modbus-Vacon CX Interface
Modbus Function Codes
Function Code 1, Read Control Bits
Function Code 2, Read Status Bits
Function Code 3, Read Parameters
Function Code 4, Read Variables
Function Code 5, Write Control Bits
Function Code 6, Write Parameter
Function Code 8, Diagnostic
VACON Control Interface
VACON Parameters
Frequency Reference
Monitoring Variables
Active Fault Code
Parameter Write and Read
CONNECTIONS (Small Modbus Board for Vacon CXS, Vacon CX211OPT)
Board Layout
Modbus Connections
Installation of CX211OPT in Vacon CXS Drives
Advertisement
Quick Links
1
General
2
Error Detection
3
Vacon Parameters
4
Active Fault Code
Download this manual
VACON
CX/CXL/CXS
FREQUENCY CONVERTERS
Modbus
Fieldbus
Option Board
USER'S MANUAL
Subject to changes without notice
F O R S M O O T H C O N T R O L
Table of
Contents
Previous
Page
Next
Page
1
2
3
4
5
Advertisement
Table of Contents
Need help?
Do you have a question about the CX Series and is the answer not in the manual?
Ask a question
Questions and answers
Related Manuals for Vacon CX Series
I/O Systems Vacon CXS Series Installation Manual
Cx/cxl/cxs frequency converters, i/o-expander board (17 pages)
Media Converter Vacon CX Manual
Frequency converters brake choppers and resistors (16 pages)
Media Converter Vacon CX Manual
Frequency converters, rfi/du/dt/sinus-filters (13 pages)
Media Converter Vacon CXL User Manual
Frequency converters profibus dp fieldbus option board (27 pages)
Media Converter Vacon CX Manual
Frequency converters (70 pages)
Media Converter Vacon CX User Manual
Frequency converters (52 pages)
Media Converter Vacon CX Installation Manual
Frequency converters (17 pages)
Media Converter Vacon CXL Series User Manual
Frequency converters (23 pages)
Media Converter Vacon Vacon NX OPTC6 User Manual
Canopen option board (48 pages)
Media Converter Vacon nx User Manual
Frequency converter (120 pages)
Media Converter Vacon 20 Complete User's Manual
Ac drives (156 pages)
Media Converter Vacon nxs/p User Manual
Lonworks option board opt-c4 (31 pages)
Media Converter Vacon NXP Manual
Frequency converters (55 pages)
Media Converter Vacon NX Service Manual
(113 pages)
Media Converter Vacon NXL series User Manual
(92 pages)
Media Converter Vacon NXP/C 5 Series User Manual
Frequency converters (84 pages)
This manual is also suitable for:
Cx211opt
Cxs series
Cxl series
Table of Contents
Print
Rename the bookmark
Delete bookmark?
Delete from my manuals?
Login
Sign In
OR
Sign in with Facebook
Sign in with Google
Upload manual
Upload from disk
Upload from URL


Need help?
Do you have a question about the CX Series and is the answer not in the manual?
Questions and answers