Table of Contents

Related Manuals for CDA sk450


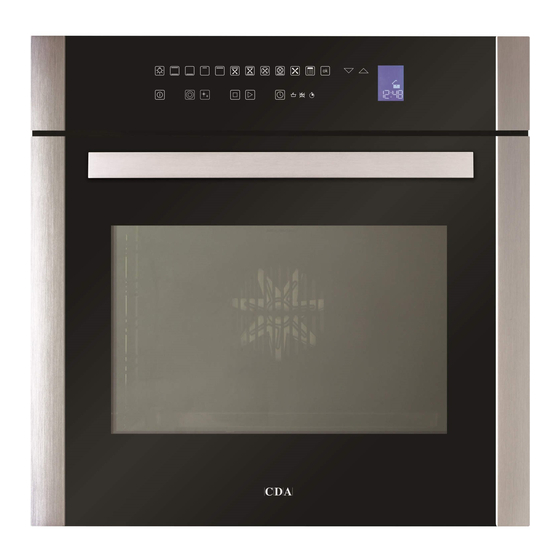
Summary of Contents for CDA sk450
- Page 1 Single Ecoclean Oven Manual for Installation, Use and Maintenance Customer Care Department • The Group Ltd. • Harby Road • Langar • Nottinghamshire • NG13 9HY T : 01949 862 012 F : 01949 862 003 E : service@cda.eu W : www.cda.eu...
- Page 2 Keep the oven door closed when in use. Appliance information: Please enter the details on the appliance rating plate below for reference, to assist CDA Customer Care in the event of a fault with your appliance and to register your appliance for guarantee purposes. Appliance Model...
- Page 3 CE Declarations of Conformity: This oven has been designed, constructed and marketed in compliance with safety requirements of EEC Directive 2006/95/EEC (Low voltage) and requirements of EMC Directive 2004/108/EEC. This appliance has been manufactured to the strictest standards and complies with all applicable legislation, including Electrical safety (LVD) and Electromagnetic interference compatibility (EMC).
- Page 4 Important • Read the user instructions carefully before using the oven for the first time. • Follow the instructions for first use of the oven. • Clean the oven regularly. • Remove spills as soon as they occur. • Always use oven gloves when removing shelves and trays from the ovens.
-
Page 5: Using The Touch Controls
Using the Touch Controls The touch controls should be used with the flat of your finger, rather than the fingertip. fig. 1... -
Page 6: The Control Panel
The Control Panel fig. 2 Oven light Conventional oven Warming oven Half grill Full grill Fanned grill Fan assisted oven Fan oven On/Off and key lock Rapid preheat Oven clean Stop Start... - Page 7 Fan oven + lower heat Defrost Auto recipe Confirm Scroll downward / Reduce power Scroll upward / Increase power Digital display Timer function Timer - cooking time Timer - end time Minute minder Decrease settings Increase settings...
-
Page 8: Before First Use
Before First Use When the oven is connected to the electrical supply for the first time, the display will ask you to select your language: Use the buttons to select the language you want, use the “ok” button to confirm your choice. The oven will remember your language preference, even after future power outages. - Page 9 General Settings & Use Clock To set the clock, touch the “Timer function” key for at least 3 seconds, the clock will show “00:00” with the separator dots flashing. Use the “+” and “-” keys to set the correct time: Five seconds after selecting the time the dots will stop flashing and the time will be set.
- Page 10 To turn the oven on Touch the “On/Off” key briefly, it gives one short beep followed immediately by a long one, the word ”ON” appears on the display for approximately one minute. To turn the oven off Touch the “On/Off” key briefly, it gives one long beep, the word ”OFF”...
- Page 11 Warming oven First touch the “On/Off” key (as p10), then touch the “Warming oven” key. The warming oven programme allows you to prove dough and bake blind, using just heat from below. The cooking temperature defaults to 50°C and can be set between 50-250 (MAX) °C in 5˚C increments.
- Page 12 Fanned grill First touch the “On/Off” key (as p10), then touch the “Fanned grill” key. The fanned grill programme uses the grill element for grilling and the fan to help circulate heat around the food. This is ideal for cooking on several shelves.
- Page 13 The temperature can be changed at any time by touching the keys. During heating the “°C” symbol flashes and the display shows the actual temperature in the oven. Fan oven + lower heat First touch the “On/Off” key (as p10), then touch the “Fan oven + lower heat”...
- Page 14 Use of the Food Probe The food probe is a thermometer which, when inserted into your food in the oven, makes it possible to check its internal temperature and use it to establish when it is cooked through. Using the food probe 1.
-
Page 15: Special Functions
If at any time you want to change either the probe set temperature or the oven setting temperature, touch the “ok” key to toggle the display between the setting temperatures. Then use the keys to adjust the setting. Note: When using the food probe the preset temperatures for all programmes are changed. -
Page 16: Automatic Recipes
preheat” key again, the oven beeps twice and the “Rapid preheat” key returns to white lighting to show this is deactivated. Oven clean This function cleans the oven’s catalytic side and rear panels by running a maximum temperature cycle. The “Oven clean” function can only be used when no cooking function has been selected. - Page 17 select the option required then confirm by touching the “ok” key for each selections. At the end of the process the oven displays the set cooking time; this may be adjusted up or dow using the “+” and “-” keys, then the “ok” to confirm.
- Page 18 Timer and Minute Minder Programming the oven This is only applicable to these functions:- Fan oven Fan oven + grill Fan grill Grill Any timer functions required should be set after the relevant cooking programme has been set, and before the “start” key is touched.
-
Page 19: Minute Minder
Programming delayed cooking This is achieved by programming an end time (when you want the food ready) and also programming a cooking time (as the recipe). Minute minder The minute minder is a timer that is independent of the function of the oven;... -
Page 20: Care And Maintenance
Care and Maintenance IMPORTANT: Always disconnect the appliance from the power supply before undertaking any cleaning or maintenance. You should always allow the oven to cool fully after use before undertaking any cleaning or maintenance. Changing the oven lamp • Remove all shelves and the grill pan from the oven. - Page 21 cause premature failure. Always use a clean cloth or gloves. • Reattach the glass cover, pressing it firmly into position. • Hook the catalytic panel back into position. • Replace the side rack by locating the two hooks at the top and clipping it back into position on its lower fixing stud.
- Page 22 Stainless steel can be effectively cleaned by simply using a dilute solution of water and mild detergent and drying to a shine with a clean cloth. Proprietary stainless steel cleaners are available. We recommend the CDA E-Cloth available from the CDA Sales Team for cleaning stainless steel surfaces. Enamelled parts All enamelled parts must be cleaned with a sponge and soapy water only, or other non-abrasive products.
- Page 23 Catalytic liners The catalytic oven liners must only be cleaned with fresh water. For stubborn stains, boil a cup of water in the oven for 2 to 3 minutes. Steam will soften the marks prior to cleaning. Grill When used regularly, the grill element does not need cleaning as the intense heat will burn off any splashes.
-
Page 24: Installation
Installation The appliance can be installed under a worktop or in a wall unit (open or closed) with the appropriate dimensions for recessed installation. Centre the oven in the unit so as to ensure a minimum distance of 10mm between the appliance and the surrounding unit. The material of the unit supporting the appliance must be heat resistant (or covered with a heat resistant material). - Page 25 Fig. 6 Fig. 7...
-
Page 26: Mains Electricity Connection
Mains Electricity Connection Warning! This appliance must be earthed Fig. 8 We recommend that the appliance is connected by a qualified electrician, who is a member of the N.I.C.E.I.C. and who will comply with the I.E.T. and local regulations. This appliance is intended to be connected to fixed wiring and is not suitable for connection to a 13A plug or 13A supply. - Page 27 This appliance is supplied with a 3 core mains cable; the wires are in accordance with the following code: Green and Yellow = Earth Blue = Neutral Brown = Live Please note: • The mains cable must only be replaced by a qualified electrician or service engineer and must be of equivalent or better rating (i.e.
- Page 28 Please contact our Customer Care Department for Service on the details below. Customer Care Department • The Group Ltd. • Harby Road • Langar • Nottinghamshire • NG13 9HY T : 01949 862 012 F : 01949 862 003 E : service@cda.eu W : www.cda.eu...
Need help?
Do you have a question about the sk450 and is the answer not in the manual?
Questions and answers