Table of Contents
Advertisement
Quick Links
Advertisement
Table of Contents

Related Manuals for UTStarcom UT618


Summary of Contents for UTStarcom UT618
- Page 1 Rhein Tech Laboratories Client: UTStarcom, Inc. 360 Herndon Parkway Model: UTS-618 Suite 1400 FCC ID: O6YUTS-618 Herndon, VA 20170 FCC: Part 24 http://www.rheintech.com Date: June 3, 2003 APPENDIX H: MANUAL Please see the following pages. Page 37 of 72...
- Page 2 UT618 User Manual Issue 0.2 Document No. 2XX 702 002...
- Page 3 UTStarcom, Inc.” Copyright Statement: “UTStarcom, Inc. 2003. All rights reserved. No part of this publication may be reproduced in any form or by any means without the prior written permission of UTStarcom, Inc.” Warranty Language: “The contents of this manual, whether in whole or in part, do not constitute...
- Page 4 Table of Contents iii Safety Precautions Introduction Thank you for purchasing your new UT618 phone. Please read this instruction manual thoroughly. The display screens, illustrations, etc., used in this document are created for instructional purposes and can differ slightly with the actual phone.
- Page 5 Table of Contents UT618 User Manual Explanation of Symbols Before using your phone, please read the “Safety Precautions” thoroughly. The cautions included here are provided to prevent danger to persons and property. The following explain the degree of danger and damage that could occur if these safety precautions are not observed.
- Page 6 Table of Contents v Handling the Phone, Battery, and Charger Use only the battery and charger approved for the UT618 phone. The use of any other types can result in damage to the phone, electric shock or the risk Compulsory of fire.
- Page 7 Table of Contents UT618 User Manual Handling the Phone Do not use the phone while driving. Park the vehicle before using the phone. Traffic safety first. Prohibited Observe any special regulations in effect in any area (hospital, aircraft, etc) when you have to use the phone.
- Page 8 UT618 User Manual Table of Contents vii Handling the Battery Do not dispose of the battery pack in a fire. They may explode. Check with local waste management codes for disposal instructions. Prohibited Do not force the battery pack into the phone. Improper installation can cause malfunctions or damage the battery pack.
- Page 9 Table of Contents UT618 User Manual Handling the Charger Use only a power source that provides the appropriate voltage (AC220V±10% or AC110V±10%) for the charger. An unsuitable power Compulsory source can result in damaging the charger, electric shock or the risk of fire.
- Page 10 UT618 User Manual Table of Contents ix Phone Information Avoid extremely high or low temperatures. Always use the phone in an environment with a temperature range of 10°C~40°C and humidity range of 45%~95%. For maximum signal strength and noise free operation, use away from electrical appliances such as TV, radio or personal computer.
-
Page 11: Table Of Contents
Table of Contents UT618 User Manual Table of Contents GETTING STARTED ............................1-1 ............................1-1 ACKAGE CONTENTS ..............................1-1 PECIFICATION ............................. 1-3 ANDSET ESCRIPTION ............................. 1-5 ESCRIPTION ............................1-6 ISPLAY NDICATOR 1.5.1 Main Display Indicator ..........................1-6 1.5.2 Sub Display Indicator..........................1-9 ’... - Page 12 UT618 User Manual Table of Contents xi 2.13 ID (N )..................2-15 ISPLAYING ALLER EEDS NETWORK SUPPORT 2.14 ........................2-16 EJECTING NIDENTIFIED 2.15 ..........................2-16 HOWING ALKING 2.16 ............................2-16 OWER EARCHING SETTING UP YOUR PHONE (MAIN MENU) ....................3-1 ................................3-1 ..............................
- Page 13 Table of Contents UT618 User Manual 3.18 ..............................3-25 ALCULATOR 3.19 LDS ( )........................3-26 NEEDS NETWORK SUPPORT 3.20 LTS ( ) ........................3-26 NEEDS NETWORK SUPPORT 3.20.1 Setting LTS ..............................3-26 3.20.2 Changing the LTS Password ........................3-27 3.21 ..........................3-28...
- Page 14 UT618 User Manual Table of Contents xiii ..............................4-13 ISPLAY 4.7.1 Scrolling ..............................4-13 PHONE BOOK................................5-1 ............................ 5-1 DITING A HONE 5.1.1 Editing a New Phone Book........................5-1 5.1.2 Resume Editing the Phone Book........................5-3 5.1.3 Modifying the Phone Book Contents ......................5-3 5.1.4 Adding Data to the Phone Book ........................5-3...
- Page 15 Table of Contents UT618 User Manual ............................... 7-1 ETUP 7.1.1 Online Sign Up ............................7-1 7.1.2 Changing/Resetting Center Number......................7-2 7.1.3 Sending Email Setting ..........................7-2 7.1.4 Receiving Email Setting..........................7-3 7.1.5 Signature (Sign)............................7-3 7.1.6 Quote Text in Reply to an Email........................7-3 ............................7-4...
- Page 16 UT618 User Manual Table of Contents xv 8.1.4 Saving Bookmark From Air Info .......................8-2 8.1.5 Saving Air Info Address From Mailbox.....................8-3 ........................... 8-3 ELETING A OOKMARK 8.2.1 Deleting Bookmarks Individually ......................8-3 8.2.2 Deleting All Bookmarks..........................8-4 8.2.3 Resetting Bookmark...........................8-4 ..........................8-5...
- Page 17 Table of Contents UT618 User Manual BLANK PAGE...
-
Page 18: Getting Started
Please check the package contents by comparing them with the following list. In case there are missing items or product defects, please contact your local phone dealer. • Main unit (UT618 phone) and Lithium Ni-MH battery • Battery charger • Hand strap •... - Page 19 1-2 Getting Started UT618 User Manual Note: The length of standby time the battery can supply power is determined by the telephone usage. The following actions or situations can consume more power and reduce the standby time. • Migration to areas where signal strength is weak.
-
Page 20: Handset Description
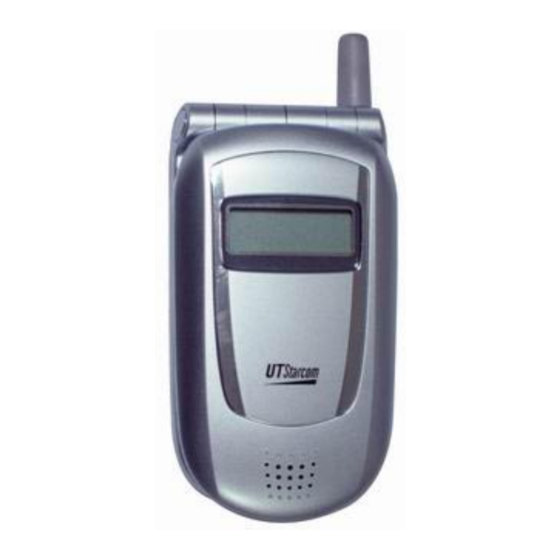
UT618 User Manual Getting Started 1-3 1.3 Handset Description 1. Fixed antenna: The antenna cannot to be extended. Any attempt to pull out the antenna may damage the handset and antenna. 2. Sub display: The Sub display flashes when there is any incoming call, message, Email or alarm. - Page 21 1-4 Getting Started UT618 User Manual key: This key is used to enter a Custom Function, search the network and to return back to the previous screen. key: This key is used for accessing the Main menu, Manner Setting or Sub-LCD Setting and save edited data or block incoming calls.
-
Page 22: Soft Key Description
UT618 User Manual Getting Started 1-5 (*) key: This key is used as a carriage return key and also for selecting tones when inputting Chinese data. (#) key: This key is used display the sub-menu when editing text. 20. Microphone 21. -
Page 23: Display Indicator
1-6 Getting Started UT618 User Manual • If the first icon in the last line of the display indicates , it means you can press to select the function; if the second icon is , it means you can press to select the function;... - Page 24 UT618 User Manual Getting Started 1-7 Signal Strength: Indicates the current signal strength. When the phone is in a service area lines are displayed to signify signal strength. More lines mean better signal strength. Signal strength is symbolized as follows and it also indicates whether the phone is in public mode or public/group mode.
- Page 25 1-8 Getting Started UT618 User Manual This symbol indicates a new short message. The right side indicates the numbers of unread messages. When the messages are less than 9, it displays a number; when they are over 10, it is displayed as Email Indication: This symbol indicates an unread email.
-
Page 26: Sub Display Indicator
UT618 User Manual Getting Started 1-9 Note: • Battery level is an indicator. The number of the bars may change under different environmental conditions. • If the standby screen displays “Please Charge”, it means that the battery has run out of power and it needs to be recharged immediately. -
Page 27: How To Use The User's Manual
1-10 Getting Started UT618 User Manual • Receive mail You got E-mail • Alarm 10/10 Fri.10:00 Alarm • Schedule (the second line indicates the first 16 bytes of the information) 08/09 Fri. 19:00 [Max 16bytes] • Group incoming call Group 1 No.0001... -
Page 28: Activity Status On Opening / Closing The Flip Cover
UT618 User Manual Getting Started 1-11 1.6.3 Activity status on Opening / Closing the Flip Cover Status Opening the flip Closing the flip Incoming call If automatic answer is not set Incoming ring will be switched off but the phone will still... -
Page 29: Quick Browse
1-12 Getting Started UT618 User Manual 1.6.7 Quick Browse In the main menu or list screen, you can browse features quickly by pressing and holding to any direction. • Press and hold to the right. Browse to bottom-right menu and the cursor will return to the upper-left menu again. - Page 30 UT618 User Manual Getting Started 1-13 Main Menu • Press and hold downwards Browse to bottom-right menu and the cursor will return to the upper-left menu again. Main Menu • List screen Melody List 4/29 The Christm Can't help fa...
-
Page 31: Scenarios Where The Phone Can't Be Used
1-14 Getting Started UT618 User Manual Note If the data is less than six, does not work. 1.7 Scenarios where the phone can’t be used 03/15 Fri. 3 : 0 • Reason: (Public mode) the user is out of the service area. -
Page 32: Charging The Battery
UT618 User Manual Getting Started 1-15 Please Charge • Reason: If the battery is low under standby mode, the display indicates “Please Charge” and sounds a warning beep. • Solution: Please charge. Please Charge 00:00:20 • Reason: Warning beep sounds when the phone is in use, which means there is only one minute talk time remaining. -
Page 33: Battery Life
1-16 Getting Started UT618 User Manual 100-240V AC Outlet 2. Plug the charger into the charging connector of the phone. • During charging, the red light will be illuminated. • It takes 2.5-3.5 hours to charge. (Exact time may vary depending on circumstances) •... -
Page 34: Replacing The Battery
UT618 User Manual Getting Started 1-17 • If the flip is open, it consumes more battery power. • At high or low temperature, battery power consumption will increase. The battery life will decrease at low temperature however the performance will increase once it is back to normal temperature. - Page 35 1-18 Getting Started UT618 User Manual 3. Pull out the battery, but make sure not to pull the connector lead directly. After the battery is out pull the connecter gently. Please make sure you remember the way in which the connecter was connected ( Polarity).
-
Page 36: Connecting The Phone Hand Strap
UT618 User Manual Getting Started 1-19 Note: The red lead of the battery is the positive terminal (anode) and the black lead is the negative terminal (cathode). Caution: Before using the phone for the first time, please charge the battery for 2.5-3.5 hours. -
Page 37: Service Issues
1-20 Getting Started UT618 User Manual 2. Pass the other end of the hand strap through the thin thread and push the thin thread to the bottom. 1.10 Service Issues • This PAS phone cannot be used out of the service area. When the phone is in the service area, it displays indicator. -
Page 38: Learning To Use Your Phone
Learning to use your phone 2. Learning to Use Your Phone 2.1 Power On / Power Off When you use the phone for the first time or if the phone has not been used for an extended period of time, make sure the phone is charged for 2.5-3.5 hours before using it. -
Page 39: Feature Selection Methods
2-2 Learning to use your phone UT618 User Manual Group 02/14 Fri. 3 : 0 3. Public/Group Mode: You can use all functions available in Public Mode and Group Mode. Group 02/14 Fri. 3 : 0 4. Transfer Mode: Phone book entries and bookmarks can be transferred among the phones with Group Mode set. -
Page 40: Selecting A Feature By Moving The Cursor
UT618 User Manual Learning to use your phone 2-3 2.3.1 Selecting a Feature by Moving the Cursor • Press to enter the "Main Menu". • To enter "OK menu”, press at standby display. • Press key to select the desired feature. - Page 41 2-4 Learning to use your phone UT618 User Manual Features Operations Melody setting Melody select Melody compose Voice memo Time manager Time Date Alarm Schedule Calendar Anniversary Sub LCD Screen/LCD Wallpaper LCD contrast Backlight Talking time Standby mode Group mode...
-
Page 42: Making A Call
UT618 User Manual Learning to use your phone 2-5 Features Operations All reset 2.3.3.2 Ok Menu Features Operations Air Info Retrieve Editing Data SMS BOX Receive Email Send Email Retrieve Send All Editing Data Mail Box MiMi Setup Online Sign Up... - Page 43 2-6 Learning to use your phone UT618 User Manual 2. Refer to "Set Up Standby Mode" for details on how to set up standby mode. 3. Calls can be established successfully only when there is sufficient signal strength. 4. Key in the phone number of the party you want to call, the number will be displayed on the screen.
-
Page 44: Dialed Number Record
UT618 User Manual Learning to use your phone 2-7 Note: • You can also press first, then dial. But this will cause a few seconds delay between end of dialing and sending out the signal. • In step 4 if you type in 32 numbers, you will not be able to press to search the phone book. -
Page 45: Composing A New Message
2-8 Learning to use your phone UT618 User Manual • Press to switch between Dialed Record and Detailed Record. • Icon description: phone call, short message, auto received email. • When email is set to auto receive, auto received email will be recorded but cannot be redialed. -
Page 46: Changing A Number
UT618 User Manual Learning to use your phone 2-9 • If the number selected is not a message, "Check SMS" is grayed out and cannot be selected. 3. Press to select " Check SMS ". The content of the message is displayed. -
Page 47: Incoming Call Record
2-10 Learning to use your phone UT618 User Manual • When a call is received, the phone will ring, and the Sub LCD will flash (if the phone flip is already open, the Sub LCD will not flash.) • To stop ringing / vibration, press . -
Page 48: Calling Back
UT618 User Manual Learning to use your phone 2-11 2.7.1 Calling Back 1. Press to show the most recent incoming call record. • Incoming call record will show date, time, and whether the call has been answered. Indicates the call has been answered, including received short messages. -
Page 49: Composing A New Message
2-12 Learning to use your phone UT618 User Manual 2.7.2 Composing a New Message 1. Select a number from incoming call records to create a new short message. 2. Press to display the sub menu. 3. Press to select " New SMS" and enter "SMS" editing screen. -
Page 50: Adjusting Earpiece Volume
UT618 User Manual Learning to use your phone 2-13 • There can be a maximum of 20 dialed number and saved numbers. When the numbers of record exceed 20, the new record will replace the old ones. The oldest one will be replaced first. -
Page 51: Holding A Call
2-14 Learning to use your phone UT618 User Manual • During a call, you can press to enter " Whisper" mode if " Whisper" mode is not turned on, and press to turn off " Whisper" mode if " Whisper" mode is turned on. When the call is completed, it will return to its original setting. -
Page 52: Three Party Calling
UT618 User Manual Learning to use your phone 2-15 2.12.2 Three Party Calling • This feature allows you to call another person while you are in a call to initiate a three party conversation. • Example: A and B are having a conversation and they need C to join them. -
Page 53: Rejecting Unidentified Call
2-16 Learning to use your phone UT618 User Manual 2.14 Rejecting Unidentified Call • If you subscribe to caller ID service, you can turn on this function to reject unidentified calls. If you don't subscribe to caller ID, please turn off this function. - Page 54 UT618 User Manual Learning to use your phone 2-17 Note: • You can press other keys when the phone is searching for network signals, however this will stop network searching. • You can also search for network signals during a call, but it is limited to three.
- Page 55 2-18 Learning to use your phone UT618 User Manual BLANK PAGE...
-
Page 56: Setting Up Your Phone (Main Menu)
Setting Up Your Phone 3. Setting Up Your Phone (Main Menu) 3.1 Key Beep • You can either keep the beep on or off. The default setting is “ON”. 1. Press , to display “Call/vibrator” menu. 2. Press “key beep” toggles from “ON” to “OFF” Note: •... -
Page 57: Setting/Canceling Manner Mode
3-2 Setting Up Your Phone UT618 User Manual 1. Press , to display the “Manner Setting” screen. 2. Press to select the item. 3. Press for “ON/OFF”. 4. While setting the volume, press , to display “Volume”. • There are five levels of volume to choose from (1-5). Use the scroll up, scroll down key to raise or lower the volume. -
Page 58: Setting Earphone Pickup
UT618 User Manual Setting Up Your Phone 3-3 3. Press to select vibrator type press • When you set vibrator type, the phone will vibrate with the set style for reference 4. Press , to display “Set” which means the vibrator has been turned on. -
Page 59: Melody Select
3-4 Setting Up Your Phone UT618 User Manual 3.5.1 Melody Select 1. Press , to display “Melody Select” menu. • The current melody setting is indicated in the next line. The volume indicator is on the right side. 2. Press... -
Page 60: Searching Melody By Category
UT618 User Manual Setting Up Your Phone 3-5 3.5.2 Searching Melody by Category 1. Press , to display “Melody Select” menu. 2. Press to select the item you want to search press , to display the “Melody List”. 3. Press to display the melody sub-menu. -
Page 61: Composing A Melody
3-6 Setting Up Your Phone UT618 User Manual 2. Press to select the item you want to search press , to display “Melody List”. 3. Press to select a melody composed by you. 4. Press to display the melody sub-menu 5. - Page 62 UT618 User Manual Setting Up Your Phone 3-7 • To change the scale of a note, please refer to the following method: Keys Press once Press Press three Press four Press five Press six twice times times times times ▲...
-
Page 63: Modifying A Melody
3-8 Setting Up Your Phone UT618 User Manual 7. Enter the title press , to display “Registered”, which means your self- composed melody has been saved. Note: • To set the self-composed melody as ring for a call or alarm, please refer to section “Melody Select”. -
Page 64: Resuming Melody Composition
UT618 User Manual Setting Up Your Phone 3-9 3.6.3 Resuming Melody Composition • During composition, if there is an incoming call or if you press , the composed data will be saved temporarily. 1. Press , “Delete Composing Data, YES/NO” is displayed. -
Page 65: Playing The Voice Memo
3-10 Setting Up Your Phone UT618 User Manual 1. Press , to display “Voice Memo” menu. 2. Press to select “2 Record”, to display “Recording” which means that the record begins. 3. If you press or when the “End Recording” screen is displayed, the record is said to have ended. -
Page 66: Setting The Time
UT618 User Manual Setting Up Your Phone 3-11 Setting the Time • When the time is set, the items such as alarm in “ Time Manager” can be used. Incoming/Dialed Record will have the corresponding time and date stamp. • The time can be set from January 1 2000 to December 31 2099. -
Page 67: Setting An Appointed Date
3-12 Setting Up Your Phone UT618 User Manual Alarm Time: 15sec. Snooze: “OFF” Once: The alarm will ring at the preset time on the appointed date. Appointed day: The alarm will ring at the preset time on the assigned day every week. -
Page 68: Setting An Appoint Day
UT618 User Manual Setting Up Your Phone 3-13 • The icon is displayed on the main display. 3.9.2 Setting an Appoint Day • The alarm will ring at the preset time on the same day of every week. 1. Press , to display “Alarm”... -
Page 69: Setting A Schedule
3-14 Setting Up Your Phone UT618 User Manual • If you have not set date and time, “Schedule” is grayed out and cannot be selected. To set the date and the time, please refer to section “Setting the Time”. • You cannot set schedules for past dates. -
Page 70: Searching A Schedule By Icon
UT618 User Manual Setting Up Your Phone 3-15 Sports Plan Date Movie Anniversary Birthday Wedding Travel Test Shopping Holiday Hospital Party Other Meeting • Press to preview the image on the main display for the scheduled time. 9. Press , to display “Registered”, which means the schedule, has been set. -
Page 71: Modifying A Schedule
3-16 Setting Up Your Phone UT618 User Manual Travel Test Shopping Holiday Hospital Party Other Meeting 3. Press to select the icon you want to search press to display all the activities in the selected category. 4. After you press... -
Page 72: Deleting The Current Day Schedule
UT618 User Manual Setting Up Your Phone 3-17 • Press to display the next month calendar; press to display the previous month calendar. • If the other months have no scheduled activities, cannot be used. 3. Press to select the date you want to delete... -
Page 73: Deleting All Schedules
3-18 Setting Up Your Phone UT618 User Manual 3. Select “YES” press , to display “Deleted”, which means all past schedules have been deleted. 3.10.7 Deleting All Schedules • You can delete all scheduled activities. • If there is no schedule saved in the phone, “Delete All” item is grayed out and cannot be selected. -
Page 74: Anniversary
UT618 User Manual Setting Up Your Phone 3-19 • Press to select another schedule. 3.12 Anniversary • If you have set an anniversary day, the anniversary icon and information will be displayed on the main display on that day. • You can enter a maximum of 8 alphabets or 16 alphanumeric characters. -
Page 75: Changing An Anniversary
3-20 Setting Up Your Phone UT618 User Manual 8. Press , to display “Registered”, which means the anniversary day has been set. Note: • The anniversary icon and information will be displayed on the main display on the anniversary day. -
Page 76: Deleting Anniversary Individually
UT618 User Manual Setting Up Your Phone 3-21 3.12.4 Deleting Anniversary Individually 1. Press , to display “Anniversary” screen. 2. Press to select “Edit” to display the anniversary list sorted by date. 3. Press to select the anniversary you want to edit... -
Page 77: Setting Wallpaper
3-22 Setting Up Your Phone UT618 User Manual Note: • The following are the details of the Sub LCD, the backlight and the ringing under various situations: When the phone flip is When the phone flip When the phone flip... -
Page 78: Deleting Pictures
UT618 User Manual Setting Up Your Phone 3-23 • After you select the picture, press to preview the wallpaper. 4. Press , to display “Set”, which means the wallpaper, has been set. 3.14.2 Deleting Pictures • You can delete pictures you saved in the phone. -
Page 79: Setting The Sub Display Contrast
3-24 Setting Up Your Phone UT618 User Manual 3.15.2 Setting the sub Display Contrast 1. Press , to display “LCD Contrast” menu. 2. Press to select “2 Sub Display”. 3. Press to adjust the level of the main display contrast. -
Page 80: Calculator
UT618 User Manual Setting Up Your Phone 3-25 2. Press to select the standby mode. 3. Press , to display “Set”, which means the selected standby mode, has been set. • The text information of the selected standby mode will be displayed after “Set”... -
Page 81: Lds (Needs Network Support)
3-26 Setting Up Your Phone UT618 User Manual 3. If you want to end calculation, press to go back to standby mode. • ·Press to go back to “Special” menu. Note: • You can use this result to do the next calculation. -
Page 82: Changing The Lts Password
UT618 User Manual Setting Up Your Phone 3-27 • The password you entered will be displayed as “****”. If the password is incorrect, “Invalid Password” will be displayed and the screen will go back to the standby mode. Press to select “1 ON”... -
Page 83: Selecting The Language
3-28 Setting Up Your Phone UT618 User Manual 3.21 Selecting the Language • The phone supports to languages “ENGLISH” and “CHINESE”. • The default setting for the language is “CHINESE”. The menu is in Chinese. 1. Press , to display “Language” menu. -
Page 84: Changing The Phone Password
UT618 User Manual Setting Up Your Phone 3-29 • The password you entered will be displayed as “****”. • If the password is correct, “Cancelled” will be displayed, which means “Phone Lock” has been cancelled. The icon on the main display will disappear. -
Page 85: Accessing Voice Mail
3-30 Setting Up Your Phone UT618 User Manual • When your phone is turned off, out of the service area or you cannot answer calls under some specific situations, the incoming call information will be recorded in the voice mail. The system will answer the calls and ask the callers to leave messages. -
Page 86: Your Own Number
UT618 User Manual Setting Up Your Phone 3-31 3.25 Your Own Number • You can use this feature to set the phone number in the phone and press to display “Own number” to check it. • The number can be the actual phone number or a virtual number (e.g. for security reason). -
Page 87: Turning On Toll Lock
3-32 Setting Up Your Phone UT618 User Manual 3.26.1 Turning On Toll Lock 1. Press , to display “Toll Lock” menu. 2. Select “1 ON”, to display “Set”, which means the toll lock is turned on. • If the toll lock is set on, will be displayed on the main display. -
Page 88: All Reset
UT618 User Manual Setting Up Your Phone 3-33 Functional Items Default settings Key Beep Manner Setting (Key Beep) Manner Setting (Vibrator) Manner Setting (Volume) Manner Mode Vibrator (Call) Vibrator (Alarm) Vibrator (Schedule) Vibrator (SMS/Mail) Earphone Pickup Melody Select (Call) Tone 1... - Page 89 3-34 Setting Up Your Phone UT618 User Manual • “Resetting” is displayed, which means the phone is retrieving some of the default settings. • When “Completed” is displayed, it indicates all the settings have been reset to their default values.
-
Page 90: Custom Function
UT618 User Manual Setting Up Your Phone 3-35 Function Items Default settings SMS in editing Deleted Free Box (Rename) Free Box 1-3 Mail in editing Deleted Schedule None Anniversary None Sent Beep Sign Air Info Text Omit Center Number (Online Sign Up) -
Page 91: Deleting Custom Function Individually
3-36 Setting Up Your Phone UT618 User Manual • You can also press corresponding numbers to enter the operational screen. 3.29.3 Deleting Custom Function Individually 1. Press , “Custom Function” menu appears. 2. Press to select the function you want to delete. -
Page 92: Text Edition
Text Edition 4. Text Edition 4.1 Entering Text 4.1.1 Text Input Area • The Text input area can be categorized into sections for better understanding. Text Text shou ˋ 寿受授瘦售兽狩 1. Input Method Area • This is indicated on the right margin of the title area. The user can select from the three options available, viz. -
Page 93: Switching Input Method
4-2 Text Edition UT618 User Manual • This is the last line of the screen, which indicates the functions of the keys. • When the input area and the word selection area/relevant words area are blank: • Press to display the sub menu. -
Page 94: Features Using Text Input
UT618 User Manual Text Edition 4-3 4.1.3 Features Using Text Input Input methods number English Pinyin Features Schedule/Anniversary/(entering title), Phone Book (entering name and searching name), Melody Compose (entering title), SMS (entering text), Mail (entering text and subject), Air Info (entering text and subject),... -
Page 95: Input Method
4-4 Text Edition UT618 User Manual Keys Input Methods Input Characters def DEF English number Pinyin Abc ABC English number Pinyin jkl JKL English number Pinyin mno MNO English number pqrs Pinyin pqrs PQRS English number Pinyin tuv TUV English... -
Page 96: Entering Chinese Character
UT618 User Manual Text Edition 4-5 Note: • If you want to enter a character that is as the same as the previous one, or is on the same key as the previous one, please use to move the cursor then enter the second character. -
Page 97: Entering English Characters And Numbers
4-6 Text Edition UT618 User Manual • When you enter the first character in the input area, the relevant words of what you are entering will be displayed. Select a relevant word and press . If you enter other characters directly, these relevant words will be erased. -
Page 98: Cutting Text
UT618 User Manual Text Edition 4-7 6. Press to complete. Note: • To paste the text, please refer to section “Pasting Text”. • The most recent copy or cut text will be available even if the phone is turned off. -
Page 99: Marks
4-8 Text Edition UT618 User Manual 4.3 Marks 4.3.1 Entering marks 1. Press under text entering mode, to display the sub menu. • The items in the sub menu may be different due to different text. 2. Press , to display “Mark” list. Please refer to section “Mark List” for details. -
Page 100: Emoji
UT618 User Manual Text Edition 4-9 Note: • If you send “Marks” to a computer or a different model phone, some of them may not be displayed correctly. • Please refer to the phone display for the exact symbols. 4.4 Emoji 4.4.1 Entering Emoji... -
Page 101: Emoji List
4-10 Text Edition UT618 User Manual 4.4.2 Emoji List Note: • If you send “Emoji” to a computer or a different model phone, some of them may not be displayed correctly. • Please refer to the phone display for the exact symbols. -
Page 102: Saving Canned Msg While Editing
UT618 User Manual Text Edition 4-11 • The phone comes with fixed canned MSG. You can also create and edit your own MSG and save it. • You can save up to 18 alphabets or 36 alphanumeric characters for each MSG. -
Page 103: Deleting Canned Msg Individually
4-12 Text Edition UT618 User Manual 4.5.3 Deleting Canned MSG Individually 1. Press , to display “Edit Canned MSG” screen. 2. Press to select the MSG you want to delete press , to display the sub menu. 3. Press to select “Delete One”, to display “Deleted”, which means the MSG has been deleted. -
Page 104: Display Mode
UT618 User Manual Text Edition 4-13 Romantic Classical Emotion Own edited MSG 4.7 Display Mode • You can use automatic scrolling mode to read SMS/Mail for your convenience. • The size of the character is 16*16 dot. There are two scrolling directions and 3 speeds to select. - Page 105 4-14 Text Edition UT618 User Manual BLANK PAGE...
-
Page 106: Phone Book
Phone Book 5. Phone Book 5.1 Editing a Phone Book The phone can save 200 phone data. Each data includes three phone numbers and two email addresses. You can also sort and group your phone data and set call blocking. Items Notes / Options Saves up to 18 Alphabets or 36 alphanumeric characters... - Page 107 5-2 Phone Book UT618 User Manual 7. Press • To enter a second email address, please select the second “ ” and repeat Steps 6-7. Else, go to Step 8 directly. 8. Press to select “ ” and press to enter “Group” screen.
-
Page 108: Resume Editing The Phone Book
UT618 User Manual Phone Book 5-3 5.1.2 Resume Editing the Phone Book • While editing a phone book, if you press or if you have an incoming call, the phone will automatically save the data. You can select “Editing Data” later to complete it. -
Page 109: Saving A Dialed Number/Incoming Call Number Into The Phone Book
5-4 Phone Book UT618 User Manual 5. Press to save it or press to select “Register” and press , to display “Registered”, which means that the data you added has been saved. 5.1.5 Saving a Dialed Number/Incoming Call Number into the Phone Book 1. -
Page 110: Deleting Phone Book
UT618 User Manual Phone Book 5-5 • If there is no saved message, “SMS Box” item will gray out and cannot be selected. 2. Press to select the item press 3. Press to select the SMS press 4. Press to select “Phone Book”, and display the phone book menu. -
Page 111: Deleting All Phone Book
5-6 Phone Book UT618 User Manual 5.2.2 Deleting All Phone Book 1. Press , to display “Password” screen. 2. Enter the password. The password you enter is displayed as “****”. • If the password is correct, “Delete All? YES/NO” will be displayed; if the password is incorrect, “Invalid Password”... -
Page 112: Searching By Group
UT618 User Manual Phone Book 5-7 • You can select a phone number and press to dial or select an address and press to edit an email. Note: • In step 4, you can select a record and press to revise it. -
Page 113: Grouping Phones
5-8 Phone Book UT618 User Manual 5.5 Grouping Phones • If an incoming call has already been grouped, the phone will play a specific ring and display a specific image. You can also edit the group name, which is up to 10 alphabets or 20 alphanumeric characters. -
Page 114: Modifying Group
UT618 User Manual Phone Book 5-9 Note: • Pressing during operation can skip the steps and directly save group settings. • If an incoming call is a grouped call, the phone will play a specific ring and display a specific image. -
Page 115: Dialing A Secret Phone Number
5-10 Phone Book UT618 User Manual 3. Press to select (Call Block) menu. • Please refer to section “Editing a New Phone Book” Step 9 on how to set call block. 4. Select “Register” press • “Registered” is displayed, which means the secret phone number has been set. - Page 116 UT618 User Manual Phone Book 5-11 4. Press , to display “Number” screen. 5. Press to display the phone numbers or enter the phone number directly. • You can search the phone number in “Name Search”, “Dialed Record” and “Incoming Record”.
-
Page 117: Modifying Favorite Call
5-12 Phone Book UT618 User Manual 5.7.2 Modifying Favorite Call 1. Press , to display “Favorite Call” list. 2. Press to select the record you want to modify press , the detailed settings of the selected favorite call will be displayed. -
Page 118: Dialing From Favorite Call
UT618 User Manual Phone Book 5-13 5.7.5 Dialing From Favorite Call 1. Enter the serial number of the favorite call you want to dial. 2. Press to dial. Note: • You can also press to select the phone number from “Favorite Call”... - Page 119 5-14 Phone Book UT618 User Manual Note: • Call block is only available under the public mode. • If a phone number is both set to “Favorite Call” and “Call Block”, the phone will operate call block as a priority.
-
Page 120: Short Message Service (Needs Network Support)
Short Message Service 6. Short Message Service (Needs Network Support) 6.1 Brief Introduction to SMS • Short message service needs network support to work effectively. • SMS is text message sent and received between PAS phones (both the sender’s and the receiver’s phones must have this feature). It can send up to 45 alphabets or 90 alphanumeric characters;... - Page 121 6-2 Short Message Service UT618 User Manual • You can enter up to 45 alphabets or 90 alphanumeric characters. • Press to use Mark, Emoji and Canned MSG. To use these functions please refer to section on “Entering Symbols”. • Press , the carriage return symbol “...
-
Page 122: Resuming Composing A Message
UT618 User Manual Short Message Service 6-3 • To resume editing please refer to section “Resuming Composing a Message”. • If the recipient’s phone does not support short message function, when it gets a message, the message will be treated as an ordinary call. -
Page 123: Composing An Animation Message
6-4 Short Message Service UT618 User Manual : Indicates read message. • Press to display the detailed information. 3. Press to select a message press , to display the “SMS” content screen. 4. Please refer to section “Composing a New Message” Steps 2-8 to edit and send the message. -
Page 124: Animation List
UT618 User Manual Short Message Service 6-5 6.3.2 Animation List... -
Page 125: Frame List
6-6 Short Message Service UT618 User Manual 6.3.3 Frame List... -
Page 126: Receiving A Message
UT618 User Manual Short Message Service 6-7 6.4 Receiving a Message 1. The phone will automatically receive messages and ring for 5 seconds with the preset ringing style. • The main display will display the message “You Got SMS” and icon. -
Page 127: Replying/Forwarding A Message
6-8 Short Message Service UT618 User Manual • Press to display the sub menu. Press to select “Detail”, to display the detailed information of the selected message. Press to back to SMS list screen. 3. Press to select the message you want to read. -
Page 128: Setting/Canceling Sms Protect
UT618 User Manual Short Message Service 6-9 • If you select “Reply”, the recipient’s phone number will be automatically filled in the address line. • If you select “Forward”, the original content of the message will be automatically filled in the text area. -
Page 129: Delete Sms
6-10 Short Message Service UT618 User Manual 6.8 Delete SMS 6.8.1 Deleting Individual Messages 1. Press to display “SMS Box”. • If there is no message in the phone, “SMS Box” will be grayed out and cannot be selected. 2. Press... -
Page 130: Deleting All Messages In A Selected Sms Box- Method 1
UT618 User Manual Short Message Service 6-11 6.8.3 Deleting All Messages in a Selected SMS Box- Method 1 1. Press to display “SMS Box”. • If there is no message, “SMS Box” will be grayed out and cannot be selected. -
Page 131: Setting Sent Beep
6-12 Short Message Service UT618 User Manual • If the password is correct, “Delete All? YES NO” will be displayed; if the password is incorrect, “Invalid Password” will be displayed and will go back then back to standby mode wallpaper. -
Page 132: E-Mail (Needs Network Support)
E-Mail 7. E-mail (Needs Network Support) 7.1 MiMi Setup • Email service needs network support to work effectively. • When you subscribe to Email service from your service provider, you will get a random personal email address for your phone. You can change this email address through “Online Sign Up”... -
Page 133: Changing/Resetting Center Number
7-2 E-Mail UT618 User Manual Note: • If the signal is weak or interrupted during the sending, the screen will display “transmission disconnected”. 7.1.2 Changing/Resetting Center Number • The phone has four default center numbers when you purchase it. If the numbers you get from your service provider are different from these four numbers, you can change the number by following steps shown. -
Page 134: Receiving Email Setting
UT618 User Manual E-Mail 7-3 • If “Send/Receive” is set and emails are received, the emails will be treated as per the settings in section “Receiving Email Setting”. 7.1.4 Receiving Email Setting • You can set “All” or “Select” in “Receive” or “Send/Receive”. -
Page 135: Sending An Email
7-4 E-Mail UT618 User Manual • The default setting for “Quote” is OFF. 1. Press , to display “MiMi Setup” menu. 2. Press to switch “Quote” from OFF to ON. When you reply to an email, it will automatically copy its text. - Page 136 UT618 User Manual E-Mail 7-5 6. Press to select the category of the recipient press • To send the same email to several persons, please repeat Step 5. • Each “Cc:” “Bcc:” and “Reply-To:” parameters has a maximum of 255 bytes.
-
Page 137: Receiving Emails
7-6 E-Mail UT618 User Manual • If sending email fails, transmission will be disconnected. If the email is too big, a message “Size Over Mail ” will be displayed. Press clear the disconnection alert. • The email, which has not been sent, will be automatically saved into Mail Out Box. -
Page 138: Reading/Forwarding An Email
UT618 User Manual E-Mail 7-7 Note: • If there is an incoming call when you edit an email with an attachment, the attachment will not be saved. Please attach it again when you resume editing. • “Editing Data” can only save one data. -
Page 139: Sending Waiting-For-Send Emails
7-8 E-Mail UT618 User Manual Note: • Please refer to section “Sending Waiting-for-send emails” on how to send waiting-for-send emails 7.2.6 Sending Waiting-for-send emails • You can send all waiting-for-send emails at one time. • To save an email when you are editing it please refer to section “Saving an Email”. -
Page 140: Attaching Attachments From Mail Box
UT618 User Manual E-Mail 7-9 6. Press , to display “Email” screen. Select “Send”. 7. Press to send the mail. Note: • In Step 5, if press , the sub menu of “1 Delete One/ 2 Delete All” will be displayed. To delete one attachment, please press ;... -
Page 141: Receiving Emails Individually
7-10 E-Mail UT618 User Manual • If there is not enough space for new emails, the latest email will automatically replace the oldest one. 7.3.1 Receiving Emails Individually • You can select the mail you want to receive in order to block junk mails from cluttering your mailbox. -
Page 142: Receiving All Emails
UT618 User Manual E-Mail 7-11 Note: • If the email is too large, “Size Over, Mail Receive?” will be displayed on the screen. You can select “YES” or “NO”. If you select “YES”, “Size Over, Mail Delete?” will be displayed to ask if you would like to delete the mail from email center. -
Page 143: Auto Email
7-12 E-Mail UT618 User Manual unread mails are under 9, it will be displayed as numbers 1-9. If they are over 10, it will be displayed as Note: • When the mailbox is full, it cannot receive new mails. • If the mail is too big, the phone will automatically receive the allowable limit of the mail. - Page 144 UT618 User Manual E-Mail 7-13 • The display displays the “ ” icon and “You Got E-Mail”. The right side of the icon indicates the numbers of the unread mails. If the numbers of unread mails are under 9, it will be displayed as numbers 1- 9.
-
Page 145: Deleting Emails In The System
7-14 E-Mail UT618 User Manual 7.3.4 Deleting Emails in the System • The system has a limit for the numbers and size of new mails. • If you do not receive new mails and keep them in the system, the system will not be able to receive new mails due to limited system capacity. - Page 146 UT618 User Manual E-Mail 7-15 : Text scrolls one line down. : Display previous page. : Display next page. Press and hold : Text scrolls up speedily. Press and hold : Text scrolls down speedily. Press and hold : Go back to the top of the text.
-
Page 147: Reading Emails In Out Box
7-16 E-Mail UT618 User Manual • If the text or the attachment of the mail is in a non-supported format, the phone will not display it and prompt you “Format Invalid”. • If the text of the mail contains a phone number; the characters will have a black background. -
Page 148: Reading Data In Air Info Log
UT618 User Manual E-Mail 7-17 : With attachment 7.4.3 Reading Data in Air Info Log • Air Info connecting record will be saved in Air Info Log. The Air Info Log can save only one data. This data will be replaced when you receive new data. -
Page 149: Attachment
7-18 E-Mail UT618 User Manual Cc: Other receiver’s email address for receiving the carbon copy. Bcc: Other receiver’s email address for receiving the blind carbon copy. Reply-to: Designate email address for the receiver to reply this email. • The details of mails in Air Info log are as the follows: Handset Time: The time when the user downloads data. -
Page 150: Saving Pictures You Received
UT618 User Manual E-Mail 7-19 • When you send an email with a picture from a computer, please send the picture as an attachment. If you directly send it as text, it will not be properly displayed even though it can be received. -
Page 151: Playing Melody Attachment
7-20 E-Mail UT618 User Manual • When you select an occupied data number, “Replace?” will be displayed. Select “YES” press to replace the old data. If the old data has been set to an incoming call screen of phone group or favorite call, and the new picture is under 96x72 dot, then “Change as an incoming call screen?”... -
Page 152: Saving Downloaded Melody
UT618 User Manual E-Mail 7-21 7.5.4 Saving Downloaded Melody • Up to 10 downloaded monodies and 10 downloaded harmonies can be saved in the phone, and they can be set as an incoming ring. 1. Please refer to steps 1-5 of “Playing Melody Attachment” to select the melody attachment to be saved. - Page 153 7-22 E-Mail UT618 User Manual 3. Press to select the mail you want to reply to press to display the sub menu. 4. Press to select “Reply”, to display “E-mail” screen. • The address line is automatically filled in with the sender’s email address.
-
Page 154: Forwarding An Email
UT618 User Manual E-Mail 7-23 7.6.2 Forwarding an Email • To forward an email to others, please follow the following steps. 1. Press , to display “Mail” menu. 2. Press to select the mailbox that will save the mail press 3. -
Page 155: Setting Auto Saving List
7-24 E-Mail UT618 User Manual 5. Press , to display “Set”, which means the Free Box, has been renamed. 7.7.2 Setting Auto Saving List • The user can save a sender’s email to a specific Free Box automatically. These senders’ name list can be edited through “Auto Save” function. -
Page 156: Searching An Email
UT618 User Manual E-Mail 7-25 5. Press to select “Delete One”, “Deleted” image appears, which means this data has been deleted. • If you want to delete the entire list, press to select “Delete All” press 7.8 Searching an Email •... -
Page 157: Searching An Email By Subject
7-26 E-Mail UT618 User Manual 7.8.2 Searching an Email by Subject • You can enter key words of the subject to search an email. 1. Please refer to section “Searching an Email by Date” Steps 1-3. 2. Press to select “Subject” and display the subject screen. -
Page 158: Transferring An Email Between Mail Box
UT618 User Manual E-Mail 7-27 7.9 Transferring an Email between Mail Box • You can move the mail in In Box or Out Box to Free Box to save or move mails from one Free Box to another. (This is not available for Air Info Log) •... -
Page 159: Deleting Emails
7-28 E-Mail UT618 User Manual • The display will revert to mail list screen and the protected mail has a “ ” icon next to it. Note: • If a mail has been set for protection, item 5 “Unprotect” will be displayed in Step 4. -
Page 160: Deleting All Emails In A Designated Mailbox- Method 2
UT618 User Manual E-Mail 7-29 7. Enter phone password. The password you entered is displayed as “****”. • If the password is correct, “Delete All? YES/NO” is displayed; if the password is incorrect, “Invalid Password” is displayed and the screen returns to standby mode wallpaper. - Page 161 7-30 E-Mail UT618 User Manual 4. Press to select the mail type you want to delete. “1 Unprotected”: Delete only unprotected mails. “2 All Mail”: Delete all mails including protected ones. 5. Press , to display “Password” screen. 6. Enter phone password. The password you entered is displayed as “****”.
-
Page 162: Bookmark
Bookmark 8. Bookmark 8.1 Creating a Bookmark • You can save your frequently used Air Info addresses into “Bookmark”. A maximum number of 200 records can be saved. • You can enter up to 16 English/Chinese or 32 alphanumeric characters in “Name”... -
Page 163: Resuming Editing The Bookmark
8-2 Bookmark UT618 User Manual 8.1.2 Resuming Editing the Bookmark • While you are editing a bookmark, if you press or if there is an incoming call to interrupt the editing, the phone will automatically save the data. You can read the edited data and resume editing later. -
Page 164: Saving Air Info Address From Mailbox
UT618 User Manual Bookmark 8-3 3. Press to display the content of “Air Info”. • The addresses that can be selected have a black background. 4. Press to select the address you want to save press to show the sub menu. -
Page 165: Deleting All Bookmarks
8-4 Bookmark UT618 User Manual 3. Select the bookmark you want to delete. The following options are displayed. • “Name Search”: Please refer to section “ Searching a Bookmark” on how to search. • “My favorite”: Please refer to section “ Connecting From My Favorite”... -
Page 166: Searching A Bookmark
UT618 User Manual Bookmark 8-5 • The password you enter will be displayed as “****”. • If the password is correct, “Reset? YES/NO” will be displayed; if the password is incorrect, “Invalid Password” will be displayed and the phone will go back to the standby mode screen 4. - Page 167 8-6 Bookmark UT618 User Manual BLANK PAGE...
-
Page 168: Air Info (Needs Network Support)
Air Info 9. Air Info (Needs Network Support) • Air Info is only available under Public and Public/Group modes and it requires network support. • You can search information through the phone and enjoy the convenience brought by network. • Air Info includes LDS feature, which allows the users to access the related information around them. - Page 169 9-2 Air Info UT618 User Manual • When disconnected, the information will be automatically stored in “Air Info Log”. You can read the information offline. • This manual only describes the procedure where the text and subject are ignored while entering text and subject in Air Info connection.
-
Page 170: Connecting From Air Info Log
UT618 User Manual Air Info 9-3 Notice: • The phone can automatically save the latest 10 addresses into Air Info Record. If it does not connect to Air Info, “2 Air Info Record” is grayed out and cannot be selected. -
Page 171: Connecting From My Favorite
9-4 Air Info UT618 User Manual • You can also do the same by moving the cursor to “Connect” and pressing • Please follow the Air Info instruction for operation. 5. To continue the operation, please refer to “Connecting From MiMi Express”... -
Page 172: Saving Air Info Data Online
UT618 User Manual Air Info 9-5 • Handset Time: The date and time of receiving the Air Info. • From: The Air Info address. • To: The recipient’s email address. Note: • You can save an address or connect to it by pressing... -
Page 173: Reading Air Info Offline
9-6 Air Info UT618 User Manual 9.7 Reading Air Info Offline • When disconnected, the screen stays at the latest Air Info content display. This connection record will be saved in “Air Info Log”. To read the connection record, please refer to the section on “Reading Data in Air Info Log”. -
Page 174: Group
Group 10. Group 10.1 Setting a Group To setup and establish a group at least 2 phones are required. In a group there can be only one master phone. The transceiver number of the master phone is fixed and is 0000 (you do not need to enter it). The slave phone numbers can be selected from 1-8000 according to your requirements. -
Page 175: Setting The Slave Phone
10-2 Group UT618 User Manual • When you set a group, the master phone (Step 5 in setting the master) and the slave phone (Step 7 in setting the slave phone) must press at the same time. • While setting up a group, the master phone and the slave phone must be within 100 meters. -
Page 176: Communication
UT618 User Manual Group 10-3 4. Press “YES” press “Deleted” is displayed once the group is deleted. Note: • When all groups are deleted, the phone will automatically be back to “Public” standby mode. • When all groups are deleted, “Group”, “Public/Group” or “Transfer” cannot be selected and used. -
Page 177: Transferring A Phone Book
10-4 Group UT618 User Manual 3. Press to terminate the call; “End Call” will be displayed. 10.4 Transferring a Phone Book • To use “Transfer” feature, you need to set a group and then switch to “Transfer” standby mode. • Send and receive data includes the following information:... -
Page 178: Transferring All Phone Book Data
“Disconnect”. • If you use UT618 phone to transfer email addresses in the phone book to UTS 708- UT88, the addresses will be saved into the phone book of UTS 708-UT88. The phone categories such as regular phone or office number set by UT618 will be set as “none”... -
Page 179: Transferring Bookmarks
10-6 Group UT618 User Manual 3. Press , to display “Transceiver No.” input screen. 4. Enter the transceiver’s number press , to display “Transferring”, which means that the phone is transferring data. • The number of selected data and the number of transferring data will be indicated on the right side of the screen. -
Page 180: Transferring All Bookmarks
UT618 User Manual Group 10-7 Note: • When the bookmark cannot be transferred, “Transfer Failed” will be displayed. The probable reasons may be as the follows: The receiver’s phone does not support “Transfer” function; the receiver’s phone is not under “Transfer”... - Page 181 10-8 Group UT618 User Manual BLANK PAGE...
-
Page 182: Data Communication
11. Data Communication 11.1 Data Communication Procedure (Needs Network Support) UT618 phone comes with a feature of 64K wireless data communication. It can be connected with a USB Data Cable (to be purchased separately) to a computer to transmit data wirelessly at a speed of 64K or 32K. Please refer to USB Data Cable User Guide for more instruction. - Page 183 11-2 Data Communication UT618 User Manual • The data communication dialing record will not be saved in the phone’s dialed record. • If you need to connect for an extended period of time, please charge the battery fully or charge it when it is connected.
-
Page 184: Maintenance & Troubleshooting
Maintenance and Troubleshooting 12. Maintenance & Troubleshooting 12.1 Phone Maintenance • Use a soft dry cloth for cleaning to wipe off any accumulated dust or fingerprints. • Use a soft cloth dampened in water for cleaning to wipe off any heavily accumulated dust and dirt. - Page 185 Remove the battery and reinsert it after 1 minute. Troubleshooting guidelines If it is not one of the above problems or the problem cannot be solved, please contact UTStarcom’s Customer Service at: Address: 4th Floor, 8th Building, No.1 Jiaogong Road, Hangzhou PRC...
-
Page 186: Index
Index Index Dialed record, 1-19 Display setting of mail, 1-19 Incoming call record, 1-19, 2-11, 2-12 Air Info, 1-19, 7-23, 8-3, 9-1, 9-6 Number memo, 1-19, 2-7, 2-13, 3-28, 4-3 Air Info Log, 9-3 Time setting, 1-19 Display Header, 9-4 Life, 1-16 MiMi Express, 9-1, 9-4 Replace, 1-17... - Page 187 13-2 Index UT618 User Manual Call/Vibrator, 2-3, 2-13 Charging, 1-3, 1-7, 1-9, 1-15, 1-16, 1-17, 7- Caller ID, 2-4, 2-15, 5-13 11, 7-12 Display, 2-15 Charging Status, 1-7 Canned MSG Data Communication, 1-10, 11-1 Delete, 4-12 Display area, 1-8 Edit, 4-11...
- Page 188 UT618 User Manual Index 13-3 Auto, 7-12, 7-13 Emoji Auto Saving Enter, 4-9 Delete, 7-24 List, 4-10 Setting, 7-24 Change Center Number, 7-2, 7-12 Compose, 7-4, 7-8 Favorite Call Delete, 7-14, 7-28, 7-29 Answer, 5-13 Details, 7-17 Delete, 5-12 Forward, 7-7, 7-21, 7-23...
- Page 189 13-4 Index UT618 User Manual Description, 1-3 Melody Earphone jack, 1-5 Compose, 3-6 Earpiece, 1-2, 1-3, 2-3, 2-10, 2-13, 3-32, 3- Resume, 3-9 Delete, 3-5, 3-9 Fixed antenna, 1-3 Modify, 3-8 Main display, 1-3 Search, 3-5 Microphone, 1-5 Setting, 3-3, 3-4, 3-5, 3-8, 3-9, 3-11, 3-13,...
- Page 190 UT618 User Manual Index 13-5 Secret, 5-9 Setting, 5-9 Package Pictures Contents, 1-1 Delete, 3-23 Password Play LTS, 3-27, 3-29 Voice Memo, 3-10 Phone, 3-29 Play Melody, 7-20, 7-21 Phone Power, 2-16 Earphone Pickup, 3-3 Off, 2-1 Key Beep, 3-1, 3-33, 3-34...
- Page 191 13-6 Index UT618 User Manual Delete, 6-10, 6-11 Call Waiting, 2-14 Forward, 6-3, 6-8 Time Frame List, 6-6 Setting, 3-11, 3-14, 3-18, 3-19 Introduction, 6-1 Time setting, 1-19 Protect, 6-9 Toll Lock, 1-8, 2-7, 3-31, 3-32 Read, 2-8, 6-3, 6-7...
Need help?
Do you have a question about the UT618 and is the answer not in the manual?
Questions and answers