
Related Manuals for UTStarcom UTS700X


Summary of Contents for UTStarcom UTS700X
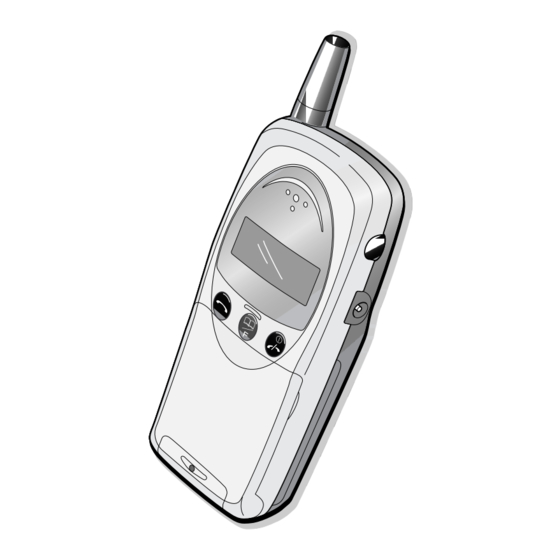
- Page 1 UTS700X UTS700X Personal Station Owner’s Manual UTS700X_Cover1-4.pm6 1/6/00, 3:43 PM...
- Page 2 Before You Use Your Phone G This phone uses radio waves. Your call may be cut off if you are in a location that cannot be reached by radio waves. Even when you are inside a service area, your call may be still cut off if you are in a place that cannot be reached by radio waves (close to a building wall, a metal door or electrical appliances).
- Page 3 General Precautions When Using the Phone, Battery and AC adapter DANGER Only use the battery and AC adapter specified by our brand for use with this phone. The use of a battery or AC adapter other than that specified could result in the battery leaking fluids, overheating, Essential bursting or igniting.
- Page 4 Precautions When Using the Mobile Phone WARNING Do not use your mobile phone while driving, as this is dangerous and could cause a traffic accident. Pull over and park in a safe place before using the phone. Prohibited Switch off the phone when you are in places where the use of mobile phones is prohibited, such as in an aircraft or hospital.
- Page 5 Precautions When Using the Battery DANGER Do not dispose of the battery by throwing it in a fire, as this could cause the battery to ignite or burst. If you are having difficulty connecting the battery to your mobile phone, do not use force as this could cause the battery to leak fluids, overheat or ignite.
- Page 6 CAUTION Keep the battery dry. Moisture on the battery could cause the battery to overheat, emit smoke or corrode. Do not use or leave the battery in direct sunlight or in hot places such as in a car on a hot day. This could cause the battery to leak Prohibited fluids and overheat, and could impair the performance or reduce the lifetime of the battery.
- Page 7 CAUTION Always unplug the AC adapter before performing any cleaning or maintenance. Failure to do so could cause an electric shock. Essential Do not place heavy objects on the power cord or attempt to modify the power cord as this could cause an electric shock or fire. Prohibited Always grasp the AC adapter itself when you unplug the AC adapter.
- Page 8 Notes on the Battery Store the battery in a cool, well-ventilated location that is not exposed to direct sunlight. The battery has a limited life. However, the life of any battery is limited, and the amount of time for which a battery can be used between recharges gradually decreases.
-
Page 9: Table Of Contents
Table of Contents Introduction ..................Welcome ..................What is included in the box .............. Getting Started ..................Getting to know your UTS700X phone ..........Phone descriptions ..............Technical data ................Charging the battery ................. Switching the phone ON and OFF ........... - Page 10 WARNING! FCC RF EXPOSURE COMPLIANCE This PCS phone has been tested and complies with the Federal Communications Commission (FCC) RF exposure limits for General Population/Uncontrolled exposure environment. In addition, it complies with the following Standards and Guidelines: • FCC 96-326, Guidelines for Evaluating the Environmental Effects of Radio-Frequency Radiation.
-
Page 11: Introduction
Thank you for purchasing the phone. Phone is a highly advanced phone that is designed to use a variety of advanced features in a simple, easy- to-use way. What is included in the box • UTS700X • AC adapter Personal Phone • Battery Pack (Ni-MH) •... -
Page 12: Getting Started
Getting Started Getting to know your phone Phone descriptions N ote: Your phone uses a fixed type antenna that cannot be extended. D o not try to extend the antenna, otherwise, you may damage it. 1. Antenna Local phone number dis- 2. -
Page 13: Technical Data
Getting Started Technical data UTS700X (main unit) Dimensions ......... approx. (W)44 × (L)105 × (H) 26.3 mm (excl.Antenna) Weight ..........approx. 95g Power supply ........DC3.6V 350mAh Continuous stand by time ....approx. 500 hours Continuous talk time ......approx. 5 hours AC adapter Input ........... -
Page 14: Charging The Battery
Getting Started Charging the battery Before using your phone for the first time, charge the battery for three and a half hours. 1. Connect the AC adapter to a power source and insert the AC adapter plug into the phone. The battery mark on display will start to blink. -
Page 15: Switching The Phone On And Off
Getting Started Switching the phone ON and OFF Switching the phone ON Press the key until the phone display backlight comes on. The phone will emit a tone when the power is switched on. The display backlight will go out after approximately 10 seconds. N ote: Even if you have set the backlight setting to O FF, the backlight will come on when the phone is switched on. -
Page 16: Basic Operations
Basic Operations Making a call Make sure that the reception signal is sufficient and that at least one bar is shown on the signal indicator. Open the flip cover. The backlight of the display will come on. Enter the telephone number, including the full area code. -
Page 17: Inserting A Pause Into The Telephone Number
Basic Operations closing the flip cover. Five seconds after the flip cover is closed, the phone will emit a click and the call is dis- connected. For the five seconds after the flip cover is closed, the connection to the other party is connect but the sound is muted. -
Page 18: Answering A Call
Basic Operations Answering a call You will hear the ringing pattern. The backlight of the display lights and you will see the phone number of the other party, if they have selected to send their own number. If the number exceeds 11 digits, 11 digits of the number will be shown then the display will scroll to show the remaining numbers. -
Page 19: Adjusting The Earpiece Volume
Basic Operations Adjusting the earpiece volume You can adjust the volume of the earpiece while you are taiking on the phone. The default setting is “Medium”. Press the key while you are taiking on the phone. The earpiece volume is shown on the display. The current volume is adjusted as shown for each press of the keys. -
Page 20: Deleting Numbers From The List
Basic Operations Deleting numbers from the list You can perform this operation while waiting for a call. Press the key. Press the key until the num- ber you want to delete is selected. Press and hold down the key. When YES-1 NO-3 appears on the display release the key. -
Page 21: Deleting A Number In The Received Call List
Basic Operations Deleting a number in the received call list You can perform this operation while waiting for a call. Press the key. Press the key until the num- ber you want to delete is selected. Press and hold down the key. -
Page 22: Locking The Phone
Basic Operations Locking the phone You can lock the phone so that you do not accidentally press any keys when carrying the phone while it is switched on. Press the key until the key mark is Key mark shown on the display. While the phone is locked, you cannot per- form any operation other than those listed below:... -
Page 23: Advanced Dialing Services
Advanced Dialing Services Storing a number in the phonebook You can store up to 20 telephone numbers in the phonebook. You can use the phonebook while you are talking the phone. Enter the telephone number. You can also store telephone numbers that include a pause. -
Page 24: Dialing A Number In The Phonebook
Advanced Dialing Services N ote: For numbers stored in locations 01 to 09, you use the two-touch function to dial them quickly . If you store a telephone number during a call, the tones of the key used to enter the number will be heard by the other party . -
Page 25: Using Two-Touch Dialing
Advanced Dialing Services Pressing the number keys. The location number and its telephone num- ber is displayed for the number you pressed. For example: To select location number 05 Press the key then the key. If there is no telephone number stored in the location number you entered, the location number blinks. -
Page 26: Changing A Phonebook Entry
Advanced Dialing Services Changing a phonebook entry Enter the new telephone number for the number you want to change. Press the key. Press the key or the num- ber keys to select the number of the lo- cation you want to change. The existing number and the newly entered number are displayed alternately on the display. -
Page 27: Using Advanced Functions
Using Advanced Functions Displaying your own number You can display your own number. You can do this while waiting for a call or during a call. Press and hold down the key. When “F_” appears in the information area of the display release the key. -
Page 28: Changing The Ring Pattern
Using Advanced Functions Pressing the key increases the volume. If the volume set- ting is High, then pressing the key will have no effect. Press the key. The ring pattern stops and the phone returns to the display before the key was pressed. - Page 29 Using Advanced Functions Ring Patterns and Melody names Electronic Sound Electronic Sound Electronic Sound Electronic Sound William Tell Gavotte Hungarian Rhapsody Humoresque Voices of Spring “Spring” Sonata Turkish March Beautiful Dreamer Menuet Symphony (No.5) in C minor Eine Kline Nachtmusik Tin Soldiers March Song of Joy “Orpheus at Hells”...
-
Page 30: Changing The Key Tone
Using Advanced Functions Changing the key tone You can check and adjust the settings for the tone mode when you press any of the keys on the phone. The default setting is 2. You can adjust the setting while waiting for a call. Press and hold down the key. -
Page 31: Changing The Auto-Response Time
Using Advanced Functions Changing the auto-response time When using the phone with the Earphone microphone, you can check and adjust the settings for the automatic response time (seconds) from the time you receive a call. The default setting is 00 (off). You can adjust the setting while waiting for a call. -
Page 32: Changing The "No Service Area" Alert
Using Advanced Functions Changing the “NO SERVICE AREA” alert You can check and adjust the setting for the alert tone that informs you when you have moved outside the service area and that the signal re- ception has deteriorated. The default setting is ON-1. You can adjust the setting while waiting for a call. -
Page 33: About The Hand Over Tone Function
Using Advanced Functions Press the key. : A HAND OVER alert tone is emitted. : A HAND OVER alert tone is not emit- ted. Press the key. The phone returns to the display before the key was pressed. Even if you do not press the key, the dis- play will be cleared after 20 seconds. -
Page 34: Changing The Backlight Setting
Changing the backlight setting You can check and adjust the settings for the backlight of your phone. The default setting is ON-1, You can adjust the setting while waiting for a call. Press and hold down the key. When “F_” appears in the information area of the display release the key. -
Page 35: Changing The "Send Own Number" Setting
Using Advanced Functions Changing the “SEND OWN NUMBER” setting This function lets you decide whether to send the telephone number of the phone when you make a call or not. The default setting is ON-1 (SEND). You can adjust the setting while waiting for a call. Press and hold down the key. -
Page 36: Appendix
Appendix Cleaning the exterior of the phone To clean everyday dirt and stains, wipe the phone with a soft, dry cloth. To clean stubborn stains, wipe the phone with a soft cloth that has been moistened with water and a neutral detergent, then wrung tightly so it is slightly damp. - Page 37 Appendix Insert the new battery. Insert the battery with the marking facing up- wards and firmly insert the cables into the connectors. Make sure you insert the colored cables into the correct connectors. Store the battery cables between the body of the phone and the battery.
-
Page 38: Troubleshooting
Appendix Troubleshooting If you are experiencing problems with your phone, please check the chart below before calling for assistance. If you cannot solve the prob- lem after consulting this chart, contact your local dealer. Problem Cause The power does not come on. •... - Page 39 UTS700X_Body.pm6 1/6/00, 2:51 PM...
- Page 40 All rights reserved. This material may not be reproduced or copied,in whole or in part, without the written permission of UTStarcom, Inc. 5KKTR12PL7XX 0600CR Printed in Japan 5KKTR12PL7XX UTS700X_Cover1-4.pm6 1/6/00, 3:43 PM...
Need help?
Do you have a question about the UTS700X and is the answer not in the manual?
Questions and answers