
Related Manuals for Audiovox AVX10USB


Summary of Contents for Audiovox AVX10USB
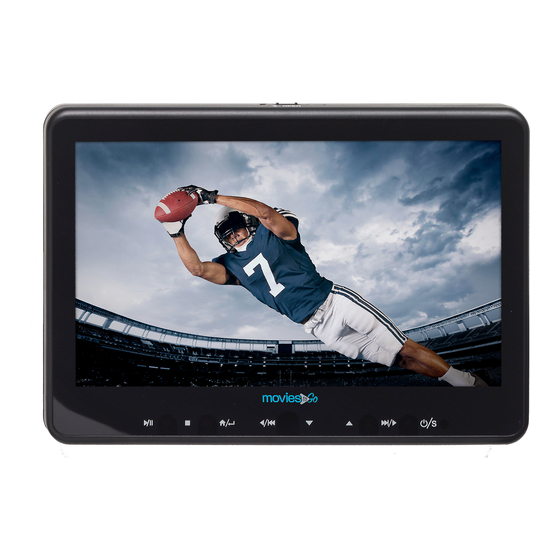
- Page 1 AVX10USB 10.1 Inch LCD Monitor WithBuilt In DVD Player For Rear Seat Entertainment Installation And Operation Manual...
- Page 2 Congratulations Congratulations on your purchase of this Mobile Video Rear Seat Entertainment System! The SBD61011 has been designed to provide passengers with unlimited content options delivering smiles for many miles. Please read the directions that follow to familiarize yourself with the product to ensure that you obtain the best results from your equipment.
-
Page 3: Table Of Contents
Table of Contents Features ......................5 Materials to use in this package ..............6 Docking bracket installation ..............8 Wiring diagram ....................7 Control and indicators diagram ..............9 Remote Control Operation ...............11 Remote Control functions .................12 Source menu ....................16 System Menu Setting and Adjustments ..........18 Playing DVDs and Audio Discs ..............24 Playing USB Devices ..................24 Playing MP3 Discs ..................25... -
Page 4: Features
Features • 10.1” Digital Thin Film Transistor (TFT) Active Matrix Liquid Crystal Display LED Backlit Monitor • Built-in DVD Player • Last position memory for DVD Player • Six Audio / Video Source Inputs DVD, USB, CARD, AV, AUX and HDMI. •... -
Page 5: Materials To Use In This Package
Materials To Use In This Package 1. AVX10USB system unit -(1PC) 2. MTB60001 docking bracket -(1PC) 3. Rubber pole adaptor x 7 pairs Ø9.5mm,Ø11.5mm , Ø12.0mm, Ø12.2mm, Ø13.3mm, Ø13.95mm and Ø15.95mm Note: This rubber pole adaptor is use to fit the MTB60001 docking bracket on the pillow pole. -
Page 6: Docking Bracket Installation
Docking Bracket Installation Choose a correct rubber pole adaptor and put it on the pillow metal pole before install the docking bracket. Install the docking bracket to the pillow metal pole and tighten with the screw know . Plug in the harness cable on the monitor before dock on the docking bracket. Harness wire need to install properly. -
Page 7: Wiring Diagram
Wiring Diagram Master Monitor Satellite Monitor Headrest Cable Headrest Cable Blue Headrest Cable Green Blue Headrest Cable Green Video In Yellow Audio In Left White Audio In Right Red 8P Din + AV Connector Harness DC 12V In Green +12V(ACC) Ground Green Blue... -
Page 8: Control And Indicators Diagram
Controls And Indicators Diagram 11 10 1. Power Indicator Red light indicator ( Bright = Standby Mode, Dim = Power On 2. Power/ Source ( To turn system On/ Off and to select the source. 3. Infrared Transmitter To broadcast audio signal to IR headphone. 4. - Page 9 Controls And Indicators Diagram(Continued) 11. Stop( Press once for pre-stop, press twice for totally stop the DVD/ Media information . 12. Infrared Transmitter To broadcast audio signal to IR headphone. 13. Play/ Pause( To start playback or pause the DVD/Media. 14.
-
Page 10: Remote Control Operation
Remote control operation Battery Replacement 1. Remove the battery cover. 2. Insert two AAA batteries into the battery holder. Be sure to observe the correct polarity. Reinstall the battery cover into the battery holder until the holder is click . -
Page 11: Remote Control Functions
Remote Control functions... - Page 12 Remote Control functions(Continued) Function control is available on the unit and the Remote Control. ** Function not available in this model. 1. POWER* Press this button to turn the unit ON and OFF. 2. SOURCE* Press to display the Source OSD for DVD, USB, CARD, AV,AUX and HDMI1. 3.
- Page 13 Remote Control functions(Continued) 13. SCAN BACKWARD ( Press to search in a backward direction. Press repeatedly to change the search speed from 2, 4, 8, 20 times and normal speed. 14. SCAN FORWARD ( Press to search in a forward direction. Press repeatedly to change the search speed from 2, 4, 8, 20 times and normal speed.
- Page 14 Remote Control functions(Continued) 23. FMM ON/OFF Turns the FM Modulator power on/off. 24. AUDIO Press to display and select audio language in DVD mode. Each time this button is pressed, the language changes. 25. PIX ( Picture Select ) This button is used to make picture adjustments. Use the UP or DOWN direction buttons to select BRIGHTNESS, CONTRAST,COLOR, TINT, or RESET.
- Page 15 Souce menu The System is capable of accessing six source inputs. To select or change a source, press the source button on the front panel or the Source button on the remote control. The source OSD will appear on the screen as shown in the figure below. Use the + or - cursor buttons on the front panel or the p or q cursor buttons on the remote control to highlight a source.
-
Page 16: Source Menu
Source menu(Continued) An external video source such as a video game system or other audio/video devices may be connected to the system via the AUX input. Connect your peripheral device to the supplied Aux Adapter harness and plug the harness into the AUX Input on the side of the system. Turn the external source component on with its power button or remote control and it is now ready to play the audio and video signal from the source connected to AUX. -
Page 17: System Menu Setting And Adjustments
System Menu Setting and Adjustments PICTURE CONTROL The PICTURE setup functions allows the user to select and set the picture control function. BRIGHTNESS CONTRAST PICTURE COLOR BRIGHTNESS, CONTRAST, COLOR adjustments range AUDIO TINT SYSTEM from 0 to 32. PLAYER TINT adjustments range from -16 to 16. MOVE ADJUST EXIT... - Page 18 LANGUAGE ENGLISH DEFAULT DVD PICTURE PICTURE MONITOR MODE AUDIO AUDIO RESET System Menu Setting and Adjustments(Continued) SYSTEM SYSTEM PLAYER PLAYER MOVE ADJUST EXIT MENU MONITOR MODE This allows the user to change the system to M1 or M2 mode. Once the setting is changed, the remote LANGUAGE ENGLISH control and IR headphones will only work if set to...
- Page 19 System Menu Setting and Adjustments(Continued) PLAYER MODE The Player setup function allow the user to select DVD functionality. TV SYSTEM The TV SYSTEM setup allows the user to choose television standard which corresponds to your TV. TV SYSTEM NTSC SCREEN SAVER NTSC-Select this type for NTSC TV PICTURE PICTURE...
- Page 20 AUDIO LANGUAGE ENGLISH AUDIO LANGUAGE ENGLISH MOVE ADJUST EXIT MOVE ADJUST EXIT MENU MENU TV SYSTEM NTSC SCREEN SAVER PICTURE PICTURE ASPECT RATIO 4:3 PS AUDIO AUDIO PASSWORD SETUP TV SYSTEM System Menu Setting and Adjustments(Continued) NTSC SUBTITLE LANGUAGE ENGLISH SYSTEM SYSTEM RATING...
- Page 21 System Menu Setting and Adjustments(Continued) AUDIO LANGUAGE This setting allows you to select a preferred audio language. This function only applies to discs TV SYSTEM NTSC encoded with different audio languages. SCREEN SAVER PICTURE ASPECT RATIO 16:9 Options: ENGLISH, FRENCH, SPANISH and GERMAN. AUDIO PASSWORD SETUP SYSTEM...
- Page 22 System Menu Setting and Adjustments(Continued) FMM MODULATION(ON/OFF) This setting allows you to turn the FMM modulator ON or OFF. FM MODULATION FMM CHANNEL FMM CHANNEL PICTURE PICTURE AUDIO AUDIO This setting allows you to select the frequency. SYSTEM SYSTEM The unit has a 100 channel built-in wireless PLAYER PLAYER FM Modulator.
-
Page 23: Playing Dvds And Audio Discs
Playing DVD and Audio Discs Playing DVDs When a disc is loaded. Press the DISPLAY button on the remote control to display the status banner. The status banner includes the disc title, chapter audio language , subtitle & angle. Title Selection: Some DVDs contain more than one title (e.g. sitcoms, collections, etc.) Press the numeric (0-9) buttons to initiate a change of chapter title selection. -
Page 24: Playing Mp3 Discs
Playing DVD and Audio Discs(Continued) Use the cursor keys p q t or u and OK to navigate the on screen menus. The USB port can play AUDIO, PHOTO, VIDEO . The following formats are supported: Audio • • • Photo •... -
Page 25: Dvd Basics
DVD Basics To get the optimum use out of the DVD Player, please read the following: DVD Region Code The DVD player is preset to a region code at the factory depending on where the DVD player is sold. A DVD from a different region cannot be played in this unit and the unit will display "WRONG REGION”. -
Page 26: Troubleshooting
Troubleshooting PROBLEM SOLUTION IR remote inoperative • Verify that the battery in the remote is fresh. • Verify that the remote sensor eye is not obstructed. Disc won't play • Insert a disc with the label side facing the viewer. •... - Page 27 FCC Caution This device complies with part 15 of the FCC Rules. Operation is subject to the following two conditions: (1) This device may not cause harmful interference, and (2) this device must accept any interference received, including interference that may cause undesired operation.
Need help?
Do you have a question about the AVX10USB and is the answer not in the manual?
Questions and answers