Table of Contents
Advertisement
Advertisement
Table of Contents

Summary of Contents for Sea & Sea YS-01
- Page 1 03112 UNDERWATER STROBE YS-01...
-
Page 3: Table Of Contents
Contents Safety Precautions ............. Safety Precautions for Use of Battery ......Accessories ..............Identification of Parts ..........Operation ............E-10 Target light switch ..........E-11 Ready / TTL lamp ..........E-12 Fixing Bolt ............E-12 Installing the Batteries ..........E-13 Connecting the Strobe .......... -
Page 4: Safety Precautions
Safety Precautions For safe handling of the product, please read the following precautions carefully before use. Failure to heed the precautions listed below could result in serious consequences. To prevent injury or damage to yourself and/or others, please observe the precautions as they contain highly important information related to personal and product safety. - Page 5 Safety Precautions Do not fire the strobe or illuminate the light towards a driver of a vehicle to avoid causing accidents. Do not operate the product while driving a vehicle. Inattention could result in accidents. For use on land, do not operate the product at precarious foothold. It may cause falling, injury or product damage.
- Page 6 Safety Precautions Using the strobe close to your subject's eyes could cause temporary visual impairment. Particular care should be observed if photographing infants, the strobe should be no less than one meter (3 feet) from the subject. Be careful when touching the product immediately after firing repeatedly or lighting for a long time.
-
Page 7: Safety Precautions For Use Of Battery
Safety Precautions Carefully observe the O-ring maintenance manual for the handling of O-rings befor use. SEA&SEA SUNPAK Co., Ltd. assumes no liability for errors or discrepancies in this manual. Specifications and appearance are subject to change without notice. The silicon grease included in the product package is inedible. Safety Precautions for Use of Battery DANGER Never expose the battery to flame or fire, or to excessive heat. - Page 8 Safety Precautions for Use of Battery Never use batteries should you notice any changes such as leakage, discoloration or deformation. When you notice the situation as abnormal, discontinue use immediately and take the product to a SEA&SEA authorized service center for inspection. Keep out of reach of children to prevent accidental ingestion.
-
Page 9: Accessories
Accessories Before using this model, check to make sure that all accessories are present. Diffuser Strap YS-01 Diffuser Sillicon Grease Fixing Bolt O-ring Maintenance Manual YS-01 Instruction Manual (this manual) ... -
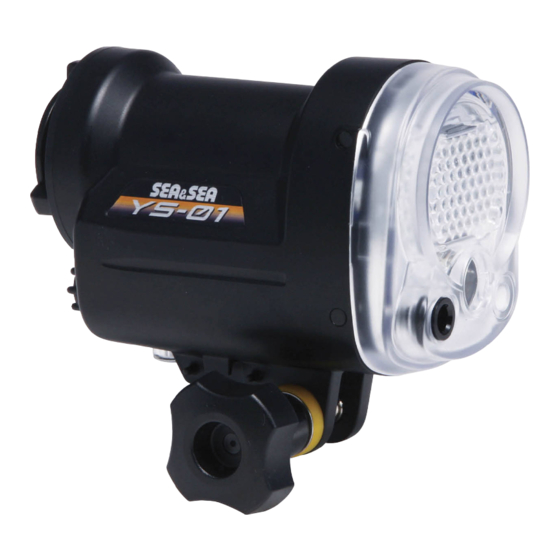
Page 10: Identification Of Parts
Identification of Parts Reflector Fiber-optic cable socket (for additional strobe (P.J-16)) Fiber-optic cable hook LED target light (P.J-11) (P.J-15) Fiber-optic cable socket (P.J-15)) Slave sensor Target light switch (P.J-11) Battery cap (P.J-13) Light level control dial(P.J-11) Mode switch (P.J-10) Ready / TTL lamp (P.J-12) Arm installation Strap eyelet(P.J-19) -
Page 11: Operation
Identification of Parts Operation Mode Switch Turns the power off. Set the mode switch to [OFF] when you are not using the strobe. Set the mode switch to this position when you shoot with manual flash using a digital camera that pre-flashes. FULL Set the mode switch to this position when you shoot with manual flash using a... -
Page 12: Target Light Switch
Identification of Parts Light level control dial Light amount can be adjusted in 10 increments when the mode switch is set to [ ] or [ ]. Marks can be used to verify 1/4 ( ) or 1/2 ( ) of full flash. In DS-TTL mode you can micro-adjust FULL (dimming only) the light amount. -
Page 13: Ready / Ttl Lamp
Identification of Parts Ready / TTL lamp Ready Illuminates in red when the strobe is ready to fire. Illuminates in green for approx. 3 seconds after firing with DS-TTL flash output. Fixing Bolt To mount the strobe to an arm, insert the fixing bolt in the direction of the arrow. -
Page 14: Installing The Batteries
Installing the Batteries This model can be powered by the following batteries. Use four of each type. AA alkaline battery, AA Ni-MH battery, AA oxyride battery Make sure that the mode switch is in the OFF position Turn ① counterclokwise to the OPEN●... - Page 15 Installing the Batteries Align the round mark and ① Round mark ① on the battery cap with the OPEN ● position, insert the battery cap into the strobe Fig.3 ① Turn ① clockwise to the LOCK position Turn until you hear the sound of it clicking into place.
-
Page 16: Connecting The Strobe
Connecting the Strobe When you use this strobe, connect the strobe to the camera (housing) with a fiber-optic cable (optional). Using a built-in slave sensor, this strobe is triggered by sensing the light from a digital camera's built-in flash. If the fiber-optic cable is not used, depending on the shooting conditions the strobe may either not fire, or not obtain DS-TTL flash exposure compensation. - Page 17 Connecting the Strobe CAUTION When shooting, set the built-in flash of the camera to the forced-flash mode. The strobe will not fire unless the built-in flash of the camera fires. Refer to the digital camera instruction manual for setting the forced-flash mode. Refer to the fiber-optic cable instruction manual before use.
-
Page 18: Taking Photographs
Taking Photographs When shooting, set the built-in flash of the camera to the forced-flash mode. The strobe will not fire unless the built-in flash of the camera fires. Settings chart Mode switch setting Camera / Housing Manual DS-TTL DX-1200HD DX-8000G TTL... - Page 19 Taking Photographs Take a photograph To check the mode switch You can check whether the settings of the mode switch are correct, by shooting the strobe with a digital camera. The number of times a digital camera's built-in flash will fire differs depending on the shooting mode.
-
Page 20: Ds-Ttl Photography
Taking Photographs DS-TTL photography The DS-TTL system on this strobe is a slave TTL system with flash dimming functionality. This system is useful for when you are using another main strobe that can pre-flash such as a camera's built-in TTL flash or another TTL strobe that is connected to the camera. -
Page 21: Using The Diffuser
Taking Photographs Using the Diffuser Use of the diffuser is highly recommended for shooting short camera-to-subject distances. Attaching the diffuser Attach the included diffuser strap to the strap eyelets on the diffuser and the strobe Strap eyelet Align the notches on the top and bottom of the diffuser with the protrusions on the reflector Firmly set the tabs on the diffuser into the grooves on the right and left side of the body... - Page 22 Taking Photographs Detaching the diffuser Pinch in and pull up on the tabs (A) Tabs (A) simultaneously to remove the tabs from the side grooves. CAUTION Do not try to forcibly remove the diffuser with the tab on only one side as doing so may cause breakage.
-
Page 23: Maintenance And Storage
Maintenance and Storage CAUTION Never use chemicals, cosmetics, any petroleum solvents such as paint thinner, or neutral detergent on the product. They may deform and damage the product. After each use in salt water, make sure the battery and connector caps are attached, then in a watertight condition soak it sufficiently in fresh water. -
Page 24: Specifications
Specifications Mode switch (OFF / / TTL) Controls and functions Light level control dial (10 increments) Target light switch (ON/OFF) Ready lamp (Illuminates in red when the Indicator strobe is ready to fire.) TTL lamp (Illuminate in green for approx.3 sec. - Page 25 Memo...
Need help?
Do you have a question about the YS-01 and is the answer not in the manual?
Questions and answers