
Related Manuals for EUFY RoboVac 11c Pet Edition (T2111)


Summary of Contents for EUFY RoboVac 11c Pet Edition (T2111)
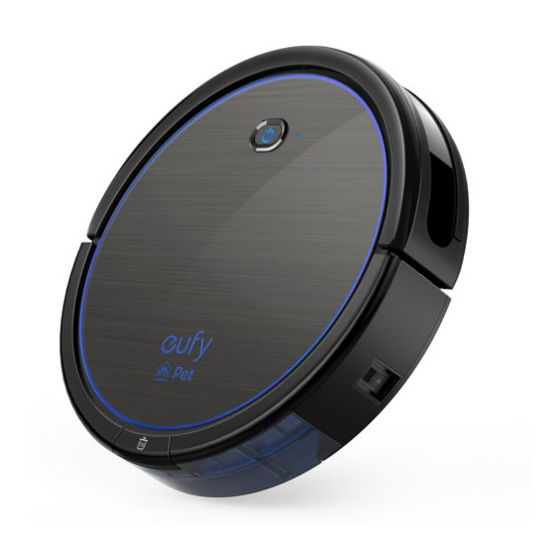
- Page 1 Cleaning For FAQs and more information, please visit: www.eufylife.com Owner’s Manual RoboVac 11c Pet Edition (T2111) T2111 51005000847 V01...
-
Page 2: Table Of Contents
Table of Contents About Your RoboVac What's in the Box RoboVac Anatomy 06 Using Your RoboVac Important Tips Before Use Install the Charging Base Charge Your RoboVac Start / Stop Cleaning Select a Cleaning Mode Schedule Cleaning Use Your RoboVac with the EufyHome App Use Your RoboVac with Amazon Alexa / the Google Assistant (Optional) Use the Boundary Strips... -
Page 3: About Your Robovac
About Your RoboVac RoboVac Anatomy What's in the Box Top & Side Auto cleaning On/O button Bumper Wi-Fi status light Remote Control RoboVac 11c Pet Edition Charging Base (AAA Battery ×2) Infrared sensor Main power switch (On/O ) Dust collector Dust collector release button Boundary Strips Power Adapter... - Page 4 Dust Collector Remote Control Filter cover Return RoboVac to Charging Base Foam filter Start/Stop Auto cleaning High-performance filter Control cleaning direction manually Adjust the hour and minute Start Spot cleaning Start Edge cleaning Charging Base Start Single Room cleaning Status light Power socket Charging contact pins Install 2 AAA batteries before using the remote control for the first time.
-
Page 5: Using Your Robovac
Using Your RoboVac Install the Charging Base Important Tips Before Use Place the Charging Base on a hard, level surface and against a wall. Remove objects within 3 ft/1 m of the left and right side and within 6 ft/2 m of the front of the Charging Base. -
Page 6: Charge Your Robovac
Charge Your RoboVac Start / Stop Cleaning • RoboVac has a pre-installed rechargeable battery that has to be fully charged before use. 1. Turn on the main power supply • RoboVac returns to the Charging Base at the end of a cleaning cycle or when its battery is Press the main power switch on the side of RoboVac to turn on the main power supply. - Page 7 Power Boost Feature 3. Edge cleaning When the Power Boost feature is enabled, RoboVac will automatically increase the suction RoboVac reduces its speed when it detects a wall and then follows the wall to ensure the power if it detects stronger power is needed to ensure the best clean. Power Boost is ideal edge is cleaned thoroughly.
-
Page 8: Schedule Cleaning
5. Manual cleaning You can direct RoboVac to clean a particular area by using the directional buttons on the remote control. EufyHome Forward Download the EufyHome app from the App Store (iOS devices) or Google Play Left (Android devices). Open the app and create a user account. Right Tap the “+”... -
Page 9: Use Your Robovac With Amazon Alexa / The Google Assistant (Optional)
To control RoboVac with your voice, say simple commands to Google Assistant. • RoboVac is connected with the EufyHome app. • You have an Alexa-enabled device (i.e. Eufy Genie, Amazon Echo, Echo Dot and Amazon "Ok Google, ask RoboVac to start cleaning."... -
Page 10: Use The Boundary Strips
Cleaning and Maintenance Use the Boundary Strips With the Boundary Strips, you can keep RoboVac away from any area or item you do not Clean the Dust Collector and Filters want RoboVac to clean. RoboVac will recognize the Boundary Strips and not cross into the blocked-off area. -
Page 11: Clean The Rolling Brush
Clean the Sensors and Charging Pins Push the dust collector back into the main unit. To maintain best performance, clean the drop sensors and charging pins regularly. • Dust off the drop sensors and charging contact pins using a cloth or cleaning brush. - It is recommended to empty the dust collector and clean the filter after every use. -
Page 12: Replace The Side Brushes
Troubleshooting Replace the Side Brushes The side brushes may become bent or damaged after being used for a period of time. Problem Solutions Follow the instructions below to replace them. • Make sure the main power switch is in the ON position. Use a Phillips screwdriver to unscrew the screws on the side brushes. -
Page 13: Wi-Fi Connection
- The firewall and port settings of your Wi-Fi router allow RoboVac to connect Four beeps RoboVac’s suction fan is stuck. • Make sure the suction inlet is not blocked with the Eufy servers. by any hair or debris. • Network Security Requirement RoboVac’s infrared sensor on the... -
Page 14: Specifications
DC 14.4 V Battery Type Li-ion 2500 mAh If you cannot control RoboVac with your smartphone, find the solutions below to solve the problem. If the problem persists, contact the Eufy service center for help. Dust Collector Capacity 0.55 L Cleaning Time Max.
Need help?
Do you have a question about the RoboVac 11c Pet Edition (T2111) and is the answer not in the manual?
Questions and answers