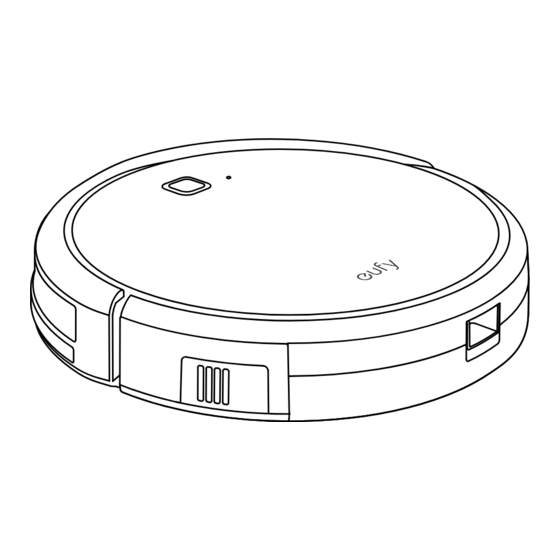
Summary of Contents for EUFY T2103
- Page 1 Cleaning For FAQs and more information, please visit: www.eufylife.com Owner’s Manual RoboVac 11c Product Model: T2103 SM-A540-V01...
-
Page 2: Table Of Contents
Table of Contents Important Safety Instructions 04 About Your RoboVac What's In the Box RoboVac Anatomy Using Your RoboVac Important Tips Before Use Before You Start Install the Charging Base Charge Your RoboVac Start/Stop Cleaning Select a Cleaning Mode Schedule Cleaning Use Your RoboVac with EufyHome App Use Your RoboVac with Amazon Alexa (Optional) Cleaning and Maintenance... -
Page 3: Important Safety Instructions
Important Safety Instructions To reduce the risk of injury or damage, read these safety • This device is for indoor use only. instructions carefully and keep them at hand when setting up, • This device is not a toy. Do not sit or stand on this device. using and maintaining this device. -
Page 4: About Your Robovac
About Your RoboVac RoboVac Anatomy What's In the Box Top & Side Auto cleaning On/O button Bumper Wi-Fi status light O F F RoboVac 11c Charging Base Remote Control Main power switch (On / O ) Charging socket Dust collector Dust collector release button Bottom Power Adapter... -
Page 5: Using Your Robovac
Using Your RoboVac Dust Collector Filter door Important Tips Before Use Filter cover Foam filter HEPA-style filter Filter door release button Charging Base Status light Charging contact pins Power socket Remote Control Remove power cords and small objects from the floor that may entangle RoboVac. Start/Stop Auto cleaning Remove rugs that are thicker than 0.4 in/10 mm as they may cause RoboVac to malfunction. -
Page 6: Before You Start
Before You Start 2. Remove objects within 3 ft/1 m of the left and right side and within 6 ft/2 m of the front of the charging base. 1. Remove the protective film covering RoboVac and the Charging Base. 3. Connect the round connector of the adapter into the power socket on the Charging Base and the other end into a wall outlet. -
Page 7: Start/Stop Cleaning
Start/Stop Cleaning Method 2: Press on the remote control to return RoboVac to the Charging Base. 1. Turn on the main power supply Press the power switch on the side of RoboVac to turn on the main power supply. 2. Start cleaning Method 3: Charge RoboVac directly with the power adaptor. - Page 8 4. Single Room cleaning - RoboVac will return to the Charging Base automatically when the power level RoboVac intensively cleans one single room and stops when cleaning is complete. Select becomes low. this mode only when one specific room needs to be cleaned. Make sure to confine RoboVac - Whenever you turn RoboVac on, it will start Auto cleaning.
-
Page 9: Schedule Cleaning
Schedule Cleaning - If you have any problem with Wi-Fi setup, refer to this section “ ”. With the EufyHome app, you can schedule RoboVac to start cleaning at a particular time. - If RoboVac gets stuck in any space, tap on the app to find the machine. -
Page 10: Cleaning And Maintenance
Open the Alexa app and select “Skills” from the menu. On the Skills screen, search for “EufyHome - RoboVac”. Once you have found the “EufyHome - RoboVac” skill, tap Enable. Login with your EufyHome account so that Alexa can control your RoboVac. Say simple commands to Alexa: Press the filter door release button to open the filter door and take out the filters. -
Page 11: Clean The Rolling Brush
Clean the Rolling Brush Clean the Side Brushes Pull on release tabs to unlock brush guard as shown. Foreign substances, such as hair, can easily get tangled in the side brushes, and dirt may adhere to them. Be sure to clean them regularly. Lift the rolling brush to remove. - Page 12 Troubleshooting Error Codes When RoboVac is in trouble, it will emit a series of short or long beeps and the red indicator on RoboVac will be on or flashing. Problem Solutions Flashing red indicator light • Make sure the power switch is in the ON position. •...
-
Page 13: Wi-Fi Connection
If you cannot control RoboVac with your smartphone, find the solutions below to solve the problem. If the problem persists, contact the Eufy service center for help. Before Wi-Fi setup, make sure RoboVac and your Wi-Fi network meet the following... -
Page 14: Notice
Notice Customer Service The symbol on the product or its packaging indicates: 12-Month Limited Warranty Do not dispose of electrical appliances as unsorted municipal waste, use separate Lifetime Technical Support collection facilities. Contact your local authority for information regarding the collection systems available.


Need help?
Do you have a question about the T2103 and is the answer not in the manual?
Questions and answers