
Related Manuals for Allen-Bradley 1336 IMPACT


Summary of Contents for Allen-Bradley 1336 IMPACT
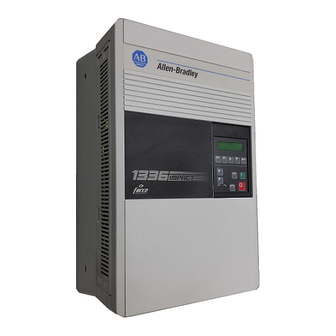
- Page 1 Allen-Bradley Troubleshooting 1336 IMPACTt Adjustable Frequency Guide AC Drive (Series A) A020 – A030 B040 – B050 BX040, BX060 C025 – C060 AB Spares...
- Page 2 Important User Because of the variety of uses for the products described in this publication, Information those responsible for the application and use of this control equipment must satisfy themselves that all necessary steps have been taken to assure that each application and use meets all performance and safety requirements, including any applicable laws, regulations, codes and standards.
- Page 3 By filling out this form you can help us provide the most useful, thorough, and accurate manuals available. Please take a few minutes to tell us what you think. Then mail or FAX this form. FAX: to your local Allen-Bradley Sales Office or 414/512-8579 PUBLICATION NAME PUBLICATION NUMBER, DATE AND PART NUMBER (IF PRESENT) ✓...
- Page 4 FOLD HERE FOLD HERE NO POSTAGE NECESSARY IF MAILED IN THE UNITED STATES BUSINESS REPLY MAIL FIRST CLASS PERMIT NO. 413 MEQUON, WI POSTAGE WILL BE PAID BY ADDRESSEE ALLEN-BRADLEY Attn: Marketing Communications P.O. Box 760 Mequon, WI 53092-9907...
- Page 5 Summary of Changes Summary of Changes The information below summarizes the changes to the company-wide templates since the last release. Updated Information No changes have been made to this manual. AB Spares Publication 1336 IMPACT-6.2 – March 1998...
-
Page 6: Table Of Contents
Control Firmware Function ......1–13 Publication 1336 IMPACT-6.2 – March 1998... - Page 7 ........3–19 Accessing Chassis Power Components ....3–19 AB Spares Publication 1336 IMPACT-6.2 – March 1998...
- Page 8 ........5–20 Publication 1336 IMPACT-6.2 – March 1998...
- Page 9 ......6–2 Schematics — 20 – 60 HP Chapter 7 1336 IMPACT Drives Index AB Spares Publication 1336 IMPACT-6.2 – March 1998...
-
Page 10: Manual Objective
BX040, BX060, and C025 – C060. Who Should Use This This manual is intended for qualified service personnel responsible Manual for troubleshooting and repairing the 1336 IMPACT Adjustable Frequency AC Drive. You should: • Read this entire manual before performing maintenance or repairs to drives. -
Page 11: Electrostatic Discharge Precautions
B Quasi-differential mode with the oscilloscope chassis correctly grounded to an earth ground. ATTENTION: Only personnel familiar with the 1336 IMPACT Adjustable Frequency AC Drive and associated machinery should plan or implement the installation, start-up and subsequent maintenance of the system. -
Page 12: 1336 Impact Product Identification
Board Mounting Plate. The drive nameplate contains the drive’s catalog number and other important drive information. Reference the catalog number when ordering replacement parts. Figure P.1 Drive Nameplate Location Nameplate located on tab of Main Control Board Mounting Plate AB0334B Publication 1336 IMPACT-6.2 – March 1998... -
Page 13: Drive And Option Identification
The following is an explanation of the catalog numbering system for Identification 1336 IMPACT Adjustable Frequency AC Drives and options. The catalog number is coded to identify the drive power rating and can be found on the drive shipping carton and nameplate. - Page 14 (75HP/55kW and above) at altitudes of 1,000 meters or less. 500 – 600V AC drive rating is based on nominal voltage of 600v and carrier frequency of 4kHz (60HP/45kW and below) or 2kHz (75HP/55kW and above) at altitudes of 1,000 meters or less. Refer to Drive Rating Qualifications on page P–9. Refer to Table P.I for explanation of “E” rating. Publication 1336 IMPACT-6.2 – March 1998...
- Page 15 (75HP/55kW and above) at altitudes of 1,000 meters or less. 500 – 600V AC drive rating is based on nominal voltage of 600v and carrier frequency of 4kHz (60HP/45kW and below) or 2kHz (75HP/55kW and above) at altitudes of 1,000 meters or less. Refer to Drive Rating Qualifications on page P–9. AB Spares Publication 1336 IMPACT-6.2 – March 1998...
- Page 16 Contact Closure & Encoder Feedback Programmer/Controller with Digital Pot +24V AC/DC +24V AC/DC & Encoder Feedback 115V AC 115V AC & Encoder Feedback For a more functionally complete description of each option, refer to Publication 1336 IMPACT-1.0. Publication 1336 IMPACT-6.2 – March 1998...
- Page 17 Drive Ambient Temperature Rating is 40_C. If ambient exceeds 40_C, the drive must be derated. Drive Rating is based on altitudes of 1,000m (3,000 ft) or less. If installed at higher altitude, drive must be derated. Refer to the 1336 IMPACT User Manual. AB Spares Publication 1336 IMPACT-6.2 – March 1998...
-
Page 18: Drive Rating Qualifications
Table P.I Enclosure Type Code Description Enclosure Description Type Code Open style (IP00) NEMA Type 1 (IP20) NEMA Type 1 (IP20) “CE” Metal Cover NEMA Type 4 (IP65) NEMA Type 12 (IP54) Publication 1336 IMPACT-6.2 – March 1998... -
Page 19: Conventions
Female connectors are at the ends of wires or ribbon cables and plug into male connectors. Default When a drive function defaults, it automatically changes to a pre-programmed setting. AB Spares Publication 1336 IMPACT-6.2 – March 1998... -
Page 20: Enable Input
External Fault. Parameter Parameters are programmable drive functions that define various operating functions or status displays of a drive. Refer to Bulletin 1336 IMPACT Adjustable Frequency AC Drive User Manual for parameter details. Publication 1336 IMPACT-6.2 – March 1998... -
Page 21: Press
• User Manual Bulletin 1201 Graphic Programming Terminal (1201-5.0) Current 1336 IMPACT spare parts information, including recommended parts, catalog numbers, and pricing, can be obtained from the following sources. • Allen–Bradley home page on the World Wide Web at: http://www.ab.com Select Drives, and the select Information for Drives, Including Part Lists . -
Page 22: Control Logic Wiring And Adapters
Component damage may result if you ignore electrostatic discharge control procedures. If you are not familiar with static control procedures, reference Rockwell Automation Publication 8000-4.5.2, Guarding Against Electrostatic Discharge, or any other applicable ESD protection handbook. Publication 1336 IMPACT-6.2 – March 1998... -
Page 23: L Option Board
L Option Board The L Option Board provides a means of interfacing various signals and commands to the 1336 IMPACT by using contact closures. Six different versions of the L Option are available: Contact Closure Interface Contact Closure Interface with Encoder Feedback... -
Page 24: L Option Board Jumpers
Main Control Board. If this board is removed, these jumpers must be reinstalled and the L Option Mode parameter must be programmed to “1”. Figure 1.2 Jumper Locations Jumper J10 (Located on Main Board) AB0763A Publication 1336 IMPACT-6.2 – March 1998... -
Page 25: Available Inputs
Then select the remaining control functions available. After selecting a group of L Option Modes, use Table 1.A for specific mode selection. Record the selected mode number below. Selected Mode Number: AB Spares Publication 1336 IMPACT-6.2 – March 1998... -
Page 26: Local Programming
TB3 is 2.1 and 0.30 mm (14 and 22 AWG). Maximum torque for all terminals is 1.36 N-m (12 lb-in.). Use copper wire only. Figure 1.3 TB3 Terminal Designations Included on L7E, L8E, & L9E Only AB0293B Publication 1336 IMPACT-6.2 – March 1998... - Page 27 11 In mode 5, the MOP value is not reset to 0 when you stop. In mode 27, the MOP value is AB Spares reset when you stop. Available in versions 2.02 and later. Publication 1336 IMPACT-6.2 – March 1998...
- Page 28 In modes 9, 10, and 15, the MOP value is not reset to 0 when you stop. In modes 28, 29, and 30, the MOP value is reset when you stop. Available in versions 2.02 and later. AB0291B Publication 1336 IMPACT-6.2 – March 1998...
- Page 29 Speed regulate Torque regulate Minimum torque/speed Maximum torque/speed Sum of the torque and speed Zero torque Zero torque O = Open = Removed = 0 X = Closed = Applied = 1 AB Spares Publication 1336 IMPACT-6.2 – March 1998...
-
Page 30: Human Interface Module (Him)
Panel and Control Panel. The Display Panel provides a means of programming the drive and viewing the various operating parameters. The Control Panel allows different drive functions to be controlled. Refer to the 1336 IMPACT User Manual for HIM operation. Important: The operation of HIM functions depends upon drive parameter settings. -
Page 31: Removing The Him
AB0337B Removing the HIM For handheld operation, you can remove the module and place it up to 10 meters (33 feet) from the 1336 IMPACT drive. (You do need a cable to do this.) ATTENTION: Some voltages present behind the drive front cover are at incoming line potential. - Page 32 (adapter 2, 3, 4, or 5) or adapter 1 (the HIM cradle). 2. Set SP Enable Mask (parameter 124) and/or Fault Select 1 (parameter 20) to enable the port into which you plugged the HIM. Publication 1336 IMPACT-6.2 – March 1998...
-
Page 33: Him Operation
Figure 1.7) will be shown. This display shows the current status of the drive (i.e. Stopped, Running, etc.) or any faults that may be present (Not Enabled, etc.). Refer to the 1336 IMPACT User Manual for HIM operation. Figure 1.7 Status Display Stopped +0.00 RPM... -
Page 34: Drivetools
Windows applications. For operation, refer to the Product Data DriveTools Software manual. Control Firmware Function All control functions in the 1336 IMPACT drive are performed through the use of parameters that can be changed with a programming terminal or DriveTools. Refer to an overview Block Diagram of the Control Firmware Function in the 1336 IMPACT User Manual. - Page 35 Ref 1 parameter and contains a number value representing the speed reference. The speed reference can originate from an external control device such as a potentiometer connected to the analog input of the Main Control Board. Refer to the 1336 IMPACT User Manual, Publication 1336 IMPACT-5.0. AB Spares...
-
Page 36: Troubshooting And Error Codes
This chapter provides information to help troubleshoot your 1336 IMPACT drive. ATTENTION: Do not troubleshoot or maintain the 1336 IMPACT drive unless you are familiar with your drive system and the associated machinery. You may be injured and/or the equipment may be damaged if you do not comply. - Page 37 Faults are annunciated on the Human Interface Module (HIM) at the time they occur. Warnings are not annunciated on the HIM. To help troubleshoot your 1336 IMPACT drive, the drive logs any faults or warnings in either the fault or warning queue. The faults and warnings that are contained in the queues are either configurable or non-configurable.
-
Page 38: Viewing The Fault And Warning Queues On The Him
Status options until Fault Queue is displayed. 5. Press the Enter key. 6. Press the Enter key when View Queue is displayed. The fault queue can contain up to 32 faults. The 1336 IMPACT drive reports the faults using the following format: Figure 2.2... -
Page 39: What Are The Fault Descriptions
Motor Stall Time (parameter 25) with the If you do not want this condition to be motor at zero speed. reported as a fault, change bit 5 in Fault Select 2 (parameter 22) to 0. AB Spares Publication 1336 IMPACT-6.2 – March 1998... - Page 40 VP, Flashing red Soft has been in excess of 105% of Inverter Inv Overload reported as a fault, change bit 15 in Fault Amps (parameter 11) too long. Select 2 (parameter 22) to 0. Publication 1336 IMPACT-6.2 – March 1998...
- Page 41 If the fault still occurs, replace the main control board. 03015 Recycle the power. If the fault does not VP, Flashing red Soft A hardware malfunction has occurred. AB Spares HW Malfunction clear, replace the main control board. Publication 1336 IMPACT-6.2 – March 1998...
- Page 42 VP, Flashing red Soft A math limit has occurred. Math Limit manual. If you do not want this condition to be reported as a fault, change bit 10 in Fault Select 2 (parameter 22) to 0. Publication 1336 IMPACT-6.2 – March 1998...
- Page 43 • Replace drive, if required. port 1 is set (1). If you do not want this condition to be reported as a fault, change bit 9 in Fault Select 1 (parameter 20) to 0. AB Spares Publication 1336 IMPACT-6.2 – March 1998...
- Page 44 SCANport adapters, and main control board. SP Error interrupted. • Replace drive, if required. If you do not want this condition to be reported as a fault, change bit 15 in Fault Select 1 (parameter 20) to 0. Publication 1336 IMPACT-6.2 – March 1998...
- Page 45 • Replace drive, if required. port 6 is set (1). If you do not want this condition to be reported as a warning, change bit 14 in Warning Select 1 (parameter 21) to 0. AB Spares Publication 1336 IMPACT-6.2 – March 1998...
- Page 46 Soft manual for more information. Prechrg Time within 30 seconds. If you do not want this condition to be reported as a fault, change bit 1 in Fault Select 1 (parameter 20) to 0. Publication 1336 IMPACT-6.2 – March 1998...
- Page 47 Prechrg Time within 30 seconds. If you do not want this condition to be reported as a warning, change bit 1 in Warning Select 1 (parameter 21) to 0. AB Spares Publication 1336 IMPACT-6.2 – March 1998...
- Page 48 A hardware malfunction occurred. HW Malfunction clear, replace the main control board. 13004 Recycle the power. If the fault does not CP, Solid red Hard A hardware malfunction occurred. HW Malfunction clear, replace the main control board. Publication 1336 IMPACT-6.2 – March 1998...
-
Page 49: Diagnostic Procedures By Symptom
2–14 Troubleshooting and Error Codes Diagnostic Procedures by The following charts list drive symptoms, symptom descriptions, and Symptom recommended actions. Figure 2.4 Drive Will Not Start or Jog AB Spares Publication 1336 IMPACT-6.2 – March 1998... - Page 50 Troubleshooting and Error Codes 2–15 Figure 2.5 No HIM Display Publication 1336 IMPACT-6.2 – March 1998...
- Page 51 2–16 Troubleshooting and Error Codes Figure 2.6 HIM Displays “Running” AB Spares Publication 1336 IMPACT-6.2 – March 1998...
- Page 52 Troubleshooting and Error Codes 2–17 Figure 2.7 Motor Response Not Where You Want It Publication 1336 IMPACT-6.2 – March 1998...
-
Page 53: Start Up Troubleshooting Procedures
Check the encoder wiring. to swap the leads again. • Check the encoder itself. Miscellaneous If you are having problems with how your 1336 IMPACT drive is Troubleshooting operating, refer to this table for possible solutions before calling for Procedures help. - Page 54 Input Scale (parameter 104) if your speed input is coming from the analog range. inputs. • Check Speed Scale 1 (parameter 30) or Speed Scale 7 (parameter 37). • Check Absolute Overspd (parameter 24). • Check Min Speed Limit (parameter 215). Publication 1336 IMPACT-6.2 – March 1998...
-
Page 55: Encoderless Troubleshooting Procedures
(parameter 178) until the trip stops occurring. • Increase the bandwidth in Spd Desired BW (parameter 161). overspeed during starting • If the overspeed occurs during a reversal, increase the deceleration time (slower deceleration).shippshippy AB Spares Publication 1336 IMPACT-6.2 – March 1998... -
Page 56: Disassembly And Access
Component damage may result if you ignore electrostatic discharge control procedures. If you are not familiar with static control procedures, reference Rockwell Automation Publication 8000-4.5.2, Guarding Against Electrostatic Discharge, or any other applicable ESD protection handbook. Publication 1336 IMPACT-6.2 – March 1998... -
Page 57: Tools
Phillips screwdriver • Standard screwdriver • 5/16-inch or 8 mm socket • 11/16-inch or 17 mm socket • 5/16-inch or 8 mm open-end wrench • Torque wrench, metered in lb-in. or N-m AB Spares Publication 1336 IMPACT-6.2 – March 1998... -
Page 58: Fastener Torque Specifications
The following illustrates temporary and final tightening sequences for components fastened to a heat sink using four screws. Temporary torque is 1/3 (33%) of final torque. The numeric illustration labels are for your assistance. Drive components do not carry these labels. Publication 1336 IMPACT-6.2 – March 1998... -
Page 59: Torque Specifications
25 – 31 2.8 – 3.5 Ground Sense CT Bus bars to capacitor bank 25 – 31 2.8 – 3.5 Main Control Board Board to Mounting Plate 12 – 16 1.4 – 1.8 AB Spares Publication 1336 IMPACT-6.2 – March 1998... -
Page 60: Disassembly And Access Procedures
Disassembly and Access Procedures 3–5 Disassembly and Access Procedures Opening the Drive Enclosure Figure 3.3 Drive Enclosure Enclosure Cover Captive Thumbscrew AB0852A Publication 1336 IMPACT-6.2 – March 1998... -
Page 61: Removal
ATTENTION: Wear a wrist-type grounding strap when servicing 1336 IMPACT drives. Failure to protect drive components against ESD may damage drive components. Refer to Electrostatic Discharge Precautions at the beginning of this chapter. -
Page 62: Removing L Option Board
Disassembly and Access Procedures 3–7 Removing L Option Board Figure 3.4 L Option Board Control Interface Board Terminal Strip AB0853A Publication 1336 IMPACT-6.2 – March 1998... -
Page 63: Removal
ATTENTION: Wear a wrist-type grounding strap when servicing 1336 IMPACT drives. Failure to protect drive components against ESD may damage drive components. Refer to Electrostatic Discharge Precautions at the beginning of this chapter. -
Page 64: Removing The Main Control Board Mounting Plate
Verify bus voltage by measuring the voltage between +DC and –DC on terminal block TB1. Do not attempt to service the drive until the bus voltage has discharged to zero volts. Publication 1336 IMPACT-6.2 – March 1998... -
Page 65: Installation
3–10 Disassembly and Access Procedures ATTENTION: Wear a wrist-type grounding strap when servicing 1336 IMPACT drives. Failure to protect drive components against ESD may damage drive components. Refer to Electrostatic Discharge Precautions at the beginning of this chapter. Important: Before you remove connections and wires from the... -
Page 66: Removing The Main Control Board
Verify bus voltage by measuring the voltage between +DC and –DC on terminal block TB1. Do not attempt to service the drive until the bus voltage has discharged to zero volts. Publication 1336 IMPACT-6.2 – March 1998... -
Page 67: Installation
3–12 Disassembly and Access Procedures ATTENTION: Wear a wrist-type grounding strap when servicing 1336 IMPACT drives. Failure to protect drive components against ESD may damage drive components. Refer to Electrostatic Discharge Precautions at the beginning of this chapter. Important Before you remove connections and wires from the... -
Page 68: Removing The Precharge Board
Verify bus voltage by measuring the voltage between +DC and –DC on terminal block TB1. Do not attempt to service the drive until the bus voltage has discharged to zero volts. Publication 1336 IMPACT-6.2 – March 1998... -
Page 69: Installation
3–14 Disassembly and Access Procedures ATTENTION: Wear a wrist-type grounding strap when servicing 1336 IMPACT drives. Failure to protect drive components against ESD may damage drive components. Refer to Electrostatic Discharge Precautions at the beginning of this chapter. Important: Before you remove connections and wires from the... -
Page 70: Removing The Gate Driver Board
Verify bus voltage by measuring the voltage between +DC and –DC on terminal block TB1. Do not attempt to service the drive until the bus voltage has discharged to zero volts. Publication 1336 IMPACT-6.2 – March 1998... -
Page 71: Installation
3–16 Disassembly and Access Procedures ATTENTION: Wear a wrist-type grounding strap when servicing 1336 IMPACT drives. Failure to protect drive components against ESD may damage drive components. Refer to Electrostatic Discharge Precautions at the beginning of this chapter. Important: Before you remove connections and wires from the... -
Page 72: Removing The Snubber Board
Verify bus voltage by measuring the voltage between +DC and –DC on terminal block TB1. Do not attempt to service the drive until the bus voltage has discharged to zero volts. Publication 1336 IMPACT-6.2 – March 1998... - Page 73 3–18 Disassembly and Access Procedures ATTENTION: Wear a wrist-type grounding strap when servicing 1336 IMPACT drives. Failure to protect drive components against ESD may damage drive components. Refer to Electrostatic Discharge Precautions at the beginning of this chapter. Important: Before you remove connections and wires from the...
-
Page 74: Installation
Failure to replace guards may result in death or serious injury. Accessing Chassis Power Components To access the power components located on the chassis, refer to Removing the Gate Driver Board in this chapter. Publication 1336 IMPACT-6.2 – March 1998... - Page 75 3–20 Disassembly and Access Procedures This Page Intentionally Left Blank AB Spares Publication 1336 IMPACT-6.2 – March 1998...
-
Page 76: Component Test Procedures
Follow the safety-related practices of NFPA 70E, Electrical Safety for Employee Workplaces, when working on or near energized equipment. Do not work alone on energized equipment. Publication 1336 IMPACT-6.2 – March 1998... -
Page 77: Electrostatic Discharge Precautions
Phillips screwdriver • Standard screwdriver • 5/16-inch or 8 mm socket • 11/16-inch or 17 mm socket • 5/16-inch or 8 mm open-end wrench • Torque wrench, metered in lb-in. or N-m AB Spares Publication 1336 IMPACT-6.2 – March 1998... -
Page 78: Test 1 - Testing Input Rectifier Scr1
Important: Before you remove connections and wires from the drive components, mark the connections and wires to correspond with their component connections and terminals to prevent incorrect wiring during assembly. Publication 1336 IMPACT-6.2 – March 1998... - Page 79 Rectifier SCR1. 8. If the Input Rectifier requires replacement, check the Power Modules for damage. Refer to Testing the Power Modules in this chapter. 9. Assemble the drive in reverse order of disassembly. AB Spares Publication 1336 IMPACT-6.2 – March 1998...
-
Page 80: Test 2 - Testing The Bus Capacitor Bank
Verify bus voltage by measuring the voltage between +DC and –DC on terminal block TB1. Do not attempt to service the drive until the bus voltage has discharged to zero volts. Publication 1336 IMPACT-6.2 – March 1998... - Page 81 Input Meter Rating Volts Reading 280V DC +/–5% 322V DC +/–5% 336V DC +/–5% 535V DC +/–5% 580V DC +/–5% 675V DC +/–5% 700V DC +/–5% 810V DC +/–5% 850V DC +/–5% AB Spares Publication 1336 IMPACT-6.2 – March 1998...
- Page 82 Capacitor Bank and Load-Sharing Resistors. Refer to Chapter 5 – Part Replacement Procedures, Bus Capacitor Bank. ATTENTION: Replace all guards and insulators before applying power to the drive. Failure to replace guards may result in death or serious injury. Publication 1336 IMPACT-6.2 – March 1998...
-
Page 83: Test 3 - Testing Power Modules Pm1 - Pm3
Important: Before you remove connections and wires from the drive components, mark the connections and wires to correspond with their component connections and AB Spares terminals to prevent incorrect wiring during assembly. Publication 1336 IMPACT-6.2 – March 1998... - Page 84 Board. Refer to Testing the Gate Driver Board in this chapter. 9. Assemble the drive in reverse order of disassembly. ATTENTION: Replace all guards and insulators before applying power to the drive. Failure to replace guards may result in death or serious injury. Publication 1336 IMPACT-6.2 – March 1998...
-
Page 85: Test 4 - Testing Bus Fuse F1
Verify bus voltage by measuring the voltage between +DC and –DC on terminal block TB1. Do not attempt to service the drive until the bus voltage has discharged to zero volts. AB Spares Publication 1336 IMPACT-6.2 – March 1998... - Page 86 Chapter 5 – Part Replacement Procedures, Bus Fuse F1. 8. Assemble the drive in reverse order of disassembly. ATTENTION: Replace all guards and insulators before applying power to the drive. Failure to replace guards may result in death or serious injury. Publication 1336 IMPACT-6.2 – March 1998...
-
Page 87: Test 5 - Testing The Gate Driver Board
Verify bus voltage by measuring the voltage between +DC and –DC on terminal block TB1. Do not attempt to service the drive until the bus voltage has discharged to zero volts. AB Spares Publication 1336 IMPACT-6.2 – March 1998... - Page 88 Procedures, Removing the Gate Driver Board. 11. Assemble the drive in reverse order of disassembly. ATTENTION: Replace all guards and insulators before applying power to the drive. Failure to replace guards may result in death or serious injury. Publication 1336 IMPACT-6.2 – March 1998...
-
Page 89: Test 6 - Testing The Precharge Board
Verify bus voltage by measuring the voltage between +DC and –DC on terminal block TB1. Do not attempt to service the drive until the bus voltage has discharged to zero volts. AB Spares Publication 1336 IMPACT-6.2 – March 1998... - Page 90 L Option Board (if used) 4. Set your meter to measure resistance. 5. Test fuses F1, F2, and F3 for open conditions. 6. Replace the Precharge Board if any fuse shows an open condition. Publication 1336 IMPACT-6.2 – March 1998...
-
Page 91: Test 7 - Testing The Thermistor
Verify bus voltage by measuring the voltage between +DC and –DC on terminal block TB1. Do not attempt to service the drive until the bus voltage has discharged to zero volts. AB Spares Publication 1336 IMPACT-6.2 – March 1998... - Page 92 7. Measure the resistance across the Thermistor wires. Nominal meter reading should be 100K ohms at room temperature. 8. If the Thermistor reading measures other than the nominal value, replace the Thermistor. Refer to Chapter 5 – Part Replacement Procedures, Thermistor. Publication 1336 IMPACT-6.2 – March 1998...
- Page 93 4–18 Component Test Procedures This Page Intentionally Left Blank AB Spares Publication 1336 IMPACT-6.2 – March 1998...
-
Page 94: Part Replacement Procedures
Component damage may result if you ignore electrostatic discharge control procedures. If you are not familiar with static control procedures, reference Rockwell Automation Publication 8000-4.5.2, Guarding Against Electrostatic Discharge, or any other applicable ESD protection handbook. Publication 1336 IMPACT-6.2 – March 1998... -
Page 95: Tools
L Option Board installation and removal procedures, refer to Chapter 3. Detailed Product Rockwell Automation Adjustable Frequency AC Drives are modular Identification by design to enhance troubleshooting and spare parts replacement, thereby helping reduce production down-time. AB Spares Publication 1336 IMPACT-6.2 – March 1998... - Page 96 Fuse F1 Control Interface DC Bus Inductor Bus Capacitor Board (Behind Ground Bank Control Sense CT) Bus Cap Interface Connectors Ground Sense Board Connector Connectors Precharge Board Snubber Board/SCR Fuses Connector Terminal Strip TB3 AB0857A Publication 1336 IMPACT-6.2 – March 1998...
-
Page 97: Ground Sense Ct
Verify bus voltage by measuring the voltage between +DC and –DC on terminal block TB1. Do not attempt to service the drive until the bus voltage has discharged to zero volts. AB Spares Publication 1336 IMPACT-6.2 – March 1998... - Page 98 Part Replacement Procedures 5–5 ATTENTION: Wear a wrist-type grounding strap when servicing 1336 IMPACT drives. Failure to protect drive components against ESD may damage drive components. Refer to Electrostatic Discharge Precautions at the beginning of this chapter. Important: Before you remove connections and wires from the...
-
Page 99: Installation
2. Install the Ground Sense CT in reverse order of removal. Refer to Table 3.A – Fastener Torque Specifications. ATTENTION: Replace all guards and insulators before applying power to the drive. Failure to replace guards may result in death or serious injury. AB Spares Publication 1336 IMPACT-6.2 – March 1998... -
Page 100: Bus Fuse F1
Part Replacement Procedures 5–7 Bus Fuse F1 Bus Fuse F1 is located at the top of the heat sink. Figure 5.3 Bus Fuse F1 AB0332A Publication 1336 IMPACT-6.2 – March 1998... -
Page 101: Removal
ATTENTION: Wear a wrist-type grounding strap when servicing 1336 IMPACT drives. Failure to protect drive components against ESD may damage drive components. Refer to Electrostatic Discharge Precautions at the beginning of this chapter. -
Page 102: Thermistor
Verify bus voltage by measuring the voltage between +DC and –DC on terminal block TB1. Do not attempt to service the drive until the bus voltage has discharged to zero volts. Publication 1336 IMPACT-6.2 – March 1998... -
Page 103: Installation
5–10 Part Replacement Procedures ATTENTION: Wear a wrist-type grounding strap when servicing 1336 IMPACT drives. Failure to protect drive components against ESD may damage drive components. Refer to Electrostatic Discharge Precautions at the beginning of this chapter. Important: Before you remove connections and wires from the... -
Page 104: Power Modules Pm1 - Pm3
Verify bus voltage by measuring the voltage between +DC and –DC on terminal block TB1. Do not attempt to service the drive until the bus voltage has discharged to zero volts. Publication 1336 IMPACT-6.2 – March 1998... -
Page 105: Installation
5–12 Part Replacement Procedures ATTENTION: Wear a wrist-type grounding strap when servicing 1336 IMPACT drives. Failure to protect drive components against ESD may damage drive components. Refer to Electrostatic Discharge Precautions at the beginning of this chapter. Important: Before you remove connections and wires from the... -
Page 106: Input Rectifier Scr1
Verify bus voltage by measuring the voltage between +DC and –DC on terminal block TB1. Do not attempt to service the drive until the bus voltage has discharged to zero volts. Publication 1336 IMPACT-6.2 – March 1998... -
Page 107: Installation
5–14 Part Replacement Procedures ATTENTION: Wear a wrist-type grounding strap when servicing 1336 IMPACT drives. Failure to protect drive components against ESD may damage drive components. Refer to Electrostatic Discharge Precautions at the beginning of this chapter. Important: Before you remove connections and wires from the... -
Page 108: Fan
Part Replacement Procedures 5–15 The Fan is located behind and on the bottom of the heat sink. Figure 5.7 Fan Wire Stake-On Connectors Flow Fan Guard AB0323A Publication 1336 IMPACT-6.2 – March 1998... -
Page 109: Removal
ATTENTION: Wear a wrist-type grounding strap when servicing 1336 IMPACT drives. Failure to protect drive components against ESD may damage drive components. Refer to Electrostatic Discharge Precautions at the beginning of this chapter. -
Page 110: Installation
Inductor L1. Connect the red wire to the positive fan terminal and the black wire to the negative terminal. ATTENTION: Replace all guards and insulators before applying power to the drive. Failure to replace guards may result in death or serious injury. Publication 1336 IMPACT-6.2 – March 1998... -
Page 111: Dc Bus Inductor L1
Main Chassis DC Bus L3 wire to DC+ Inductor L1 wire to SCR1 Terminal C (–) L4 wire to SCR1 Terminal A (+) L2 wire to DC– TB1 and Mounting Plate AB0347A AB Spares Publication 1336 IMPACT-6.2 – March 1998... -
Page 112: Removal
ATTENTION: Wear a wrist-type grounding strap when servicing 1336 IMPACT drives. Failure to protect drive components against ESD may damage drive components. Refer to Electrostatic Discharge Precautions at the beginning of this chapter. -
Page 113: Installation
2. Install DC Bus Inductor L1 in reverse order of removal. Refer to Table 3.A – Fastener Torque Specifications. ATTENTION: Replace all guards and insulators before applying power to the drive. Failure to replace guards may result in death or serious injury. AB Spares Publication 1336 IMPACT-6.2 – March 1998... - Page 114 Verify bus voltage by measuring the voltage between +DC and –DC on terminal block TB1. Do not attempt to service the drive until the bus voltage has discharged to zero volts. Publication 1336 IMPACT-6.2 – March 1998...
- Page 115 5–22 Part Replacement Procedures ATTENTION: Wear a wrist-type grounding strap when servicing 1336 IMPACT drives. Failure to protect drive components against ESD may damage drive components. Refer to Electrostatic Discharge Precautions at the beginning of this chapter. Important: Before you remove connections and wires from the...
- Page 116 13.6K Ohms E2– AB0326A ATTENTION: The Capacitor Bus PCB must connect a positive (+) capacitor terminal to a negative (–) capacitor terminal. Capacitors not connected correctly will explode and cause death or serious injury. Publication 1336 IMPACT-6.2 – March 1998...
- Page 117 5–24 Part Replacement Procedures This Page Intentionally Left Blank AB Spares Publication 1336 IMPACT-6.2 – March 1998...
- Page 118 Contact your local Rockwell Automation distributor or sales office for a complete listing of area sales and support centers near you. For parts catalog numbers, refer to the 1336 IMPACT Spare Parts Pricing publication included with your drive documentation set. See next page for more information.
- Page 119 Allen-Bradley home page on the World Wide Web at http://www.ab.com then select . . . “Drives and Motors” followed by . . . “1336 IMPACT” from the Product Directory and . . . “Technical Support . . .” Select "Parts List" AB Spares...
- Page 120 6–2 Replacement Parts List Replacement Parts Listing Figure 6.1 Parts for A020 – A030, B040, B050, BX040, BX060, and C025 – C060 Drives 11 (bottom back side) 13 (behind 12) AB0858A Publication 1336 IMPACT-6.2 – March 1998...
- Page 121 Chapter 5, Fan GND SENSE Ground Sense CT — Chapter 5, Ground Sense CT DC Bus Inductor Main Chassis Chapter 5, DC Bus Inductor L1 C1–C6 Bus Capacitors Main Chassis Chapter 5, Bus Capacitors AB Spares Publication 1336 IMPACT-6.2 – March 1998...
- Page 122 6–4 Replacement Parts List This Page Intentionally Left Blank Publication 1336 IMPACT-6.2 – March 1998...
- Page 123 Chapter 7 7–1 Schematics — 20 – 60 HP 1336 IMPACT Drives AB Spares Publication 1336 IMPACT-6.2 – March 1998...
- Page 124 7–2 Schematics — 20 – 60 HP 1336 IMPACT Drives PHASE L1, R PHASE L2, S PHASE L3, T HIGH VOLT +DC AUX IN ACT1 ACT2 HIGH VOLT –DC AUX DGND +BUS DGND DGND –BUS DGND U_POS+ U_NEG+ V_POS+ V_NEG+...
- Page 125 Schematics — 20 – 60 HP 1336 IMPACT Drives 7–3 TABLE 1 – FUSES DC FUSE LINE FUSE INVERTER (AC) FR,FS,FT HP RATING A70Q TYPE TYPE JJ 230VAC 100A,700V 100A 125A,700V 100A 125A,700V 100A 380/460VAC 40CT 50VT 100A,700V 50CT 60VT...
- Page 126 7–4 Schematics — 20 – 60 HP 1336 IMPACT Drives Main Control Board Publication 1336 IMPACT-6.2 – March 1998...
- Page 127 Enclosure Type, P–9 Mtr Stall, 2–4 Identification, P–4 MtrOvrld Pnd, 2–4 Illustration, 5–3 MtrOvrld Trp, 2–4 Nameplate Location, P–3 Open Circuit, 2–12 Rating, P–9 Overcurrent, 2–11 Overvoltage, 2–11 AB Spares Param Limit, 2–7 Prechrg Time, 2–11 Publication 1336 IMPACT-6.2 – March 1998...
- Page 128 Fault/Warning Queues, 2–3 Audience, P–1 Conventions, P–10 Objective, P–1 Related Publications, P–12 Input Mode. See L Option Mode Mounting Input Rectifier Four-Point, 3–3 Illustration, 5–13 Two-Point, 3–3 Installation, 5–14 Removal, 5–13 Test, 4–3 Inputs, Available, 1–4 Publication 1336 IMPACT-6.2 – March 1998...
- Page 129 Termistor, Test, 4–16 Gate Driver Board Removal, 3–15 Thermistor Gate Driver Board Test, 4–12 Illustration, 5–9 Ground Sense CT Installation, 5–6 AB Spares Installation, 5–10 Ground Sense CT Removal, 5–4 Removal, 5–9 Input Rectifier Installation, 5–14 Publication 1336 IMPACT-6.2 – March 1998...
- Page 130 SP 6 Timeout, 2–10 Warnings, 2–1 SP Error, 2–11 Bus Cycle>5, 2–13 Spd Fdbk Loss, 2–8 Bus Drop, 2–13 Viewing Queue with HIM, 2–3 Bus Undervlt, 2–13 Wire Sizes, 1–5 External Flt In, 2–8 Inv Overload, 2–6 Publication 1336 IMPACT-6.2 – March 1998...
- Page 131 1336 IMPACT, ControlNet, and SCANport are trademarks of Rockwell Automation Company, Inc. PLC is a registered trademark of Rockwell Automation. AB Spares...
- Page 132 Sweden • Switzerland • Taiwan • Thailand • Turkey • United Arab Emirates • United Kingdom • United States • Uruguay • Venezuela • Yugoslavia Allen-Bradley Headquarters, 1201 South Second Street, Milwaukee, WI 53204 USA, Tel: (1) 414 382-2000 Fax: (1) 414 382-4444 Publication 1336 IMPACT-6.2 –...
Need help?
Do you have a question about the 1336 IMPACT and is the answer not in the manual?
Questions and answers