
Related Manuals for HomeMatic HmIP-SWD


Summary of Contents for HomeMatic HmIP-SWD
- Page 1 Montage- und Bedienungsanleitung Mounting instruction and operating manual Wassersensor S. 2 Water Sensor p. 23 HmIP-SWD...
- Page 2 Lieferumfang Anzahl Bezeichnung Homematic IP Wassersensor 1,5 V LR03/Micro/AAA Batterie Bedienungsanleitung Dokumentation © 2018 eQ-3 AG, Deutschland Alle Rechte vorbehalten. Ohne schriftliche Zustimmung des Herausgebers darf diese Anleitung auch nicht auszugsweise in irgendeiner Form reproduziert werden oder unter Verwendung elektronischer, mechanischer oder chemischer Verfahren verviel- fältigt oder verarbeitet werden.
-
Page 7: Table Of Contents
Inhaltsverzeichnis Hinweise zur Anleitung ...........8 Gefahrenhinweise ............8 Funktion und Geräteübersicht ........10 Allgemeine Systeminformationen ......11 Inbetriebnahme .............. 11 Anlernen ................11 Einsatzort ................13 Batterien wechseln ............13 Fehlerbehebung ............. 15 Schwache Batterien ............15 Befehl nicht bestätigt ............15 Duty Cycle ................16 Fehlercodes und Blinkfolgen .......... -
Page 8: Hinweise Zur Anleitung
Hinweise zur Anleitung Hinweise zur Anleitung Lesen Sie diese Anleitung sorgfältig, bevor Sie Ihre Homematic IP Geräte in Betrieb nehmen. Bewahren Sie die Anleitung zum späteren Nachschlagen auf! Wenn Sie das Gerät anderen Personen zur Nutzung überlassen, übergeben Sie auch diese Anleitung. - Page 9 Gefahrenhinweise Aus Sicherheits- und Zulassungsgründen (CE) ist das eigenmächtige Umbauen und/oder Verän- dern des Gerätes nicht gestattet. Betreiben Sie das Gerät nur in staubfreier Umge- bung, setzen Sie es keinem Einfluss von Vibratio- nen, ständiger Sonnen- oder anderer Wärmeein- strahlung, übermäßiger Kälte keinen...
-
Page 10: Funktion Und Geräteübersicht
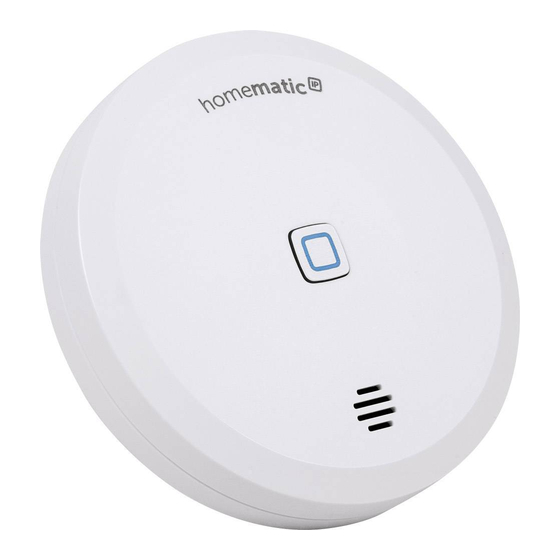
Durch den Batteriebetrieb und die federnd gelagerten Messsonden kann das Gerät flexibel an jeden Einsatzort angepasst werden. Die Empfindlichkeit und das Auslöseverhalten des Was- sersensors können individuell über die Homematic IP App angepasst werden. Geräteübersicht (s. Abbildung 1): Systemtaste (Anlerntaste und LED) -
Page 11: Allgemeine Systeminformationen
Bitte lesen Sie diesen Abschnitt erst vollstän- dig, bevor Sie mit dem Anlernen beginnen. Richten Sie zunächst Ihren Homematic IP Access Point über die Homematic IP App ein, um weitere Homematic IP Geräte im System nutzen zu kön- nen. Weitere Informationen dazu finden Sie in der Bedienungsanleitung des Access Points. - Page 12 Inbetriebnahme kann, muss er zunächst an den Homematic IP Access Point angelernt werden. Zum Anlernen des Wassersensors gehen Sie wie folgt vor: • Öffnen Sie die Homematic IP App auf Ihrem Smartphone. • Wählen Sie den Menüpunkt „Gerät anlernen“ aus.
-
Page 13: Einsatzort
Batterien wechseln • Zur Bestätigung eines erfolgreichen Anlernvor- gangs leuchtet die LED grün. Das Gerät ist nun einsatzbereit. • Leuchtet die LED rot, versuchen Sie es erneut. • Wählen Sie aus, in welcher Anwendung (z. B. Si- cherheit) Sie das Gerät verwenden möchten. •... - Page 14 Batterien wechseln Um die Batterien des Wassersensors zu wechseln, gehen Sie wie folgt vor: Öffnen Sie das Batteriefach (D), indem Sie die • Abdeckkappe (C) und die Elektronikeinheit (E) voneinander wegdrehen und die Abdeckung ab- nehmen (s. Abbildung 3+4). • Entnehmen Sie die leeren Batterien.
-
Page 15: Fehlerbehebung
Batterien wieder mehrfach gesendet werden. Bricht beim Senden die Spannung wieder zusammen, wird dies in der Homematic IP App und am Gerät ange- zeigt (s. „7.4 Fehlercodes und Blinkfolgen“ auf Seite 17). Tauschen Sie in diesem Fall die leeren Batterien gegen zwei neue aus (s. -
Page 16: Duty Cycle
Geräte dürfen bei Erreichen des 1 %-Limits nicht mehr senden, bis diese zeitliche Begrenzung vorüber ist. Ge- mäß dieser Richtlinie, werden Homematic IP Geräte zu 100 % normenkonform entwickelt und produziert. Im normalen Betrieb wird der Duty Cycle in der Regel nicht erreicht. -
Page 17: Fehlercodes Und Blinkfolgen
Fehlerbehebung Fehlercodes und Blinkfolgen Blinkcode Bedeutung Lösung Kurzes oranges Funküber- Warten Sie, bis Blinken tragung/ die Übertragung Sendeversuch/ beendet ist. Datenübertra- gung 1x langes Vorgang Sie können mit grünes bestätigt der Bedienung Leuchten fortfahren. Kurzes oranges Anlernmodus Geben Sie die Blinken (alle aktiv letzten vier Ziffern... -
Page 18: Wiederherstellung Der Werkseinstellungen
Wiederherstellung der Werkseinstellungen 1x langes rotes Vorgang Versuchen Sie Leuchten fehlgeschla- es erneut (s. „7.2 gen oder Duty Befehl nicht bestä- Cycle-Limit tigt“ auf Seite 15 erreicht oder „7.3 Duty Cycle“ auf Seite 16). 6x langes rotes Gerät defekt Achten Sie auf die Blinken Anzeige in Ihrer App oder wenden... -
Page 19: Wartung Und Reinigung
Wartung und Reinigung herzustellen, gehen Sie wie folgt vor: • Halten Sie die Systemtaste (A) für 4 s gedrückt, bis die LED (A) schnell orange zu blinken beginnt (s. Abbildung 5). • Lassen Sie die Systemtaste wieder los. • Drücken Sie die Systemtaste erneut für 4 s, bis die LED grün aufleuchtet. -
Page 20: Allgemeine Hinweise Zum Funkbetrieb
Gegebenheiten vor Ort eine wichtige Rolle. Hiermit erklärt die eQ-3 AG, Maiburger Str. 29, 26789 Leer, Deutschland, dass der Funkanlagentyp Homema- tic IP HmIP-SWD der Richtlinie 2014/53/EU entspricht. Der vollständige Text der EU-Konformitätserklärung ist unter der folgenden Internetadresse verfügbar: www.eq-3.de... -
Page 21: Technische Daten
Technische Daten Technische Daten Geräte-Kurzbezeichnung: HmIP-SWD Versorgungsspannung: 2x 1,5 V LR03/Micro/AAA Stromaufnahme: 100 mA max. Batterielebensdauer: 5 Jahre (typ.) Schutzart: IP44 Umgebungstemperatur: -20 bis +50 °C Abmessungen (Ø x H): 80 x 30 mm Gewicht: 78,2 g (inkl. Batterien) Funk-Frequenzband:... - Page 22 Technische Daten Entsorgungshinweis Gerät nicht im Hausmüll entsorgen! Elektroni- sche Geräte sind entsprechend der Richtlinie über Elektro- und Elektronik-Altgeräte über die örtlichen Sammelstellen für Elektronik-Altgeräte zu entsorgen. Konformitätshinweis Das CE-Zeichen ist ein Freiverkehrszeichen, das sich ausschließlich an die Behörden wendet und keine Zusicherung von Eigenschaften beinhaltet.
- Page 23 Package contents Quantity Description Homematic IP Water Sensor 1.5 V LR6/micro/AAA batteries User manual Documentation © 2018 eQ-3 AG, Germany All rights reserved. Translation from the original version in Ger- man. This manual may not be reproduced in any format, either in...
- Page 24 Table of contents Information about this manual........25 Hazard information ............25 Function and device overview ........27 General system information ........28 Start-up ................28 Teaching-in ................28 Installation site..............30 Replacing batteries ............30 Troubleshooting .............32 Weak batteries ..............32 Command not confirmed ..........32 Duty Cycle ................
-
Page 25: Information About This Manual
Information about this manual Please read this manual carefully before beginning ope- ration with your Homematic IP component. Keep the manual so you can refer to it at a later date if you need to. If you hand over the device to other persons for use, ple- ase hand over this manual as well. - Page 26 Hazard information We do not assume any liability for damage to pro- perty or personal injury caused by improper use or the failure to observe the hazard information. In such cases, any claim under warranty is extin- guished! For consequential damages, we assume no liability! The device may only be operated in dry and dust- free environment and must be protected from...
-
Page 27: Function And Device Overview
The sensitivity and trigger behaviour of the water sensor can be individually adjusted using the Homematic IP app. Device overview (see figure 1): System button (teach-in button and LED) -
Page 28: General System Information
General system information General system information This device is part of the Homematic IP smart home system and works with the Homematic IP radio pro- tocol. All devices of the system can be configured comfortably and individually with the Homematic IP smartphone app. - Page 29 Start-up you must teach-in the device to your Homematic IP Ac- cess Point first. To teach-in the water sensor, please proceed as follows: • Open the Homematic IP app on your smartpho- • Select the menu item “Teach-in device”. •...
-
Page 30: Installation Site
Replacing batteries • If the LED lights up red, please try again. • Please select, in which application (e.g. security) you would like to use the device. • Allocate the device to a room and give the device a name. Installation site Once you have completed the teach-in process, you can easily set up the water sensor at the installation site of... - Page 31 Replacing batteries Open the battery compartment (D) by rotating • the cap (C) and electronic unit (E) away from each other and removing the cover (see figures 3+4). • Remove the empty batteries. • Insert two new 1.5 V LR03/micro/AAA batteries into the battery compartment, making sure that you insert them the right way round (see figure 6).
-
Page 32: Troubleshooting
If the battery voltage is too weak, this will be displayed in the Homematic IP app and directly on the device via the device LED (A) (see „7.4 Error codes and flashing se- quences“... -
Page 33: Duty Cycle
Devices must cease transmission when they reach the 1% limit until this time restriction co- mes to an end. Homematic IP devices are designed and produced with 100% conformity to this regulation. During normal operation, the duty cycle is not usually reached. -
Page 34: Error Codes And Flashing Sequences
Troubleshooting Error codes and flashing sequences Flashing code Meaning Solution Fast orange Radio Wait until the flashing transmission transmission is attempting to completed. transmit/data transmission 1x long green Operation You can continue lighting confirmed operation. Short orange Teach-in mode Please enter the flashing (every active last four numbers... -
Page 35: Restore Factory Settings
Restore factory settings 1x long red Operation Please try again (or lighting failed or duty see „7.2 Command cycle limit is not confirmed“ on reached page 32 or „7.3 Duty Cycle“ on page 33). 6x long red Device Please see your flashing defective app for error mes-... -
Page 36: Maintenance And Cleaning
Release the system button to finish the proce- dure. The device will perform a restart. After the restart, you can again integrate your device into your Homematic IP system. Maintenance and cleaning The device does not require you to carry out any maintenance other than replacing the battery when necessary. -
Page 37: General Information About Radio Operation
Hereby, eQ-3 AG, Maiburger Str. 29, 26789 Leer/Ger- many declares that the radio equipment type Home- matic IP HmIP-SWD is in compliance with Directive 2014/53/EU. The full text of the EU declaration of con- formity is available at the following internet address:... -
Page 38: Technical Specifications
Technical specifications Technical specifications Device short description: HmIP-SWD Supply voltage: 2x 1.5 V LR03/micro/AAA Current consumption: 100 mA max. Battery life: 5 years (typ.) Degree of protection: IP44 Ambient temperature: -20 to +50 °C Dimensions (Ø x H): 80 x 30 mm Weight: 78.2 g (inkl. - Page 39 Technical specifications Instructions for disposal Do not dispose of the device with regular dome- stic waste! Electronic equipment must be dispo- sed of at local collection points for waste electro- nic equipment in compliance with the Waste Electrical and Electronic Equipment Directive. Information about conformity The CE sign is a free trading sign addressed ex- clusively to the authorities and does not include...
- Page 40 Kostenloser Download der Homematic IP App! Free download of the Homematic IP app! Bevollmächtigter des Herstellers: Manufacturer’s authorised representative: eQ-3 AG Maiburger Straße 29 26789 Leer / GERMANY www.eQ-3.de...
Need help?
Do you have a question about the HmIP-SWD and is the answer not in the manual?
Questions and answers