
Related Manuals for Bresser 1877495


Summary of Contents for Bresser 1877495
- Page 1 Digital Night Vision Binoculars 1x mit Kopfhalterung/with head mount Art. No. 1877495 BEDIENUNGSANLEITUNG..2 INSTRUCTION MANUAL ..10...
-
Page 2: Manual Download
этой ссылке (QR-код). web utilizando el siguiente enlace (código MANUAL DOWNLOAD: QR) para ver las versiones disponibles. Deseja um manual detalhado deste produto numa determinada língua? Visite a nossa Website através da seguinte ligação (QR www.bresser.de/P1877495 Code) das versões disponíveis. -
Page 3: Zu Dieser Anleitung
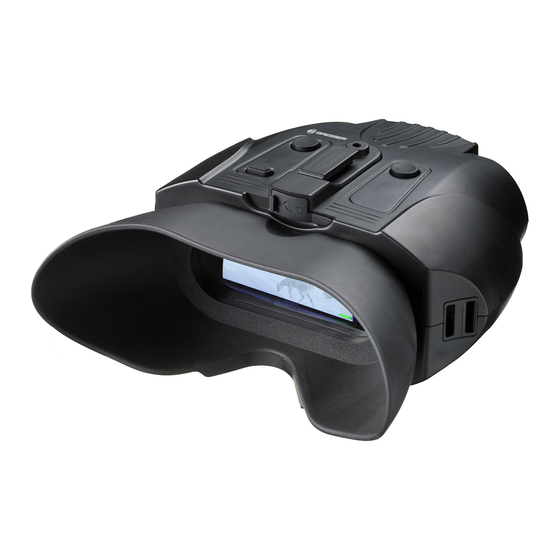
Zu dieser Anleitung Lesen Sie vor der Benutzung des Ge- HINWEIS! räts aufmerksam die Sicherheitshin- Bauen Sie das Gerät nicht auseinander! Wen- weise und die Bedienungsanleitung. den Sie sich im Falle eines Defekts an Ihren Fachhändler. Er nimmt mit dem Service-Center Bewahren Sie diese Bedienungsanleitung für Kontakt auf und kann das Gerät ggf. - Page 4 Teileübersicht Lange gedrückt halten um das Gerät ein- oder auszuschalten. POWER IR drücken für 7 Helligkeitsstufen (0 > 1 > 2 > 3 > 4 > 5 > 6 > 7 > 0 …) bei Verwendung in der Nacht. Drücken Sie ZOOM zum Vergrößern. Der maximale Zoom ist 2X. Bei Erreichen von 2X, drücken sie ZOOM ein weiteres Mal um ZOOM wieder auf 1X zu gelangen.
-
Page 5: Aufladen Des Geräts
Scharfeinstellungsrad Aufladen des Geräts (1) USB-Deckel öffnen. (2) Schließen Sie das USB-Kabel zum Aufladen an. Die Ladezeit beträgt ca. 3 Stunden. (3) Sie können das Gerät auch mit einer mobilen Powerbank betreiben. -
Page 6: Gerät Einschalten
Gerät einschalten (1) Halten Sie die POWER Taste gedrückt um das Gerät einzuschal- ten. Sobald das Gerät eingeschaltet ist, blicken Sie innen auf den LCD-Bildschirm. (2) Nehmen Sie die Scharfeinstellung am Rad vorne auf der Unterseite vor. (3) Bei Nachtbeobachtung, aktivieren Sie die Infrarotbeleuchtung, durch drücken der IR-Taste. - Page 7 Montage der Kopfhalterung Schieben Sie (A) in die Montagevorrichtung Die Kopfhalterung besteht aus 4 Einzelteilen. auf der Oberseite des Nachtsichtgeräts. Sichern Sie (A) mit der Schraube (B) fest an. Verbinden Sie (A) mit der Kopfhalterung (D). Sichern Sie beide Elemente mit Hilfe der Flügelschraube (C).
-
Page 8: Fehlerbehebung
Elektronik zu vermeiden. Schützen Sie das Gerät vor Staub und Feuchtigkeit! EG-Konformitätserklärung Eine „Konformitätserklärung“ in Übereinstimmung mit den anwendbaren Richtlinien und entsprechenden Normen ist von der Bresser GmbH erstellt worden. Diese kann auf Anfrage jederzeit eingesehen werden. ENTSORGUNG Entsorgen Sie die Verpackungsmaterialien sortenrein. Informationen zur ordnungsgemä- ßen Entsorgung erhalten Sie beim kommunalen Entsorgungsdienstleister oder Umwel-... -
Page 10: General Warning
About this Instruction Manual Please read the safety instructions and NOTE! the operating instructions carefully befo- Do not disassemble the device. In the event re use. of a defect, please contact your dealer. The dealer will contact the Service Centre and can Keep these instructions for renewed use at a send the device in to be repaired, if neces- later date. -
Page 11: Parts Overview
Parts overview Long press for power on and off POWER Press IR for 7 levels of brightness (0 > 1 > 2 > 3 > 4 > 5 > 6 > 7 > 0 …) when using the binoculars at night. Press ZOOM to zoom in at multiple levels. -
Page 12: Charging The Device
Focus Wheel Charging the device (1) Open the USB cover. (2) Connect the USB cable for charging. The charging time is about 3 hours. (3) You can also operate the device with a mobile power bank. -
Page 13: Turn On The Device
Turn on the device (1) Long press the POWER button to turn on the binocular. Once the power is on, look into the LCD screen inside. (2) Adjust the focus by turning the focus wheel at the front bottom. (3) For night use, turn on the IR by pressing the IR button. Increase the brightness by pressing the button repeatedly. -
Page 14: Head Mount Assembly
Head mount assembly Slide (A) into the mounting fixture on the top The head mount consists of 4 parts. of the night vision device. Secure (A) with the screw (B), firmly. Connect (A) to the head mount (D). Secure both elements using the thumb knob (C). -
Page 15: Troubleshooting
Protect the device from dust and moisture. EC DECLARATION OF CONFORMITY Bresser GmbH has issued a „Declaration of Conformity“ in accordance with applica- ble guidelines and corresponding standards. This can be viewed any time upon request. -
Page 16: Garantie & Service
(QR code) for available versions. Alternatively you can also send an email to manuals@bresser.de or leave a message on +49 (0) 28 72 – 80 74-220*. Please always state your name, precise address, a valid phone number and email address, as well as the article number and name. -
Page 17: Garantía Y Servicio
O envíenos un mensaje a la dirección de correo manuals@ bresser.de o déjenos un mensaje telefónico en el siguiente número +49 (0) 28 72 – 80 74-220*. Asegúrese de dejar su nombre, dirección, teléfono válido, una dirección de correo electrónico así... - Page 20 Bresser GmbH Gutenbergstr. 2 · DE-46414 Rhede Besuchen Sie uns auf • Find us on: Germany www.bresser.de · service@bresser.de...
Need help?
Do you have a question about the 1877495 and is the answer not in the manual?
Questions and answers