
Related Manuals for Espressione 8212S


Summary of Contents for Espressione 8212S
-
Page 1: Instruction Manual
#8212S Concierge Automatic Coffee Machine UPC# 786818-500030 Instruction Manual ESPRESSIONE NA/Electra-Craft, Inc. 41 Woodbine Street Bergenfield,NJ USA 07621-3513 info@electra-craft.com... - Page 2 8212S Automatic Coffee Machine Instruction Manual...
- Page 3 IMPORTANT INFORMATION For safety purpose you should read the instructions carefully before using the appliance for the first time. Save the instructions for future reference. The appliance is designed for domestic use and should be operated in accordance with these instructions for use.
- Page 4 14. Do not attempt to open the main body or dismantle any parts from the appliance, there is no serviceable part inside. 15. The appliances normally cleaned after use and not intended to be immersed in water for cleaning and the appliance must not be immersed 16.
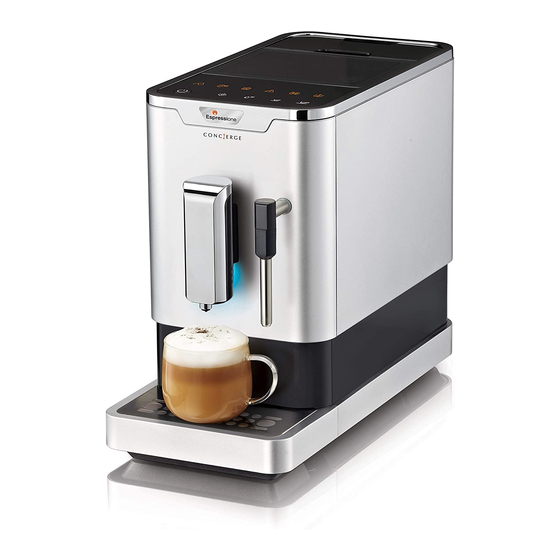
- Page 5 GET TO KNOW YOUR AUTOMATIC COFFEE MACHINE GENERAL DESCRIPTION External Drip Tray Internal Drip Tray Coffee Grounds Container Metal tube Steam Nozzle Steam indicator light Adjustable coffee spout Coffee Bean Container Coffee Beans Container Cover Water Tank Service Door Cleanness brush...
-
Page 6: Control Panel
CONTROL PANEL Flashing: Low water level/ Water tank missing Bean container empty Solid light: coffee grounds container is full Flashing: Internal Drip Tray/coffee grounds container is missing Solid light: Brewer is missing/ installed improperly Flashing: Service door is opened / installed improperly Solid light: Requires to do descaling Flashing: Descaling is under process Empty System Function is running... -
Page 7: Machine Installation
III. ACCESSORY In the box, three packs of cleaning agents are included for the process of self-cleaning. B. MACHINE INSTALLATION Remove any protective films, stickers and other packing material appliance Choose a safe and stable surface with an easily reachable power supply and allow minimum distance from the sides of the machines. - Page 8 Unwind and straighten the power cord and insert the plug into the socket located on the back of the machine. Insert the other end of the power cord into a wall socket with suitable power voltage. C. Daily Operation I. MAKING YOUR COFFEE 1.
-
Page 9: Filling The Water Tank
II. FILLING THE WATER TANK When is flashing, the water tank is in low water level and requires filling the water tank. 1. Lift the water tank by using the lid as the handle 2. Rinse the water tank with fresh water and then fill the tank to the Max level and place it back into the machine. -
Page 10: Filling The Bean Container
III. FILLING THE BEAN CONTAINER When is flashing, the appliance needs to be filled with coffee bean: 1. Remove the bean container lid 2. Slowly pour in the coffee beans. 3. Install back the container lid. IMPORTANT: Fill the coffee bean container with coffee beans only. Grounded coffee, instant coffee, caramelized coffee and any other objects may damage the machine IV. - Page 11 1. Remove the external drip tray. 2. Empty the water inside the drip tray in the sink and wash it with fresh water. Dry it afterwards. 3. Slides open the internal drip tray and the coffee grounds container. 4. Empty the coffee grounds container and wash it with fresh water.
- Page 12 6. Remove the service door. 7. Press the release knob. 8. Remove the brewer. 9. Wash the brewer with fresh water. Dry the brewer afterwards. 10. Insert back the brewer to its original position and install back the service door its original position. Note: When lights up s olid, it indicates that the brewer is missing / installed improperly.
- Page 13 11. Place the coffee grounds container on the internal drip tray and insert back into it original position. Note: When is flashing, the coffee grounds container is missing 12. Place the external drip tray at it original position 13. Unlock the nozzle cover by turning it to left. Then pull it downward to remove.
-
Page 14: Grinding Adjustment
15. Wash the nozzle cover and metal tube with fresh water. 16. Assembly the metal tube back to the nozzle cover. Then push upward to place the nozzle cover back. And turn it to right to lock it. VII. Turning Off the machine Switch off the appliance by pressing the power on/off button. -
Page 15: Mode Selection
III. MODE SELECTION The machine has two different setting: default setting, ECO mode and speed mode. In ECO mode, the appliance helps to save more energy. In speed mode, the user can make their coffee faster than in default setting. ECO Mode Speed Mode Default Setting... -
Page 16: Manual Rinsing
5. In standby condition, press and hold and strong espresso button for 5 seconds. A beep sound will be heard with and strong espresso button will be flashing. 6. Press strong espresso button to confirm undergoing the self-cleaning process. To resume back to the standby condition, press will be flashing indicates that the appliance is undergoing the self-cleaning process. - Page 17 After rinsing, the appliance will return to the standby condition. IV. CLEANING THE APPLIACNE Disconnect the power cord from the mains supply outlet. Empty all the water in the internal and external drip tray Use a damp cloth or non-scratching cleaner to clean the water stains on the appliance. IMPORTANT: Never use any abrasive, vinegar or descaling agents not included in the box to clean the appliance.
- Page 18 4. Take the brewer out 5. Use Cleanness Brush to clean the powder outlet...
-
Page 19: Troubleshooting
F. TROUBLESHOOTING PROBLEM CAUSE SOLUTION The appliance does not The appliance is not - Plug in and press the switch. work. connected to the mains. - Check the cable and the Plug No or delayed response in - Appliance is under an - Unplug the appliance.
Need help?
Do you have a question about the 8212S and is the answer not in the manual?
Questions and answers