Table of Contents
Advertisement
Quick Links
Advertisement
Table of Contents

Related Manuals for BH LK700S


Summary of Contents for BH LK700S
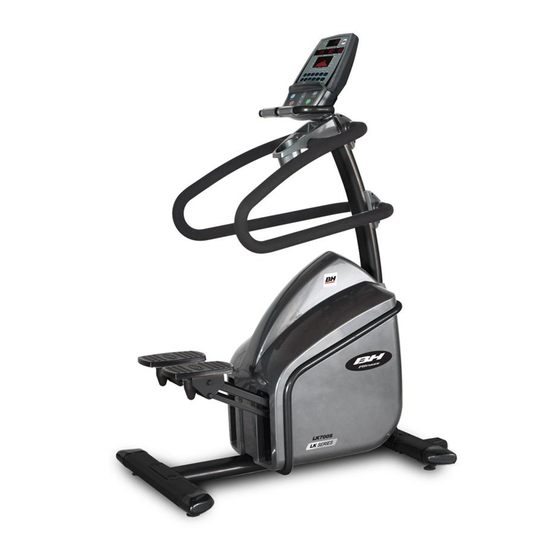
- Page 1 LK700S OWNER’S MANUAL Important: Read all instructions carefully before using this product. Retain this owner’s manual for future reference. BH North America | 20155 Ellipse, Foothill Ranch, California 92610 | p.949.206.0330 | f.949.206.0013 | www.BHFitnessUSA.com LK700S -v3...
-
Page 2: Table Of Contents
TABLE OF CONTENTS Title Page Introduction Safety Information Exercise Instruction Training Guidelines Suggested Stretching Assembly Instructions Handrail Fine Adjustment Steps Moving The Machine Parts List Exploded View Drawing Console Operations Maintenance and Cleaning Warranty LK700S -v3... - Page 3 CONGRATULATIONS Congratulations on your purchase of BH Fitness equipment. We hope you appreciate the style, quality, and value that exercisers around the world have come to expect from BH Fitness. If you have any questions, concerns or product issues please call our Customer Service Team at 1-866-325-2339 or email us at CustomerSupport@BHNorthAmerica.com.
-
Page 4: Safety Information
6. This machine must only be used for the purposes described in this manual. DO NOT use accessories that are not recommended by BH Fitness. Read manual prior to use and follow all warnings and instructions. 7. Do not place sharp objects near the machine. -
Page 5: Exercise Instruction
6. Get on the equipment slowly and securely. 7. Select the program or workout option that is most closely aligned with your workout interests. 8. Start slowly and work your way up to a comfortable pace. 9. Be sure to cool down after your workout. LK700S -v3... -
Page 6: Training Guidelines
Is an exercise intense enough to trigger anaerobic metabolism. This means “without oxygen” and is the output of energy when the oxygen supply is insufficient to meet the body’s long term energy demands. (For example, a 100 meter sprint.) LK700S -v3... - Page 7 This involves a gradual decrease in the intensity of the exercise session. Following exercise, a large supply of blood remains in the working muscles. If it is not returned promptly to the central circulation, pooling of blood may occur in the muscles. LK700S -v3...
- Page 8 Two final comments: (1) don’t be concerned with day to day variations in your pulse rate, being under pressure or not enough sleep can affect it; (2) your pulse rate is a guide, don’t become a slave to it. LK700S -v3...
- Page 9 Once you start your exercise program, you should continue through to the end. Do not break off halfway through and then restart at the same place later on without going through the warm-up stage again. The rest period required between exercises may vary from person to person. LK700S -v3...
- Page 10 Quadriceps Stretch With one hand against a wall for balance, reach behind you and pull your left foot up. Bring your heel as close to your buttocks as possible. Hold for 15 counts and repeat with right foot up. LK700S -v3...
- Page 11 Keep your left leg straight and the right foot on the floor; then bend the right leg and lean forward by moving your hip toward the wall. Hold, then repeat on the other side for 15 counts. LK700S -v3...
-
Page 12: Assembly Instructions
ASSEMBLY INSTRUCTIONS LK700S -v3... - Page 13 MP3 sound wire Truss Phillips screw M4 xP0.7 x15 Lug wrench Washer 10mm Phillips screwdriver Washer 8mm Hex wrench 5mm Spring washer M10 Hex wrench 6mm Phillips screw 12mm Hex wrench 8mm Hex wrench 3mm Hex bolt 30mm LK700S -v3...
- Page 14 (K17) and 2 Washers (K14). In the top holes on the frame secure with 2 Hex Screws (K06) 2 Spring Washers (K17) and 2 Washers (K14). In the remaining hole, secure 1 Hex Screw 25mm (K11) and 1 Spring Washer (K17) LK700S -v3...
- Page 15 Upper Controle Tube (A) onto the Middle Control Tube (C) and secure the Top two holes with 2 Hex Screws 65mm (K08). Secure the two bottom holes with 2 Hex Screws 55mm (K10) and 2 Washers 8mm (K15). LK700S -v3...
- Page 16 Wire and Upper Pulse Wire coming out of the Computer Console (F). Tuck the wires into the inside of the Upper Control Tube (A) to avoid pinching. Then secure the console to the Upper Control Tube (A) with 2 Phillips Screws 12mm (K18). LK700S -v3...
- Page 17 Phillips Screw 15mm - K13 - 2PCS STEP 4 Slide the Front Cover A and Front Cover B together and secure with 4 Phillips Screws 15mm (K13). These are the Screws you took out and set aside in Step 2. LK700S -v3...
- Page 18 STEP 5 Put the Rear Cover over the connection of the Frame (B) and the Middle Control Tube (C). Align the holes and secure with 4 Phillips Screws (K12). Two on each side of the Rear Cover (D). LK700S -v3...
- Page 19 LK700S HANDRAIL FINE ADJUSTMENT STEPS: 1. Tighten the top 2 Screws first and check to see if the Handrail is skewed. 2. Install the Lower 2 Screws but do not tighten. 3. If the handrail is skewed, loosen the top 2 screws.
-
Page 20: Moving The Machine
After moving the machine, make sure it is level. There are 4 Adjustable leveling feet under the corners of the front and rear stabilizers. Adjust the leveling feet until the machine is solid and level. LK700S -v3... -
Page 21: Parts List
Front Cover B LK700S-C01 LK700S-A21 Chain Cover LK700S-C02 Belt Wheel Post Core LK700S-A22 Chain Cover Front Plate LK700S-C03 Belt Wheel LK700S-A23 BH Logo Sticker LK700S-C04 Drive Belt LK700S-A24 Phillips Screw (ST) LK700S-C05 Hex Screw LK700S-A25 Phillips Screw LK700S-C06 Washer LK700S-A26... - Page 22 (X) Other LK700S-G01 Hand Grip Pulse Sensor Base LK700S-X01 Power Supply LK700S-G02 Hand Grip Pulse Sensor Plate LK700S-X03 Rear Cover LK700S-G03 Double Side Tape LK700S-X04 Belt 1830mm LK700S-G04 Round Head Philips Screw (Y) Hardware Pack LK700S-G05 Hex Nut LK700S -v3...
- Page 23 LK700S -v3...
-
Page 24: Console Operations
CONSOLE OPERATIONS LK700S -v3... - Page 25 2. Press the ENTER/MODE button to enter the program. 3. TIME will display, default value is 0:00, press the UP/DOWN buttons to adjust values then press MODE/ENTER to set the time. 4. DISTANCE will display, the default value is 0.0, press the UP/DOWN buttons to adjust LK700S -v3...
- Page 26 1. Press the UP/DOWN buttons to select USER, press ENTER/MODE to enter into the program. (User 1-4 is selected at machine start up). 2. TIME will display, default value is 0:00, press the UP/DOWN buttons to adjust values LK700S -v3...
- Page 27 ENTER to set the height. 3. AGE will display, press the UP/DOWN buttons to adjust the values then press MODE/ ENTER to set the age. 4. SEX will display, the default value is M for Male, press the UP/DOWN buttons to LK700S -v3...
- Page 28 5. When your actual heart rate value is higher than preset heart rate value +-4, the resistance will decrease one level at a time. The lowest is level 1. 6. When your actual heart rate value is higher than the preset heart rate value, the HEART LK700S -v3...
- Page 29 >=127 >=100 <100 >=55 >=188 >=165 >=129 >=107 <107 RESULT FEMALE HEART RATE <35 >=197 >=181 >=150 >=140 <140 <45 >=212 >=197 >=161 >=150 <150 <55 >=228 >=212 >=181 >=169 <169 >=55 >=238 >=223 >=197 >=181 <181 RESULT LK700S -v3...
- Page 30 PROGRAM PROFILES MANUAL WATTS LK700S -v3...
- Page 31 PROGRAMS P1-P12 LK700S -v3...
-
Page 32: Maintenance And Cleaning
Use a soft cloth, dampened with warm water. Do not use aerosol sprays or pump bottles as they may deposit sediments upon the console surface. The use of harsh chemicals will destroy the protective coating and cause a static build-up that may damage the some of the components. LK700S -v3... -
Page 33: Warranty
WARRANTY LIGHT COMMERCIAL WARRANTY BH North America will repair or replace, free of charge, at its option, parts that are defective as a result of material or workmanship. Lifetime replacement warranty coverage on frame and three (3) years on other parts. Labor warranty coverage is two (2) years.
Need help?
Do you have a question about the LK700S and is the answer not in the manual?
Questions and answers