Advertisement
®
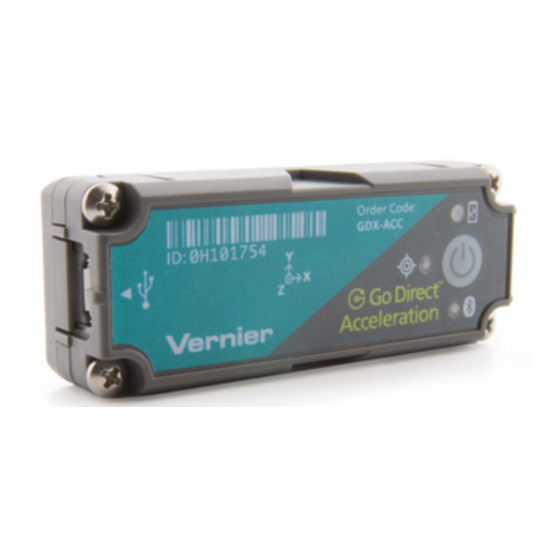
Go Direct
Acceleration
(Order Code GDX-ACC)
Collect acceleration, rotation, and altitude data in
the classroom or in the field. Go Direct Acceleration
®
connects wirelessly via Bluetooth
acceleration sensor has two acceleration ranges plus an altimeter and a 3-axis
gyroscope.
Measure helmet impacts in concussion-related investigations.
l
Slip it into your pocket and pirouette or ride a half-pipe.
l
Zip-tie this accelerometer to your bicycle or affix it to your lab cart without
l
any dragging cables.
Note: Vernier products are designed for educational use. Our products are not
designed nor are they recommended for any industrial, medical, or commercial
process such as life support, patient diagnosis, control of a manufacturing
process, or industrial testing of any kind.
What's Included
Go Direct Acceleration
l
Micro USB Cable
l
Shim plate for cart
l
U-bracket for cart
l
Cylinder mounting plate
l
Compatible Software
See
www.vernier.com/manuals/gdx-acc
Go Direct Acceleration.
Getting Started
Please see the following link for platform-specific connection information:
www.vernier.com/start/gdx-acc
Bluetooth Connection
1. Install Graphical Analysis 4 on
your computer, Chromebook™, or
mobile device. If using LabQuest 2,
make sure LabQuest App is up to
date. See www.vernier.com/ga4 for
Graphical Analysis 4 availability or
www.vernier.com/downloads to
update LabQuest App.
2. Charge your sensor for at least
2 hours before first use.
or wired via USB to your device. This 3-axis
for a list of software compatible with
USB Connection
1. If using a computer or
Chromebook, install Graphical
Analysis 4. If using LabQuest 2,
make sure LabQuest App is up to
date. See www.vernier.com/ga4 for
Graphical Analysis 4 availability or
www.vernier.com/downloads to
update LabQuest App.
2. Connect the sensor to the USB
port.
3. Turn on your sensor by pressing the
power button once. The LED will
blink red.
4. Launch Graphical Analysis 4 or
turn on LabQuest 2.
5. If using Graphical Analysis 4, click
or tap Sensor Data Collection. If
using LabQuest 2, choose Wireless
Device Setup > Go Direct from the
Sensors menu.
6. Select your Go Direct sensor from
the list of Discovered Wireless
Devices. Your sensor's ID is located
near the barcode on the sensor. The
LED will blink green when it is
successfully connected.
7. Click or tap Done. You are now
ready to collect data.
8. This is a multi-channel sensor. To
change the channel selections, see
www.vernier.com/start/gdx-acc
Charging the Sensor
Connect Go Direct Acceleration to the included Micro USB Cable and any
USB device for two hours.
You can also charge up to eight Go Direct Acceleration Sensors using our
Go Direct™ Charge Station, sold separately (order code: GDX-CRG). An LED
on each Go Direct Acceleration indicates charging status.
Charging
Fully charged
Powering the Sensor
Turning on the sensor
Putting the sensor in sleep
mode
1
3. Launch Graphical Analysis 4 or
turn on LabQuest 2. You are now
ready to collect data.
4. This is a multi-channel sensor. To
change the channel selections, see
www.vernier.com/start/gdx-acc
Orange LED next to battery icon is solid while
sensor is charging.
Green LED next to battery icon solid when
sensor is fully charged.
Press button once. Red LED indicator next to
Bluetooth icon flashes when unit is on.
Press and hold button for more than three
seconds to put into sleep mode. Red LED
indicator stops flashing when sleeping.
Advertisement
Table of Contents

Related Manuals for Vernier Go Direct Acceleration


Summary of Contents for Vernier Go Direct Acceleration
- Page 1 U-bracket for cart USB device for two hours. Cylinder mounting plate You can also charge up to eight Go Direct Acceleration Sensors using our Go Direct™ Charge Station, sold separately (order code: GDX-CRG). An LED Compatible Software on each Go Direct Acceleration indicates charging status.
-
Page 2: Connecting The Sensor
Calibrating the Sensor Channels Acceleration Go Direct Acceleration has 11 measurement channels: In most cases, calibration is not necessary for this sensor. However, most X-axis acceleration (m/s accelerometers, including this one, sense gravity as well as acceleration. Thus, if... -
Page 3: Specifications
Storage and Maintenance wish to offset and choose Calibrate. Orient your sensor as for measurement and To store Go Direct Acceleration for extended periods of time, put the device in enter 0 m/s (or whatever offset you choose, for example –19.6 m/s if you sleep mode by holding the button down for at least three seconds. -
Page 4: Troubleshooting
The reading is non-zero as the test mass Vernier warrants this product to be free from defects in materials and inside the device has to have a force applied to accelerate it. That’s just a workmanship for a period of five years from the date of shipment to the normal force that happens to be horizontal. -
Page 5: Federal Communication Commission Interference Statement
Afin de réduire les interférences radio potentielles pour les autres utilisateurs, le type d’antenne et son gain doivent être choisie de telle such marks by Vernier Software & Technology is under license. Other trademarks and trade names are those of façon que l’équivalent de puissance isotrope émis (e.i.r.p) n’est pas plus grand que celui permis pour une communication établie.
Need help?
Do you have a question about the Go Direct Acceleration and is the answer not in the manual?
Questions and answers