Table of Contents
Advertisement
Quick Links
®
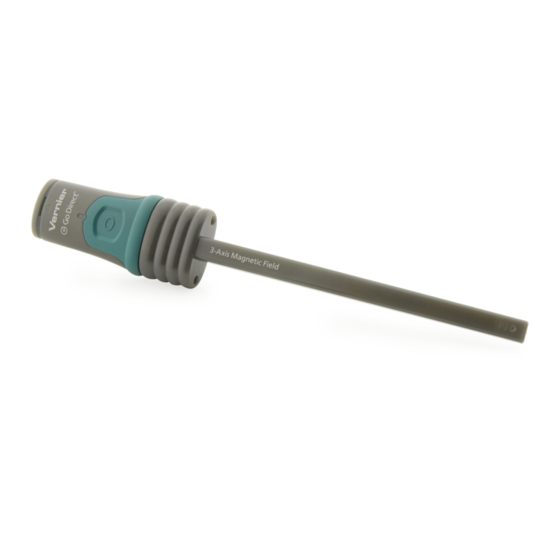
Go Direct
3-Axis
Magnetic Field
(Order Code GDX-3MG)
Go Direct 3-Axis Magnetic Field allows you to
determine the magnitude and direction of the magnetic field at any point in
space. It directly connects wirelessly via Bluetooth
platform.
Note: Vernier products are designed for educational use. Our products are not
designed nor are they recommended for any industrial, medical, or commercial
process such as life support, patient diagnosis, control of a manufacturing
process, or industrial testing of any kind.
What's Included
Go Direct 3-Axis Magnetic Field
l
Rechargeable battery (included inside unit)
l
Micro USB Cable
l
Compatible Software
See
www.vernier.com/manuals/gdx-3mg
Direct 3-Axis Magnetic Field.
Getting Started
Please see the following link for platform-specific connection information:
www.vernier.com/start/gdx-3mg
Bluetooth Connection
1. Install Graphical Analysis 4 on
your computer, Chromebook™, or
mobile device. See
www.vernier.com/ga4 for software
availability.
2. Charge your sensor for at least
2 hours before first use.
3. Turn on your sensor by pressing
the power button once. The
®
Bluetooth
LED will blink red.
4. Launch Graphical Analysis 4.
5. Click or tap Sensor Data
Collection.
6. Click or tap your Go Direct sensor
from the list of Discovered
Wireless Devices. Your sensor's ID
is located near the barcode on the
sensor. The Bluetooth LED will
®
or wired via USB to your
for a list of software compatible with Go
USB Connection
1. If using a computer or Chromebook,
install Graphical Analysis 4. If using
LabQuest 2, make sure LabQuest
App is up to date. See
www.vernier.com/ga4 for Graphical
Analysis 4 availability or
www.vernier.com/downloads to
update LabQuest App.
2. Connect the sensor to the USB port.
3. Launch Graphical Analysis 4 or turn
on LabQuest 2. You are now ready
to collect data.
4. This is a multi-channel sensor. To
change the default channel
selections, see
www.vernier.com/start/gdx-3mg
blink green when it is successfully
connected.
7. This is a multi-channel sensor. The
active channel is listed in the
Connected Devices Sensor
Channels list. To change channels,
select the check box next to the
Sensor Channel(s) you would like
to activate.
8. Click or tap Done to enter
data-collection mode.
Charging the Sensor
Connect Go Direct 3-Axis Magnetic Field to the included Micro USB Cable
and any USB device for two hours.
You can also charge up to eight Go Direct 3-Axis Magnetic Field Sensors using
our Go Direct Charge Station, sold separately (order code: GDX-CRG).
Charging
Fully charged
Powering the Sensor
Turning on the sensor
Putting the sensor in sleep
mode
Connecting the Sensor
See the following link for up-to-date connection information:
www.vernier.com/start/gdx-3mg
Connecting via Bluetooth
Ready to connect
Connected
1
Blue LED is on steady and a red LED is flashing
while sensor is connected to the Micro USB
Cable or Charge Station.
Blue LED is off when charging is complete.
Press button once. Red LED indicator flashes
when unit is on.
Press and hold button for more than three
seconds to put into sleep mode. Red LED
indicator stops flashing when sleeping.
Red LED flashes when sensor is awake and
ready to connect.
Green LED flashes when sensor is connected via
Bluetooth and taking data.
Advertisement
Table of Contents

Related Manuals for Vernier Go Direct GDX-3MG


Summary of Contents for Vernier Go Direct GDX-3MG
- Page 1 8. Click or tap Done to enter Note: Vernier products are designed for educational use. Our products are not data-collection mode. designed nor are they recommended for any industrial, medical, or commercial process such as life support, patient diagnosis, control of a manufacturing Charging the Sensor process, or industrial testing of any kind.
- Page 2 Connecting via USB Measuring the X-direction Magnetic Field Magnetic fields that point in the same direction the wand is pointing are Connected and charging Blue and green LED solid when sensor is con- recorded as positive, and fields that point in the opposite direction are recorded nected to Graphical Analysis via USB and unit as negative.
- Page 3 User calibration is not available for this sensor. We have set the sensor to match expected battery life should be several years. Replacement batteries are available our stored calibration before shipping it. from Vernier (order code: GDX-BAT-300). It is useful, however, to zero Go Direct 3-Axis Magnetic Field. Position the Storage and Maintenance sensor and zero it using your data-collection software.
- Page 4 Vernier warrants this product to be free from defects in materials and Le présent appareil est conforme aux CNR d’Industrie Canada applicables aux appareils radio exempts de licence. L’exploitation est autorisée aux deux conditions suivantes :...
- Page 5 The Bluetooth word mark and logos are registered trademarks owned by the Bluetooth SIG, Inc. and any use of such marks by Vernier Software & Technology is under license. Other trademarks and trade names are those of their respective owners.
Need help?
Do you have a question about the Go Direct GDX-3MG and is the answer not in the manual?
Questions and answers