Advertisement
®
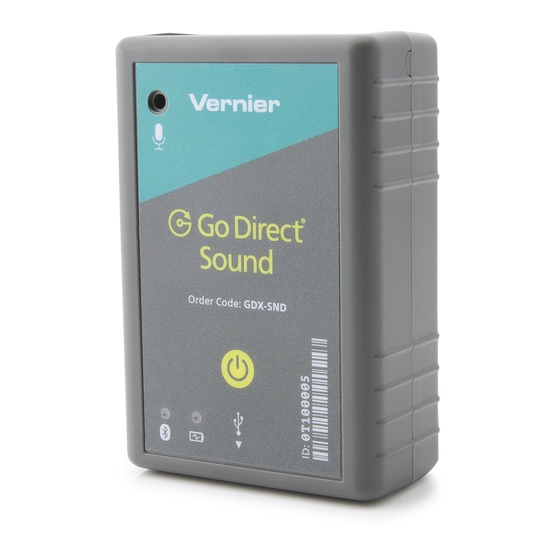
Go Direct
Sound
(Order Code GDX-SND)
Go Direct Sound can be used for a variety of activities with
sound waves.
Demonstrate how the wave pattern changes when
l
frequency and amplitude are changed.
Compare the waveforms from various musical instruments.
l
Measure the speed of sound by using reflected sound waves in a tube.
l
Demonstrate beat patterns.
l
Determine the period and then the frequency of a sound by measuring the
l
time between peaks on the waveform.
Measure sound level in decibels.
l
Investigate sound insulation and room acoustics.
l
Investigate the logarithmic nature of the decibel scale.
l
Note: Vernier products are designed for educational use. Our products are not
designed nor are they recommended for any industrial, medical, or commercial
process such as life support, patient diagnosis, control of a manufacturing
process, or industrial testing of any kind.
What's Included
Go Direct Sound
l
Micro USB Cable
l
Compatible Software
See
www.vernier.com/manuals/gdx-snd
Direct Sound.
Getting Started
Please see the following link for platform-specific connection information:
www.vernier.com/start/gdx-snd
Bluetooth Connection
1. Install Graphical Analysis 4 on
your computer, Chromebook™, or
mobile device. If using LabQuest 2,
make sure LabQuest App is up to
date. See www.vernier.com/ga4 for
Graphical Analysis 4 availability or
www.vernier.com/downloads to
update LabQuest App.
2. Charge your sensor for at least
2 hours before first use.
3. Turn on your sensor by pressing the
power button once. The LED will
blink red.
for a list of software compatible with Go
USB Connection
1. If using a computer or
Chromebook, install Graphical
Analysis 4. If using LabQuest 2,
make sure LabQuest App is up to
date. See www.vernier.com/ga4 for
Graphical Analysis 4 availability or
www.vernier.com/downloads to
update LabQuest App.
2. Connect the sensor to the USB
port.
3. Launch Graphical Analysis 4 or
turn on LabQuest 2. You are now
ready to collect data.
4. Launch Graphical Analysis 4 or
turn on LabQuest 2.
5. If using Graphical Analysis 4, click
or tap Sensor Data Collection. If
using LabQuest 2, choose Wirelss
Device Setup > Go Direct from the
Sensors menu.
6. Select your Go Direct sensor from
the list of Discovered Wireless
Devices. Your sensor's ID is located
near the barcode on the sensor. The
LED will blink green when it is
successfully connected.
7. Click or tap Done to enter
data-collection mode.
8. This is a multi-channel sensor. To
change the default channel
selections, see
www.vernier.com/start/gdx-snd
Charging the Sensor
Connect Go Direct Sound to the included Micro USB Cable and any USB
device for two hours.
You can also charge up to eight Go Direct Sound sensors using our Go Direct
Charge Station, sold separately (order code: GDX-CRG). An LED on each Go
Direct Sound indicates charging status.
Charging
Fully charged
1
4. This is a multi-channel sensor. To
change the default channel
selections, see
www.vernier.com/start/gdx-snd
Orange LED next to battery icon is solid while
sensor is charging.
Green LED next to battery icon solid when
sensor is fully charged.
Advertisement
Table of Contents

Related Manuals for Vernier Go Direct Sound


Summary of Contents for Vernier Go Direct Sound
- Page 1 Go Direct Sound device for two hours. Micro USB Cable You can also charge up to eight Go Direct Sound sensors using our Go Direct Compatible Software Charge Station, sold separately (order code: GDX-CRG). An LED on each Go for a list of software compatible with Go Direct Sound indicates charging status.
-
Page 2: Powering The Sensor
Bluetooth wireless tech- down the volume of the sound. nology. While capturing waveforms, Go Direct Sound can store up to 5000 data points. Connecting via USB It is possible to capture high frequency (>10,000 Hz) sound waves by increasing the data-collection rate. -
Page 3: Specifications
Storage and Maintenance Calibrating the Sensor To store Go Direct Sound for extended periods of time, put the device in sleep Microphone and Wave Amplitude mode by holding the button down for at least three seconds. The red LED will The Microphone and Wave Amplitude channels are uncalibrated, which means stop flashing to show that the unit is in sleep mode. -
Page 4: Troubleshooting
How the Sensor Works and electronic equipment. By ensuring that this product is disposed of correctly, Go Direct Sound uses a MEMS microphone that has a frequency response you help prevent potential negative consequences on human health or on the covering essentially the range of the human ear. - Page 5 The Bluetooth word mark and logos are registered trademarks owned by the Bluetooth SIG, Inc. and any use of such marks by Vernier Software & Technology is under license. Other trademarks and trade names are those of their respective owners.
Need help?
Do you have a question about the Go Direct Sound and is the answer not in the manual?
Questions and answers