Advertisement
Table of Contents
- 1 Table of Contents
- 2 Important Safety Instructions
- 3 General Information
- 4 Appliance Details
- 5 Electrical Connection
- 6 Interior Light: Replacing the Lamp
- 7 Removing the Oven Door
- 8 Installation
- 9 Instructions for Use
- 10 Controls
- 11 Oven Functions
- 12 Using the Display
- 13 Cleaning
- 14 Troubleshooting
- 15 Using the Oven
- Download this manual
Advertisement
Table of Contents

Subscribe to Our Youtube Channel
Related Manuals for Omega OO885XR


Summary of Contents for Omega OO885XR
- Page 1 OPERATING AND INSTALLATION INSTRUCTIONS OO885XR...
-
Page 3: Table Of Contents
INSTALLATION, OPERATION AND MAINTENANCE INSTRUCTIONS FOR OMEGA BUILT-IN ELECTRIC OVEN RANGE OO885XR BUILT-IN ELECTRIC OVEN CONGRATULATIONS Thank you for choosing one of our many fantastic built in ovens. We are confident that you will now be able to meet your cooking needs. Before you use the oven we strongly recommend that you read though the whole user manual which provides the description of this product and the proper use of its functions. -
Page 4: Important Safety Instructions
IMPORTANT SAFETY INSTRUCTIONS IMPORTANT: Read the assembly instruction section and safety precautions of this booklet carefully before removing the contents of this carton. This appliance is not intended for use by persons (including children) with reduced physical, sensory or mental capabilities, or lack of experience or knowledge, unless they have been given supervision or instruction concerning the use of the appliance by a person responsible for their safety. -
Page 5: General Information
Nr. 1506270006 OMEGA FCADD5050033848 230-240V ~ 50 Hz Model : OO885XR 5350 W Type: E88A / B151004DTC Countries: AUS / NZ Stainless Steel... -
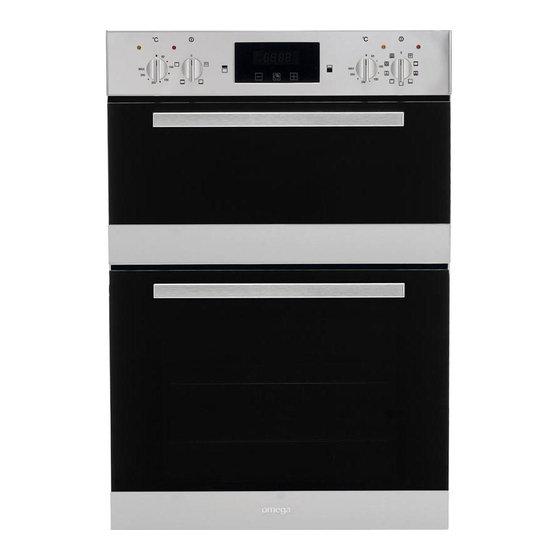
Page 6: Appliance Details
APPLIANCE DETAILS Dimensions -height 888 mm -width 595 mm -depth 561 mm -usable volume 58 + 32 litres Electrical Details 230-240V ~ 50 HZ -rated voltage -max rated input 5350 W This information can be found on the rating plate (data label) affixed to the inside of the door jamb. -
Page 7: Electrical Connection
ELECTRICAL CONNECTION LOCAL AUTHORITY REQUIREMENTS Installation is only permitted by a licensed electrician, and carried out according to instructions provided by the manufacturer. Incorrect installation might cause harm and damage which the manufacturer accepts no responsibility. ELECTRICAL INSTALLATION FOR THE LICENSED ELECTRICIAN This oven must be connected to a 220-240V 50Hz power supply. -
Page 8: Interior Light: Replacing The Lamp
INTERIOR LIGHT: REPLACING THE LAMP WARNING: Disconnect the appliance from the power supply before replacing the lamp to avoid the possibility of an electric shock. Unscrew the cover attached to the lamp holder; anti-clockwise. Unscrew the lamp and replace it with another high-temperature lamp (power rating 25W). -
Page 9: Installation
INSTALLATION CAUTION: THIS APPLIANCE MUST BE INSTALLED BY A PROFESSIONAL ELECTRICIAN, AND IN ACCORDANCE WITH THE MANUFACTURER’S INSTRUCTIONS. BEFORE CARRYING OUT ANY ADJUSTMENT OR REPAIR ON THE APPLIANCE, MAKE CERTAIN IT IS DISCONNECTED FROM THE POWER SUPPLY. Statutory regulations, technical standards, directives The appliance must be installed in conformity with current statutory regulations and in accordance with applicable safety standards. -
Page 10: Instructions For Use
INSTRUCTIONS FOR USE General Instructions CAUTION: The oven door becomes hot during use. Be sure to keep children well away. Do not use the oven as a room heater. Always be very careful when connecting other electrical appliances to the power supply if these are situated near the oven: the power cables must not come into contact with hot parts of the oven. -
Page 11: Controls
CONTROLS Thermostat Selector (Top Oven) Thermostat Selector (Bottom Oven) SELECTOR The selector knob is used to select the different functions. Each is explained in detail. To select a function, turn the control knob to the desired oven function and then set the temperature with the thermostat control. THERMOSTAT The thermostat control knob is used to select the desired temperature for cooking. -
Page 12: Oven Functions
OVEN FUNCTIONS TOP OVEN The oven functions for the top oven are listed below. Position 0: The oven is switched OFF. Position 1: Oven interior light Position 2: Lower heating element Set the required temperature between 50 and 250°C. This setting is used typically for food to be reheated or warmed. Position 3: Conventional cooking Set the required cooking temperature between 50 and 250°C. - Page 13 OVEN FUNCTIONS BOTTOM OVEN The oven functions for the bottom oven are listed below. Position 0: The oven is switched OFF. Position 1: Oven interior light Position 2: Conventional cooking Set the required cooking temperature between 50 and 250 °C. The red light will go out as soon as the selected temperature has been reached.
- Page 14 OVEN FUNCTIONS Position 6: Grill Set the thermostat at a temperature between 50 and 250°C. The red light will go out as soon as the selected temperature has been reached. Position 7: Fan + Double grill Set the thermostat to the required temperature between 50 and 250°C. Fan operation combined with the grill lets you cook particular foods quickly and deeply.
-
Page 15: Using The Display
USING THE DISPLAY The electronic programmer incorporates the following functions: 24 hour clock with luminous display 24 hour timer Automatic cooking Semiautomatic cooking The electronic programmer operates only on the main lower oven. Symbols When this symbol is displayed, the oven will operate when the temperature and cooking function are set. - Page 16 USING THE DISPLAY Automatic Cooking (Programmed start and stop times) Figure 1 To cook food in the oven using the automatic timer, proceed as follows: Establish how long the food needs to cook Press the centre button for approximately three seconds, then press it again until “dur”...
- Page 17 USING THE DISPLAY Semiautomatic Cooking Press the centre button for approximately three seconds until you Only defining hear a beep, then press it again until “dur” appears as in the image. duration to set the required cooking duration, the press the centre button again until you return to the current time display.
-
Page 18: Cleaning
CLEANING Never clean the oven with a high-pressure steam cleaning device, as it may cause a short circuit. Before cleaning, switch the cooker off and let it cool down properly. Front side of the casing For cleaning of front part of the cooker, use the usual cleaning agents and follow the manufacturer’s instructions. Never use any aggressive cleaning agents or dish cleaning accessories which might cause scratches. -
Page 19: Troubleshooting
TROUBLESHOOTING If the oven does not operate: The oven may be unplugged from the power source or switched off at the power source. The household fuse may have blown or household power supply is off. The timer may not be set correctly. If the oven does not heat: ... -
Page 20: Using The Oven
USING THE OVEN Set the selector for the type of cooking required. Preheat the oven, setting the thermostat to the required temperature. Once the oven has heated to the selected temperature, the orange warning light will go out. This same light will appear again automatically during operation of the oven to indicate that the heating elements are on. - Page 21 USING THE OVEN COOKING TABLE FOR TOP OVEN - CONVENTIONAL COOKING In heating system with top and bottom heaters operating. It is recommended to preheat the oven for 10 minutes. DISHES LEVEL TEMPERATURE COOKING TIME Yorksire Pudding 200 °C 30 - 40 min Fatless Sponge Cake 180 °C 25 - 30 min...
Need help?
Do you have a question about the OO885XR and is the answer not in the manual?
Questions and answers