
Subscribe to Our Youtube Channel
Related Manuals for Omega OO845XR


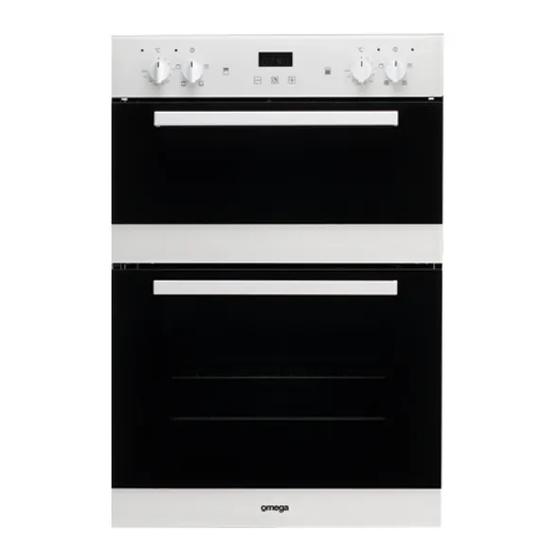
Summary of Contents for Omega OO845XR
- Page 1 Instructions for the Use, Care and Installation of OO845XR OO845WR Built-In Double Ovens...
-
Page 3: Table Of Contents
CONTENTS SAFETY PRECAUTION ……………………5 GENERAL INFORMATION ………………...6 INSTRUCTIONS FOR USE…………………7 INSTALLATION..…………………………..8 CONTROL PANEL …………………………10 USING THE OVENS……………………….13 ROASTING GUIDE………………………...14 TIMER TOUCH CONTROL……………….15 CLEANING AND MAINTENANCE……….17 TECHNICAL DATA…………………………20 REPLACING THE LAMP…………………..21 REMOVING THE DOOR…………………..22... - Page 4 Dear Customer, Thank you for selecting one of our products. We are certain it will respond fully to your needs and expectations, giving perfect results every time. Please read this manual carefully. The instructions it contains will enable you to use the appliance correctly and to best advantage.
-
Page 5: Safety Precaution
SAFETY PRECAUTIONS - To avoid any possible hazard, the appliance may be installed by qualified personnel only. -Any repairs by unqualified persons may result in electric shock or short circuit. In order to avoid possible injuries to your body or to the appliance, do not attempt any repairs by an unqualified service personnel. -
Page 6: General Information
GENERAL INFORMATION The oven data plate remains accessible following installation, and is exposed to view simply by opening the door. It shows all details needed to identify the appliance, and these must be indicated when ordering replacement parts. Given the type and height of this built-in oven, it can be installed only in a full- height kitchen unit. -
Page 7: Instructions For Use
INSTRUCTIONS FOR USE General instructions CAUTION: the oven door becomes hot during use. Be sure to keep children well away! Do not use the oven as a room heater. Always be very careful when connecting other electrical appliances to the power supply if these are situated near the oven: the power cables must not come into contact with hot parts of the oven. -
Page 8: Installation
INSTALLATION CAUTION: THIS APPLIANCE MUST BE INSTALLED BY A PROFESSIONAL ELECTRICIAN, AND IN ACCORDANCE WITH THE MANUFACTURER’S INSTRUCTIONS BEFORE CARRYING OUT ANY ADJUSTMENT OR REPAIR ON THE APPLIANCE, MAKE CERTAIN IT IS DISCONNECTED FROM THE ELECTRICAL POWER SUPPLY Statutory regulations, technical standards, directives The appliance must be installed in conformity with current statutory regulations and in accordance with applicable safety standards. - Page 9 Electrical connection Make certain the nominal a.c. power supply voltage corresponds to that indicated on the identification data plate. The appliance must be connected to the supply by way of an isolating switch with minimum contact separation of 3 mm. Suitable isolating components include automatic breakers, fuses and relays.
-
Page 10: Control Panel
CONTROL PANEL TOP OVEN The oven offers a basic choice between two types of cooking: A) conventional oven cooking B) grill (infrared radiant heat) Selector functions: Position 0: The oven is switched OFF Position 1: Oven interior light (turn to the right) Position 2: Lower heating element Set the required temperature between 50 and 250 °... -
Page 11: Main Oven
MAIN OVEN The oven offers a choice between two types of cooking: A) fan-assisted oven cooking B) grill (infrared radiant heat). Position 0: The oven is switched OFF Position 1: Oven interior light Position 2: Defrost The oven interior light and the orange warning light remain on — as is normally the case during all other functions of the oven —... - Page 12 COOKING TABLE FOR TOP OVEN CONVENTIONAL COOKING IN HEATING SYSTEM WITH TOP AND BOTTOM HEATERS OPERATING. It is recommended to preheat the oven 10 min. COOKING TABLE FOR THE TOP OVEN WITH INFRARED HEATER OPERATING Grilling is carried out at the door closed. 5 minutes oven preheating is recommended. Setting possibility from 50 - max (250)°...
-
Page 13: Using The Ovens
USING THE OVENS Set the selector for the type of cooking required. Preheat the oven, setting the thermostat to the required temperature. Once the oven has heated to the selected temperature, the orange warning light will go out. This same light will appear again automatically during operation of the oven to indicate that the heating elements are on. -
Page 14: Roasting Guide
ROASTING GUIDE - Frozen meat should be thoroughly thawed before cooking. For large joints it is advisable to thaw overnight. - Frozen poultry should be thoroughly thawed before cooking, the time required depends on the size of the bird e.g. a large turkey may take up to 48 hours to thaw. - Adjust the shelf position so the meat or poultry will be in the centre of the oven. -
Page 15: Timer Touch Control
TIMER TOUCH CONTROL Setting the clock Figure 1 “Auto” and “0:00” will start flashing when the unit is switched on for the first time. To set the clock, press the central button for about 3 seconds. When appears, press “+” or “-“ to set the correct time. - Page 16 End of cooking time Figure 4 The end of cooking time can also be set. Press the central button for 3 seconds. Press the central button twice consecutively and wait for “End” to appear (figure 4). Press “+” and “-” to set the required end of cooking time.
-
Page 17: Cleaning And Maintenance
CLEANING AND MAINTENANCE Never clean the oven with the high- pressure steam cleaning device, as it may provoke short circuit. Before cleaning switch the cooker off and let it cool down completely. Front side of the casing For cleaning of frontal part of the cooker use the usual cleaning agents and follow the manufacturer’s instructions. - Page 18 Self Cleaning Catalytic Liners Our smooth walled ovens can be fitted with self cleaning panels to cover the inside walls. These special panels are simply hooked on to the walls before the side frames are fitted. They are coated in a special, micro-prorous catalytic enamel which oxidises and gradually vaporises splashes of grease and oil at cooking temperatures over 200 degrees.
- Page 19 The oven’s side runners can easily be removed by disconnecting them from the peg in the bottom, turning them towards the inside of the oven and extracting them from the supporting holes. To put them back in place, reverse this procedure. Clean the side grids only with conventional detergents.
-
Page 21: Replacing The Lamp
INTERIOR LIGHT: REPLACING THE LAMP CAUTION: Disconnect the appliance from the power supply. To replace the lamp of the oven interior light, first unscrew and remove the protective cover A. Renew the lamp, and refit the cover A. Max power 25 W. Please call 1300 739 033 to find your closest spare parts outlet. -
Page 22: Removing The Door
REMOVING THE OVEN DOOR The door is easily removed, as follows: - open the door completely; - raise the two hinge levers as indicated in the drawing; - close the door again until a click is produced by the levers raised previously; - lift the door upward and away from the front of the oven to free it from the sockets;... - Page 23 NOTES...
- Page 24 The manufacturer declines any responsibility for possible inaccuracies in the present publication attributable to copying and printing errors. The right is reserved by the manufacturer to make such changes to products as are deemed necessary or appropriate, without affecting their essential characteristics.
Need help?
Do you have a question about the OO845XR and is the answer not in the manual?
Questions and answers
I have an Omega double oven - model number OO845WR. Can you please enlighten me as to the amount of amps required for this appliance. Seperate for each one is great. Please state both.