Table of Contents

Related Manuals for Omega OO60B


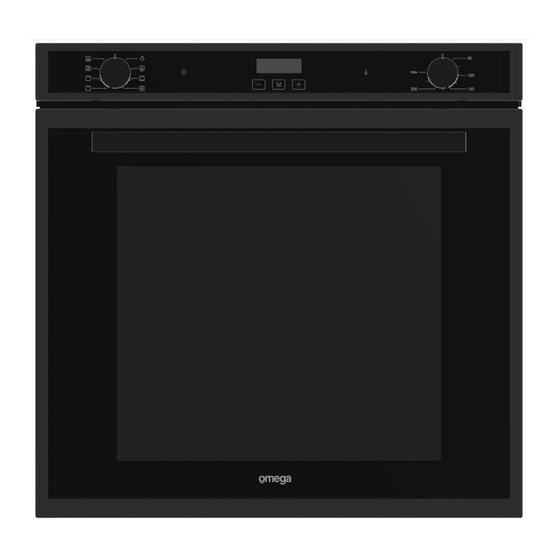
Summary of Contents for Omega OO60B
- Page 1 INSTALLATION, OPERATION & MAINTENANCE INSTRUCTIONS FOR OMEGA 90L, 60CM BUILT-IN ELECTRIC OVENS Models Included: OO60B OBES61 INSTALLATION, OPERATION AND MAINTENANCE INSTRUCTIONS FOR OMEGA BUILT-IN ELECTRIC OVEN RANGE OBES61, OBES6...
-
Page 3: Table Of Contents
It is important that you retain these instructions, proof of purchase as well as other important documents about this product for future reference. Due to continual product development, Omega reserves the right to alter specifications or appearances without notice. Dispose of packaging responsibly – recycle where facilities are available. -
Page 4: Important Safety Instructions
IMPORTANT SAFETY INSTRUCTIONS IMPORTANT: Read the assembly instruction section and safety precautions of this booklet carefully before removing the contents of this carton. This appliance is not intended for use by persons (including children) with reduced physical, sensory or mental capabilities, or lack of experience or knowledge, unless they have been given supervision or instruction concerning the use of the appliance by a person responsible for their safety. -
Page 5: Appliance Details
OVENS: Rated Voltage: 220 to 240 Vac 50 Hz Max Rated Inputs: OO60B: 2970-3540W, Supply Connection: OVENS - 15A plug. This information can be found on the rating plate (data label) affixed to the inside of the door jamb. SIZES:... - Page 6 OVEN LAMP REPLACEMENT The appliance must first be disconnected from the power outlet or turned off at your isolation switch. Unscrew the glass cover attached to the lamp holder; anti-clockwise. Unscrew the lamp and replace it with another high-temperature lamp with the following characteristics: Type: E 14 Voltage: AC220V-240V Wattage: 15W...
-
Page 7: Installation
INSTALLATION The adjacent furniture must be able to withstand a minimum temperature rise of 85°C above the ambient temperature of the room it is located in, during periods of use. The power supply to the appliance must be cut off before any adjustments or maintenance work is done on it. PREPARATION FOR INSTALLATION AND USE Manufactured with best quality parts and materials, this modern, functional and practical oven will meet your needs in all respects. - Page 8 CABINET DIMENSIONS & VENTILATION REQUIREMENTS The figure opposite shows the ventilation and cut-out requirements for the installation of the appliance into a standard kitchen cabinet. The figure opposite shows the ventilation and cut-out requirements for the installation of the appliance into a tall housing unit.
-
Page 9: Operating Instructions
OPERATING INSTRUCTIONS ACCESSORIES It is recommended that you use the containers indicated depending on the food you will cook in your oven. You can also use glass containers, cake pans and special oven trays suitable for use in your oven (available in kitchenware shops). - Page 10 CONTROLS 01) Oven Function Selection Knob. 04) Thermostat Indicator. 02) Power Indicator. 05) Oven Thermostat Control Knob. 03) Oven Timer Buttons (“-”, program, “+”). 06) LED Display. OVEN FUNCTION SELECTION KNOB The oven function selection knob is used to select the different functions possible (see table). Each is explained in detail.
- Page 11 OVEN FUNCTION CONTROL CHART Please note: To run the oven without using the timer, the oven must be set to “Manual Mode”. The Manual Mode indicator (8) must be lit on the display (the Auto Mode indicator should not be lit). Note: Oven shelves are numbered from 8 at the top down to 1 at the bottom when referring to the food cooking chart.
- Page 12 Defrost Function: You can start the defrost operation by putting the frozen food into oven and bringing the function control knob to the indicated mark. This function will not cook/bake the food; it only helps to defrost it within a short time. Put the food to be defrosted on the wire rack that you will place on the second rack support from the bottom.
- Page 13 Maxi-Grill Function: This function is used for faster grilling and for grills with a lot of food. Adjust the function control knob so it indicates the Maxi-Grill function symbol. Set the oven’s thermostat control knob to the required temperature. After a preheating period of 10 minutes, put your food into the oven. For grilling, put the food on the grill rack and sit into the tray.
- Page 14 USING THE DIGITAL TIMER Time of Day Adjustment: The time must be adjusted before starting to use the oven. Following power supply to the oven, the decimal point will flash. While the decimal point is flashing, use the (+) and (-) buttons to adjust the current time (24 hour clock).
- Page 15 Setting the cooking end time function: The cooking end time function allows you to set the oven to cook until a pre-set time, after which the oven will turn off. Select the desired temperature & oven functions with the control knobs (the oven will start to work).
-
Page 16: Cleaning
CLEANING NOTE: Cleaning and maintenance operations must only be carried out when the oven is cool. The appliance should be disconnected from the power outlet or turned off at your isolation switch before commencing any cleaning process. Cleaning the oven exterior: Before starting to clean your oven, be sure that all control buttons are off and your appliance has cooled off. -
Page 17: Recommended Cooking Times
RECOMMENDED COOKING TIMES LOWER‐UPPER HEAT – (Conventional) LOWER‐UPPER HEAT + FAN (Fan Assist) Thermost FOOD Thermostat Rack Rack Cooking Period (min) at pos Cooking Period (min) pos. (°c) pos. pos. (°c) Scones Plain or fruit 220 3‐4 10‐15 210 3‐4 10‐15 Cake ‐ Butter cake (deep) 180 3‐4 40 170 3‐4 40 Cake ‐ Sponge 180 3‐4 25‐30 170 3‐4 25‐30 Cake – Cup cakes 180 ... -
Page 18: Cooking Guides
Oven Shelf Location Your Omega oven has six positions or racks for the oven shelves to be positioned depending on your choice of cooking function and size of roasting dishes or containers. These are numbered from 1 (the lowest shelf position) to 6 (the highest shelf position). -
Page 19: Transportation
Grilling Cooking times may vary according to the nature of the foods, their homogeneity and their volume. When cooking a certain food for the first time, it is advisable to choose the lowest temperature and then increase temperature as required. Cakes and Baking Organize the oven shelves while the oven is cold and before preparing a recipe. - Page 20 A division of Shriro Australia Pty Ltd 104 Vanessa St Kingsgrove NSW 2208 IN AUSTRALIA: 1300 795 572 IN NEW ZEALAND: (09) 415 6000 www.omegaappliances.com.au IM Ref: OO60B 07/2018/02FC F O R I N D O O R U S E O N L Y...
Need help?
Do you have a question about the OO60B and is the answer not in the manual?
Questions and answers