
Related Manuals for Adafruit Feather M4 Express


Summary of Contents for Adafruit Feather M4 Express
- Page 1 Adafruit Feather M4 Express Created by lady ada Last updated on 2019-03-04 10:41:14 PM UTC...
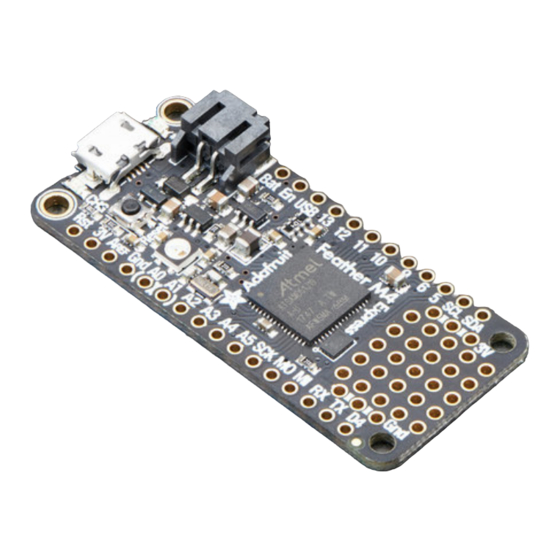
- Page 2 Overview It's what you've been waiting for, the Feather M4 Express featuring ATSAMD51. This Feather is fast like a swift, smart like an owl, strong like a ox-bird (it's half ox, half bird, OK?) This feather is powered by our new favorite chip, the ATSAMD51J19 - with its 120MHz Cortex M4 with floating point support and 512KB Flash and 192KB RAM.
- Page 3 8-bit Parallel capture controller (for camera/video in) Built in 100mA lipoly charger with charging status indicator LED Pin #13 red LED for general purpose blinking Power/enable pin 4 mounting holes Reset button © Adafruit Industries https://learn.adafruit.com/adafruit-feather-m4-express-atsamd51 Page 8 of 183...
- Page 4 The Feather M4 Express uses the extra space left over to add a Mini NeoPixel, 2 MB SPI Flash storage and a little prototyping space. You can use the SPI Flash storage like a very tiny hard drive. When used in CircuitPython, the 2 MB flash acts as storage for all your scripts, libraries and files.
- Page 5 © Adafruit Industries https://learn.adafruit.com/adafruit-feather-m4-express-atsamd51 Page 10 of 183...
-
Page 6: Power Pins
EN - this is the 3.3V regulator's enable pin. It's pulled up, so connect to ground to disable the 3.3V regulator 3V - this is the output from the 3.3V regulator, it can supply 500mA peak Logic pins © Adafruit Industries https://learn.adafruit.com/adafruit-feather-m4-express-atsamd51 Page 11 of 183... - Page 7 There's a 'camera' input peripheral you can use with some camera chips to capture video with 8-bit data width. We thought this was neat so we made sure all those pins were available. Here are the PCC pins (left) and the Feather M4 © Adafruit Industries https://learn.adafruit.com/adafruit-feather-m4-express-atsamd51...
-
Page 8: Qspi Flash And Neopixel
QSPI Flash and NeoPixel As part of the 'Express' series of boards, the Feather M4 Express is designed for use with CircuitPython. To make that easy, we have added two extra parts to this Feather M4: a mini NeoPixel (RGB LED) and a 2 MB QSPI (Quad SPI) Flash... -
Page 9: Other Pins
If you'd like to do more advanced development, trace-debugging, or not use the bootloader, we have the SWD interface exposed. You'll have to solder to the two SWD/SWCLK pads on the bottom: © Adafruit Industries https://learn.adafruit.com/adafruit-feather-m4-express-atsamd51 Page 14 of 183... -
Page 10: Header Options
Before you go gung-ho on soldering, there's a few options to consider! The first option is soldering in plain male headers, this lets you plug in the Feather into a solderless breadboard © Adafruit Industries https://learn.adafruit.com/adafruit-feather-m4-express-atsamd51 Page 15 of 183... - Page 11 Another option is to go with socket female headers. This won't let you plug the Feather into a breadboard but it will let you attach featherwings very easily © Adafruit Industries https://learn.adafruit.com/adafruit-feather-m4-express-atsamd51 Page 16 of 183...
- Page 12 We also have 'slim' versions of the female headers, that are a little shorter and give a more compact shape © Adafruit Industries https://learn.adafruit.com/adafruit-feather-m4-express-atsamd51 Page 17 of 183...
-
Page 13: Soldering In Plain Headers
Soldering in Plain Headers Prepare the header strip: Cut the strip to length if necessary. It will be easier to solder if you insert it into a breadboard - long pins down © Adafruit Industries https://learn.adafruit.com/adafruit-feather-m4-express-atsamd51 Page 18 of 183... - Page 14 And Solder! Be sure to solder all pins for reliable electrical contact. (For tips on soldering, be sure to check out our Guide to Excellent Soldering (https://adafru.it/aTk) © Adafruit Industries https://learn.adafruit.com/adafruit-feather-m4-express-atsamd51 Page 19 of 183...
- Page 15 Solder the other strip as well. © Adafruit Industries https://learn.adafruit.com/adafruit-feather-m4-express-atsamd51 Page 20 of 183...
-
Page 16: Soldering On Female Header
Soldering on Female Header Tape In Place For sockets you'll want to tape them in place so when you flip over the board they don't fall out © Adafruit Industries https://learn.adafruit.com/adafruit-feather-m4-express-atsamd51 Page 21 of 183... - Page 17 Flip & Tack Solder After flipping over, solder one or two points on each strip, to 'tack' the header in place © Adafruit Industries https://learn.adafruit.com/adafruit-feather-m4-express-atsamd51 Page 22 of 183...
- Page 18 And Solder! Be sure to solder all pins for reliable electrical contact. (For tips on soldering, be sure to check out our Guide to Excellent Soldering (https://adafru.it/aTk) © Adafruit Industries https://learn.adafruit.com/adafruit-feather-m4-express-atsamd51 Page 23 of 183...
- Page 19 You're done! Check your solder joints visually and continue onto the next steps © Adafruit Industries https://learn.adafruit.com/adafruit-feather-m4-express-atsamd51 Page 24 of 183...
-
Page 20: Power Management
'hotswap' style so you can always keep the Lipoly connected as a 'backup' power that will only get used when USB power is lost. The JST connector polarity is matched to Adafruit LiPoly batteries. Using wrong polarity batteries can destroy your Feather ©... -
Page 21: Power Supplies
Serial.print("VBat: " ); Serial.println(measuredvbat); For CircuitPython, we've written a helper function to do the math for you. All you have to do is call the get_voltage() function, provide the pin and print the results. © Adafruit Industries https://learn.adafruit.com/adafruit-feather-m4-express-atsamd51 Page 26 of 183... -
Page 22: Enable Pin
Do not use 7.4V RC batteries on the battery port - this will destroy the board The Feather is not designed for external power supplies - this is a design decision to make the board compact and low cost. It is not recommended, but technically possible: © Adafruit Industries https://learn.adafruit.com/adafruit-feather-m4-express-atsamd51 Page 27 of 183... - Page 23 Connect an external 5V power supply to the USB and GND pins. Not recommended, this may cause unexpected behavior when plugging in the USB port because you will be back-powering the USB port, which could confuse or damage your computer. © Adafruit Industries https://learn.adafruit.com/adafruit-feather-m4-express-atsamd51 Page 28 of 183...
-
Page 24: Arduino Ide Setup
Preferences menu. You can access it from the File menu in Windows or Linux , or the Arduino menu on OS X . A dialog will pop up just like the one shown below. © Adafruit Industries https://learn.adafruit.com/adafruit-feather-m4-express-atsamd51... - Page 25 We will be adding a URL to the new Additional Boards Manager URLs option. The list of URLs is comma separated, and you will only have to add each URL once. New Adafruit boards and updates to existing boards will automatically be picked up by the Board Manager each time it is opened.
- Page 26 (https://adafru.it/eSI). If you have multiple boards you want to support, say ESP8266 and Adafruit, have both URLs in the text box separated by a comma (,) Once done click OK to save the new preference settings. Next we will look at installing boards with the Board Manager.
-
Page 27: Using With Arduino Ide
All. You will then be able to select and install the boards supplied by the URLs added to the preferences. Remember you need SETUP the Arduino IDE to support our board packages - see the previous page on how to add adafruit's URL to the preferences Install SAMD Support First up, install the latest Arduino SAMD Boards (version 1.6.11 or later) - Page 28 Make sure you have Type All selected to the left of the Filter your search... box You can type Adafruit SAMD in the top search bar, then when you see the entry, click Install Even though in theory you don't need to - I recommend rebooting the IDE Quit and reopen the Arduino IDE to ensure that all of the boards are properly installed.
- Page 29 Click below to download our Driver Installer https://adafru.it/AB0 https://adafru.it/AB0 Download and run the installer Run the installer! Since we bundle the SiLabs and FTDI drivers as well, you'll need to click through the license © Adafruit Industries https://learn.adafruit.com/adafruit-feather-m4-express-atsamd51 Page 34 of 183...
- Page 30 Select which drivers you want to install, the defaults will set you up with just about every Adafruit board! Click Install to do the installin' Blink Now you can upload your first blink sketch! Plug in the M0 or M4 board, and wait for it to be recognized by the OS (just takes a few seconds). It will create a...
-
Page 31: Successful Upload
& reset After uploading, you may see a message saying "Disk Not Ejected Properly" about the ...BOOT drive. You can ignore that message: it's an artifact of how the bootloader and uploading work. © Adafruit Industries https://learn.adafruit.com/adafruit-feather-m4-express-atsamd51 Page 36 of 183... -
Page 32: Compilation Issues
Compilation Issues If you get an alert that looks like Cannot run program "{runtime.tools.arm-none-eabi-gcc.path}\bin\arm-non-eabi-g++" Make sure you have installed the Arduino SAMD boards package, you need both Arduino & Adafruit SAMD board packages Manually bootloading If you ever get in a 'weird' spot with the bootloader, or you have uploaded code that crashes and doesn't auto-reboot into the bootloader, click the RST button twice (like a double-click)to get back into the bootloader. - Page 33 The fix for this issue is to make sure Adafruit's custom udev rules are applied to your system. One of these rules is made to configure modem manager not to touch the Feather board and will fix the programming difficulty issue.
-
Page 34: What Is Circuitpython
Other reasons to use CircuitPython include: You want to get up and running quickly. Create a file, edit your code, save the file, and it runs immediately. There is no compiling, no downloading and no uploading needed. © Adafruit Industries https://learn.adafruit.com/adafruit-feather-m4-express-atsamd51 Page 39 of 183... - Page 35 CircuitPython. That's the core of the open source concept. This makes CircuitPython better for you and everyone who uses it! © Adafruit Industries https://learn.adafruit.com/adafruit-feather-m4-express-atsamd51 Page 40 of 183...
-
Page 36: Set Up Circuitpython Quick Start
Follow this quick step-by-step for super-fast Python power :) https://adafru.it/vlF https://adafru.it/vlF Click the link above to download the latest UF2 file. Download and save it to your desktop (or wherever is handy). © Adafruit Industries https://learn.adafruit.com/adafruit-feather-m4-express-atsamd51 Page 41 of 183... - Page 37 If double-clicking doesn't work the first time, try again. Sometimes it can take a few tries to get the rhythm right! You will see a new disk drive appear called FEATHERBOOT. Drag the adafruit_circuitpython_etc.uf2 file to FEATHERBOOT. © Adafruit Industries https://learn.adafruit.com/adafruit-feather-m4-express-atsamd51 Page 42 of 183...
-
Page 38: Further Information
The LED will flash. Then, the FEATHERBOOT drive will disappear and a new disk drive called CIRCUITPY will appear. That's it, you're done! :) Further Information For more detailed info on installing CircuitPython, check out Installing CircuitPython (https://adafru.it/Amd). © Adafruit Industries https://learn.adafruit.com/adafruit-feather-m4-express-atsamd51 Page 43 of 183... -
Page 39: Installing Mu Editor
Installing Mu Editor Mu is a simple code editor that works with the Adafruit CircuitPython boards. It's written in Python and works on Windows, MacOS, Linux and Raspberry Pi. The serial console is built right in so you get immediate feedback from your... - Page 40 "gear" icon. If the mode says "Microbit" or something else, click on that and then choose "Adafruit" in the dialog box that appears. Mu attempts to auto-detect your board, so please plug in your CircuitPython device and make sure it shows up as a CIRCUITPY drive before starting Mu Now you're ready to code! Lets keep going..
- Page 41 Mu is currently being developed. So there are lots of changes being made! Current versions are available from links at bottom of this page (https://adafru.it/Be5). However, use at your own risk! These are not stable versions and come with no guarantees of working. © Adafruit Industries https://learn.adafruit.com/adafruit-feather-m4-express-atsamd51 Page 46 of 183...
-
Page 42: Creating And Editing Code
Mu, click the New button in the top left Copy and paste the following code into your editor: import board import digitalio import time led = digitalio.DigitalInOut(board.D13) led.direction = digitalio.Direction.OUTPUT while True: led.value = True time.sleep(0.5) led.value = False time.sleep(0.5) © Adafruit Industries https://learn.adafruit.com/adafruit-feather-m4-express-atsamd51 Page 47 of 183... - Page 43 Save this file as code.py on your CIRCUITPY drive. On each board you'll find a tiny red LED. It should now be blinking. Once per second © Adafruit Industries https://learn.adafruit.com/adafruit-feather-m4-express-atsamd51 Page 48 of 183...
-
Page 44: Editing Code
/ vi safely writes all changes Sublime Text (https://adafru.it/xNB) safely writes all changes Visual Studio Code (https://adafru.it/Be9) appears to safely write all changes gedit on Linux appears to safely write all changes © Adafruit Industries https://learn.adafruit.com/adafruit-feather-m4-express-atsamd51 Page 49 of 183... -
Page 45: Eject Or Sync The Drive After Writing
On Linux, use the sync command in a terminal to force the write to disk. Oh No I Did Something Wrong and Now The CIRCUITPY Drive Doesn't Show Up!!! © Adafruit Industries https://learn.adafruit.com/adafruit-feather-m4-express-atsamd51... -
Page 46: Exploring Your First Circuitpython Program
Leave the rest of the code as-is. Save your file. See what happens to the LED on your board? Something changed! Do you know why? Let's find out! Exploring Your First CircuitPython Program First, we'll take a look at the code we're editing. Here is the original code again: © Adafruit Industries https://learn.adafruit.com/adafruit-feather-m4-express-atsamd51 Page 51 of 183... - Page 47 Code will loop "while" the condition is "true" (vs. false), and as is never False, the code will True: True loop forever. All code that is indented under is "inside" the loop. while True: Inside our loop, we have four items: © Adafruit Industries https://learn.adafruit.com/adafruit-feather-m4-express-atsamd51 Page 52 of 183...
-
Page 48: More Changes
If your program doesn't seem to be updating as you work, make sure you haven't created another code file that's being read instead of the one you're working on. © Adafruit Industries https://learn.adafruit.com/adafruit-feather-m4-express-atsamd51... -
Page 49: Connecting To The Serial Console
Please note that Mu does yet not work with nRF52 or ESP8266-based CircuitPython boards, skip down to the next section for details on using a terminal program. First, make sure your CircuitPython board is plugged in. If you are using Windows 7, make sure you installed the drivers (https://adafru.it/Amd). © Adafruit Industries https://learn.adafruit.com/adafruit-feather-m4-express-atsamd51 Page 54 of 183... -
Page 50: Using Something Else
Windows requires you to download a terminal program, check out this page for more details (https://adafru.it/AAH) Mac and Linux both have one built in, though other options are available for download, check this page for more details (https://adafru.it/AAI) © Adafruit Industries https://learn.adafruit.com/adafruit-feather-m4-express-atsamd51 Page 55 of 183... -
Page 51: Interacting With The Serial Console
Excellent! Our print statement is showing up in our console! Try changing the printed text to something else. Keep your serial console window where you can see it. Save your file. You'll see what the serial console displays when © Adafruit Industries https://learn.adafruit.com/adafruit-feather-m4-express-atsamd51... - Page 52 Usually when you run into errors, it's not because you introduced them on purpose. You may have 200 lines of code, and have no idea where your error could be hiding. This is where the serial console can help. Let's take a look! © Adafruit Industries https://learn.adafruit.com/adafruit-feather-m4-express-atsamd51...
- Page 53 If your code isn't working, and you want to know where it's failing, you can put print statements in various places to see where it stops printing. The serial console has many uses, and is an amazing tool overall for learning and programming! © Adafruit Industries https://learn.adafruit.com/adafruit-feather-m4-express-atsamd51 Page 58 of 183...
- Page 54 Either way, once you press a key you'll see a prompt welcoming you to the REPL! >>> © Adafruit Industries https://learn.adafruit.com/adafruit-feather-m4-express-atsamd51 Page 59 of 183...
- Page 55 To list built-in modules, please do `help("modules")`. Remember the libraries you learned about while going through creating code? That's exactly what this is talking about! This is a perfect place to start. Let's take a look! © Adafruit Industries https://learn.adafruit.com/adafruit-feather-m4-express-atsamd51 Page 60 of 183...
- Page 56 In this case, it's telling the REPL that you plan to do something with that module. Next, type into the REPL and press enter. dir(board) © Adafruit Industries https://learn.adafruit.com/adafruit-feather-m4-express-atsamd51 Page 61 of 183...
-
Page 57: Returning To The Serial Console
And if your program was affecting anything visual on the board, you'll see that start up again as well. You can return to the REPL at any time! © Adafruit Industries https://learn.adafruit.com/adafruit-feather-m4-express-atsamd51 Page 62 of 183... - Page 58 © Adafruit Industries https://learn.adafruit.com/adafruit-feather-m4-express-atsamd51 Page 63 of 183...
-
Page 59: Circuitpython Libraries
Installing the CircuitPython Library Bundle We're constantly updating and improving our libraries, so we don't (at this time) ship our CircuitPython boards with the © Adafruit Industries https://learn.adafruit.com/adafruit-feather-m4-express-atsamd51 Page 64 of 183... -
Page 60: Example Files
Instead, you can find example code in the guides for your board that depends on external libraries. Some of these libraries may be available from us at Adafruit, some may be written by community members! Either way, as you start to explore CircuitPython, you'll want to know how to get libraries on board. - Page 61 This demonstration will only return an error if you do not have the required library loaded into the folder on your drive. CIRCUITPY Let's use a modified version of the blinky example. © Adafruit Industries https://learn.adafruit.com/adafruit-feather-m4-express-atsamd51 Page 66 of 183...
-
Page 62: Library Install On Non-Express Boards
If you run into this error in the future, follow along with the steps above and choose the library that matches the one you're missing. Library Install on Non-Express Boards If you have a Trinket M0 or Gemma M0, you'll want to follow the same steps in the example above to install libraries as © Adafruit Industries https://learn.adafruit.com/adafruit-feather-m4-express-atsamd51 Page 67 of 183... -
Page 63: Updating Circuitpython Libraries/Examples
A new library bundle is released every time there's an update to a library. Updates include things like bug fixes and new features. It's important to check in every so often to see if the libraries you're using have been updated. © Adafruit Industries https://learn.adafruit.com/adafruit-feather-m4-express-atsamd51... -
Page 64: Frequently Asked Questions
Frequently Asked Questions These are some of the common questions regarding CircuitPython and CircuitPython microcontrollers. Is ESP8266 or ESP32 supported in CircuitPython? Why not? © Adafruit Industries https://learn.adafruit.com/adafruit-feather-m4-express-atsamd51 Page 69 of 183... - Page 65 How do I connect to the Internet with CircuitPython? © Adafruit Industries https://learn.adafruit.com/adafruit-feather-m4-express-atsamd51 Page 70 of 183...
- Page 66 Is there asyncio support in CircuitPython © Adafruit Industries https://learn.adafruit.com/adafruit-feather-m4-express-atsamd51 Page 71 of 183...
- Page 67 My RGB NeoPixel/DotStar LED is blinking funny colors - what does it mean? © Adafruit Industries https://learn.adafruit.com/adafruit-feather-m4-express-atsamd51 Page 72 of 183...
- Page 68 CircuitPython 3.x by cloning the CircuitPython GitHub repo (https://adafru.it/tB7), and mpy-cross running in the directory. Then run to create a make circuitpython/mpy-cross/ ./mpy-cross path/to/foo.py foo.mpy in the same directory as the original file. © Adafruit Industries https://learn.adafruit.com/adafruit-feather-m4-express-atsamd51 Page 73 of 183...
- Page 69 No, WINC1500 will not fit into the M0 flash space. Can AVRs such as ATmega328 or ATmega2560 run CircuitPython? Commonly Used Acronyms CP or CPy = CircuitPython (https://adafru.it/cpy-welcome) CPC = Circuit Playground Classic (https://adafru.it/ncE) CPX = Circuit Playground Express (https://adafru.it/wpF) © Adafruit Industries https://learn.adafruit.com/adafruit-feather-m4-express-atsamd51 Page 74 of 183...
- Page 70 Frequently Asked Questions These are some of the common questions regarding CircuitPython and CircuitPython microcontrollers. Is ESP8266 or ESP32 supported in CircuitPython? Why not? © Adafruit Industries https://learn.adafruit.com/adafruit-feather-m4-express-atsamd51 Page 75 of 183...
- Page 71 How do I connect to the Internet with CircuitPython? © Adafruit Industries https://learn.adafruit.com/adafruit-feather-m4-express-atsamd51 Page 76 of 183...
- Page 72 Is there asyncio support in CircuitPython © Adafruit Industries https://learn.adafruit.com/adafruit-feather-m4-express-atsamd51 Page 77 of 183...
- Page 73 My RGB NeoPixel/DotStar LED is blinking funny colors - what does it mean? © Adafruit Industries https://learn.adafruit.com/adafruit-feather-m4-express-atsamd51 Page 78 of 183...
- Page 74 CircuitPython 3.x by cloning the CircuitPython GitHub repo (https://adafru.it/tB7), and mpy-cross running in the directory. Then run to create a make circuitpython/mpy-cross/ ./mpy-cross path/to/foo.py foo.mpy in the same directory as the original file. © Adafruit Industries https://learn.adafruit.com/adafruit-feather-m4-express-atsamd51 Page 79 of 183...
- Page 75 No, WINC1500 will not fit into the M0 flash space. Can AVRs such as ATmega328 or ATmega2560 run CircuitPython? Commonly Used Acronyms CP or CPy = CircuitPython (https://adafru.it/cpy-welcome) CPC = Circuit Playground Classic (https://adafru.it/ncE) CPX = Circuit Playground Express (https://adafru.it/wpF) © Adafruit Industries https://learn.adafruit.com/adafruit-feather-m4-express-atsamd51 Page 80 of 183...
- Page 76 Now plug in your board. The Device Manager list will refresh and a new item will appear under Ports (COM & LPT). You'll find a different (COM#) after this item in the list. © Adafruit Industries https://learn.adafruit.com/adafruit-feather-m4-express-atsamd51 Page 81 of 183...
-
Page 77: Install Putty
If you want to save those settings for later, use the options under Load, save or delete a stored session. Enter a name in the box under Saved Sessions, and click the Save button on the right. © Adafruit Industries https://learn.adafruit.com/adafruit-feather-m4-express-atsamd51... - Page 78 If no code is running, the window will either be blank or will look like the window above. Now you're ready to see the results of your code. Great job! You've connected to the serial console! © Adafruit Industries https://learn.adafruit.com/adafruit-feather-m4-express-atsamd51 Page 83 of 183...
- Page 79 Now plug in your board. The Device Manager list will refresh and a new item will appear under Ports (COM & LPT). You'll find a different (COM#) after this item in the list. © Adafruit Industries https://learn.adafruit.com/adafruit-feather-m4-express-atsamd51 Page 84 of 183...
- Page 80 If you want to save those settings for later, use the options under Load, save or delete a stored session. Enter a name in the box under Saved Sessions, and click the Save button on the right. © Adafruit Industries https://learn.adafruit.com/adafruit-feather-m4-express-atsamd51...
- Page 81 If no code is running, the window will either be blank or will look like the window above. Now you're ready to see the results of your code. Great job! You've connected to the serial console! © Adafruit Industries https://learn.adafruit.com/adafruit-feather-m4-express-atsamd51 Page 86 of 183...
-
Page 82: Troubleshooting
Did you install the Adafruit Windows Drivers package by mistake? You don't need to install this package on Windows 10 for most Adafruit boards. The old version (v1.5) can interfere with recognizing your device. Go to Settings -> Apps and uninstall all the "Adafruit" driver programs. - Page 83 Now install the new 2.3.0.0 (or higher) Adafruit Windows Drivers Package: https://adafru.it/AB0 https://adafru.it/AB0 When running the installer, you'll be shown a list of drivers to choose from. You can check and uncheck the boxes to choose which drivers to install.
-
Page 84: Circuitpy Drive Does Not Appear
CircuitPython RGB Status Light The Feather M0 Express, Feather M4 Express, Metro M0 Express, Metro M4 Express, ItsyBitsy M0 Express, ItsyBitsy M4 Express, Gemma M0, and Trinket M0 all have a single NeoPixel or DotStar RGB LED on the board that indicates the status of CircuitPython. -
Page 85: Circuitpy Drive Issues
USB, it may corrupt the flash drive. It can happen on Windows, Mac or Linux. In this situation, the board must be completely erased and CircuitPython must be reloaded onto the board. © Adafruit Industries https://learn.adafruit.com/adafruit-feather-m4-express-atsamd51 Page 90 of 183... - Page 86 If you are running a version of CircuitPython before 2.3.0, and you don't want to upgrade, or you can't get to the REPL, you can do this. 1. Download the correct erase file: https://adafru.it/AdI https://adafru.it/AdI https://adafru.it/AdJ https://adafru.it/AdJ https://adafru.it/AdK https://adafru.it/AdK https://adafru.it/AYe https://adafru.it/AYe https://adafru.it/DjD https://adafru.it/DjD https://adafru.it/DBA https://adafru.it/DBA https://adafru.it/Eca https://adafru.it/Eca © Adafruit Industries https://learn.adafruit.com/adafruit-feather-m4-express-atsamd51 Page 91 of 183...
-
Page 87: Old Way: For Non-Express Boards Without A Uf2 Bootloader (Feather M0 Basic Proto, Feather Adalogger, Arduino Zero)
There are a couple ways to free up space. The board ships with the Windows 7 serial driver too! Feel free to delete that if you don't need it or have already © Adafruit Industries https://learn.adafruit.com/adafruit-feather-m4-express-atsamd51 Page 92 of 183... - Page 88 At this /Volumes/CIRCUITPY point all the hidden files should be cleared from the board and some hidden files will be prevented from being created. © Adafruit Industries https://learn.adafruit.com/adafruit-feather-m4-express-atsamd51 Page 93 of 183...
- Page 89 Finder because it will still create these hidden extended attribute files in some cases (for files downloaded from the internet, like Adafruit's modules). To copy a file or folder use the -X option for the cp command in a terminal. For example to copy a foo.mpy file to the board use a command like: cp -X foo.mpy /Volumes/CIRCUITPY...
- Page 90 Whoa! We have 13Ki more than before! This space can now be used for libraries and code! © Adafruit Industries https://learn.adafruit.com/adafruit-feather-m4-express-atsamd51 Page 95 of 183...
-
Page 91: Uninstalling Circuitpython
Now double-click your CircuitPython board until you see the onboard LED(s) turn green and the ...BOOT directory shows up. Then find the downloaded MakeCode .uf2 file and drag it to the ...BOOT drive. © Adafruit Industries https://learn.adafruit.com/adafruit-feather-m4-express-atsamd51 Page 96 of 183... -
Page 92: Moving To Arduino
Start by plugging in your board, and double-clicking reset until you get the green onboard LED(s) - just like with MakeCode Within Arduino IDE, select the matching board, say Circuit Playground Express Select the correct matching Port: © Adafruit Industries https://learn.adafruit.com/adafruit-feather-m4-express-atsamd51 Page 97 of 183... - Page 93 Make sure the LED(s) are still green, then click Upload to upload Blink. Once it has uploaded successfully, the serial Port will change so re-select the new Port! Once Blink is uploaded you should no longer need to double-click to enter bootloader mode, Arduino will automatically reset when you upload © Adafruit Industries https://learn.adafruit.com/adafruit-feather-m4-express-atsamd51 Page 98 of 183...
-
Page 94: Welcome To The Community
Adafruit CircuitPython community. We're going to highlight some of the many ways you can be a part of it! Adafruit Discord The Adafruit Discord server is the best place to start. -
Page 95: Adafruit Forums
Whether your hardware is giving you issues or your code doesn't seem to be working, the forums are always there for you to ask. You need an Adafruit account to post to the forums. You can use the same account you use to order from Adafruit. -
Page 96: Adafruit Github
We need your help to make CircuitPython even better. On GitHub, you can submit feature requests, provide feedback, report problems and much more. If you have © Adafruit Industries https://learn.adafruit.com/adafruit-feather-m4-express-atsamd51 Page 101 of 183... - Page 97 Learn Guides. If you want help understanding what's going on behind the scenes in any CircuitPython code you're writing, ReadTheDocs is there to help! © Adafruit Industries https://learn.adafruit.com/adafruit-feather-m4-express-atsamd51 Page 102 of 183...
-
Page 98: Circuitpython Essentials
Some examples require external components, such as switches or sensors. You'll find wiring diagrams where applicable to show you how to wire up the necessary components to work with each example. Let's get started learning the CircuitPython Essentials! © Adafruit Industries https://learn.adafruit.com/adafruit-feather-m4-express-atsamd51 Page 103 of 183... -
Page 99: Circuitpython Built-Ins
>>> g = lambda x: x**2 >>> g(8) Random Numbers To obtain random numbers: import random will give a floating point number from random.random() will give you an integer number between random.randint( min , max ) © Adafruit Industries https://learn.adafruit.com/adafruit-feather-m4-express-atsamd51 Page 104 of 183... - Page 100 Note: To "comment out" a line, put a # and a space before it. To "uncomment" a line, remove the # + space from the beginning of the line. For Feather M0 Express and Feather M4 Express, comment out (and/or switch = DigitalInOut(board.D2)
-
Page 101: Find The Pins
Trinket M0 D2 is connected to the blue wire, labeled "2", and located between "3V" and "1" on the board. D13 is labeled "13" and is located next to the USB micro port. © Adafruit Industries https://learn.adafruit.com/adafruit-feather-m4-express-atsamd51 Page 106 of 183... - Page 102 Use alligator clips to connect your switch to your Gemma M0! Feather M0 Express and Feather M4 Express D5 is labeled "5" and connected to the blue wire on the board. D13 is labeled "#13" and is located next to the USB micro port.
- Page 103 D13 is labeled "L" and is located next to the USB micro port. Read the Docs For a more in-depth look at what can do, check out page in Read the digitalio DigitalInOut Docs (https://adafru.it/C4c). © Adafruit Industries https://learn.adafruit.com/adafruit-feather-m4-express-atsamd51 Page 108 of 183...
-
Page 104: Circuitpython Analog In
Main Loop The main loop is simple. It out the voltage as floating point values by calling on our analog object. prints get_voltage Connect to the serial console to see the results. © Adafruit Industries https://learn.adafruit.com/adafruit-feather-m4-express-atsamd51 Page 109 of 183... - Page 105 This, in turn, changes the analog voltage level that will be read by your board on A1. Wire it up The list below shows wiring diagrams to help find the correct pins and wire up the potentiometer, and provides more information about analog pins on your board! © Adafruit Industries https://learn.adafruit.com/adafruit-feather-m4-express-atsamd51 Page 110 of 183...
- Page 106 2, on the same end of the board as the reset button. You have 5 analog pins you can use. For the full list, see pinouts page (https://adafru.it/AMd) on the main guide. © Adafruit Industries https://learn.adafruit.com/adafruit-feather-m4-express-atsamd51 Page 111 of 183...
- Page 107 (https://adafru.it/AMa) on the main guide. Feather M0 Express and Feather M4 Express A1 is located along the edge opposite the battery connector. There are multiple ground pins. 3V is located along the same edge as A1, and is next to the reset button.
- Page 108 ItsyBitsy M0 Express and ItsyBitsy M4 Express A1 is located in the middle of the board, near the "A" in "Adafruit". Ground is labled "G" and is located next to "BAT", near the USB Micro port. 3V is found on the opposite side of the USB port from Ground, next to RST.
-
Page 109: Circuitpython Analog Out
Express boards like the Circuit Playground Express, Metro M0 Express, ItsyBitsy M0 Express, ItsyBitsy M4 Express, Metro M4 Express, Feather M4 Express, or Feather M0 Express have more code space and can perform audio playback capabilities via the DAC. Gemma M0 and Trinket M0 cannot! -
Page 110: Find The Pin
A0 is located between VOUT and A1 near the battery port. Trinket M0 A0 is labeled "1~" on Trinket! A0 is located between "0" and "2" towards the middle of the board on the same side as the red LED. © Adafruit Industries https://learn.adafruit.com/adafruit-feather-m4-express-atsamd51 Page 115 of 183... - Page 111 A0 is located between GND and A1 on the opposite side of the board from the battery connector, towards the end with the Reset button. Feather M4 Express A0 is located between GND and A1 on the opposite side of the board from the battery connector, towards the...
- Page 112 ItsyBitsy M0 Express A0 is located between VHI and A1, near the "A" in "Adafruit", and the pin pad has left and right white parenthesis markings around it. ItsyBitsy M4 Express A0 is located between VHI and A1, and the pin pad has left and right white parenthesis markings around it.
- Page 113 On the Metro M4 Express, there are TWO true analog outputs: A0 and A1. © Adafruit Industries https://learn.adafruit.com/adafruit-feather-m4-express-atsamd51 Page 118 of 183...
-
Page 114: Circuitpython Pwm
The following example uses to make a series of tones on a piezo. pulseio To use with any of the M0 boards, no changes to the following code are needed. © Adafruit Industries https://learn.adafruit.com/adafruit-feather-m4-express-atsamd51 Page 119 of 183... - Page 115 To use with the Metro M4 Express, ItsyBitsy M4 Express or the Feather M4 Express, you must comment out the line and uncomment piezo = pulseio.PWMOut(board.A2, duty_cycle=0, frequency=440, variable_frequency=True) line. A2 is not a piezo = pulseio.PWMOut(board.A1, duty_cycle=0, frequency=440, variable_frequency=True) supported PWM pin on the M4 boards! Remember: To "comment out"...
- Page 116 Trinket has PWM available on the following pins: D0, A2, SDA, D2, A1, SCL, MISO, D4, A4, TX, MOSI, D3, A3, RX, SCK, D13, APA102_MOSI, APA102_SCK. There is NO PWM on: A0, D1. © Adafruit Industries https://learn.adafruit.com/adafruit-feather-m4-express-atsamd51 Page 121 of 183...
- Page 117 To use A1, comment out the current pin setup line, and uncomment the line labeled for the M4 boards. See the details above! Feather M4 Express has PWM on the following pins: A1, A3, SCK, D0, RX, D1, TX, SDA, SCL, D4, D5, D6, D9, D10, D11, D12, D13.
- Page 118 A3, A4, D0, RX, D1, TX, D2, D3, D4, D5, D6, D7, D8, D9, D10, D11, D12, D13, SDA, SCL, NEOPIXEL, SCK, MOSI, MISO. There is NO PWM on: A0, A1, A5, FLASH_CS. © Adafruit Industries https://learn.adafruit.com/adafruit-feather-m4-express-atsamd51 Page 123 of 183...
- Page 119 # Timer conflict error. print("Timers in use:", pin_name) # Prints the timer conflict pins. except TypeError: # Error returned when checking a non-pin object in dir(board). pass # Passes over non-pin objects in dir(board). © Adafruit Industries https://learn.adafruit.com/adafruit-feather-m4-express-atsamd51 Page 124 of 183...
-
Page 120: Circuitpython Servo
For example, to wire a servo to Trinket, connect the ground wire to GND, the power wire to USB, and the signal wire to 0. Remember, A2 on Trinket is labeled "0". © Adafruit Industries https://learn.adafruit.com/adafruit-feather-m4-express-atsamd51 Page 125 of 183... - Page 121 For boards like Feather M0 Express, ItsyBitsy M0 Express and Metro M0 Express, connect the ground wire to any GND, the power wire to USB or 5V, and the signal wire to A2. © Adafruit Industries https://learn.adafruit.com/adafruit-feather-m4-express-atsamd51 Page 126 of 183...
- Page 122 For the Metro M4 Express, ItsyBitsy M4 Express and the Feather M4 Express, connect the ground wire to any G or GND, the power wire to USB or 5V, and the signal wire to A1. Servo Code Here's an example that will sweep a servo connected to pin A2 from 0 degrees to 180 degrees and back:...
-
Page 123: Circuitpython Internal Rgb Led
Since we're using the APA102_MOSI APA102_SCK single onboard LED, the last thing we do is tell it that there's only LED! © Adafruit Industries https://learn.adafruit.com/adafruit-feather-m4-express-atsamd51 Page 128 of 183... - Page 124 Trinket M0, Gemma M0, ItsyBitsy M0 Express, and ItsyBitsy M4 Express each have an onboard Dotstar LED, so no changes are needed to the initial version of the example. Feather M0 Express, Feather M4 Express, Metro M0 Express, Metro M4 Express, and Circuit Playground Express each have an onboard NeoPixel LED, so you must comment out...
- Page 125 Making Rainbows (Because Who Doesn't Love 'Em!) Coding a rainbow effect involves a little math and a helper function called . For details about how wheel works, wheel this explanation here (https://adafru.it/Bek)! © Adafruit Industries https://learn.adafruit.com/adafruit-feather-m4-express-atsamd51 Page 130 of 183...
-
Page 126: Circuit Playground Express Rainbow
? Well, you may have a Circuit Playground Express, which as you can see has TEN fill NeoPixel LEDs built in. The examples so far have only turned on the first one. If you'd like to do a rainbow on all ten LEDs, change the © Adafruit Industries https://learn.adafruit.com/adafruit-feather-m4-express-atsamd51 Page 131 of 183... - Page 127 LEDs in the colors you led.fill chose! For more details, check out the NeoPixel section of the CPX guide (https://adafru.it/Bem)! © Adafruit Industries https://learn.adafruit.com/adafruit-feather-m4-express-atsamd51 Page 132 of 183...
-
Page 128: Circuitpython Neopixel
On Gemma M0 and Circuit Playground Express this is the Vout pad - that pad has direct power from USB or the battery, depending on which is higher voltage. On Trinket M0, Feather M0 Express, Feather M4 Express, ItsyBitsy M0 Express and ItsyBitsy M4 Express the USB or BAT pins will give you direct power from the USB port or battery. - Page 129 (0, 255 - pos * 3, pos * 3) pos -= 170 return (pos * 3, 0, 255 - pos * 3) def color_chase(color, wait): for i in range(num_pixels): pixels[i] = color © Adafruit Industries https://learn.adafruit.com/adafruit-feather-m4-express-atsamd51 Page 134 of 183...
- Page 130 To provide the number of pixels, assign the variable to the number of pixels you'd like to use. In this num_pixels example, we're using a strip of We've chosen to set , or 30%. brightness=0.3 © Adafruit Industries https://learn.adafruit.com/adafruit-feather-m4-express-atsamd51 Page 135 of 183...
-
Page 131: Neopixel Helpers
Check out the example below to see how our NeoPixel code looks for using with RGBW LEDs! # CircuitPython demo - NeoPixel RGBW import time import board import neopixel pixel_pin = board.A1 © Adafruit Industries https://learn.adafruit.com/adafruit-feather-m4-express-atsamd51 Page 136 of 183... - Page 132 # Increase or decrease to change the speed of the solid color change. time.sleep(1) pixels.fill(GREEN) pixels.show() time.sleep(1) pixels.fill(BLUE) pixels.show() time.sleep(1) color_chase(RED, 0.1) # Increase the number to slow down the color chase color_chase(YELLOW, 0.1) color_chase(GREEN, 0.1) © Adafruit Industries https://learn.adafruit.com/adafruit-feather-m4-express-atsamd51 Page 137 of 183...
- Page 133 # Increase the number to slow down the rainbow Read the Docs For a more in depth look at what can do, check out NeoPixel on Read the Docs (https://adafru.it/C5m). neopixel © Adafruit Industries https://learn.adafruit.com/adafruit-feather-m4-express-atsamd51 Page 138 of 183...
-
Page 134: Circuitpython Dotstar
On Gemma M0 and Circuit Playground Express this is the Vout pad - that pad has direct power from USB or the battery, depending on which is higher voltage. On Trinket M0, Feather M0 Express, Feather M4 Express, ItsyBitsy M0 Express and ItsyBitsy M4 Express the USB or BAT pins will give you direct power from the USB port or battery. - Page 135 (pos * 3, 0, 255 - pos * 3) def color_fill(color, wait): pixels.fill(color) pixels.show() time.sleep(wait) def slice_alternating(wait): pixels[::2] = [RED] * (num_pixels // 2) pixels.show() time.sleep(wait) pixels[1::2] = [ORANGE] * (num_pixels // 2) pixels.show() time.sleep(wait) © Adafruit Industries https://learn.adafruit.com/adafruit-feather-m4-express-atsamd51 Page 140 of 183...
- Page 136 = (i * 256 // num_pixels) + j pixels[i] = wheel(rc_index & 255) pixels.show() time.sleep(wait) RED = (255, 0, 0) YELLOW = (255, 150, 0) ORANGE = (255, 40, 0) GREEN = (0, 255, 0) © Adafruit Industries https://learn.adafruit.com/adafruit-feather-m4-express-atsamd51 Page 141 of 183...
- Page 137 LED object at all. We've chosen to . If you set , you must include each time you'd like to send data auto_write=False auto_write=False pixels.show() © Adafruit Industries https://learn.adafruit.com/adafruit-feather-m4-express-atsamd51 Page 142 of 183...
-
Page 138: Dotstar Helpers
To check if other pin combinations have hardware SPI, change the pin names on the line reading: to the pins you want to use. Then, check the results in the serial console. Super is_hardware_SPI(board.A1, board.A2): simple! © Adafruit Industries https://learn.adafruit.com/adafruit-feather-m4-express-atsamd51 Page 143 of 183... - Page 139 SPI!") else: print("This pin combination isn't hardware SPI.") Read the Docs For a more in depth look at what can do, check out DotStar on Read the Docs (https://adafru.it/C4d). dotstar © Adafruit Industries https://learn.adafruit.com/adafruit-feather-m4-express-atsamd51 Page 144 of 183...
-
Page 140: Circuitpython Uart Serial
Note it will always return immediately because there is an internal buffer! So read as much data as you can 'digest'. If there is no data available, will return , so check for that before continuing. read() None © Adafruit Industries https://learn.adafruit.com/adafruit-feather-m4-express-atsamd51 Page 145 of 183... - Page 141 The red wire connects between the power pins on the GPS and your board. The blue wire connects from TX on the GPS to RX on your board. The white wire connects from RX on the GPS to TX on your board. © Adafruit Industries https://learn.adafruit.com/adafruit-feather-m4-express-atsamd51 Page 146 of 183...
- Page 142 Connect USB on the Trinket to VIN on the GPS. Connect Gnd on the Trinket to GND on the GPS. Connect D3 on the Trinket to TX on the GPS. Connect D4 on the Trinket to RX on the GPS. © Adafruit Industries https://learn.adafruit.com/adafruit-feather-m4-express-atsamd51 Page 147 of 183...
- Page 143 Connect A1/D2 on the Gemma to TX on the GPS. Connect A2/D0 on the Gemma to RX on the GPS. Feather M0 Express and Feather M4 Express Connect USB on the Feather to VIN on the GPS. Connect GND on the Feather to GND on the GPS.
- Page 144 These are the results from a Trinket M0, your output may vary and it might be very long. For more details about UARTs and SERCOMs check out our detailed guide here (https://adafru.it/Ben) © Adafruit Industries https://learn.adafruit.com/adafruit-feather-m4-express-atsamd51 Page 149 of 183...
-
Page 145: Trinket M0: Create Uart Before I2C
On the Trinket M0 (only), if you are using both , you must create the UART object first, e.g.: busio.UART busio.I2C >>> import board,busio >>> uart = busio.UART(board.TX, board.RX) >>> i2c = busio.I2C(board.SCL, board.SDA) Creating first does not work: busio.I2C © Adafruit Industries https://learn.adafruit.com/adafruit-feather-m4-express-atsamd51 Page 150 of 183... - Page 146 >>> import board,busio >>> i2c = busio.I2C(board.SCL, board.SDA) >>> uart = busio.UART(board.TX, board.RX) Traceback (most recent call last): File "", line 1, in ValueError: Invalid pins © Adafruit Industries https://learn.adafruit.com/adafruit-feather-m4-express-atsamd51 Page 151 of 183...
- Page 147 Check out the list below for a diagram of your specific board! Be aware that the Adafruit microcontroller boards do not have I2C pullup resistors built in! All of the Adafruit breakouts do, but if you're building your own board or using a non-Adafruit breakout, you must add 2.2K-10K ohm pullups on both SDA and SCL to the 3.3V.
- Page 148 Connect USB on the Trinket to VIN on the TSL2561. Connect Gnd on the Trinket to GND on the TSL2561. Connect D2 on the Trinket to SCL on the TSL2561. Connect D0 on the Trinket to SDA on the TSL2561. © Adafruit Industries https://learn.adafruit.com/adafruit-feather-m4-express-atsamd51 Page 153 of 183...
- Page 149 Connect A1/D2 on the Gemma to SCL on the TSL2561. Connect A2/D0 on the Gemma to SDA on the TSL2561. Feather M0 Express and Feather M4 Express Connect USB on the Feather to VIN on the TSL2561. Connect GND on the Feather to GND on the TSL2561.
-
Page 150: Find Your Sensor
I2C scan to see if the board is detected, and if it is, print out its I2C address. Copy and paste the code into code.py using your favorite editor, and save the file. © Adafruit Industries https://learn.adafruit.com/adafruit-feather-m4-express-atsamd51 Page 155 of 183... -
Page 151: I2C Sensor Data
Now we know for certain that our sensor is connected and ready to go. Let's find out how to get the data from our sensor! Copy and paste the code into code.py using your favorite editor, and save the file. © Adafruit Industries https://learn.adafruit.com/adafruit-feather-m4-express-atsamd51 Page 156 of 183... - Page 152 Then we have a simple loop that prints out the lux reading using the sensor object we created. We add a , so it only prints once per second. Connect to the serial console to see the results. Try shining a light time.sleep(1.0) on it to see the results change! © Adafruit Industries https://learn.adafruit.com/adafruit-feather-m4-express-atsamd51 Page 157 of 183...
- Page 153 These are the results from an ItsyBitsy M0 Express. Your output may vary and it might be very long. For more details about I2C and SERCOMs, check out our detailed guide here (https://adafru.it/Ben). © Adafruit Industries https://learn.adafruit.com/adafruit-feather-m4-express-atsamd51 Page 158 of 183...
- Page 154 "\t SDA pin:", sda_pin) else: pass © Adafruit Industries https://learn.adafruit.com/adafruit-feather-m4-express-atsamd51 Page 159 of 183...
-
Page 155: Circuitpython Hid Keyboard And Mouse
# Make all pin objects inputs with pullups for pin in keypress_pins: key_pin = digitalio.DigitalInOut(pin) key_pin.direction = digitalio.Direction.INPUT key_pin.pull = digitalio.Pull.UP key_pin_array.append(key_pin) led = digitalio.DigitalInOut(board.D13) led.direction = digitalio.Direction.OUTPUT print("Waiting for key pin...") © Adafruit Industries https://learn.adafruit.com/adafruit-feather-m4-express-atsamd51 Page 160 of 183... -
Page 156: Create The Objects And Variables
We'll be using two keypresses, but you can have up to six keypresses at once. Next objects are created. We only have US right now (if you make other layouts keyboard keyboard_layout © Adafruit Industries https://learn.adafruit.com/adafruit-feather-m4-express-atsamd51 Page 161 of 183... -
Page 157: The Main Loop
= analogio.AnalogIn(board.A1) select = digitalio.DigitalInOut(board.A2) select.direction = digitalio.Direction.INPUT select.pull = digitalio.Pull.UP pot_min = 0.00 pot_max = 3.29 step = (pot_max - pot_min) / 20.0 def get_voltage(pin): return (pin.value * 3.3) / 65536 © Adafruit Industries https://learn.adafruit.com/adafruit-feather-m4-express-atsamd51 Page 162 of 183... - Page 158 Connect Yout on the joystick to pin A1 on your board. Connect Sel on the joystick to pin A2 on your board. Remember, Trinket's pins are labeled differently. Check the Trinket Pinouts page (https://adafru.it/AMd) to verify your wiring. © Adafruit Industries https://learn.adafruit.com/adafruit-feather-m4-express-atsamd51 Page 163 of 183...
-
Page 159: Circuitpython Hid Mouse Helpers
0-20.0 using this helper function. That way we can simplify our code and use larger ranges for our thresholds instead of trying to figure out tiny decimal number changes. Main Loop First we assign to read the voltages from x_axis y_axis © Adafruit Industries https://learn.adafruit.com/adafruit-feather-m4-express-atsamd51 Page 164 of 183... - Page 160 For more detail check out the documentation at https://circuitpython.readthedocs.io/projects/hid/en/latest/ © Adafruit Industries https://learn.adafruit.com/adafruit-feather-m4-express-atsamd51 Page 165 of 183...
-
Page 161: Circuitpython Storage
For Gemma M0, Trinket M0, Metro M0 Express, Metro M4 Express, ItsyBitsy M0 Express and ItsyBitsy M4 Express, no changes to the initial code are needed. For Feather M0 Express and Feather M4 Express, comment out , and switch = digitalio.DigitalInOut(board.D2) uncomment switch = digitalio.DigitalInOut(board.D5) -
Page 162: Logging The Temperature
Find the Pins section of the CircuitPython Digital In & Out guide (https://adafru.it/Bes). Instead of wiring up a switch, however, you'll be connecting the pin directly to ground with alligator clips or jumper wires. © Adafruit Industries https://learn.adafruit.com/adafruit-feather-m4-express-atsamd51 Page 167 of 183... - Page 163 Now it will be possible for you to write to the filesystem from your computer again, but it will not be logging data. We have a more detailed guide on this project available here: CPU Temperature Logging with CircuitPython. (https://adafru.it/zuF) If you'd like more details, check it out! © Adafruit Industries https://learn.adafruit.com/adafruit-feather-m4-express-atsamd51 Page 168 of 183...
- Page 164 © Adafruit Industries https://learn.adafruit.com/adafruit-feather-m4-express-atsamd51 Page 169 of 183...
-
Page 165: Circuitpython Cpu Temp
But it's close! If you'd like to print it out in Fahrenheit, use this simple formula: Celsius * (9/5) + 32. It's super easy to do math using CircuitPython. Check it out! © Adafruit Industries https://learn.adafruit.com/adafruit-feather-m4-express-atsamd51 Page 170 of 183... -
Page 166: Circuitpython Expectations
3.x bundle (https://adafru.it/ABU). We will soon stop providing the 2.x bundle as an automatically created download on the Adafruit CircuitPython Bundle repo. If you must continue to use 2.x, you can still download the 2.x version of from the 2.x release of mpy-cross CircuitPython on the CircuitPython repo and create your own 2.x compatible .mpy library files. -
Page 167: Differences Between Circuitpython And Micropython
For a more detailed list of the differences between CircuitPython and Python, you can look at the MicroPython documentation. We keep up with MicroPython stable releases, so check out the core 'differences' they document here. (https://adafru.it/zwA) © Adafruit Industries https://learn.adafruit.com/adafruit-feather-m4-express-atsamd51 Page 172 of 183... - Page 168 © Adafruit Industries https://learn.adafruit.com/adafruit-feather-m4-express-atsamd51 Page 173 of 183...
-
Page 169: Uf2 Bootloader Details
This is an information page for advanced users who are curious how we get code from your computer into your Express board! Adafruit SAMD21 (M0) and SAMD51 (M4) boards feature an improved bootloader that makes it easier than ever to flash different code onto the microcontroller. This bootloader makes it easy to switch between Microsoft MakeCode, CircuitPython and Arduino. - Page 170 That could mean that your USB cable is no good, it isn't connected to a computer, or maybe the drivers could not enumerate. Try a new USB cable first. Then try another port on your computer! Once the bootloader is running, check your computer. You should see a USB Disk drive... © Adafruit Industries https://learn.adafruit.com/adafruit-feather-m4-express-atsamd51 Page 175 of 183...
-
Page 171: Using The Mass Storage Bootloader
To flash something new, simply drag any UF2 onto the drive. After the file is finished copying, the bootloader will automatically restart. This usually causes a warning about an unsafe eject of the drive. However, its not a problem. The bootloader knows when everything is copied successfully. © Adafruit Industries https://learn.adafruit.com/adafruit-feather-m4-express-atsamd51 Page 176 of 183... -
Page 172: Using The Bossa Bootloader
If you are running Windows 7 (or, goodness, something earlier?) You will need a Serial Port driver file. Windows 10 users do not need this so skip this step. You can download our full driver package here: https://adafru.it/AB0 https://adafru.it/AB0 © Adafruit Industries https://learn.adafruit.com/adafruit-feather-m4-express-atsamd51 Page 177 of 183... - Page 173 Ports (COM & LPT) for a device called Feather M0 or Circuit Playground or whatever! If you see something like this, it means you did not install the drivers. Go back and try again, then remove and re-plug the USB cable for your board © Adafruit Industries https://learn.adafruit.com/adafruit-feather-m4-express-atsamd51 Page 178 of 183...
-
Page 174: Running Bossac On The Command Line
Linux. Once downloaded, extract the files from the zip and open the command linux line to the directory with bossac For example here's the command line you probably want to run: bossac -e -w -v -R ~/Downloads/adafruit-circuitpython-feather_m0_express-3.0.0-adafruit.5.bin This will rase the chip, rite the given file, erify the write and eset the board. -
Page 175: Updating The Bootloader
After the file is copied over, the bootloader will be updated and appear again. The INFO_UF2.TXT file should show the newer version number inside. For example: UF2 Bootloader v2.0.0-adafruit.5 SFHWRO Model: Metro M0 Board-ID: SAMD21G18A-Metro-v0 Lastly, reload your code from Arduino or MakeCode or flash the latest CircuitPython core (https://adafru.it/tBa). -
Page 176: Getting Rid Of Windows Pop-Ups
If you do a lot of development on Windows with the UF2 bootloader, you may get annoyed by the constant "Hey you inserted a drive what do you want to do" pop-ups. Go to the Control Panel. Click on the Hardware and Sound header Click on the Autoplay header © Adafruit Industries https://learn.adafruit.com/adafruit-feather-m4-express-atsamd51 Page 181 of 183... -
Page 177: Making Your Own Uf2
If you somehow damaged your bootloader or maybe you have a new board, you can use a JLink to re-install it. Here's a short writeup by turbinenreiter on how to do it for the Feather M4 (but adaptable to other boards) (https://adafru.it/ven) © Adafruit Industries https://learn.adafruit.com/adafruit-feather-m4-express-atsamd51 Page 182 of 183... - Page 178 Downloads Datasheets ATSAMD51 details (https://adafru.it/Bf8) (the main chip on the Feather M4) Fritzing object in the Adafruit Fritzing Library (https://adafru.it/aP3) EagleCAD PCB files in GitHub (https://adafru.it/BNv) Schematic & Fab Print © Adafruit Industries Last Updated: 2019-03-04 10:41:14 PM UTC Page 183 of 183...
Need help?
Do you have a question about the Feather M4 Express and is the answer not in the manual?
Questions and answers