
Subscribe to Our Youtube Channel
Related Manuals for Adafruit Feather HUZZAH ESP8266


Summary of Contents for Adafruit Feather HUZZAH ESP8266
- Page 1 Adafruit Feather HUZZAH ESP8266 Created by lady ada https://learn.adafruit.com/adafruit-feather-huzzah-esp8266 Last updated on 2022-02-14 04:27:21 PM EST ©Adafruit Industries Page 1 of 53...
-
Page 2: Table Of Contents
Install the ESP8266 Board Package • Setup ESP8266 Support • Blink Test • Connecting via WiFi Using WipperSnapper • Install USB Driver for ESP8266 • Enable Web Serial • Install WipperSnapper • Blink Test Using MicroPython ©Adafruit Industries Page 2 of 53... - Page 3 Downloads • Datasheets & Files • More info about the ESP8266 • Schematic • Rev G Schematic • Fabrication Print ESP8266 F.A.Q. ©Adafruit Industries Page 3 of 53...
- Page 4 ©Adafruit Industries Page 4 of 53...
-
Page 5: Overview
Overview Feather is the new development board from Adafruit, and like it's namesake it is thin, light, and lets you fly! We designed Feather to be a new standard for portable microcontroller cores. This is the Adafruit Feather HUZZAH ESP8266 - our take on an 'all-in-one' ESP8226 WiFi development board with built in USB and battery charging. - Page 6 USB connector. But, if you do have a battery, you can take it on the go, then plug in the USB to recharge. The Feather will automatically switch over to USB power when its available. ©Adafruit Industries Page 6 of 53...
- Page 7 Built in 100mA lipoly charger with charging status indicator LED • Pin #0 red LED for general purpose blinking. Pin #2 blue LED for bootloading debug & general purpose blinking • Power/enable pin • 4 mounting holes • Reset button ©Adafruit Industries Page 7 of 53...
-
Page 8: Pinouts
We also toss in some header so you can solder it in and plug into a solderless breadboard. Lipoly battery and USB cable not included (but we do have lots of options in the shop if you'd like!) Pinouts ©Adafruit Industries Page 8 of 53... -
Page 9: Power Pins
USB - this is the positive voltage to/from the micro USB jack if connected • EN - this is the 3.3V regulator's enable pin. It's pulled up, so connect to ground to disable the 3.3V regulator ©Adafruit Industries Page 9 of 53... -
Page 10: Logic Pins
These are connected through to the CP2104 USB-to-Serial converter so they should n ot be connected to or used unless you're super sure you want to because you will also be getting the USB traffic on these! ©Adafruit Industries Page 10 of 53... -
Page 11: I2C & Spi Pins
Likewise, you can use SPI on any pins but if you end up using 'hardware SPI' you will want to use the following: • SPI SCK = GPIO #14 (default) • SPI MOSI = GPIO #13 (default) • SPI MISO = GPIO #12 (default) ©Adafruit Industries Page 11 of 53... -
Page 12: Gpio Pins
GPIO #16 can be used to wake up out of deep-sleep mode, you'll need to connect it to the RESET pin Also note that GPIO #12/13/14 are the same as the SCK/MOSI/MISO 'SPI' pins! ©Adafruit Industries Page 12 of 53... -
Page 13: Analog Pins
• EN (CH_PD) - This is the enable pin for the ESP8266, pulled high by default. When pulled down to ground momentarily it will reset the ESP8266 system. This pin is 3.3V logic only ©Adafruit Industries Page 13 of 53... -
Page 14: Nc Pins
Header Options! Before you go gung-ho on soldering, there's a few options to consider! The first option is soldering in plain male headers, this lets you plug in the Feather into a solderless breadboard ©Adafruit Industries Page 14 of 53... - Page 15 Feather into a breadboard but it will let you attach featherwings very easily We also have 'slim' versions of the female headers, that are a little shorter and give a more compact shape ©Adafruit Industries Page 15 of 53...
-
Page 16: Soldering In Plain Headers
But its a little bulky Soldering in Plain Headers Prepare the header strip: Cut the strip to length if necessary. It will be easier to solder if you insert it into a breadboard - long pins down ©Adafruit Industries Page 16 of 53... -
Page 17: Add The Breakout Board
And Solder! Be sure to solder all pins for reliable electrical contact. (For tips on soldering, be sure to check out our Guide to Excellent Soldering (https://adafru.it/aTk)). ©Adafruit Industries Page 17 of 53... - Page 18 Solder the other strip as well. You're done! Check your solder joints visually and continue onto the next steps ©Adafruit Industries Page 18 of 53...
-
Page 19: Soldering On Female Header
Soldering on Female Header Tape In Place For sockets you'll want to tape them in place so when you flip over the board they don't fall out ©Adafruit Industries Page 19 of 53... -
Page 20: Flip & Tack Solder
Flip & Tack Solder After flipping over, solder one or two points on each strip, to 'tack' the header in place ©Adafruit Industries Page 20 of 53... -
Page 21: And Solder
And Solder! Be sure to solder all pins for reliable electrical contact. (For tips on soldering, be sure to check out our Guide to Excellent Soldering (https://adafru.it/aTk)). ©Adafruit Industries Page 21 of 53... -
Page 22: Power Management
You're done! Check your solder joints visually and continue onto the next steps Power Management Don't power the Huzzah ESP8266 with a CanaKit 5V power supply, these power supplies have been destroying the CP2104 chip. ©Adafruit Industries Page 22 of 53... -
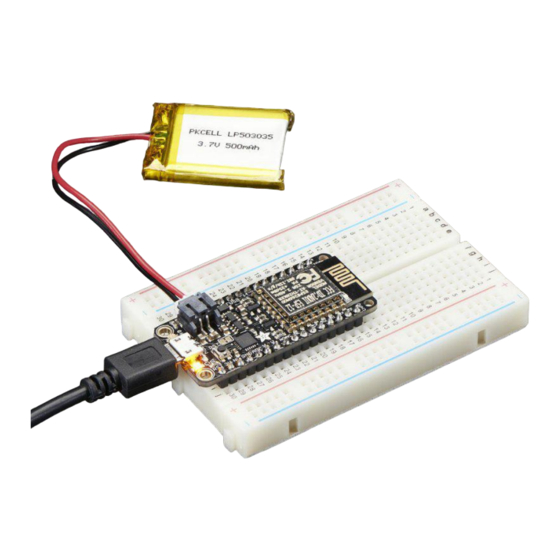
Page 23: Battery + Usb Power
'hotswap' style so you can always keep the LiPoly connected as a 'backup' power that will only get used when USB power is lost. The JST connector polarity is matched to Adafruit LiPoly batteries. Using wrong polarity batteries can destroy your Feather ©Adafruit Industries... -
Page 24: Power Supplies
3.7V Since the ESP8266 does not have multiple ADC pins, we didn't want to 'sacrifice' one for Lipoly battery monitoring. However we do have a tutorial that mentions how to do ©Adafruit Industries Page 24 of 53... -
Page 25: Enable Pin
Here's what you cannot do: • Do not use alkaline or NiMH batteries and connect to the battery port - this will destroy the LiPoly charger and there's no way to disable the charger ©Adafruit Industries Page 25 of 53... -
Page 26: Using Nodemcu Lua
USB port, which could confuse or damage your computer. Using NodeMCU Lua Each Feather HUZZAH ESP8266 breakout comes pre-programmed with NodeMCU's Lua interpreter. As of this writing, we ship with NodeMCU 0.9.5 build 20150318 powered by Lua 5.1.4 but it may be more recent... -
Page 27: Open Up Serial Console
Use any serial console program you like, we just happen to be used to Putty! Once the terminal software is connected, click the Reset button on the Feather HUZZAH ESP8266 board to reset it and have it print out the welcome message: ©Adafruit Industries Page 27 of 53... -
Page 28: Hello World
Arduino pinouts on the board so watch out! The Lua documentation for the ESP8266 has GPIO #4 and #5 swapped so if #4/ #5 aren't working for you, try swapping! Pin Notes PCB/Arduino NodeMCU/Lua No pullups! ©Adafruit Industries Page 28 of 53... - Page 29 So to set the pin #0 LED on and off (which would be pin #3 in Lua) first make it an output: gpio.mode(3, gpio.OUTPUT) Turn the LED on with: gpio.write(3, gpio.LOW) And off with: ©Adafruit Industries Page 29 of 53...
-
Page 30: Scanning & Connecting To Wifi
Scanning & Connecting to WiFi We'll continue with a quick demo of scanning for WiFi and connecting. Once you're back at the Lua prompt, set the ESP8266 into WiFi Client mode with ©Adafruit Industries Page 30 of 53... -
Page 31: Webclient Example
-- wait 1,000,000 us = 1 second print(wifi.sta.status()) print(wifi.sta.getip()) WebClient example Once you're got the IP address you can connect to adafruit, for example, and read a webpage and print it out: sk=net.createConnection(net.TCP, 0) sk:on("receive", function(sck, c) print(c) end ) sk:connect(80,"207.58.139.247") -
Page 32: Using Arduino Ide
Using Arduino IDE While the Feather HUZZAH ESP8266 comes pre-programmed with NodeMCU's Lua interpretter, you don't have to use it! Instead, you can use the Arduino IDE which may be more familar. This will write directly to the firmware, erasing the NodeMCU... - Page 33 If you are using Mac OS 10.12.6 (Sierra) and you cannot upload with the latest Mac OS VCP driver, please try the legacy v4 driver below. Note you will need to uninstall the v5 driver using uninstall.sh (in the driver package) ©Adafruit Industries Page 33 of 53...
-
Page 34: Install The Arduino Ide 1.6.8 Or Greater
Additional Board Manager URLs field in the Arduino v1.6.4+ preferences. Visit our guide for how to add new boards to the Arduino 1.6.4+ IDE for more info about adding third party boards (https://adafru.it/f7X). Next, use the Board manager to install the ESP8266 package. ©Adafruit Industries Page 34 of 53... -
Page 35: Setup Esp8266 Support
If you want to use this board with Adafruit IO Arduino - make sure you're on version 2.5.1 or ABOVE. After the install process, you should see that esp8266 package is marked INSTALLED. Close the Boards Manager window once the install process has completed. - Page 36 For Upload Speed, select 115200 baud (You can also try faster baud rates, we were able to upload at a blistering 921600 baud but sometimes it fails & you have to retry) The matching COM port for your FTDI or USB-Serial cable ©Adafruit Industries Page 36 of 53...
-
Page 37: Blink Test
LOW); delay(500); Now you can simply upload! The Feather HUZZAH has built in auto-reset that puts it into bootloading mode automagically The sketch will start immediately - you'll see the LED blinking. Hooray! ©Adafruit Industries Page 37 of 53... -
Page 38: Connecting Via Wifi
Create a new sketch with this code: Simple HTTP get webclient test #include <ESP8266WiFi.h> const char* ssid = "yourssid"; const char* password = "yourpassword"; const char* host = "wifitest.adafruit.com"; void setup() { Serial.begin(115200); delay(100); // We start by connecting to a WiFi network Serial.println();... - Page 39 IDE Open up the IDE serial console at 115200 baud to see the connection and webpage printout! ©Adafruit Industries Page 39 of 53...
-
Page 40: Using Wippersnapper
We encourage you to try out WipperSnapper with the understanding that it is not final release software and is still in development. If you encounter any bugs, glitches, or difficulties during the beta period, or with this guide, please contact us via http://io.adafruit.com/support ©Adafruit Industries Page 40 of 53... -
Page 41: Install Usb Driver For Esp8266
Simply load the WipperSnapper firmware onto your board, add credentials, and plug it into power. Your board will automatically register itself with your Adafruit IO account. From there, you can add components to your board such as buttons, switches, potentiometers, sensors, and more! Components are dynamically added to hardware,... -
Page 42: Enable Web Serial
Next, download and install the SiLabs CP2104 Driver so your operating system can "talk to" your Feather HUZZAH ESP8266. There are drivers for Windows, Mac, and Linux. Click here to download the CP2104 USB Driver https://adafru.it/vrf Enable Web Serial We've developed a web-based tool for you to install WipperSnapper on your ESP8266. - Page 43 Once you have successfully connected to the ESP8266, a form will appear with a spot to enter your credentials. To obtain your Adafruit IO credentials, navigate to the Adafruit IO WipperSnapper page (https://adafru.it/TAu) and click "My Key". A modal will pop up with your Adafruit IO username and the active key. ©Adafruit Industries Page 43 of 53...
- Page 44 Navigate back to the WipperSnapper Firmware Uploader and enter your network and Adafruit IO credentials. Click Install WipperSnapper. You should see WipperSnapper being flashed to your ESP8266. Hang tight and stay on this tab, the process takes a little over a minute. Do not disconnect your ESP8266 from USB.
- Page 45 Once the tool completes the installation, the top form will collapse and you'll see a message in the log indicating that the operation is complete. Navigate to https://io.adafruit.com/wippersnapper (https://adafru.it/TAu). Then, press the RST button on your ESP8266. ©Adafruit Industries Page 45 of 53...
-
Page 46: Blink Test
Congrats, your board is registered with WipperSnapper! Blink Test We'll blink the Feather Huzzah ESP8266's LED both as a functionality test and to get used to using WipperSnapper. From the Device Page for the Feather Huzzah ESP8266, click New Component. - Page 47 From the component picker, select the LED. You may optionally give the LED component a name. Select D0 as the LED Pin. Click Create Component. ©Adafruit Industries Page 47 of 53...
-
Page 48: Using Micropython
Toggle the LED component's switch to turn the LED on and off. • Note - the Feather Huzzah ESP8266's LED is reverse wired, so setting the pin LOW will turn the LED on. Therefore, toggling the switch low off will turn the LED... -
Page 49: Downloads
• AP2112K-3.3V regulator onboard (https://adafru.it/mdb) • CP2104 USB-to-Serial converter (https://adafru.it/jCr) • EagleCAD PCB Files on GitHub (https://adafru.it/olc) • Fritzing object in Adafruit Fritzing Library (https://adafru.it/c7M) • 3D Models on GitHub (https://adafru.it/GAz) Feather HUZZAH ESP8266 Pinout Diagram https://adafru.it/z4d More info about the ESP8266 • ESP8266 specification sheet (https://adafru.it/f1E) -
Page 50: Schematic
• NodeMCU PyFlasher - a cross platform ESP flashing tool (https://adafru.it/Bg4) Don't forget to visit esp8266.com for the latest and greatest in ESP8266 news, software and gossip! (https://adafru.it/f1F) Schematic Click to enlarge Rev G Schematic ©Adafruit Industries Page 50 of 53... -
Page 51: Fabrication Print
The most common reason for crashes is power failure. Make sure you're powering the Huzzah with a good ~5V power supply, and if you're using a USB-Serial cable, that it's plugged into the mainboard of your computer or through a powered hub! ©Adafruit Industries Page 51 of 53... - Page 52 In the Arduino15 folder, go into packages, and delete the folder esp8266 Go back to the Arduino IDE, and install ESP8266 board support. Now go back to the Finder, and check that you have the xtensa-lx106-elf-g++ file in the path Arduino15/packages/esp8266/tools/xtensa-lx106-elf-gcc/ 1.20.0-26-gb404fb9-2/bin/xtensa-lx106-elf-g++ That's it! ©Adafruit Industries Page 52 of 53...
- Page 53 Make sure your terminal software is sending correct line endings! The default PuTTY settings may be wrong when trying to talk to Lua on an ESP8266. Lua expects CRLF "\r\n" line endings, and apparently PuTTY defaults to just LF "\n"! ©Adafruit Industries Page 53 of 53...
Need help?
Do you have a question about the Feather HUZZAH ESP8266 and is the answer not in the manual?
Questions and answers