Emerson Rosemount 6888A Reference Manual
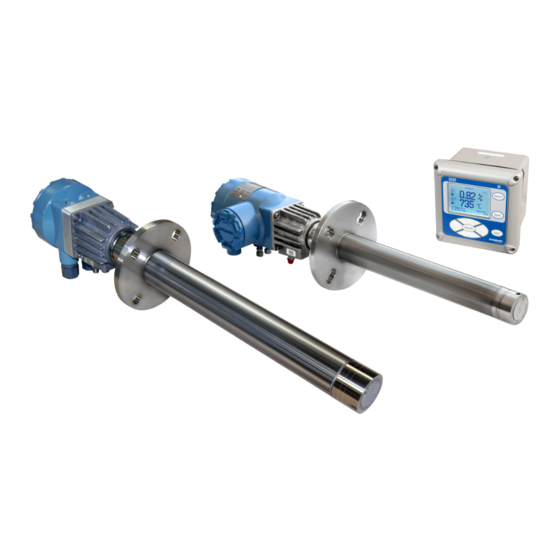
O2 combustion flue gas transmitter
Hide thumbs
Also See for Rosemount 6888A:
- Quick start manual (36 pages) ,
- Quick start manual (40 pages) ,
- Quick start manual (48 pages)

Related Manuals for Emerson Rosemount 6888A


Summary of Contents for Emerson Rosemount 6888A
- Page 1 Reference Manual 00809-0100-4890, Rev AA July 2018 ™ Rosemount 6888A O2 Combustion Flue Gas Transmitter...
- Page 2 The following instructions must be adhered to and integrated into your safety program when installing, using, and maintaining Emerson products. Failure to follow the proper instructions may cause any one of the following situations to occur: loss of life, personal injury, property damage, damage to this instrument, and warranty invalidation.
- Page 3 For assistance with technical problems, please call the Customer Support Center (CSC). Phone: 1-800-433-6076 1-440-914-1261 In addition to the CSC, you may also contact Field Watch. Field Watch coordinates Emerson's field service throughout the US and abroad. Phone: 1-800-654-RSMT (1-800-654-7768) Email: Gas.CSC@emerson.com...
-
Page 5: Table Of Contents
2.3.4 Transmitter probe with integral autocal and HART communications ......35 ™ 2.3.5 Wire the Rosemount 6888A Transmitter probe with integral autocal and FOUNDATION Fieldbus communications ................... 37 2.3.6 Wire the traditional architecture system with direct replacement probe (no electronics inside) ......................... 38 2.3.7... - Page 6 Replace transmitter board ...................99 5.4.3 Replace DR terminal board ..................102 5.4.4 Heater strut replacement ..................103 5.4.5 Cell replacement ....................... 105 5.4.6 Diffusion element replacement .................108 5.4.7 Blind cover replacement ....................110 Chapter 6 Replacement parts ..................... 113 Chapter 7 Optional accessories ....................115 Rosemount 6888A...
- Page 7 Contents Asset Management Solutions (AMS) ..................115 By-Pass Packages ........................115 Rosemount SPS 4001B Single Probe Autocalibration Sequencer ..........116 Rosemount IMPS 4000 Intelligent Multiprobe Test Gas Sequencer .......... 117 calibration gas ........................118 Optional Rosemount OxyBalance Display and Averaging System ..........119 Appendices and reference ™...
- Page 8 Contents Rosemount 6888A...
-
Page 9: Description And Specifications
The first part of the matrix defines the model. The last part defines the various options and features of the Rosemount 6888A. Ensure the features and options specified by your order number are on or included with the unit. -
Page 10: Technical Support Hotline
Optional reference and calibration gas accessories 6888A integral autocal housing 6888A probe with standard terminations/electronics housing Optional 6888Xi Advanced Electronics Technical support hotline For assistance with technical problems, please call the Customer Support Center (CSC). • 1-RAI-AND-U (1-855-724 2638) • 1-440-914-1261 Rosemount 6888A... -
Page 11: System Overview
In addition to the CSC, you may also contact Field Watch. Field Watch coordinates Emerson's field service throughout the US and abroad. • 1-800-654-RSMT (1-800-654-7768) Emerson may also be reached via the Internet through email and the World Wide Web. • Email: Gas.CSC@Emerson.com •... -
Page 12: Transmitter Probe And Rosemount 6888Xi With Flame Safety Interlock
Transmitter probe and Rosemount 6888Xi with flame safety interlock A flame safety interlock by Emerson is available for heater power disconnect whenever there is a loss of the process flame or a heater runaway condition (heater over- temperature) in the O probe. -
Page 13: Direct Replacement (Dr) Probe With Traditional Architecture Rosemount 6888Xi Electronics
Wireless capability Both the transmitter electronics in the head of the probe and the Rosemount 6888Xi Electronics communicate over HART communications and can implement wireless ™ communications via Emerson Wireless 775 THUM Adapter. 1.4.8 Automatic calibration Calibrations consist of introducting bottled gases of known value into the probe so that... -
Page 14: Communication Options
Advanced Electronics accomplish Rosemount 6888A communications. Graphic displays are available via the optional Rosemount OxyBalance Display and Averaging System. Data communications You can configure and diagnostically troubleshoot the Rosemount 6888A in one of two ways: Using the optional Rosemount 6888Xi Advanced Electronics allows local communication with the electronics. - Page 15 Delta V and Ovation Distributed Control System (DCS) with AMS-inside capability. The Rosemount 6888A can also transmit HART information wirelessly via a wireless THUM Adapter. The THUM Adapter threads into the Rosemount 6888A conduit port and converts the 4-20 mA signal to a wireless protocol. All other HART information is also transmitted.
-
Page 16: Probe Options
The basic diffusers provide for a constant outer probe tube diameter the full length of the probe. When the Rosemount 6888A is used with an abrasive shield, the diffuser body has a larger diameter with grooves to accept packing material to seal out fly ash. - Page 17 Description and specifications Snubber diffusion assembly The standard snubber diffusion assembly (Figure 1-4) is satisfactory for most applications; however, the snubber diffuser should not be used in flue gas temperatures above 400 °C (752 °F). Figure 1-4: Snubber Diffusion Assembly Ceramic diffusion assembly The ceramic diffusion assembly (Figure...
-
Page 18: Rosemount 6888A Product Matrix
Description and specifications Figure 1-6: Hastelloy Cup-Type Diffusion Assembly Rosemount 6888A product matrix Table 1-1: Calibration Glass Part number Description 1A9919G01 Two disposable calibration gas bottles - 0.4% and 8% O , balance nitrogen - 550 liters each. 1A9919G02 Two flow regulators for calibration gas bottles... - Page 19 Description and specifications Table 1-2: Rosemount 6888A Product Matrix (continued) 6 ft probe, standard probe tube 6 ft probe, standard probe tube with abrasive shield 6 ft probe, abrasion resistant probe tube 9 ft probe, abrasion resistant probe tube 9 ft probe, abrasion resistant probe tube with abrasive shield...
-
Page 20: Rosemount 6888Xi Product Matrix
Description and specifications Table 1-2: Rosemount 6888A Product Matrix (continued) Special adapter - provide existing flange dimensions, including thru-hole di- ameter Manual calibration accessories None Calibration and reference gas flowmeters and reference regulator/filter diffus- Calibration/reference panel Stoichiometer function -FOUNDATION Fieldbus only (For HART versions, order this feature... - Page 21 Description and specifications Mounting No Hardware Panel mount kit with gasket 2 in. pipe/wall mount kit Cable No cable 6 m (20 ft) cable, use with traditional architecture probe only 12 m (40 ft) cable, use with traditional architecture probe only 18 m (60 ft) cable, use with traditional architecture probe only 24 m (80 ft) cable, use with traditional architecture probe only 30 m (100 ft) cable, use with traditional architecture probe only...
-
Page 22: Transmitter/Dr Probe Specifications
Temperature limit as measured inside probe electronics -40 to 85 °C (-40 to 185 °F) DR probe, no electronics inside, ambient temperature lim- -40 to 90 °C (-40 to 194 °F) Optional Xi electronics Materials NEMA 4X, polycarbonate material Rosemount 6888A... - Page 23 Description and specifications Table 1-4: Environmental specifications (continued) General purpose certifications Xi ambient temperature limits -20 to 50 °C (-4 to 122 °F) Xi temperature limits as measured inside the electronics -20 to 70 °C (-4 to 158 °F) housing (1) Reduced cell life can be expected if operated continously at temperatures above 705 °C (1300 °F).
- Page 24 Optional loss of flame input Internally powered input to remove heater power actuated via dry contact output from probe of flame device. Emerson has satisfied all obligations coming from the European legislation to harmonize the product requirements in Europe. Rosemount 6888A...
-
Page 25: Chapter 2 Install
Install Install WARNING! Before installing this equipment, read the Essential Instructions at the front of this Reference Manual. Failure to follow safety instructions could result in serious injury or death. WARNING! ELECTRIC SHOCK Install all protective equipment covers and safety ground leads after installation. Failure to install covers and ground leads could result in serious injury or death. -
Page 26: System Considerations
Install System considerations NOTICE Plug all unused ports on the Rosemount 6888A probe housing with suitable fittings. A typical system installation for a Rosemount 6888A with integral electronics is shown in Figure 2-1. Figure 2-1: Typical system installation Gases Duct... -
Page 27: Mechanical Installation
Install all protective equipment covers and safety ground leads after installation. Failure to install covers and ground leads could result in serious injury or death. The Rosemount 6888A transmitter can be installed in general purpose areas only. Do not install the transmitter or the Rosemount 6888Xi in hazardous areas or in the vicinity of flammable liquids. -
Page 28: Install Probe
2-1. If using the optional ceramic or Hastelloy diffusion element, the vee deflector must be correctly oriented. Before inserting the Rosemount 6888A probe, check the direction of gas flow in the duct. Orient the vee deflector so the apex points upstream toward the flow. See Figure 2-2. - Page 29 Install Figure 2-3: Rosemount 6888A Probe with Standard Terminations/Electronic Housing Note All dimensions are in inches with millimeters in parentheses. Figure 2-4: Rosemount 6888A Integral Autocal Housing A. Dimension B. Dimension C. Hastelloy diffuser D. Ceramic diffuser Note All dimensions are in inches with millimeters in parentheses.
- Page 30 Install Figure 2-5: Rosemount 6888A Integral Autocal Housing Close-up A. Dimension B. Dimension C. Calibration gas 1/4 tube fittings 5.0 SCFH (2.4 L/min) 20 PSI (138 kPa) D. #10 socket head cap screw (external ground) E. 1/2 NPT conduit connection (power, signal) F.
- Page 31 Install Figure 2-6: Probe Installation A. Dimension B. Dimension C. Dimension D. Four studs, lockwashers, and nuts equally spaced on C dia. B C Table 2-2: Mounting flange ANSI Flange diameter 7.28 (185) Hole diameter .75 (20) (4) holes eq sp on BC 4.75 (121) 5.71 (145) Table 2-3:...
-
Page 32: Variable Insertion
Logic I/O, 4-20 mA signal Stack or duct metal wall Adapter plate Insulation Note Replace insulation after installing Rosemount 6888A 2.2.2 Variable insertion The ideal placement of O probes is often difficult to determine, and the variable insertion option is intended to assist in optimizing the ideal probe location. - Page 33 (with the furnace off) may be out of alignment once the furnace heats up. The variable insertion arrangement is set up for Rosemount 6888A probes with heavy-wall abrasion-resistant probe bodies only. For probe lengths of 9 feet and longer, an outboard slip support must be mounted inside the flue gas duct.
-
Page 34: Electrical Installation
This variable insertion mount is intended for use in negative pressure ducts and postive pressure ducts where the flue gas pressure is no more than 1 psi. Emerson offers other systems with isolation valve and pressure balancing for applications where the pressure is up to 50 psi. - Page 35 The transmitter accepts 120/240 Vac ±10% line voltage and 50/60 Hz. No setup is required. Figure 2-8: Rosemount 6888A Standard Probe Housing Connect the 4-20 mA signal wires at the transmitter. Use a shielded twisted wire pair. Do not allow bare shield wires to contact the circuit boards. Insulate the shield wires prior to termination.
-
Page 36: Standard Housing Transmitter Probe Plus Rosemount 6888Xi Electronics
Pull out the I/O board on the right side of the card rack inside the Rosemount 6888Xi. If your system is configured to operate two transmitter probes, there are two I/O interface boards. See Figure 2-9. Rosemount 6888A... - Page 37 Install Figure 2-9: Wiring Diagrams - Single/Dual Channel Wiring Diagram Note A. Except for JP5, JP2, and JP8 on IO board, jumper and switch settings are factory set and are shown for reference only. B. IO board 4-20 mA/HART loop power settings: JP5: Pins 1-2 internal power Rosemount 6888Xi to Rosemount 6888 transmitter, pins 2-3 external power Rosemount 6888Xi to Rosemount 6888 transmitter (requires 2500 resistor across J4, PR+ to PR-)
- Page 38 Install Table 2-4: Remote Type (continued) 4OXY Single channel O traditional architecture for 120 V probes Rosemount 6888A...
- Page 39 Install Figure 2-10: Rosemount 6888Xi Front and Bottom View A. Power supply board B. Channel #2 IO board C. Shield ground D. Channel #1 IO board E. AC input to P/S F. Plug G. Channel #2 alarm relay, SPS/IMPS H. Channel #2 4-20 mA/HART output Channel #1 alarm relay SPS/IMPS Channel #1 4-20 mA/HART output Reference Manual...
-
Page 40: Transmitter Probe With Single-Channel Xi And Flame Safety Interlock
Transmitter probe with single-channel Xi and flame safety interlock A flame safety interlock by Emerson is available for heater power disconnect whenever there is a loss of the process flame or a heater runaway condition (heater over- temperature) in the O probe. - Page 41 Install Figure 2-11: Single channel with flame safety wiring diagram Note Rosemount 6888Xi Instruction Manual for additional installation and operating instructions. All wiring marked with an asterisk (*) is factory wiring inside the Rosemount 6888Xi. Except for JP5, JP7, and JP8 on IO board, jumper and switch settings are factory set and are shown for reference only.
- Page 42 Install Figure 2-12: Rosemount 6888Xi Front and Bottom View Power supply board AC relay board Shield ground IO board Plug AC input Loss of flame output to burner management system Alarm relay, SPS/IMPS 4-20 mA/HART output Rosemount 6888A...
-
Page 43: Transmitter Probe With Integral Autocal And Hart Communications
Connect the line (L1 wire) to the L1 terminal, the neutral (L2) wire to the L2/N terminal, and the ground wire to the ground lug. The Rosemount 6888A accepts 120/240 Vac ±10%, 50/60 Hz. No setup is required. Connect the 4-20 mA signal wires form the Rosemount 6888Xi to the connections in the side chamber of the transmitter. - Page 44 C. Test points D. #8 pan htd scr (internal ground) E. Power F. Test point group NOTICE A. Except for JP5, JP7, and JP8 on IO board, jumper and switch settings are factory set and are shown for reference only. Rosemount 6888A...
-
Page 45: Wire The Rosemount 6888A Transmitter Probe With Integral Autocal And Foundation Fieldbus Communications
Connect the line (L1) wire to the L1 terminal, the neutral (L2) wire to the L2/N terminal, and the ground wire to the ground lug. The Rosemount 6888A accepts 120/240 Vac ±10% line voltage and 50/60 Hz. No setup is required. -
Page 46: Wire The Traditional Architecture System With Direct Replacement Probe (No Electronics Inside)
200 feet. Remove cover from probe. Feed all DR probe wiring through line power conduit of probe. Connect DR probe heater power leads to DR probe connectors, Figure 2-14. Table 2-4 for the Rosemount 6888Xi product matrix. Rosemount 6888A... - Page 47 Install Figure 2-14: Wiring Diagrams - Traditional Architecture with Direct Replacement Probe (no Electronics Inside) Note A. See Rosemount 6888Xi Instruction Manual for additional installation and operating instructions. B. All wiring marked with an asterisk (*) is factory wiring inside the Rosemount 6888Xi. C.
-
Page 48: Wire The Traditional Architecture Cable Connections
A traditional architecture configuration is used to provide for remote location of the transmitter electronics. All electronics are housed inside the Rosemount 6888Xi. A multi- conductor power/signal cable connects between the probe and the Rosemount 6888Xi. Use the following procedure to connect the traditional architecture probe to the Rosemount 6888Xi. Rosemount 6888A... - Page 49 Install NOTICE The traditional architecture cable is provided at the specified length and is ready for installation. The cable glands must be properly terminated to maintain EMC/EMI noise protection. Procedure Run the 7-conductor cable between the traditional architecture probe and the installation site for the Rosemount 6888Xi.
-
Page 50: Pneumatic Installation
Install Pneumatic installation 2.4.1 Reference air package After the Rosemount 6888A is installed, connect the reference air set to the Rosemount 6888A unit. Refer to the schematic diagram in Figure 2-15 for a locally assembled reference air supply. Instrument air (reference air): 5 psi (34 kPa) minimum, 8 psi (54 kPa) maximum at 2.0 scfh (1.01 L/min) maximum;... - Page 51 Install Figure 2-16: Plant Air Schematic Diagram, Accessory Housing Vent Calibration gas 1: 1/4 in. tube Calibration gas 2: 1/4 in. tube Reference air flowmeter 0.25-18 NPT female inlet connection 0.25 or 6 mm O.D. tubing (supplied by customer) Reference gas: 1/4 in. tube Reference Manual...
- Page 52 Dimensions are in inches with millimeters in parentheses. Reference air components are included in the optional manual calibration panel (Figure 2-17), the Rosemount SPS 4001 Single Probe Autocalibration Sequencer, and the Rosemount IMPS 4000 Intelligent Multiprobe Test Gas Sequencer. Rosemount 6888A...
-
Page 53: Calibration Gas
CAUTION! CALIBRATION READING ERRORS Do not use 100% nitrogen as a low gas (zero gas). Emerson suggests that gas for the low (zero) be between 0.4% and 2.0% O . Do not use gases with hydrocarbon concentrations of more than 40 parts per million. - Page 54 Install Figure 2-18: Rosemount 6888A Calibration Gas Connections Cal gas in Ref air vent Ref air in Figure 2-19: Traditional Architecture Cable Gland Assembly Rosemount 6888A...
-
Page 55: Configuration, Startup, And Operation
Configuration, startup, and operation Configuration, startup, and operation WARNING! ELECTRIC SHOCK Install all protective equipment covers and safety ground leads before equipment startup. Failure to install covers and ground leads could result in serious injury or death. CAUTION! EQUIPMENT DAMAGE If external loop power is used, the power supply must be a safety extra low voltage (SELV) type. -
Page 56: Power Up The Rosemount 6888 Transmitter With Single/Dual Channel Or Single Channel And Flame Safety Interlock Rosemount 6888Xi
The 4-20 mA signal remains at a default value of 3.5 mA, and the O reading remains at 0% through this warm-up period. After warm up, the probe begins reading oxygen, and the 4-20 mA output is based on the default range of 0-10% O Rosemount 6888A... -
Page 57: Rosemount 6888Xi Quick Start Wizard
Configuration, startup, and operation If there is an error condition at startup, an alarm message is displayed on the Rosemount 6888Xi. Rosemount 6888Xi Quick Start Wizard When the Rosemount 6888Xi is first powered, a short wizard program guides you through the basic setup. -
Page 58: Re-Initiating Rosemount 6888Xi Wizard
Rosemount 6888Xi Electronics or via HART communications to a Field Communicator or AMS console. The technician needs to manually switch the gases based upon these prompts. Emerson recommends using 0.4% O and 8% O , balance nitrogen as calibration gases. -
Page 59: Fully Automatic Calibration
Configuration, startup, and operation The electronics determine if the calibration was successful and calculate new calibration values. New calibration values are not automatically loaded into the electronics after a successful calibration, however. The technician has the opportunity to accept or reject the new values. -
Page 60: Other Features Associated With Calibration
Calibration setup is under the Detailed Setup menu. Calibration setup can be found in the Rosemount 6888Xi menu. For the factory default menu, see Figure 3-1. Rosemount 6888A... - Page 61 Configuration, startup, and operation Figure 3-1: Calibration Defaults Reference Manual...
- Page 62 Configuration, startup, and operation Figure 3-2: HART Menu Trees - Rosemount 6888Xi Rosemount 6888A...
- Page 63 Configuration, startup, and operation Reference Manual...
- Page 64 Configuration, startup, and operation Rosemount 6888A...
- Page 65 Configuration, startup, and operation Reference Manual...
- Page 66 Configuration, startup, and operation Rosemount 6888A...
- Page 67 Configuration, startup, and operation Reference Manual...
- Page 68 Configuration, startup, and operation Rosemount 6888A...
- Page 69 Configuration, startup, and operation Figure 3-3: HART Menu Trees - 375/475 Field Communicator Reference Manual...
- Page 70 Configuration, startup, and operation Rosemount 6888A...
- Page 71 Configuration, startup, and operation Reference Manual...
- Page 72 Configuration, startup, and operation Rosemount 6888A...
- Page 73 Configuration, startup, and operation Figure 3-4: FOUNDATION Fieldbus Menu Trees - Rosemount 6888Xi Reference Manual...
- Page 74 Configuration, startup, and operation Rosemount 6888A...
- Page 75 Configuration, startup, and operation Reference Manual...
- Page 76 Configuration, startup, and operation Rosemount 6888A...
- Page 77 Configuration, startup, and operation Reference Manual...
- Page 78 Configuration, startup, and operation Figure 3-5: FOUNDATION Fieldbus Menu Trees - 375/475 Field Communicator Rosemount 6888A...
- Page 79 Configuration, startup, and operation Reference Manual...
- Page 80 Configuration, startup, and operation Rosemount 6888A...
- Page 81 Configuration, startup, and operation Reference Manual...
- Page 82 Configuration, startup, and operation Rosemount 6888A...
-
Page 83: Startup
Configuration, startup, and operation Startup The transmitter begins operation when the signal wiring is connected and heater power is supplied to the transmitter. First power the AC line voltage to the heater and then power the 24 Vdc power/signal loop for the transmitter electronics. The O probe takes approximately 45 minutes to warm up to the 736 °C (1357 °F) heater setpoint. -
Page 84: System Parameter Descriptions
NM = Normal operation CA = Calibrating (analog output can be tracking or locked at last good value based on AO Tracks configuration) AL = Alarm detected (recoverable) SF = Alarm detected (non-recoverable) Active alarms Current alarms (see Chapter Rosemount 6888A... - Page 85 Configuration, startup, and operation Table 3-1: System Parameters (continued) Parameter name Unit Description Device Alarm state Failed Alarm state: On/Off NV Memory Fail, Board Temp High, Factory Mode, Heater Ramp Rate Maintenance 1 Alarm state: On/Off Sensor Open, O T/C Open, O Temp Low, O Temp High, O...
- Page 86 Index 10 is the least recent sensor re- sistance measured. Cal Logs | Time Days ago Time stamp of the previous successful calibration. There are ten calibration time stamps. Index 1 is the most re- cent, and Index 10 is the least recent time stamp. Rosemount 6888A...
-
Page 87: Parameter Setup
3.9.1 Test gas values Use a Field Communicator to set test gas values for calibration. A Rosemount 6888A shipped from the factory has test gas values for low and high set to 0.4% and 8.0% respectively. Perform this same process any time a transmitter board is replaced. -
Page 88: Track Output During Calibration
Configuration, startup, and operation A Rosemount 6888A shipped from the factory has test gas flow time and purge time set to 300 seconds. You must complete the same process any time a transmitter board is replaced. Procedure Use the 375/475 Field Communicator to access the main HART menu. -
Page 89: Configure Analog Output
YES and a Rosemount 6888Xi is not connected, the Rosemount 6888A triggers an alarm and forces the analog output to the fault level. If the Rosemount 6888A is used later with a Rosemount 6888Xi, the Rosemount 6888Xi automatically sets this parameter to YES. -
Page 90: Calibration Procedure
From the CALIBRATION menu, again select CALIBRATION. From the CALIBRATION menu, select O CALIBRATION. WARNING! Failure to remove the Rosemount 6888A from automatic control loops prior to performing this procedure may result in a dangerous operating condition. Figure 3-6: Calibration Method - Simplified In the first screen, a Loop should be removed from automatic control warning occurs. -
Page 91: Calibration Log
3.10.3 Reset calibration The Rosemount 6888A can reset the current calibration and replace it with the previous calibration. You may reset the calibration in cases where the calibration was known to contain invalid values. Resetting a calibration transfers the slope and constant from calibration 1 in the log into the calibration 0 position. -
Page 92: D/A Trim
Reset the calibration as follows: WARNING! Failure to remove the Rosemount 6888A from automatic control loops prior to performing this procedure may result in a dangerous operating condition. Using the Field Communicator: Configure > Calibration > Calibration Constants > Reset Calibration Constants. - Page 93 Configuration, startup, and operation Figure 3-7: D/A Trim Method - Simplified Reference Manual...
- Page 94 Configuration, startup, and operation Rosemount 6888A...
-
Page 95: Chapter 4 Troubleshooting
Troubleshooting Troubleshooting Overview When the zirconium oxide sensing cell is heated to its setpoint [736 °C (1357 °F)], the cell generates a voltage that represents the difference between the process O % and the reference O % inside the probe (20.95% O instrument or ambient air). - Page 96 Troubleshooting Figure 4-1: Sensor mV Reading vs %O at 736 °C (1357 °F) (Reference Air, 20.95% EMF (mV) 7.25 16.1 18.4 21.1 23.8 27.2 31.2 36.0 42.3 51.1 66.1 71.0 77.5 Rosemount 6888A...
-
Page 97: General
Troubleshooting EMF (mV) 81.5 86.3 101.4 116.6 0.01 166.8 General WARNING! ELECTRIC SHOCK Install all protective equipment covers and ground leads after troubleshooting. Failure to install covers and ground leads could result in serious injury or death. Consider the following equipment conditions, features, and requirements when troubleshooting a problem. -
Page 98: Alarm Indications
To ensure correct operation, you should make sure that the Digital Control System is configured to interpret these signal levels correctly. Once an alarm condition is identified, the Rosemount 6888A offers a number of diagnostics to interpret the specific alarm. -
Page 99: Identifying And Correcting Fault Indications
Troubleshooting Identifying and correcting fault indications There are two types of alarms: recoverable and non-recoverable. If an existing alarm is recoverable, the alarm-active indication disappears when the alarm condition no longer exists. If an alarm is not recoverable, the alarm indication continues to be displayed after the cause of the alarm condition is corrected. -
Page 100: Calibration Passes, But Still Reads Incorrectly
Always set the calibration flow rate when a new diffuser is installed and never readjust this flow rate until another new diffuser is installed. For applications with heavy particulate loading, see Section 4.5.2. If reference air is not supplied or is improperly supplied, the calibration may read incorrectly. Rosemount 6888A... - Page 101 Troubleshooting 4.5.1 Probe passes calibration, O still reads high External reference air leak There may be a leak that is permitting ambient air to mix with the process gases. Since many combustion processes are slightly negative in pressure, ambient air can be drawn into the cell area, biasing the O reading upward.
-
Page 102: Probe Passes Calibration, O 2 Still Reads Low
4.5.4 Can I calibrate a badly plugged diffuser? It may not be possible to immediately replace a plugged diffuser while the process is on- line. Rosemount 6888A... - Page 103 Troubleshooting You can calibrate the probe without pressurizing the cell by adjusting the calibration gas flow rate downward before calibration. For instance, say the process is at 3%, and the first calibration gas is 8%. Adjust the flow of cal gas downward until the reading begins to migrate from 8% to lower values, indicating that the process gases are now mixing with the calibration gases.
- Page 104 Troubleshooting Rosemount 6888A...
-
Page 105: Maintenance And Service
Maintenance and service Maintenance and service Overview This section identifies the calibration methods available and provides the procedures to maintain and service the Rosemount 6888A O transmitter. WARNING! ELECTRIC SHOCK Install all protective equipment covers and safety ground leads after equipment repair or service. -
Page 106: Calibrate
Condensation can be reduced or eliminated by insulating the probe installation, including the probe mount, flange, and blue housing. Calibrate The Rosemount 6888A O transmitter can be calibrated manually through the handheld 375/475 Field Communicator or automatically through the Rosemount SPS4001 Single Probe Autocalibration Sequencer or the Rosemount IMPS 4000 Intelligent Multiprobe Test Gas Sequencer and the Rosemount 6888Xi Advanced Electronics. -
Page 107: Remove And Replace Probe
Maintenance and service 5.4.1 Remove and replace probe Remove probe Complete the following steps to remove the probe from the stack. Turn off power to the system. Shut off the calibration gases at the cylinder and the instrument air. Disconnect the calibration gas and instrument air lines from the transmitter. Remove housing cover. - Page 108 Remove the three screws (E) securing the plastic cover (B) and transmitter board (C) to mounting plate (D). The plastic cover snaps onto the transmitter board with three tabs. Pull the cover and board away from the mounting plate. Rosemount 6888A...
- Page 109 Maintenance and service The thermal pad (F) will most likely remain attached to the mounting plate. Disconnect the two wire harness connectors from the back of the transmitter board and remove the plastic cover and transmitter board. Replacement transmitter boards come in two configurations: a.
-
Page 110: Replace Dr Terminal Board
WARNING! ELECTRIC SHOCK Disconnect and lock out power before working on any electrical components. Figure 5-2: DR terminal board mounting Cover Plastic cover DR terminal board Mounting plate Screws Screws Rosemount 6888A... -
Page 111: Heater Strut Replacement
Maintenance and service Procedure Remove cover (A) from the DR probe housing. Disconnect the power and signal wires from the DR terminal board (C). Remove the three screws (E) securing the plastic cover (B) and DR terminal board (C) to mounting plate (D). Disconnect the two wire harness conenctors from the back of the transmitter board. - Page 112 Remove tube clamps (L) and Viton tubes (K) from the CAL and REF gas ports and the CAL and REF gas lines. Leave the clamps in place on the hoses for later reassembly. Grasp the wire loop and carefully slide the heater strut assembly out of the probe tube. Rosemount 6888A...
-
Page 113: Cell Replacement
Maintenance and service When replacing the strut, orient the probe so that the small calibration gas tube is at the 6 o'clock position of the probe tube. Align the slot on the heater plate with the calibration gas line in the probe tube. Slide the strut into the probe tube. It turns to align the hole on the back plate of the strut with the calibration gas line. - Page 114 Cell Replacement Kit ANSI gasket Wire and pad assembly Anti-seize compound 22 gauge wire Closed end connector Set screws Teflon tubing Socket head cap screws Cell and flange assembly Corrugated seal Probe (not included in kit) Calibration gas passage Rosemount 6888A...
- Page 115 Maintenance and service Procedure Follow the instructions in Section 5.4.1 to remove the transmitter from the stack or duct. If the probe uses the standard diffusion element, use a wrench to remove the diffuser assembly. If equipped with the optional ceramic diffusion assembly, remove and discard the setscrews and remove the vee deflector.
-
Page 116: Diffusion Element Replacement
Hex wrenches needed to remove setscrews and socket head screws in the following procedure are available as part of a probe disassembly kit, Table 6-1. NOTICE This refers to the ceramic diffusion element only. Rosemount 6888A... - Page 117 Maintenance and service Figure 5-5: Ceramic diffuser element replacement Retainer Spanner wrench Optional ceramic diffusion element Set screw Vee deflector Cement fillet Cement port Procedure Follow the instructions in Section 5.4.1 to remove the probe from the stack or duct. Loosen set screws (D) using the hex wrench from the probe disassembly kit and remove the vee deflector (E).
-
Page 118: Blind Cover Replacement
Field wiring labels are supplied for each product configuration. Ensure the correct label is applied to the inside of the cover that matches your configuration. Figure 5-6: Field wiring labels Label for full transmitter Label for DR probe Label for DR/YEW probe Rosemount 6888A... - Page 119 Maintenance and service Procedure Remove existing cover from the transmitter housing. Select the new field wiring label that matches the existing label on the inside of the old cover. A graphic of each label and its application is shown in Figure 5-6.
- Page 120 Maintenance and service Rosemount 6888A...
-
Page 121: Chapter 6 Replacement Parts
Replacement parts Replacement parts Table 6-1: Replacement Part Kits for O Transmitter Part Number Description 6A00448G01 Kit, transmitter board 6A00448G02 Kit, transmitter board with mounting plate and cover 6A00449G01 Kit, DR terminal board 6A00449G02 Kit, DR terminal board with mounting plate and cover 6A00449G10 Kit, DR terminal board, YEW 6A00449G11... - Page 122 Tool kit - 6888 1A99119G01 Calibration gas bottles - 0.4% and 8% O , balance nitrogen - 550 liters each 1A99119G02 Two flow regulators (for calibration gas bottles) 1A99119G03 Bottle rack (1) Calibration gas bottles cannot be shipped via air freight. Rosemount 6888A...
-
Page 123: Chapter 7 Optional Accessories
Optional accessories Optional accessories Asset Management Solutions (AMS) ® Asset Management Solutions (AMS) software works in conjunction with the HART communication protocol and offers the capability to communicate with all HART plant devices from a single computer terminal. For more information, call Rosemount at 1-800-433-6076. By-Pass Packages The specially designed Rosemount By-Pass Package for oxygen analyzers has proven to withstand the high temperatures in process heaters while providing the same advantages... -
Page 124: Rosemount Sps 4001B Single Probe Autocalibration Sequencer
Optional accessories Rosemount SPS 4001B Single Probe Autocalibration Sequencer Figure 7-2: Rosemount SPS 4001B Rosemount 6888A O Transmitter Rosemount 6888Xi Advanced Electronics Rosemount SPS 4001B Rosemount specifically designed the SPS 4001B Single Probe Autocalibration Sequencer to provide the ability to perform automatic or on-demand calculations. The Rosemount SPS 4001B is fully enclosed in a NEMA cabinet suitable for wall-mounting. -
Page 125: Rosemount Imps 4000 Intelligent Multiprobe Test Gas Sequencer
Optional accessories Rosemount IMPS 4000 Intelligent Multiprobe Test Gas Sequencer Figure 7-3: Rosemount IMPS 4000 The Rosemount IMPS 4000 Intelligent Multiprobe Test Gas Sequencer is housed within an IP56 (NEMA 4X) enclosure and has the intelligence to provide calibration gas sequencing of up to four Rosemount 6888Xis to accommodate automatic and semi-automatic calibration routines. -
Page 126: O 2 Calibration Gas
Rosemount's oxygen analyzers. These lightweight, disposable gas cylinders eliminate the need to rent gas bottles. For more information, call Rosemount at 1-800-433-6076. Rosemount 6888A... -
Page 127: Optional Rosemount Oxybalance Display And Averaging System
Optional accessories Optional Rosemount OxyBalance Display and Averaging System The optional Rosemount OxyBalance Display and Averaging System receives up to eight 4-20 mA signals from individual probes, trends individual outputs, and calculates four programmable averages as additional 4-20 mA outputs. For more information, call Rosemount at 1-800-433-6076. - Page 128 Optional accessories Rosemount 6888A...
-
Page 129: Appendix A Rosemount ™ 6888 Product Certifications
A copy of the EC Declaration of Conformity can be found at the end of the Quick Start Guide. The most recent revision of the EC Declaration of Conformity can be found at Emerson.com/Rosemount. Ordinary location certification As standard, the transmitter has been examined and tested to determine that the design... -
Page 130: Canada
The panel mount gasket has not been tested for Type 4X installation. A.5.2 Canada CSA Certificate 1913435 Standards CAN//CSA C22.2 No. 61010-1-04, UL 61010-1:2004 (2nd Edition), CAN/ CSA-C22.2 No.94-M91 (R2001), UL 50 (11th Ed.) Markings , Type 4X IP66 Rosemount 6888A... -
Page 131: Locations
™ Rosemount 6888 product certifications ™ Rosemount SPS4001B and IMPS4000 Autocalibration Devices for General Purpose Locations A.6.1 USA/Canada CSA certificate 1640823 Standards CAN/CSA C22.2 No. 61010-1-04; ANSI/UL 61010-1:2004, (2nd Edition); CSA C22.2 No. 94.1-07; ANSI/UL 50 (12th Edition); CSA C22.2 No. 94.2 (1st Edition);... - Page 132 ™ Rosemount 6888 product certifications Rosemount 6888A...
-
Page 133: Appendix B Safety Data
Safety data Appendix B Safety data Safety instructions for the wiring and installation of this apparatus The following safety instructions apply specifically to all EU member states. They should be strictly adhered to in order to assure compliance with the Low Voltage Directive. Non-EU states should also comply with the following unless superseded by local or national standards. - Page 134 - and then only by trained service personnel. Rosemount 6888A...
- Page 135 Safety data Reference Manual...
- Page 136 2018 Emerson. All rights reserved. youtube.com/RosemountMeasurement The Emerson logo is a trademark and service mark of Emerson Electric Co. Rosemount is a google.com/+RosemountMeasurement mark of one of the Emerson family of companies. All other marks are the property of their AnalyticExpert.com respective owners.
Need help?
Do you have a question about the Rosemount 6888A and is the answer not in the manual?
Questions and answers