Table of Contents
Advertisement
Advertisement
Table of Contents

Subscribe to Our Youtube Channel
Related Manuals for WMF espresso


Summary of Contents for WMF espresso
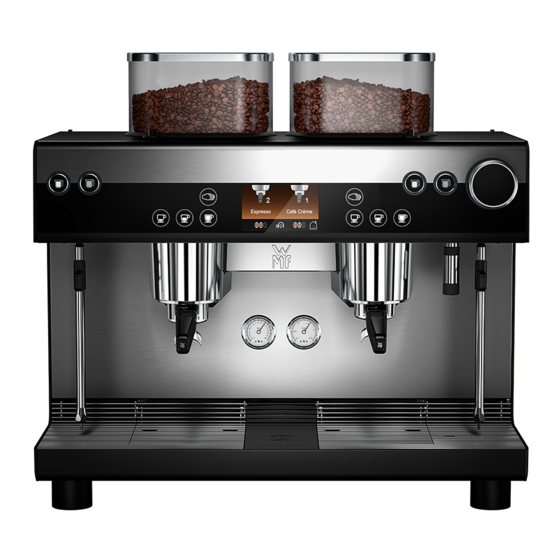
- Page 1 WMF espresso Service manual KMR Technical Support Revision: 02/2016 Rev.
-
Page 2: Preface
If significant changes are made, then this document, along with the referenced attachments and related documents, will be updated and provided to registered users for download in the service center. Attachments. WMF espresso basic setting beverages WMF espresso Software description WMF espresso event and error list Applicable documents Customer documents Technician documents Planning information Piping schematics ... -
Page 3: Change History
Change history Change history Rev. 00 Preliminary edition from KVS fall meeting, Nov. 2014 Rev. 02 1st edition for series launch Rev. 03 January 2016 edition... -
Page 4: Table Of Contents
Clean the ground coffee chute ................................................11 Replace brewing piston seal................................................12 Replace brewing piston ..................................................12 Espresso pump - Setting the brewing pressure ..........................................13 Espresso pump - low-pressure-ready ............................................... 14 Set pressure reducer ....................................................15 Set the hot water temperature ................................................15 Power Class ...................................................... - Page 5 Table of contents 2.11 Grinders – idle current calibration ..............................................17 2.12 Grinders – grinding degree setting ..............................................18 2.13 Admixture calibration for proportional valve ..........................................19 2.14 Brewing time monitoring ..................................................20 2.15 Front panel ....................................................... 21 2.16 Safety valve – Procedure for performing a functional check ....................................24 Maintenance concept ............................................
-
Page 6: Installation And Start-Up
The WMF Service engineers may only connect the coffee machine to existing prepared connection points. WMF Service is neither authorised nor responsible for carrying out any work on-site prior to connection. For details, see the planning information on the website... -
Page 7: Hardware Connection And Preparatory Work
A WMF water filter is recommended for carbonate hardness above 5 °dKH. For the WMF espresso, the –bestmax XL– water filter is recommended in the standard WMF price list. After measuring the carbonate hardness with (non-expired) test kit, cut off according to the capacity table (see the User manual included with the filter). - Page 8 Installation and start-up Requirements: Coffee machine installed and connected to water and power supply. See chapter 1.1 – 1.2.2 Basic setting Switch on the machine. Check the start-up date and time and Check date and time change them if needed and confirm the start-up date. (One-time query when switched on for the Confirmation is requested only when switched on for the first first time)
- Page 9 HW large The allocation is the same as the standard allocation set at the factory. The left brewing group is preconfigured for espresso beverages, and the right brewing group for Café crème beverages. However, this standard allocation applies only for Germany, Switzerland, and Austria. For international machines, both brewing groups are preconfigured for espresso beverages.
- Page 10 > Machine data > Defaults.> Customer -> Service See: User / Customer training WMF espresso user manual WMF espresso Software description part 1 Set the service date (delete the error memory) Service > Service dates Service / Maintenance...
-
Page 11: Service
Service Service Clean the distributor sieve The distributor sieve is based on a customer-defined cleaning interval and is described in the User manual Cleaning the distributor screen takes just a few easy steps: 1. Remove portafilter 2. Use the cleaning brush to clean the distributor sieve and bayonet joint 3. -
Page 12: Replace Brewing Piston Seal
Service Replace brewing piston seal The seal on the brewing piston (o-ring) can be changed by the technician as part of the service maintenance 1. If needed, the seal can be changed by the customer himself. The procedure is described in the User manual. The seal can be changed with just a few, simple motions: 1. -
Page 13: Espresso Pump - Setting The Brewing Pressure
Espresso pump - Setting the brewing pressure The pump and brewing pressure is set to 9 +0,5 bar at the factory. If a new espresso pump is being installed or if the desired brewing pressure is different from the setting, then this can easily be adjusted via the front access panel. -
Page 14: Espresso Pump - Low-Pressure-Ready
The WMF espresso generally comes with an integrated low-pressure-ready balanced espresso pump. This espresso pump, unlike standard non balanced espresso pumps, controls the brewing pressure to the set level, regardless of the pump inlet pressure. "Low pressure" is deactivated in the software by default; the coffee machine operates in normal mode. This means ... -
Page 15: Set Pressure Reducer
Place the hose on the plug-in nipple of the inlet assembly (illustration 1 and 2), run the free end to the drip tray and set it down there (illustration 3) Open water supply valve o For the low pressure option, the power must be switched on here and the espresso pump must be actuated by the software under Service >... -
Page 16: Power Class
Service Power Class The "Power Class" considers the country-specific heating output versions of the machine, the connection configuration at the grid power terminal, and the cur- rent protection on the supply grid side. The Power Class is therefore useful for optimizing utilization and ensuring machine functionality. The Power Class determines the following: Mutual lockout and enabling of components such as the grinder and heater. -
Page 17: Grinders - Grinding Degree And Motor Cooling
See Attachment WMF espresso Basic beverage settings With specially hardened grinder disks and the powerful grinder motor, these grinders can achieve a very fine grinding degree, with a grain size distribution down to a minimum of 190µm. -
Page 18: Grinders - Grinding Degree Setting
2nd mark. (see illustration 3) 7. Attach the grinder. Important note for technicians Finally, adjust the grinding degree again to match the customer-specified type of bean and beverage See Attachment: WMF espresso - basic setting beverages Illustration 3... -
Page 19: Admixture Calibration For Proportional Valve
Service 2.13 Admixture calibration for proportional valve Given the heavy temperature fluctuations at the start of brewing cycle, the initial opening path of the proportional valve can be adjusted via the mixing calibra- tion (=cold water mixing amount) as follows ... -
Page 20: Brewing Time Monitoring
To make sure that the brewing time monitoring steps in as precisely as possible, the most frequently served beverage recipe is marked as the reference bever- age for each brewing group. Usually this is the 1x Espresso or 1x Café Crème. -
Page 21: Front Panel
Service 2.15 Front panel The following components are installed on the front panel CPU (on CPU-power board) Plug-in board/SD card = Primary storage medium for: Machine software (firmware) Customer memory / Service memory / Working memory Important note for technicians: If the front panel is replaced, the plug-in board/SD card from the defective front panel must be installed in the replacement front panel. - Page 22 Service Power stage (on CPU-power board) 10-pole plug 30 V outputs for Grinders, brewer drives, cup storage heater 96-pole plug 5 V / 24 V inputs and outputs for valves, flow meter, microswitches, etc. Note: All outputs, with the exception of the brewer drive, are short circuit protected The outputs for the brewer drive are rated for lock-up, that is, they can withstand high currents for a longer period of time, but will be destroyed by a short circuit.
- Page 23 Service Board – for Autosteam buttons CPU-power board Plug-in board/SD card Board – for hot water buttons Connector – serial adapter board Slot for "internal backup of USB stick" Central 96 pole plug Slot of "external USB stick" (for left-hand in- sertion underneath the cup storage) Power supply from the switched- mode power supply...
-
Page 24: Safety Valve - Procedure For Performing A Functional Check
Service 2.16 Safety valve – Procedure for performing a functional check The safety valve is screwed onto the steam boiler via a pipe end. The pipe end is dimensioned so that the valve seal is exposed to a temperature load less than 80 °C. -
Page 25: Maintenance Concept
Maintenance concept Overview of maintenance activities The following WMF maintenance concept based on time-/serving-dependent cycles, describes the minimum scope of maintenance activities as recommended by WMF. Please also take into account the special terms arising from the service agreements and local factors (which may make earlier descaling of the flow heater necessary). -
Page 26: Installation Of Maintenance Packages Required For Different Brewing Times
Maintenance concept 3.1.1 Installation of maintenance packages required for different brewing times... -
Page 27: Maintenance Packages
Maintenance concept Maintenance packages Service maintenance 1 33 2893 8000 Illustration (not to scale) Module Designation Order number Count Brewer O-ring (distributor sieve) 33 2675 5000 Portafilter Insulation insert 33 2681 3000 Portafilter Screen retaining ring (spring) 33 2672 5000 Basic Steam O-ring (steam nozzle) 33 0398 4000... - Page 28 Maintenance concept Service maintenance 2 33 2893 9000 Illustration (not to scale) Module Designation Order number Count Brewer Brewing piston, compl. 33 2897 2000 Coffee / hydraulics Brewing valve socket 33 2400 8000 Ventilation / cooling 33 2617 5000 Coffee / hydraulics Release valve socket 33 2274 5000 Socket for linked valves...
-
Page 29: Descaling - Preliminary
Place the drain tube (00.0048.0041 – 290 mm) over the HW spout (splash protection) Important note for technicians for descaling: Because the espresso pump is not self-priming, and therefore the connecting line must be filled manually in order to start descaling, the descaling pump (familiar from the bistro!) is used. -
Page 30: Pressure Release Routine
The boiler pressure check has made the previous boiler inspection to be performed every 2 years much simpler, as the boiler insulation no longer needs to be re- moved for this purpose. The boiler pressure check must be performed using the "WMF test fittings". These test fittings include detailed instructions for performing the boiler pressure check. -
Page 31: Special Tools And Aids
Maximum dimensions In order to ensure that the hopper cover can close, the outer dimensions should not exceed 52 x 14 x 5.5. The WMF USB stick meets this requirements. Descaling Descaling pump Item number 33 1878 3000 Drain tube 290 mm – 00.0048.0041... - Page 32 Table of contents...
Need help?
Do you have a question about the espresso and is the answer not in the manual?
Questions and answers