Table of Contents
Advertisement
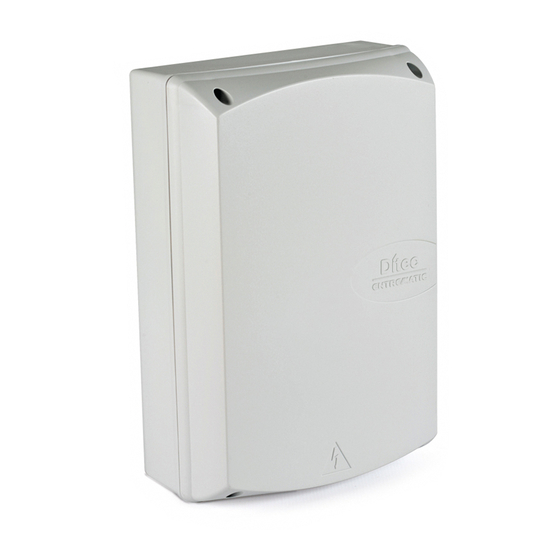
Ditec LOGIC M
Control panel installation manual for 230 V~ automation with
one or two motors
LOGICM
POWER
SA
IN
11
12
F1
L N
U W V X Z Y
M1
1~
L N
D5 S5 JT
CT 1 2 3 4 5
RF
ON
1
2 3 4 5 6
TM
TC
RP
JR6
OM
15 14 13 12 11 0 0 1 1 2 3 4 5 6 7 8 9 20 41
M2
1~
www.ditecentrematic.com
F2
JR4
JR10
SO
NIO
EO
TR
R1
J7
IP1854EN
Advertisement
Table of Contents

Related Manuals for Entrematic Ditec LOGIC M


Summary of Contents for Entrematic Ditec LOGIC M
- Page 1 Ditec LOGIC M IP1854EN Control panel installation manual for 230 V~ automation with one or two motors LOGICM JR10 D5 S5 JT CT 1 2 3 4 5 POWER 2 3 4 5 6 U W V X Z Y 15 14 13 12 11 0 0 1 1 2 3 4 5 6 7 8 9 20 41 www.ditecentrematic.com...
-
Page 3: Table Of Contents
Index Subject Page General safety precautions EC declaration of conformity Technical data 3.1 Applications Commands 4.1 Self-controlled safety edge Outputs and accessories Adjustments 6.1 Trimmer 6.2 Dip-switch 6.3 Jumper 6.4 Signals Start-up Troubleshooting Example application for two-motors swing gates Example application for one-motor swing gate Example application for sliding gate Example application for barrier Example of parallel... -
Page 4: General Safety Precautions
1. General safety precautions This installation manual is intended for qualified personnel only. Installation, electrical connections and adjustments must be performed in accordance with Good Working Methods and in compliance with applicable regulations. Before installing the product, carefully read the instructions. Bad installation could be hazard- ous. -
Page 5: Ec Declaration Of Conformity
2. EC Declaration of conformity The manufacturer Entrematic Group AB with headquarters in Lodjursgatan 10, SE-261 44 Landskrona, Sweden declares that the control panel Ditec LOGICM is in conformity with the provisions of the following EC directives: Directive 2004/108/CE; Low Voltage Directive 2006/95/CE. -
Page 6: Commands
4. Commands Command Function Description N.O. AUTOMATIC Permanently closing the contact enables automatic closing. CLOSING N.O. OPENING The opening operation starts when the contact is closed. N.O. CLOSING The closing operation starts when the contact is closed. N.O. STEP-BY-STEP With D5=ON closing the contact starts a sequential opening or clo- sing operation: open-stop-close-open. -
Page 7: Self-Controlled Safety Edge
4.1 Self-controlled safety edge SOFA1-SOFA2 or GOPAVRS Command Function Description SAFETY TEST Place the SOFA1-SOFA2 or GOPAVRS device into its housing for plug-in cards AUX. SOFA1-SOFA2 GOPAV Connecting terminal 41 enables a safety edge test cycle before every operation. If the test fails the SA led flashes and the test is repeated. N.C. - Page 8 Output Value - Accessories Description Accessories power supply. Power supply output for external accessories, including automation status lamp. NOTE: the maximum absorption of 0.5 A corresponds to the sum of all terminals 1. The control panel has two spaces for coupling board, type radio recei- 15 ...
-
Page 9: Adjustments
6. Adjustments 6.1 Trimmer Trimmer Description Setting the operating time. From 10 to 120 s. 60 s From 10 to 150 s with OM=OFF and JR6=OFF. MIN=10 s MAX=120 s NOTE: with NC limit switch, set TM=MAX. Setting motor 1 (M1) closing delay time. When closing, motor 1 (M1) starts after a delay set with TR from 0 to 30 s relative to M2. -
Page 10: Jumper
6.3 Jumper Jumper Description Overtravel reduction. Disabled. Enabled. Reduces the overtravel distance NOTE: set JR4=OFF is the motor N OT E : p re fe ra b ly s e t for the door wing. is equipped with an electric brake. JR4=ON if the door wing performs an excessive overtravel. -
Page 11: Start-Up
7. Starting Bridge the NC safety contacts with a jumper. Before starting up, check the application type selected. In the case of single door wing auto- mation, set OM=OFF. For sliding gate automation, set JR6=OFF. Any limit switches installed must be adjusted so that they are triggered near the mechanical opening and closing end stops. -
Page 12: Troubleshooting
8. Troubleshooting Problem Possible causes Remedy Automation does not open or close. No power. Check that the control panel is po- (POWER led off). wered correctly. Short circuited accessories. Disconnect all accessories from (POWER led off). terminals 0-1 (voltage must be 24 V=) and reconnect one at a time. -
Page 13: Example Application For Two-Motors Swing Gates
9. Example application for two-motors swing gates When the LOGICM control panel is used in automation applications with two swinging door wings, one of the following operating modes may be selected. <MAX <MAX Example 1 - Door wings stop against mecha- nical end stops and in the event of obstacle de- tection. - Page 14 the switches 2-3 s ahead of the mechanical end stop. In this configuration, each door wings stops against its respective mechanical closing and opening end stop. In the event of obstacle detection while opening, only the door wing that detects the obstacle stops, performing a disen- gagement operation.
-
Page 15: Example Application For One-Motor Swing Gate
10. Example application for one-motor swing gate When the LOGICM control panel is used in automation applications with one swinging door wing, one of the following operating modes may be selected. Example 1 - Door wing stops against mechanical <MAX <MAX end stops and in the event of obstacle detection. - Page 16 stop. In the event of obstacle detection before the ac- tivation of the proximity limit switch while ope- ning, the door wing stops, performing a disen- gagement operation; after the proximity limit switch is activated, the door wing stops against the obstacle.
-
Page 17: Example Application For Sliding Gate
11. Example application for sliding gate When using the LOGICM control panel for sliding au- DIP2=OFF tomation applications: set OM=OFF 2 3 4 5 6 set JR6=OFF DIP2=ON set TM=MAX (150 s). Connect the opening and closing limit switch NC con- 2 3 4 5 6 tacts to terminals 0-11-12. - Page 18 13. Example of automation in parallel The two automations [A] and [B] can be operated in parallel by making the connections indicated in the figure. Commands 1-3 and the remote controls (with DIP1=ON) are equivalent to a total opening command. Automatic closing is obtained by adjusting the TC trimmer not at the maximum and in the same position on both control panels.
- Page 19 All the rights concerning this material are the exclusive property of Entrematic Group AB. Although the con- tents of this publication have been drawn up with the greatest care, Entrematic Group AB cannot be held responsible in any way for any damage caused by mistakes or omissions in this publication.
- Page 20 Entrematic Group AB Lodjursgatan 10 SE-261 44, Landskrona Sweden www.ditecentrematic.com...
Need help?
Do you have a question about the Ditec LOGIC M and is the answer not in the manual?
Questions and answers