
Related Manuals for Magnimage LED-750H


Summary of Contents for Magnimage LED-750H
- Page 1 LED Video Processor User Manual V1.1 △ Before using this LED Video processor,please read this manual carefully and preserved for reference in the future. LED-750H...
- Page 2 Statements Without the written permission, any personnel or organization could not copy, reproduction or translate the book or part of it. Also could not transmit it in any form or any way(electronic, mechanical, photocopying, record or other way) for any business and profitable purpose. The product specifications and information mentioned in this manual is just for reference, will not give prior notice if there is any updated.
-
Page 3: Table Of Contents
Directory Overview ................................ 1 Trademark Credit ................................1 About Software ................................1 Features ................................... 2 Accessories Included ............................... 3 Extended Port .................................. 4 Safety Instructions ................................5 Function Introduction ..........................6 Brief....................................6 About the front ................................. 7 About the back ................................. 8 Technical Specifications .............................. -
Page 4: Overview
Overview Thanks for your purchasing our LED Video processor. Do hope you can enjoy the experience of the product performance. The design of the LED video processor conforms to international and industry standards. But if with improper operation, there will be a personal injury and property damage. In order to avoid the dangerous, please obey the relevant instructions when you install and operate the product. -
Page 5: Features
Features 2 screens mosaic in 1 processor. 4 DVI output ports are divided into 2 groups for horizontal mosaic, vertical mosaic, same size mosaic and different size mosaic. One single processor up-loads 4,600,000 pixels. 4 windows output. On non-mosaic mode, each output is capable of ... -
Page 6: Accessories Included
Accessories Included Using manual Power line DVI cable USB cable VGA cable Big DP port Certificate of HDMI cable cable quality... -
Page 7: Extended Port
Extended Port LED-750H is a basic model. On this basis, it can also expand simultaneously two 2K input source 【VGA、 DVI、 SDI、 USB (allows only 1 USB) 】 or one 4K input source【DP, HDMI】. Port Model Explanation 1 DVI module includes 1 DVI input... -
Page 8: Safety Instructions
Port Model Explanation 1 HDMI module includes 1 Extended one LED-750HH14 HDMI(1.4) and 1 DVI input(HDMI1.4 module HDMI1.4 protocol) Input 1 DP module includes 1 DP(1.1) and Extended one LED-750HP11 port module 1 DVI input( HDMI1.4 protocol ) dp1.1 Extended one USB LED-750HM 1 USB module includes 1 USB input module... -
Page 9: Function Introduction
Function Introduction Brief LED-750H, a superior approach to better visual performance for LED walls. It is a 4K*1K/60Hz capable video processor for 2 screens mosaic. With EDID and user-defined output management, it delivers high quality pixel-to-pixel display via its user-friendly controls. It is an ideal choice for multi-media hall, multi-purpose room, theater, studio and showroom. -
Page 12: Technical Specifications
Input Port DVI1-DVI2 2 DVI input ports HDMI1-HDMI2 2 HDMI input ports 1 DP input port,3840×1080/60Hz or 3840×2160/30Hz EXT.1 Extended port 1 EXT.2 Extended port 2 Output Port DVI1A-DVI1B Output group 1,the DVI under is a backup port DVI2A-DVI2B Output group 2,the DVI under is a backup port Technical Specifications Input Indication Port... - Page 13 Extended input indication Port Quantity Resolution 1024×768/60Hz、1280×1024/60Hz, VESA VGA×1、VGA LOOP×1 standard 1024×768/60Hz、1920×1080/60Hz , VESA DVI×1、 DVI LOOP×1 standard SDI×1、 SDI LOOP×1 The same with SDI specification Support 3840×1080×60Hz and customized DP×1 resolution DisplayPort 1.1,support 3840×1080×60Hz DP1.1 DP×1,DVI×1 and customized resolution HDMI1.4,support 3840×1080/60Hz and HDMI1.4 HDMI×1,DVI×1...
- Page 14 Output Indication Port Quantity Resolution(each DVI output) 1024×768/60Hz 1280×720/60Hz 1280×1024/60Hz 1440×900/60Hz 1024×768/120Hz 1600×1200/60Hz 2048×1152/60Hz 1680×1050/60Hz 1600×1200/60Hz-reduced 1920×1080/50Hz 1920×1080/60Hz 4 ports, 1920×1200/60Hz 2176×1168/60Hz 1024×1280/60Hz 2groups. 1936×1280/60Hz 1536×1536/60Hz Customized output resolution : The width resolution is up to 3840 The height resolution is up to 2160 Whole Unit Specifications Input Power Supply 100-240V AC~50/60Hz 0.8A...
-
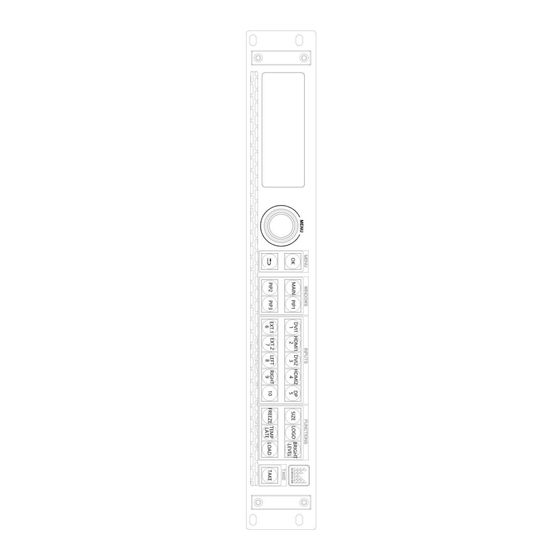
Page 15: Using Menu
Using the menu system is helpful to finish all your settings to this product. LED-750H adopts a full color LCD screen to display the information. If there is no any operating or the operating is timeout, the LCD screen will be in default state. -
Page 16: Windows
In the browse mode, rotate the knob anticlockwise, the menu will go up or go left. Rotate the knob clockwise, the menu will go down or go right. Rotate and press the knob (or press “OK” button),the menu option will be selected. After that, rotate the knob anticlockwise, the value of the selected option will decrease, while the value will be increased when rotating the knob clockwise. -
Page 17: Function
FUNCTION: There are 6 buttons in this area : SIZE, LOGO, BRIGHT LEVEL, FREEZE, TEMPLATE, LOAD. Button Default operating when pressing SIZE Enter the size setting menu LOGO Turn on or turn of the logo BRIGHT Enter the brightness level menu LEVEL FREEZE Freeze the current image... -
Page 18: Main Menu Introduction
Synchronize icon Main Menu Introduction Below symbols will appear in the main menu, their specific meaning are shown as below table: Symbols meaning Press “OK” to enter the submenu Through “OK”、 “ ”and the knob ,setting the parameters or do some adjustment, below are the detailed introduction:... -
Page 19: Main Menu
Main Menu: In the default state, press "knob" or "OK" to enter the main MENU state, the LCD screen will show the details as below: Picture Setting Output Setting Mosaic Setting Switcher Mode PIP Settings Image Crop EDID Settings VGA Adjustment Communication Misc Sync Lock Setting... -
Page 20: Image Setting Submenu
Image Setting submenu Standard [MAIN]Input: Picture Mode DVI1 Disabled Bright Level Brightness Gamma Correction Contrast [MAIN]Picture Settings Saturation [PIP1]Picture Settings [PIP2]Picture Settings Sharpness [PIP3]Picture Settings Color Temperature Reset Picture Settings Reset Settings Divided into “standard”、“low-light 1”、 “low-light 2” 、 “low-light 3” 、 Image setting “video”... -
Page 21: Output Setting Submenu
Full Screen ON 1920×1080 MAIN Roation Available in certain condition LED-750H supports 18 kinds of regular output resolution, and also supports customized output resolution, horizontal maximum 3840, Output vertical maximum 2160. refresh rate maximum 121HZ, for details, Resolution check “output indicators”, 2 group individual output with same output resolution . - Page 22 V window as“960”. You can also use the customized output resolution, and set the output resolution as“1152×960”. Note 1:LED-750H’s 2 groups output,their output resolution is same,while the output window can be set individually Note 2: Please be cautious when use the refresh rate that bigger than 60Hz or use greater height and width pixel output resolution, it is not sure that the back-end equipment can support this resolution.
-
Page 23: Mosaic Submenu
Mosaic submenu Mosaic Setting Mosaic Setting 2 Panel A Manual arrangement 1 Panel MAIN PIP1 2 Panel A 2 Panel B PIP2 Auto arrangement PIP3 DVI1~2 Quick Mosaic(2 Panels) Manual Arrangement MAIN Mosaic Setting Mosaic Setting MAIN H Total 1920 V Total 1080 PIP1... - Page 24 The left input port Right Src The right input port LED-750H series video processor’s mosaic setting ,totally 4 mode: Off: Close mosaic function. At this state, all the output ports output the same picture; 1 Panel:all the output ports output the same picture, while system can capture the synchronous signal automatically, this model can use for cascading mosaic.
- Page 25 2 Panel B:the mosaic is done by DVI 1 and DVI 2. PIP 1 and PIP 3 will add PIP on DVI 1 and DVI 2. PIP 1 and PIP 3 supports text overlay. Quick Mosaic: 1. If there is only 1 input, choose the input for left and right port 2.
-
Page 26: Switcher Mode Submenu
750H within same area network Switcher mode do not work together with mosaic mode LED-750H series switcher mode, totally 2 options: Off : Turn off the the switcher mode function 1 panel: output DVI1 output preview,there’s a “Preview” in red displayed... -
Page 27: Pip Setting
PIP Setting PIP Setting PIP1 PIP1 PIP2 Input DVI2 PIP3 Alpha PIP Feathering Setting Hold PIPn Key to Toggle On/OFF PIP Roaming PIP Roaming Direction Horizontal Input DVI2 H Start V Start 2560 Width Height In PIP Setting submenu, do such adjustments : turn on or off pip, select the input signal, transparency adjustment(0-64)... -
Page 28: Image Crop Submenu
Image Crop submenu Image Crop MAIN MAIN DVI2 PIP1 Image Crop PIP2 Parameters (0,0)1920×1080 Reset Image Crop Settings PIP3 H Start V Start Width 1920 Height 1080 select “ MAIN” 、 “PIP1” 、 “PIP2” 、 “PIP3” cropping parameters; each signal Image Crop can be cropped in different picture at the same time. -
Page 29: Edid Setting
EDID setting EDID Select DVI1 H Active 1280 V Active 60Hz Apply EDID select select one input signal EDID H Active Horizontal width V Active Vertical height Refresh rate After setting EDID, different PC, different video card, need restart PC or pull ot signal line, choose appropriate resolution in PC resolution output menu. -
Page 30: Communication Setting
Communication Setting 192.168.1.110 Network Setings RS232 Baudrate 115200 Apply Reset MAC:E2-CB-16-E0-73-6F Network settings Select IP address of this PC RS232 Baudrate Fixed value 115200 Misc setting Display in 3 pages LOGO Setting Chroma Keyer Setting Templates And Presets Time/Task Management Loop Out Setting Pattern/Caption Output Monitor... - Page 31 LOGO setting Select File PIP3 Usage Normal File1.bmp 1024 Width H Start Save LOGO V Start Height Load LOGO Save LOGO Logo Management Select File File1.bmp LOGO Position 1024 V Start H Start LOGO Border None. Load LOGO PIP function Modify normal state, used as activity picture.
- Page 32 Chroma Keyer settings Chroma Keyer(PIP3) Chroma Keyer(PIP3) Red On Black Keyer Mode Chroma Keyer(PIP3)Config Chroma Keyer Config Chroma Keyer(PIP1) Chroma Keyer(PIP1)Config Chroma Keyer(PIP3) Color Range(High) Color Range(Low) In Area Out Area Border Alpha Chroma Keyer On or off chroma keyer function User、white on black、white on black 2、black on white、black on white Keyer Mode 2、green on black、green on black 2、green on white、green on white 2、...
- Page 33 Templates and Presets Load Templates Templates Presets Digital Key To Load Presets Load Save Delete Digital Key To Load Templates Load fixed template;enter adjust interface via template button in front panel Load: in loading interface, load presets via pressing No. button, also enter load Presets interface via LOAD button in front panel.
- Page 34 Time & Task management Date And Time Date 2017/3/16 Schedule Time 20:10:35 Schedule Run/Stop Stop Schedule List Date:2017/3/16 Time:--:--:-- Preset Index Loaded Not Used Task Operation [OK]To Edit Schedule date Set date Date and time time Set time Date Set date Time Set time Schedule...
- Page 35 3” 。 Scroll direction included“left ” 、 “right” Caption Background Set caption transparency, included “translucent” 。 mode Color config Set caption color, support user Caption words input, need work with LED-750H software, and the maximum width of caption is 3840.
- Page 36 Input signal backup Auto Input Backup Status Auto signal hot backup Inactivated MAIN DVI1 DVI2 Manual signal backup Inactivated PIP1 DVI1 DVI2 Inactivated PIP2 DVI1 DVI2 PIP3 DVI1 DVI2 Inactivated Manual Input Backup MAIN DVI1 DVI2 PIP1 DVI1 DVI2 TAKE PIP2 DVI1 DVI2...
-
Page 37: Synchronization Lock Setting
Synchronization Lock setting Input Signal Monitor Sync Lock Mode Lock To main Input MAIN DVI1 1920x1080 60Hz Sync Mode Auto PIP1 DVI1 1920x1080 60Hz Genlock source Auto DVI1 1920x1080 60Hz Input V Freq monitor PIP2 DVI1 1920x1080 60Hz PIP3 Include “ synchronize to Main ”、“ synchronize to Genlock ”、 Synchronization “synchronize to input DVI1”... -
Page 38: Extend Input Port
Extend input port Ext Input Information Ext Input Setting Under this menu, you can view the information of the input expansion port and set the port switching rule. Keypad Lock Press【OK】to Lock Keypad Press【RETURN】to Cancel On Top Level Info. State Long Press【MAIN】For 3s to Lock Keypad This menu can lock the processor's keys, you need to press any key to unlock, prompt button 1276 to unlock. -
Page 39: User Guidance
User Guidance User Guidance Panel Number Select Show This Guidance At Startup Panel Number Cancel Output Port DVI1,DVI2 are Available Continue Cancel Next Direction Horizontal Input DVI1 All Necessary Information Height 1080 Width 1920 Have Been Collection Left Panel ‘Apply’To Start Auto Setting Height 1080 Right Panel Width 1920... -
Page 40: Warranty
Warranty The whole unit warranty One year (since the buying date); If the invoice is lost, the 60 days after the production date will be the warranty start date for the product. The warranty provisions The machine soaking and collisions produced besmirch or surface scratches and other abnormal using causes of malfunction or damage;...
Need help?
Do you have a question about the LED-750H and is the answer not in the manual?
Questions and answers