Table of Contents
Advertisement
The bookmark function is available in the electronic format.
User's Guide
Hitachi Inverter
Communication option for the Ethernet
P1-EN
When contacting us, please let us know the following reference number.
After reading this guide, keep it handy for future reference.
S Introduction・Cautions
C Table of Contents
1 Safety Precautions
2 Overview
3 About the P1-EN
4 Enclosed Items
5 Installation and Configuration
6 Inverter Settings
7 About the Modbus TCP
8 FAQ and Troubleshooting
9 Specifications
NT254X
Advertisement
Chapters
Table of Contents

Related Manuals for Hitachi SJ-P1 Series


Summary of Contents for Hitachi SJ-P1 Series
- Page 1 The bookmark function is available in the electronic format. After reading this guide, keep it handy for future reference. S Introduction・Cautions C Table of Contents User's Guide Hitachi Inverter 1 Safety Precautions Communication option for the Ethernet P1-EN 2 Overview...
- Page 2 ■For a proper use communication option for Hitachi SJ series P1 Before using the inverter, please read carefully the (afterward, "Hitachi SJ series P1" referred as SJ-P1). inverter's Basic and User's Guide, the P1-EN Basic This user's guide describes how to handle and Guide and this guide.
- Page 3 S.3 Product Warranty and Inquiry repaired part will be warranted for 6 months from ■About product inquiry the date of the warranty service. Hitachi will be ・For an inquiry about product damage or faults or a responsible for repairing or exchanging the...
- Page 4 ・ Please verify that the inverter settings are adequate for operation, before operating it remotely through the network. ・Please verify that the Hitachi inverter is correctly configured and installed for the intended purpose in the designed system. ・When using the Hitachi inverter please implement the following actions.
- Page 5 Introduction・Cautions S.4 Getting Started ・Please follow the steps written below for start using the P1-EN. ・Before operating the device, please read and fully understand the safety precautions written below and on the Chapter 1. Procedure▶ Verification Points▶ For more information ・Verify all safety precautions needed for ・Please refer to the "Chapter 1...
- Page 6 Introduction・Cautions S.5 Related Documents Document Name Document Code P1-EN(Ethernet) User's Guide (this document) NT254X P1-EN(Ethernet) Basic Guide NT2541X Document Name (Inverter) Document Code SJ series P1 User's Guide NT251*1) SJ series P1 Basic Guide NT2511*1) *1) It represents the version of each guide. S.6 Registered Trademark Ethernet is a registered trademark of Xerox Corporation in the United States.
-
Page 7: Table Of Contents
Table of Contents C.1 Table of Contents ● Introduction・Cautions ........ S-1 ● Table of Contents .......... C-1 ● Product Warranty and Inquiry...... S-2 Chapter 1 Safety Precautions 1.1 About this chapter .......... 1-1 1.4 Precautions ............1-3 1.2 Types of warnings ........... 1-1 1.5 Caution labels examples ........1-7 1.3 Symbol explanation ........ - Page 8 Table of Contents Chapter 8 FAQ and Troubleshooting 8.1 About this chapter .......... 8-1 8.3 Inverter troubleshooting ....... 8-3 8.2 Self-diagnosis ..........8-2 8.4 The LEDs and remedies ........ 8-4 Chapter 9 Specifications 9.1 About this chapter .......... 9-1 9.2 Device specifications ........9-2...
- Page 9 Table of Contents (Memo)
-
Page 10: About This Chapter
Chapter 1 Safety Precautions Chapter 1 Safety Precautions Contents 1.2 Types of warnings 1.1 About this chapter ........... 1-1 In this guide, the safety precautions as well as 1.2 Types of warnings ..........1-1 residual risks are categorized by degree of risk as 1.3 Symbol explanation ......... -
Page 11: Symbol Explanation
Chapter 1 Safety Precautions 1.3 Symbol explanation In this guide, there are some explanatory notes using different symbols. Please pay attention to this content and keep in mind its information. Symbol definition When handling this product, this symbol indicates danger, warning, caution about ignition, electric shock, high... -
Page 12: Precautions
Chapter 1 Safety Precautions 1.4 Precautions 1.4.1 Please be careful! Danger ・In order to explain this device details the ・If handled incorrectly or improperly, it illustrations in this guide might show this might cause death, serious physical Caution device without covers. injuries, or damage to the inverter, motor Caution ・Before operating this device please return... -
Page 13: Precautions During The Wiring
Chapter 1 Safety Precautions 1.4.3 Precautions during the wiring! Danger ● Risk of an electric shock and/or fire! ● Risk of an electric shock and/or injury! ・Be sure to ground the inverter. Electric Electric ・Entrust the wiring work only to a qualified shock shock electrician. -
Page 14: Precautions During Operation
Chapter 1 Safety Precautions 1.4.4 Precautions during operation! Danger ● Risk of an electric shock! ● Risk of an electric shock or fire! Electric Electric ・Make sure to fasten all the screws of this ・DO NOT touch the inside of this device, shock shock device before turning it on. -
Page 15: Precautions During Maintenance/Inspection
1.4.6 Precautions for disposal! Danger ● Risk of injury and/or an explosion! ・Contact Hitachi technical service or your ・For disposal of this device, outsource to a sales agent if you need to get this device qualified industrial waste disposal Injury and fixed. -
Page 16: Caution Labels Examples
Chapter 1 Safety Precautions 1.5 Caution labels examples ・We include the caution label templates so motor, inverter or system related accidents or dangerous situations may be prevented. Please use these labels for your system or equipment. ・When the inverter is configured for remote (Label example) operation, automatic operation or the retry ・For warning about automatically resumed... - Page 17 Chapter 1 Safety Precautions (Memo)
-
Page 18: Chapter 2 Overview
Chapter 2 Overview Chapter 2 Overview Contents 2.2 Applicable devices 2.1 About this chapter ........... 2-1 2.2 Applicable devices .......... 2-1 The contents of this guide will apply to the P1-EN 2.3 Before reading this guide ....... 2-1 device. For information about the inverter please 2.4 Guide objectives .......... - Page 19 Chapter 2 Overview 2.5 Guide outline This guide has the following structure. ● Chapter 7: About the Modbus TCP ● The chapter 1: Safety Precautions "About the Modbus TCP" contains the "Safety Precautions" contains safety explanation of the Modbus TCP, protocol and instructions for installing, wiring, operating, capability.
- Page 20 Chapter 2 Overview 2.6 Symbol definition In this guide, there are some explanatory notes using the symbols shown in the table below. This table also contains the explanation of each symbol. Symbol and its Description definition Simply describes some problematic recurring situations.Hence, cases...
- Page 21 Chapter 2 Overview (Memo)
-
Page 22: Chapter 3 About The P1-En
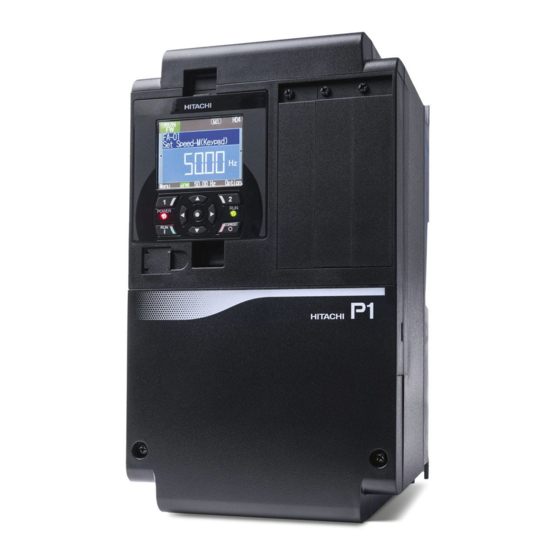
Chapter 3 About the P1-EN Chapter 3 About the P1-EN 3.1 About this chapter Contents 3.1 About this chapter ........... 3-1 This chapter contains the explanation about this 3.2 P1-EN appearance and nomenclature ..3-2 device external features and information on the 3.3 Name plate ............ - Page 23 Chapter 3 About the P1-EN 3.2 P1-EN appearance and nomenclature ! ・The four LEDs over the RJ-45 connection don't ・ I need know appearance turn on or blink. nomenclature of this device. A ・An external view of this device is shown below. For installing this device or details of LEDs, connectors and other parts refer to the chapter 5 "Installation and Configuration".
- Page 24 Chapter 3 About the P1-EN 3.3 Name plate ・What is the information written on the plate? A ・The P1-EN name plate gives the following information. Device model Factory control number Manufacture number (MFG No.) 3.4 Dimensions after innstalled ! ・ What are the P1-EN dimensions after being ・As shown on the image a part of this device will installed? stand out from the SJ-P1.
- Page 25 Chapter 3 About the P1-EN (Memo)
-
Page 26: Chapter 4 Enclosed Items
Chapter 4 Enclosed Items Chapter 4 Enclosed Items Contents 4.1 About this chapter 4.1 About this chapter ........... 4-1 This chapter contains information about the items 4.2 About the enclosed items ......4-2 enclosed with the P1-EN. Additionally, it is 4.3 Verification after the purchase ...... -
Page 27: About The Enclosed Items
Chapter 4 Enclosed Items 4.2 About the enclosed items A ・The enclosed items are shown on the images ・What items are enclosed? below. ・Enclosed items Basic Guide x1 Ferrite Core x2 P1-EN x1 ■Ferrite core specification Item Name Manufacturer Model Inner Diameter Ferrite Core SEIWA ELECRIC MFG Co., Ltd. - Page 28 Chapter 4 Enclosed Items 4.3 Verification after the purchase ・What should I verify after the purchase? 4.3.1 Verification when unpacking A ・Please verify the items written on the right when Check that the items were not smashed or unpacking. damaged during the delivery. ・In case there is any doubt or trouble with the product please contact your sales agent as soon Check that...
- Page 29 Chapter 4 Enclosed Items (Memo)
-
Page 30: About This Chapter
Installation and Configuration Chapter 5 Chapter 5 Installation and Configuration Contents 5.1 About this chapter 5.1 About this chapter ........... 5-1 This chapter contains information for installing 5.2 Supported inverters ........5-2 and system configuring this device on the inverter. 5.3 Installation ............ -
Page 31: Supported Inverters
Input/Entrée :50Hz,60Hz 200–240V 3ph ** / ** / ** A higher it can support the P1-EN. Output/Sortie : 0- 590Hz 200–240V 3ph ** / ** / ** A MFG No. 62AA****** BB001 Date:**** NE*****-** Hitachi Industrial Equipment Systems MADE IN JAPAN Co.,Ltd. 5.3 Installation 5.3.1 About the installation The P1-EN can be attached to any of the 3 option slots of the SJ-P1. -
Page 32: How To Install
Installation and Configuration Chapter 5 5.3.2 How to install Before installing the P1-EN please refer to the chapter 6 "Inverter Settings" and configure the inverter. For explanation purposes, it will be assumed that the P1-EN is going to be installed in the SLOT1. (1) Remove the cover of the option cassette connection slot. -
Page 33: Attach The Ferrite Cores
Installation and Configuration Chapter 5 (3) Secure the P1-EN with the screw removed in procedure (1). Option cassette connection slots SLOT1 SLOT2 SLOT3 RJ45 VOP keypad Fasten the screw. USB(micro-B) (4) Connect the FG terminal to functional ground. Option cassette connection slots SLOT1 SLOT2 SLOT3... -
Page 34: About The Connection
Installation and Configuration Chapter 5 5.5 About the connection ・Make sure that the communication line and the ! power line are placed as far as possible from Connect the communication cable (Ethernet each other. power line cable), so it minimizes the tension and stress over communication line are placed close to each the connector. -
Page 35: External Features
Installation and Configuration Chapter 5 5.6 External features 5.6.1 Ethernet connector specifications The P1-EN connector (PORT1 and PORT2) The connection is available Ethernet connectors specifications are shown below. conformed with 10BASE-T/100BASE-TX. ■Connector specifications Connector Type Notes The electric characteristics conform with the IEEE802.3 standard, category 5e or RJ-45 higher, with shield. -
Page 36: External Power Supply (Optional)
Installation and Configuration Chapter 5 5.6.3 External power supply (optional) Control circuits both the inverter and this device ! can be powered up by using external input DC24V. It can always be supplied by the external power However, this function is not indispensable for source. -
Page 37: System Configuration
Installation and Configuration Chapter 5 5.7 System Configuration Examples of the Ethernet system configuration are shown below. ! ・When configuring a system or confirming the ・In case of configuring a system that the inverter startup, read this guide and the instruction operates immediately at powered on, please manual about the client. -
Page 38: About This Chapter
Chapter 6 Inverter Settings Chapter 6 Inverter Settings Contents 6.1 About this chapter 6.1 About this chapter ........... 6-1 This chapter contains the information about the 6.2 Parameter Settings .......... 6-2 inverter settings that must be done when using the 6.2.1 Initialization .......... -
Page 39: Parameter Settings
Chapter 6 Inverter Settings 6.2 Parameter Settings Before starting the communication, configure the following inverter settings as necessary. 6.2.1 Initialization Configure the parameter [Ub-01] (Initialize mode ! selection) to 04 (Error history clear & Data When configuring the inverter setting parameters, initialize &... - Page 40 Chapter 6 Inverter Settings Code Parameter name Selection Initial value oL-20 IPv6 IP address (1), Gr. 1 0000~FFFF 0000 oL-21 IPv6 IP address (2), Gr. 1 0000~FFFF 0000 oL-22 IPv6 IP address (3), Gr. 1 0000~FFFF 0000 oL-23 IPv6 IP address (4), Gr. 1 0000~FFFF 0000 oL-24...
- Page 41 Chapter 6 Inverter Settings ・[oH-01]: IP address selection ・[oL-01]~[oL-04]: There are 2 possible ways of configuring the IP IPv4 IP address (1)~(4), Gr. 1 address, and they are classified in two groups. ・[oL-20]~[oL-27]: The parameter [oH-01] can communicate using IPv6 IP address (1)~(8), Gr. 1 either the group 1 or group 2.
- Page 42 Chapter 6 Inverter Settings ・[oL-09]~[oL-12]: IPv4 default gateway (1)~(4), Gr. 1 ・[oL-29]~[oL-36]: IPv6 default gateway (1)~(8), Gr. 1 ・[oL-48]~[oL-51]: IPv4 default gateway (1)~(4), Gr. 2 ・[oL-69]~[oL-76]: IPv6 default gateway (1)~(8), Gr. 2 These parameters can configure the default gateway of the Ethernet communication. [oL-09] to [oL-12]: in case of using the group 1 and the IPv4 [oL-29] to [oL-36]:...
-
Page 43: Inverter And P1-En Correlating Parameters
Chapter 6 Inverter Settings 6.2.3 Inverter and P1-EN correlating parameters The parameters described in the following table control the action taken by the inverter when there is a problem with this device or when this device is connected. ■Parameter Code Parameter name Selection Initial value... -
Page 44: Other Parameters
Chapter 6 Inverter Settings 6.2.4 Other parameters In addition to the configurations explained in sections 6.2.2 and 6.2.3, please verify the configuration of the following parameters when using this device. ・[CF-11]: Function for transforming the register data from A, V to % When using this device please select the 00(A, V) setting. - Page 45 Chapter 6 Inverter Settings (Memo)
- Page 46 Chapter 7 About the Modbus TCP Chapter 7 About the Modbus TCP Contents 7.1 About this chapter 7.1 About this chapter ........... 7-1 7.2 About the Modbus TCP ........7-2 This chapter contains information for the Modbus 7.2.1 Communication specification ....7-2 TCP communication.
-
Page 47: About The Modbus Tcp
Chapter 7 About the Modbus TCP 7.2 About the Modbus TCP 7.2.1 Communication specification The protocol of this device is Modbus TCP. ■Communication specification Items Description Fixed transmission speed: Communication method 10Mbps Full/Half-duplex or 100Mbps Full/Half-duplex *1) (transmission speed) Auto detection transmission speed: Auto negotiation *1) According to selection of communication method (transmission speed), it is to be configured as follows. -
Page 48: Data Format
Chapter 7 About the Modbus TCP 7.2.3 Data format The transfer from client (higher-level device) to the The data formats of MBAP Header and PDU are server (P1-EN) and server (P1-EN) to client shown below (higher-level device) have the same format. ■Data format of MBAP Header Address Items... -
Page 49: Modbus Function Code
Chapter 7 About the Modbus TCP 7.2.4 Modbus function code The Modbus function codes available with the inverter are shown the followings. ■Function code definition Maximum data bytes Maximum number of datas that can Code Function that can be handled by be handled by 1 message 1 message Read Coils... -
Page 50: Read Coils [01H]
Chapter 7 About the Modbus TCP 7.2.5 Read coils [01h] This function code is used to read status of coils. [Request] The Request specifies the starting address, i.e. the address of the first coil specified, and the number of coils. (Example) Reading 15 coils with the coil number of "0001h"... - Page 51 Chapter 7 About the Modbus TCP [Response] The coils in the response message are packed as one coil per bit of the data field. When reading 15 coils with the coil number of 0001h through 000Fh (in the above request), it returns the codes the following.
-
Page 52: Read Holding Registers [03H]
Chapter 7 About the Modbus TCP 7.2.6 Read holding registers [03h] This function code is used to read the contents of a contiguous block of holding registers. [Request] The request specifies the starting register address and the number of registers. In the registers are addressed starting at zero. - Page 53 Chapter 7 About the Modbus TCP [Response] The register data in the response message are packed as two bytes per register, with the binary contents right justified within each byte. Address Blocks Items Code Transaction ID (Hi) Transaction ID (Lo) Protocol ID (Hi) Modbus TCP Protocol ID (Lo)
-
Page 54: Write Single Coil [05H]
Chapter 7 About the Modbus TCP 7.2.7 Write single coil [05h] This function code is used to write a single output to either ON or OFF. Coil status Data To be ON To be OFF Output value (Hi) Output value (Lo) [Request] The request specifies the address of the coil to be forced. -
Page 55: Write Single Register [06H]
Chapter 7 About the Modbus TCP 7.2.8 Write single register [06h] This function code is used to write a single holding register. [Request] The request specifies the address of the register to be written. Registers are addressed starting at zero. (Example) Configure register... -
Page 56: Diagnostics [08H]
Chapter 7 About the Modbus TCP 7.2.9 Diagnostics [08h] Function code 08 provides a test (only 00: Retrun Query Data) for checking the communication system between the server and the client. The normal response to the Return Query Data request is to loopback the same data. The function code and sub-function codes are also echoed. -
Page 57: Write Multiple Coils [0Fh]
Chapter 7 About the Modbus TCP 7.2.10 Write multiple coils [0Fh] This function code is used to force each coil in a sequence of coils to either ON or OFF. [Request] The request specifies the coil references to be forced. (Example) By convention, bits within a byte are shown with Configure 15 coils with coil... - Page 58 Chapter 7 About the Modbus TCP [Response] The normal response returns the function code, starting address, and quantity of coils forced. Address Blocks Items Code Transaction ID (Hi) Transaction ID (Lo) Protocol ID (Hi) Modbus TCP Protocol ID (Lo) header part Data size (Hi) In the case, 6 byte lengths Data size (Lo)
-
Page 59: Write Multiple Registers [10H]
Chapter 7 About the Modbus TCP 7.2.11 Write multiple registers [10h] This function code is used to write a block of contiguous registers. [Request] The requested written values are specified in the request data field. (Example) Configure the register number "2B02h (FA-10: acceleration time monitor)"... -
Page 60: Read/Write Multiple Registers [17H]
Chapter 7 About the Modbus TCP 7.2.12 Read/Write multiple registers [17h] This function code performs a combination of one read operation and one write operation. The write operation is performed before the read. [Request] The request specifies the starting address and number of holding registers to be read as well as the starting address, number of holding registers, and the data to be written. - Page 61 Chapter 7 About the Modbus TCP [Response] The normal response contains the data from the group of registers that were read. Address Blocks Items Code Transaction ID (Hi) Transaction ID (Lo) Protocol ID (Hi) Modbus TCP Protocol ID (Lo) header part Data size (Hi) In the case, 7 byte lengths (address 6 through 12).
-
Page 62: Exception Response
Chapter 7 About the Modbus TCP 7.2.13 Exception response The inverter returns a response to the request, but if an error occurs in the request, it is to return an exception response. [Exception response] (Example) In case configuring nonexistent address to holding registers using the Modbus function code "03h (Read holding registers)", it is to return the exception response shown below. - Page 63 Chapter 7 About the Modbus TCP *2) The exception code indicates the factor of the exception response. ■Exception codes Code Description The function code received is not an allowable action for this device. The data address received is not an allowable address for this device. A value contained is not an allowable value for this device.
-
Page 64: Conection With The Prodrivenext
Chapter 7 About the Modbus TCP 7.3 Conection with the ProDriveNext Functions such as the wizard function, parameter When using the Modbus TCP for the connection file read/write function, inverter progam between the ProDriveNext and the inverter, this device and a LAN cable are required. Additionally create/download function and trace function become available when using the ProDriveNext. - Page 65 Chapter 7 About the Modbus TCP (Memo) 7-20...
- Page 66 Chapter 8 FAQ and Troubleshooting Chapter 8 FAQ and Troubleshooting 8.1 About this chapter Contents 8.1 About this chapter ........8-1 This chapter contains the troubleshooting of cases 8.2 Self-diagnosis ........... 8-2 such as errors detected by the protection function, warnings given by the warning function, or some 8.3 Inverter troubleshooting ......
- Page 67 Refer to this guide page 8-6 Refer to this guide page 8-3 “8.4 The LEDs and solutions” “8.3 Inverter troubleshooting” Cannot be solved Please contact your supplier or Hitachi inverter technical service office. 本書裏表紙 (1) Inverter model Before contacting the technical service, confirm (2) Inverter manufacture number (MFG No.)
- Page 68 Chapter 8 FAQ and Troubleshooting 8.3 Inverter troubleshooting In case the some error was detected by the inverter, it shuts the motor output down (trip). When the trip occurs, the inverter display (VOP) shows below. TRIP NRDY Occurring trip Overload MTR E005 15/12/24 22:10 Out Freq :0.50Hz...
- Page 69 Chapter 8 FAQ and Troubleshooting ■List of errors Error Error Error name Error name code code E001 Over-current error E035 External thermistor error E005 Overload motor error E036 Brake error E006 Overload braking resister error E038 Overload low speed error E007 Over-voltage error E039...
- Page 70 Chapter 8 FAQ and Troubleshooting Error Error Error name Error name code code E060 Option1 error 0 E090 STO active error E061 Option1 error 1 E091 STO-D error E062 Option1 error 2 E092 STO-1 error E063 Option1 error 3 E093 STO-2 error E064 Option1 error 4...
- Page 71 Chapter 8 FAQ and Troubleshooting 8.4 The LEDs and solutions status when abnormality occurred followings. ■LED status with abnormality RUN(green) ERR(red) Description Solutions The inverter power is not Light off Light off turned ON or P1-EN is ― initializing. ・Make sure that this product and the inverter are properly attached.
- Page 72 Chapter 9 Specifications Chapter 9 Specifications Contents 9.1 About this chapter 9.1 About this chapter ........... 9-1 This chapter contains information about the 9.2 Device Specifications ........9-2 P1-EN specifications.
- Page 73 Chapter 9 Specifications 9.2 Device Specifications ■Specifications Item Specification Model P1-EN Dimentions (width×height×depth) 20.5×98.0×54.5mm Weight 170g Ambient operating temperature -10~50℃ icing condensation Ambient operating humidity 20~90%RH conditions. Storage temperature -20~65℃ Vibration resistance 5.9m/s2(0.6G), 10~55Hz Environment IEC/EN61800-3 Conformance Second environment, Category C3 electrical safety standards IEC/EN61800-5-1 SELV Enclosure rating...
Need help?
Do you have a question about the SJ-P1 Series and is the answer not in the manual?
Questions and answers