Table of Contents
Advertisement
Advertisement
Table of Contents

Related Manuals for Devolo Magic 1 WiFi 2-1


Summary of Contents for Devolo Magic 1 WiFi 2-1
- Page 1 M anual devolo M agic 1 WiFi...
- Page 2 Magic 1 WiFi...
- Page 3 © 2018 devolo AG Aachen (Deutschland) While the information in this manual has been compiled with great care, it may not be deemed an assurance of product characteristics. devolo shall be liable only to the degree specified in the terms of sale and delivery.
-
Page 4: Table Of Contents
Connecting the devolo Magic 1 WiFi ............22 3.3.1 Starter Kit – Automatic set-up for a new devolo Magic PLC network ......22 3.3.2 Addition –... - Page 5 Warranty conditions ............... 51 devolo Magic 1 WiFi...
-
Page 6: Preface
After a brief introduction to „devolo Magic“ and to the in minor injuries or damage to property. devolo Magic 1 WiFi in Chapter 2, Chapter 3 tells you how An important note that should be obser- to successfully start using the adapter in your network. -
Page 7: Intended Use
The European Community WEEE perature fluctuations and moisture can damage both the Directive establishes minimum stan- product and the power line. devolo products may not be in- dards for handling stalled at a height above two metres unless an additional waste electrical and electronic equip- fas-tening mechanism is available. -
Page 8: Ce Conformity
Use only the provided accessories: Users do not need to carry out any maintenance on devolo Network cable: RJ45-RJ45 Cat-5e UTP devices. In the event of damage, disconnect the devolo de- vice from the mains supply by pulling it or its plug out of 1.3 CE Conformity... -
Page 9: Devolo On The Internet
CAUTION! Damage to housing from cleaning agents containing solvents devolo devices may be operated only on a mains power Clean only electroless and with dry cloth supply as described on the rating plate. To disconnect devolo devices from the mains supply, un- 1.5 devolo on the Internet... -
Page 10: Introduction
Be inspired by products that are astonishingly easy to in- stall, with impressive, innovative technology and unbea- Home is where devolo Magic is – in no time at all, table performance. devolo Magic transforms your house or flat into a multime- dia home of the future with noticeably higher speed, more Fig. -
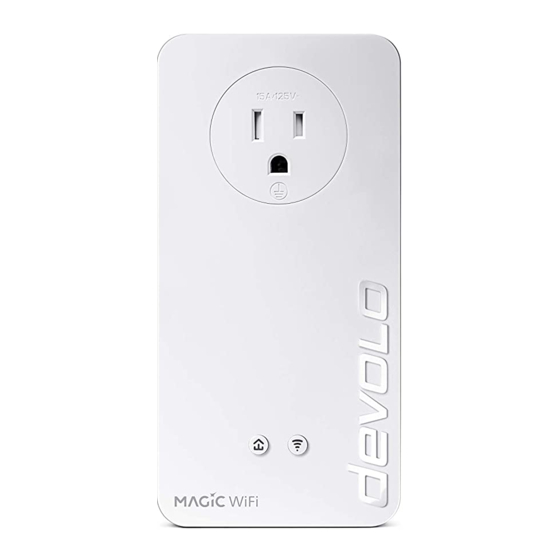
Page 11: The Devolo Magic 1 Wifi
WiFi frequently falls short due to ceilings and walls. The devolo Magic name concept has the following structure: To set up a devolo Magic network, you need at least two devolo Magic devices. For technical reasons, de- Product family devolo Magic vices from the devolo Magic series are not compatib- le with dLAN devices. - Page 12 2 network connectors devolo Magic 1 WiFi let you connect stationary net- work devices—such as a game console, TV or media receiver—to your Internet access point over the Powerline network (e.g. Internet router).
-
Page 13: Pairing - Establishing A Plc Connection
Fig. 3 Network connectors 2.3 Pairing – Establishing a PLC connec- tion devolo Magic adapters that are in the factory default con- dition, i.e. have been recently purchased or successfully re- set (see Chapter 3.5 Removing the devolo Magic adapter from a PLC network), automatically start to at-... -
Page 14: Reading The Plc Indicator Light
Magic adapter that you want to add to your existing devolo Magic network. The LED of this adap- In order to use a new devolo Magic 1 WiFi in your ter now also flashes white. devolo Magic- network, first you have to connect it to your existing devolo Magic adapters devices as a network. - Page 15 There may be electroma- gnetic or radio frequency interference on the power line. In this case, put the devolo Magic adapters clo- ser to each other or try to shut off the source of in- terference.
- Page 16 Magic adapters. Status 2: Flas- Status 2: Someone has triggered the "Identify de- hes at intervals vice" function on the web interface or in the devolo app. This function identifies the devolo Magic ad- 1 sec. apter being sought. White LED...
-
Page 17: Wifi Button
WiFi key for the initial installation of the Chapter 4 Network configuration. devolo Magic 1 WiFi is the device's WiFi key. You will find the unique key on the label on the back of the housing. ** Information on improving the transmission rate can be found in Chapter 5.4 Bandwidth optimization. -
Page 18: Reading The Wifi Indicator Light
Before the networking procedure, write down the WiFi twice; once to switch WiFi on, and again to activate key of the devolo Magic 1 WiFi. You can find the de- WPS. vice's unique key on the label on the rear side of the If the WiFi connection is switched on and you want housing. -
Page 19: Reset Button
Status 1: Someone has set the "WiFi Can be disabled LED" function in the LED settings on the web interface or in the devolo app to off. The WiFi LED is switched off and the de- volo magic adapter is still ready for use. -
Page 20: Network Jacks
Magic net- work. 2.3.5 Network jacks You can use the network jacks on the devolo Magic adap- ter to connect it to stationary devices such as computers, game consoles, etc. using a standard network cable. -
Page 21: Initial Use
Online documentation This chapter tells you everything you need to know to set Multiroom Kit: up and use your devolo Magic 1 WiFi. We describe how to connect the device and briefly describe the devolo software 2 devolo Magic 1 WiFi that comes with it. -
Page 22: Connecting The Devolo Magic 1 Wifi
Connect one devolo Magic 1 LAN 1-1 to your Internet access device's network connection (e.g. your Internet To set up a devolo Magic network, you need at least router). two devolo Magic adapters. CAUTION! Tripping hazard Lay the network cable in a barrier-free manner 3.3 Connecting the devolo Magic 1 WiFi... -
Page 23: Addition - Expanding An Existing Plc Network By Adding Another Devolo Magic 1 Wifi
(see Chapter 4.5 Powerline) devolo Magic 1 WiFi Before you can use the devolo Magic 1 WiFi in your Using devolo Cockpit or the devolo app. For more devolo Magic network, first you have to connect it to your information, refer to the following chapter. -
Page 24: Installation Of Devolo Software
More information about the web interface can be Downloading the devolo App found in Chapter 4 Network configuration. The devolo App is devolo's free app also for checking and Connecting devices to the WiFi network configuring WiFi, Magic and LAN connections for the ... - Page 25 Keep in mind that all settings that have already been made will be lost! To integrate the mains supply into another network, pro- ceed as described in Chapter 3.3.2 Addition – Expanding an existing PLC network by adding another devolo Magic 1 WiFi. devolo Magic 1 WiFi...
-
Page 26: Network Configuration
Network configuration 26 4 Network configuration By default, the web interface will open directly. Ho- wever, if an access password has been set via the op- The devolo Magic 1 WiFi has a built-in web interface that tion System... - Page 27 As soon as a change is made, an asterisk (*) is displayed in stomised information. the header of the corresponding menu page. Tables You can make changes within a table by clicking the corre- sponding table row. In edit mode, the corresponding table rows have a blue background. devolo Magic 1 WiFi...
-
Page 28: Overview
Click the Recycle bin icon to delete an entry. Click the Arrow icon to refresh a list. 4.3 Overview The Overview area shows the status of devolo Magic 1 WiFi and the connected LAN, PLC and WiFi devices. devolo Magic 1 WiFi... -
Page 29: Wifi
29 Network configuration Powerline You can view status information for your devolo Magic net- You can see status information for a cable-based network work and connected devices here. such as protocol information or the connection speed of both Ethernet ports, etc. here. -
Page 30: Status
MAC address, tion. the selected frequency band, the SSID, the transfer rates and the connection duration, information about whether Fig. 6: WiFi status devolo Magic 1 WiFi... -
Page 31: Wifi Networks
31 Network configuration 4.4.2 WiFi networks You can make all necessary changes to your WiFi network here. Fig. 7: WiFi networks devolo Magic 1 WiFi... - Page 32 Network configuration 32 WiFi network mode Channel The devolo Magic 1 WiFi supports both the parallel opera- There are 13 channels available in the 2.4 GHz frequency tion of the WiFi frequency bands and their separate use. band. The channels recommended for Europe are channels 1, 6 and 11.
-
Page 33: Guest Network
You can simply enter them into the Key field via the key- board. To set up a guest account, activate the Enable option. In addition, the devolo Magic also supports the WPA/ You can also enable or disable the guest account in WPA2 Enterprise Mode encryption key. As a central au- using the button. -
Page 34: Mesh
QR code option. Using the QR code, you can conveniently set up the connec- The mesh function of the devolo Magic 1 WiFi is switched tion to the guest network for mobile devices. Scanning the on by default. QR code automatically transfers the credentials for the guest network to the respective mobile device. - Page 35 WiFi router) to all WiFi access points (Single SSID). Start the procedure with the Start setup option and then press the WPS button of the device with the WiFi access data (SSID and WiFi password) to be applied. devolo Magic 1 WiFi...
-
Page 36: Schedule Control
Network configuration 36 4.4.5 Schedule control The Schedule control area lets you define when and if your WiFi is switched on and off. Fig. 10: WiFi schedule control devolo Magic 1 WiFi... -
Page 37: Wifi Protected Setup (Wps)
WiFi Alliance for ea- sily and quickly setting up a secure wireless network. The encryption keys of the respective WiFi devices are transmit- ted automatically and continuously to the other WiFi de- vice(s) in the wireless network. devolo Magic 1 WiFi... - Page 38 Enabling WPS encryption In order to be able to use WPS encryption, activate the Enable option. Fig. 11: WPS The devolo Magic 1 WiFi offers two different variants for By pressing the corresponding Start button on the transmitting these encryption keys: user interface under WiFi WPS Pushbutton.
-
Page 39: Neighbour Networks
Open the web interface of the WiFi client to be added transmit selected devolo Magic 1 WiFi. Confirm the encryption process as described there. Now the devices exchange their encryption keys and establish a secure WiFi connec- tion. The WiFi LED on the front panel indicates the syn- chronisation process by flashing. -
Page 40: Powerline
Network configuration 40 Fig. 12: Neighbour networks 4.5 Powerline Make all changes to your PLC network in the Powerline area. devolo Magic 1 WiFi... - Page 41 Pairing – Establishing a PLC connection you pick yourself. Enter this password for each In order to use a new devolo Magic 1 WiFi in your devolo Magic adapter in the Network password field and devolo Magic network, first you have to connect it to your confirm your settings by clicking the diskette icon.
- Page 42 Magic network, click Unpair. Receive (Mbps): Rate for receiving data Wait until the LED flashes red and then disconnect the Role: Role of the respective devolo Magic adapter on the devolo Magic adapter from the mains supply. network Advanced settings...
-
Page 43: Lan
43 Network configuration 4.6 LAN 4.6.1 Status You can see the current LAN status of the devolo Magic ad- You make changes to the network settings in the LAN apters here. The Ethernet area shows the network devices area. connected to the two network connectors Port 1 and Port 2 (e.g. -
Page 44: System
Network configuration 44 Confirm your settings by clicking the diskette icon. Then, restart the devolo Magic adapter (see Chapter 4.7.3 Configuration) to ensure that your changes take effect. IPv6 configuration If you want automatic IP address assignment and there is already a DHCP server present on the network for as- signing IP addresses (e.g. -
Page 45: Management
(e.g. computer) connected to the network interface is swit- the Device name (hostname) and Device location fields. ched on again, your devolo Magic adapter can also be ac- Both pieces of information are particularly helpful if mul- cessed over the electrical wiring again. -
Page 46: Configuration
Management System Save device configuration as file area. Then In order to restart the devolo Magic 1 WiFi, select the Re- enter a storage location and name for the settings file. start button in the System Configuration area. -
Page 47: Config Sync
Ensure that the update procedure is not inter- rupted. 4.7.5 Config Sync Config Sync makes it possible to copy the entire WiFi con- figuration of a devolo Magic 1 WiFi adapter to a new devolo Magic adapter. This includes the following settings: WiFi network Guest network Mesh WiFi Time control and time server settings. -
Page 48: Appendix
200 mW (channel 36 – 64) / Ambient conditions 10-90% Humidity, non-con- on power (EIRP) 23 dBm densing Max. transmitting po- 1,000 mW (channel 100 – 140) / Certifications 30 dBm 5.2 Frequency range and transmitting power devolo Magic 1 WiFi... -
Page 49: Channels And Carrier Frequencies
5680 MHz 5700 MHz Channels and frequencies in the 5-GHz band Channels and frequencies in the 2.4 GHz band Channel Carrier frequency 5180 MHz Channel Carrier frequency 5200 MHz 2412 MHz 5220 MHz 2417 MHz 5240 MHz devolo Magic 1 WiFi... -
Page 50: Bandwidth Optimization
2427 MHz wing "connection rules": 2432 MHz Plug the devolo Magic directly into a wall socket. 2437 MHz Avoid using power strips. This may impair the trans- 2442 MHz mission of the PLC signals. -
Page 51: Disposal Of Old Devices
5.6 Warranty conditions If your devolo device is found to be defective during initial installation or within the warranty period, please contact the vendor who sold you the product. The vendor will take care of the repair or warranty claim for you. - Page 52 Expanding an existing devolo Magic network 14 Reset 12 Factory default settings 19 Safety notes 8 Factory reset 19 SSID 33 Starting up a new devolo Magic network 13 System requirements 21 Integrated electrical socket 20 Intended use 7 devolo Magic 1 WiFi...
- Page 53 Time server 45 WiFi antenna 20 WiFi key 17 WiFi status display 18 WPA 34 WPA/WPA2 Enterprise Mode 33 WPA2 34 devolo Magic 1 WiFi...
Need help?
Do you have a question about the Magic 1 WiFi 2-1 and is the answer not in the manual?
Questions and answers