Table of Contents
Advertisement
Quick Links
Advertisement
Table of Contents

Subscribe to Our Youtube Channel
Related Manuals for V-ZUG GK16TIYSF


Summary of Contents for V-ZUG GK16TIYSF
- Page 1 Operating instructions Induction Teppan Yaki Glass ceramic hob...
- Page 2 The product family (model number) corresponds to the first alphanumerics on the identification plate. These operating instructions apply to: Type Product family GK16TIYSF 85A, 31008 GK26TIYSF 86A, 31009 Variations depending on the model are noted in the text. © V-ZUG Ltd, CH-6301 Zug, 2015...
-
Page 3: Table Of Contents
Contents 1 Safety precautions 4 Symbols used.................... 4 General safety precautions............... 5 Appliance-specific safety precautions ............ 6 Instructions for use.................. 7 2 Disposal 10 3 Using for the first time 11 4 Your appliance 12 Appliance overview.................. 12 Accessories.................... 12 Operating and display elements ............ 13 5 Operating the appliance 14 Switching the appliance on and off ............ 14 Selecting the frying zone ................ 14... -
Page 4: Safety Precautions
Safety precautions Symbols used Denotes important safety precautions. Failure to observe said precautions can result in injury or in damage to the appliance or fittings! Information and precautions that should be observed. Information on disposal Information about the operating instructions ►... -
Page 5: General Safety Precautions
1 Safety precautions General safety precautions • Read the operating instructions before using the appliance for the first time! • This appliance can be used by children aged 8 and above and by persons with reduced physical, sensory or mental cap- abilities, or lack of experience and/or knowledge, provided they are supervised or have been instructed on the safe use of the appliance and have understood the hazards involved. -
Page 6: Appliance-Specific Safety Precautions
1 Safety precautions Appliance-specific safety precautions • WARNING: If the surface is cracked or there is damage to the material thickness, the appliance must be switched off and disconnected from the electricity supply in order to avoid a possible electric shock. •... -
Page 7: Instructions For Use
1 Safety precautions Instructions for use Before using for the first time • The appliance must be installed and connected to the electricity supply in accordance with the separate installation instructions. Have a qualified fitter/ electrician carry out the necessary work. Correct use •... - Page 8 1 Safety precautions Caution: Risk of burns! • Overheated fat and oil can easily catch fire. Never attempt to extinguish burning oil or fat with water. Danger of explosion! Smother the flames with a fire blanket. Keep doors and windows closed. Caution: Risk of injury! •...
- Page 9 1 Safety precautions • The hob is an item for daily use: signs of usage such as scratches or visible material abrasion from pots or cookware are normal. Intensive use leads to more distinctive signs of usage. In such cases, the appliance continues to function perfectly and a complaint is not justified.
-
Page 10: Disposal
Disposal Packaging • All packaging materials (cardboard, plastic film (PE) and polystyrene (EPS)) are marked and should, if possible, be collected for recycling and disposed of in an environmentally friendly way. Disconnection • Disconnect the appliance from the mains. With a fixed appliance, this is to be carried out by a qualified electrician! Safety •... -
Page 11: Using For The First Time
Using for the first time The appliance must be installed and connected to the electricity sup- ply in accordance with the separate installation instructions. Have a qualified fitter/electrician carry out the necessary work. Unpleasant odours can develop during the initial operating hours of a cooking zone. -
Page 12: Your Appliance
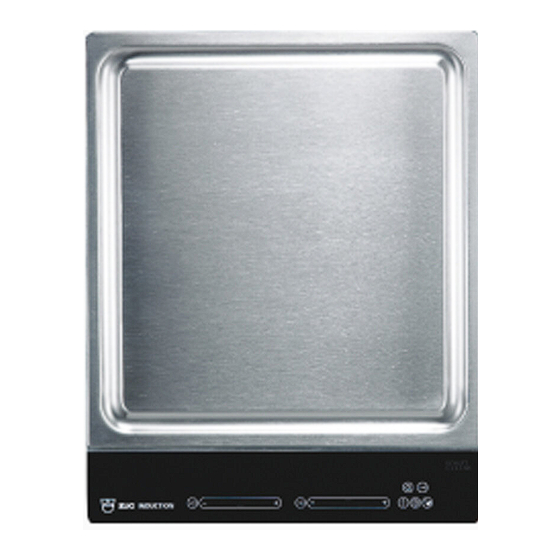
Your appliance Appliance overview GK16TIYSF GK26TIYSF Frying surface with 2 separately Frying surface with 2 separately heatable frying zones, heatable frying zones, total surface 316 × 334 mm total surface 479 × 334 mm Accessories • Wok cover, 250 mm in diameter • 2 spatulas... -
Page 13: Operating And Display Elements
4 Your appliance Operating and display elements GK16TIYSF/GK26TIYSF 1 2 3 Buttons Appliance ON/OFF Wipe protection ON/OFF Slider (for setting the power Bridging switch levels) Operating time Temperature selector Timer Displays Heating-up/cooling-down/residual-heat indicator Operating time activated Frying zone temperature display indicator... -
Page 14: Operating The Appliance
Operating the appliance Switching the appliance on and off Operation is roughly the same for all appliances. ► Switching on the appliance: Hold button down for 1 second. – flashes in the temperature display. – If there is no further input, the appliance switches off after 10 seconds for safety reasons. -
Page 15: Overview Of Frying Temperatures
5 Operating the appliance Overview of frying temperatures Cooking Frying temperature method Keep warm Prepared food under the wok cover Vegetables Gentle frying Fruit Fish and seafood, sausages, tofu, grilled cheese Omelettes , egg dishes, fried rice and noodles Roasting Chicken Burgers Meat (steak) -
Page 16: Bridging Function
5 Operating the appliance Bridging function The bridging function allows two individual cooking zones lying one behind the other to be switched on together and to be adjusted together. Switching the bridging function on ► Press the button for the required side. –... -
Page 17: Operating Time
5 Operating the appliance Operating time Do not leave the hob unattended during use. Risk of boiling over, burning on and igniting! With the operating time function, a Frying zone switches off automatically after a set time 1 min.–1 h 59 min.. Setting the operating time ►... - Page 18 5 Operating the appliance Switching the operating time function off before time ► Press the button. ► Press on the slider for the desired frying zone. flashes in the display for the operating time / timer. – – The frying zone continues to run. End of the operating time When the operating time is up –...
-
Page 19: Timer
5 Operating the appliance Timer The timer functions like an egg timer (1 min.–9 h 59 min.). Setting the timer ► Switch the appliance on. ► Press the button. flashes in the display. – ► Use any slider to set the required duration of the timer. To increase the duration of the timer, press and hold If the hob is switched off, a timer that has been activated continues to run. -
Page 20: Childproof Lock
5 Operating the appliance Childproof lock The childproof lock is to prevent the appliance from being accidentally switched on. Switching the childproof lock on ► Switch the appliance on. Ensure all frying zones are switched off. ► Press the buttons at the same time. –... -
Page 21: Wipe Protection
5 Operating the appliance 5.10 Wipe protection This function prevents unintentional changes to the power level if, for example, a cloth is wiped over the control panel. ► Press the button. – The illuminated point for the button is illuminated. ►... -
Page 22: User Settings
User settings The following user settings can be individually set and saved: User setting Setting value Factory setting Loudness of acoustic signal Medium High Acoustic signal at No acoustic signal end of operating Automatically off after time / timer 10 seconds Automatically off after 1 minute Default operating... -
Page 23: Changing User Settings
6 User settings Changing user settings ► When the hob is switched off, hold down the buttons at the same time for 3 seconds. – An acoustic signal is emitted. ► Press both sliders at the same time. – An acoustic signal is emitted. –... -
Page 24: Care And Maintenance
Care and maintenance Preferably, do not clean the appliance until it is cold. Burns hazard! Clean the hob after every use in order to prevent food residues from burning on. Cleaning dried-on and burnt-on dirt requires more effort. If the appliance is not cleaned correctly, the appearance and surface could be damaged. -
Page 25: Trouble-Shooting
Trouble-shooting What to do if ..the appliance does not function and all displays are dark? Possible cause Solution • The fuse or automatic cir- ► Change the fuse. cuit breaker of the flat or ► Reset the circuit breaker. house wiring system is de- fective. - Page 26 8 Trouble-shooting flash alternately in the display? Possible cause Solution • The automatic safety shut- ► Switch the cooking zone on again as re- off has been triggered. quired. If a cooking zone is in operation for a long time without the settings being changed, the appliance switches the cooking zone off auto- matically.
- Page 27 8 Trouble-shooting … are illuminated in the display? Possible cause Solution • An object , e.g. paper, un- ► Remove any objects in the drawer under- derneath the hob is affect- neath the hob. ing the air intake. ► Press any button to cancel the error mes- sage.
-
Page 28: Index
Index Appliance Operating and display elements.... 13 Switching on and off...... 14 Buttons.......... 13 Appliance-specific safety precautions ..6 Displays .......... 13 Operating time .......... 17 Displaying/changing ...... 17 End ............ 18 Bridging function ........16 Setting .......... 17 Switching off........ 16 Switching off before time.... 18 Switching on ........ 16 Packaging .......... - Page 29 9 Index Validity............2 Where is the identification plate? ............... 11 Wipe protection......... 21...
-
Page 30: Notes
Notes... -
Page 31: Service & Support
You can find the telephone number for your nearest V-ZUG service centre at www.vzug.com→Service→Service hotline. Technical enquiries, accessories, extended warranty V-ZUG is happy to help with your general administrative and technical enquiries, orders for accessories and spare parts, or information relating to advanced service agreements. - Page 32 ► Press the slider for the required frying zone or slide your finger along it to set the frying temperature. To switch frying zone off ► Press on the slider. To switch appliance off ► Press the button. J85A352-R03 V-ZUG Ltd Industriestrasse 66, P.O. Box 59, CH-6301 Zug info@vzug.com, www.vzug.com...
Need help?
Do you have a question about the GK16TIYSF and is the answer not in the manual?
Questions and answers