Vertiv Avocent ACS8000 Installer/User Manual
Advanced console server
Hide thumbs
Also See for Avocent ACS8000:
- Quick installation manual (4 pages) ,
- Installer/user manual (112 pages) ,
- User manual (54 pages)
Table of Contents
Advertisement
Advertisement
Table of Contents

Related Manuals for Vertiv Avocent ACS8000


Summary of Contents for Vertiv Avocent ACS8000
- Page 1 Avocent® ACS800/8000 Advanced Console Server Installer/User Guide...
- Page 2 The products covered by this instruction manual are manufactured and/or sold by Vertiv. This document is the property of Vertiv and contains confidential and proprietary information owned by Vertiv. Any copying, use or disclosure of it without the written permission of Vertiv is strictly prohibited.
-
Page 3: Table Of Contents
3.3.3 System 3.3.4 Network 3.3.5 IPSec(VPN) Advanced Settings 3.3.6 SNMP configuration 3.3.7 Ports 3.3.8 Pluggable devices 3.3.9 Authentication 3.3.10 Users accounts and user groups 3.3.11 Event notifications 3.3.12 Power management Vertiv | Avocent® ACS800/8000 Advanced Console Server Installer/User Guide |... - Page 4 Appendix F: Port Information for Communication with the DSView Software Appendix G: Accessing a Console System with a DSView Software Installation via Dial-up Appendix H: Internal Modem Appendix I: Regulatory Information Concerning the Analog Modem Installed in This Product Vertiv | Avocent® ACS800/8000 Advanced Console Server Installer/User Guide |...
-
Page 5: Introduction
1 INTRODUCTION The Avocent® ACS800/8000 Advanced Console Server serves as a single point for access and administration of connected devices, such as serial consoles, modems and power devices. The console server supports secure remote data center management and out-of-band management of IT assets from any location worldwide. NOTE: Unless noted, references to a console server refer to all models in the 800/8000 series. -
Page 6: Ipv4 And Ipv6 Support
1.1.7 VPN based on IPSec with NAT traversal If IPSec is enabled in the selected security profile, an administrator can use the VPN feature to enable secure connections. For more information, see IPSec(VPN) on page 26. Vertiv™ | Avocent® ACS800/8000 Advanced Console Server Installer/User Guide... -
Page 7: Packet Filtering
1.1.8 Packet filtering An administrator can configure a console server to filter packets like a firewall. Packet filtering is controlled by chains, which are named profiles with user-defined rules. The console server filter table contains a number of built-in chains that can be modified but not deleted. - Page 8 LAN1 and one LAN2 port may be used at the same time. If both LAN1 or LAN2 ports are connected, the fiber connection has priority. The following graphic and table illustrate the multi-protocol ports and LEDs. Vertiv™ | Avocent® ACS800/8000 Advanced Console Server Installer/User Guide...
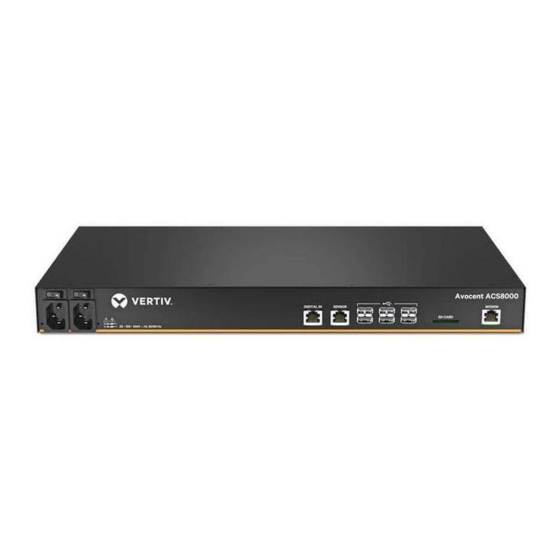
- Page 9 Figure 1.2 Avocent® ACS8000 Multi-Protocol Ports and LEDs Table 1.2 Multi-Protocol Ports and LED Descriptions NUMBER DESCRIPTION Multi-protocol ports. These two ports can accept RS422 and RS485 pin-outs in addition to Cyclades and Cisco pin-outs. LEDs. The STATUS LED is green when the console server is fully booted up and initialized. The P1 and P2 LEDs indicate an active power supply.
-
Page 10: Serial Port Led Status
Device is physically connected to the serial port Data buffering is enabled for the serial port Slow blink Telnet, SSH or Raw session is active Alert is active Fast blink TX or RX data activity Emergency Vertiv™ | Avocent® ACS800/8000 Advanced Console Server Installer/User Guide... -
Page 11: Getting Started
2 GETTING STARTED 2.1 Installation For information on installing your console server, see the ACS800 or ACS8000 Quick Installation Guide that shipped with your product. 2.2 Turning On the Console System Depending on the model, the console server is supplied with single or dual AC or DC power supplies. WARNING! Always execute the shutdown command through the web UI, CLI or DSView software under the Overview/Tools node before turning the console server off, then on again. -
Page 12: Configuring A Console System
Using a null modem cable, connect a terminal or a PC that is running terminal emulation software (such as HyperTerminal®) to the CONSOLE port on the back panel of the console server. An RJ-45 to DB9 (female) cross adaptor is provided. Vertiv™ | Avocent® ACS800/8000 Advanced Console Server Installer/User Guide... -
Page 13: Using Telnet Or Ssh
The terminal settings are 9600 bits per second (bps), 8 bits, 1 stop bit, no parity and no flow control. 2. Turn on the console server. When the console server completes initialization, the terminal will display the login banner plus the login prompt. 2.3.1 Using Telnet or SSH An authorized user can use a Telnet or SSH client to make a connection directly to the console of a device if all of the following are true:... - Page 14 At the beginning of a line, enter the hotkey defined for the SSH client followed by a period. The default is ~. -or- enter the text session hotkey for the CLI prompt and then enter exit. Vertiv™ | Avocent® ACS800/8000 Advanced Console Server Installer/User Guide...
-
Page 15: Accessing The Console System Via The Web Ui
3 ACCESSING THE CONSOLE SYSTEM VIA THE WEB UI Once you’ve connected your Avocent® ACS800/8000 Advanced Console Server to a network, you can access the console server with its web user interface (web UI). The web UI provides direct access to the console server via a graphical user interface instead of a command-based interface. - Page 16 6. Click Next to configure the Network or click the Network, Ports or Users link to open the appropriate screen. To configure network parameters: Select the Network link in the content area. 2. Enter the Hostname, Primary DNS and Domain in the appropriate fields. Vertiv™ | Avocent® ACS800/8000 Advanced Console Server Installer/User Guide...
-
Page 17: Web User Interface Overview For Administrators
3. Select the IPv4 or IPv6 method for the ETH0 interface. If using Static, enter the Address, Mask and Gateway in the appropriate fields. 4. Enable or disable LLDP (Link Layer Discovery Protocol). 5. Enable or disable IPv6 support. 6. Click Next to configure ports or click on the Security, Ports or Users link to open the appropriate screen. To configure Ports: Select the Ports link in the content area. -
Page 18: Expert Mode
Select Appliance Viewer from the Action column to open a connection to the console server. NOTE: The HTML5 viewer is the default viewer to open; however, if an administrator has selected the JNLP viewer, the Java® applet viewer appears. Vertiv™ | Avocent® ACS800/8000 Advanced Console Server Installer/User Guide... -
Page 19: System Tools
The console server supports the storage of two firmware images. As the firmware is upgraded, the image not currently running will be overwritten with the new firmware. The latest firmware can be downloaded from the Vertiv website and accessed by the console server using a File Transfer Protocol (FTP), Secure File Transfer Protocol (SFTP) or Secure Copy Protocol (SCP) server. - Page 20 An administrator can also verify the configuration by comparing it to another known or trusted configuration. The console server will declare the configuration to either be Unchanged or Modified after the verification is complete. Vertiv™ | Avocent® ACS800/8000 Advanced Console Server Installer/User Guide...
- Page 21 Configuration integrity works with and relies on the console server's saved and restored configuration files. It's also dependent on the zero-touch provisioning feature. NOTE: In order to use configuration integrity, you must save the configuration using the compressed file option. The compressed file format captures more configuration data to ensure the accuracy of the configuration integrity results.
-
Page 22: System
USB storage and SD card can be disabled to restrict the type of pluggable devices for security reasons. The 1-wire sensors can also be disabled in this section. NOTE: Disabling Pluggable Device Detection or changing the Storage Device setting will only be effective after a reboot. Vertiv™ | Avocent® ACS800/8000 Advanced Console Server Installer/User Guide... - Page 23 5. Under the Serial Devices heading, select whether port access is controlled by user and group authorization or whether port access settings to apply to all users. 6. Under Bootp Configuration retrieval, enable or disable the service. 7. Enable/disable SSH authentication via username/password. 8.
- Page 24 Enter the full URL of the online help, ending in /index.html, on the local web server in the Online Help URL field. Click Save. Vertiv™ | Avocent® ACS800/8000 Advanced Console Server Installer/User Guide...
- Page 25 It is generally advisable for you to use the online help system provided with the product or download the online help .zip file and run it from a local server. The system administrator can download the online help from Vertiv . For more information on downloading the online help, ™...
-
Page 26: Network
The eth0 MAC address is always used in bonding mode, no matter which interface is active. NOTE: After enabling or disabling bonding, you must reboot the console server for the change to take effect. Vertiv™ | Avocent® ACS800/8000 Advanced Console Server Installer/User Guide... - Page 27 Routing type The console server supports multiple routing tables for flexible policy routing. Multiple routing tables can not be enabled at the same time network failover or bonding is enabled. To enable multiple routing tables: Click Network - Settings. 2. Under Multiple Routing , click the Enable IPv4 Multiple Routing Tables radio button. Network failover To ensure a console server can be relied upon to provide access to critical devices during a network outage, it should be configured for network failover.
- Page 28 To edit a host: Select Network - Hosts. 2. Click on the IP address of the hostname you want to edit. 3. Enter a new hostname and alias, if applicable, then click Save. Vertiv™ | Avocent® ACS800/8000 Advanced Console Server Installer/User Guide...
- Page 29 Firewall Administrators can configure the console server to act as a firewall. By default, three built-in chains accept all INPUT, FORWARD and OUTPUT packets. Select the Add, Delete or Change Policy buttons to add a user chain, delete user-added chains and to change the built-in chains policy. Default chains can have their policy changed (Change Policy) to accept or drop, but cannot be deleted.
- Page 30 To configure the Fortinet® Fortigate firewall, you need to create an internal Certificate of Authority (CA) server that generates RSA certificates the console server uses for authentication. For information on creating a CA on an Ubuntu® server, see Creating a Vertiv™ | Avocent® ACS800/8000 Advanced Console Server Installer/User Guide...
- Page 31 Creating a tunnel on the server To create a tunnel on the server: From the System tab of the Fortigate web UI, click Certificates and import the CA certificate and the SERVER certificate that was generated from the easy-rsa server. 2. From the User & Device tab, click PKI and create a new user named user1 with a CA named CA_Cert_1. Then create a user group named user_group1 and put user1 in that group.
- Page 32 Diffie-Hellman Group Key Lifetime (Seconds) 86400 Local ID C=<country> S=<state> L=<city> O=<organization> Edit Phase 2 Name <name> Comments <comments> Local Address Subnet 0.0.0.0/0.0.0.0 Remote Address Subnet 0.0.0.0/0.0.0.0 Phase 2 Proposal Encyption AES128 Authentication SHA1 Vertiv™ | Avocent® ACS800/8000 Advanced Console Server Installer/User Guide...
- Page 33 Table 3.4 VPN Tunnel Configuration Parameters (continued) PARAMETER VALUE Enable Replay Detection Enabled Enable Perfect Forward Secrecy (PFS) Enabled Diffie-Hillman Group Local Port All Enabled Remote Port All Enabled Protocol All Enabled Autokey Keep Alive Enabled Key Lifetime Seconds Seconds 43200 4.
- Page 34 Enabled Comments <Comments> Enable this policy Enabled 7. From the Policy & Objects tab, click Policy - IPv4 to create Firewall Policy 2 with the following settings, then click OK. Vertiv™ | Avocent® ACS800/8000 Advanced Console Server Installer/User Guide...
- Page 35 Table 3.8 Firewall Policy 2 Configuration PARAMETER VALUE Incoming Interface internal Source Address local_lan Outgoing Interface forti2acs Destination Address ipsec_vpn_range Schedule always Service Action ACCEPT Firewall / Network Options Use Outgoing Interface Address Enabled Security Profiles Antivirus, Web Filter, Application Control, SSL Inspection All OFF Traffic Shaping Shared Shaper, Reverse Shaper, Per-IP Shaper...
- Page 36 4. Test the communication from the remote subnet's target client to the VPN DHCP IP address of the console server. NOTE: To test communication, enter ping from the target client to the VPN DHCP IP address the console server and from the console server to the subnet's target client. Vertiv™ | Avocent® ACS800/8000 Advanced Console Server Installer/User Guide...
-
Page 37: Ipsec(Vpn) Advanced Settings
3.3.5 IPSec(VPN) Advanced Settings The IPSec(VPN) configuration page includes the Advanced Settings for the ipsec.conf file. These settings, described in the following table, are displayed when the Show Advanced Settings checkbox is enabled. Table 3.10 Advanced Settings Descriptions NAME DESCRIPTION Protocols used to exchange cryptographic keys. -
Page 38: Ports
2. Click the checkbox for each port you want to configure. 3. Click the Set CAS button. Use the drop-down menus to enable or disable the port and set the RJ-45 pin-out, speed, parity, data bits, stop bits and flow control. Vertiv™ | Avocent® ACS800/8000 Advanced Console Server Installer/User Guide... - Page 39 NOTE: Selecting AUTO for the RJ-45 pin-out enables automatic detection for either Cyclades or Cisco pin-outs for RS- 232 devices. 4. Click Next or click the CAS link. a. Enter the port name (when only one port was selected) or the port name prefix (when more than one port were selected).
- Page 40 8. Click Save. Vertiv™ | Avocent® ACS800/8000 Advanced Console Server Installer/User Guide...
- Page 41 Table 3.11 CAS Profile Parameters PARAMETER DESCRIPTION Physical Status Defines the status of the serial port as either enabled or disabled. Default: Disabled. RJ-45 Pin-Out Defines the serial port pin-out as Auto, Cyclades or Cisco. Ports 1 and 2 also support RS-422 and RS-485 pin-outs. Default: Auto. Speed Defines the speed as 1200, 2400, 4800, 9600, 19200, 38400, 57600, 115200 or 230400.
- Page 42 2. Click the checkbox for a serial port with a connected modem. 3. Click the Set Dial-In button and use the drop-down menus to configure the dial-in settings. 4. Configure the PPP parameters (address, authentication and so on) and click Save. Vertiv™ | Avocent® ACS800/8000 Advanced Console Server Installer/User Guide...
- Page 43 Table 3.12 Dial-in Parameters PARAMETER DESCRIPTION Status Enables or disables the port. Default: Disabled. Speed The speed that will be used by mgetty to configure the serial device. Default: 38400 bps. Init Chat Chat for modem initialization. Default: "" \d\d\d+++\d\d\dATZ OK. Configures the local and the remote IP address for the the PPP link.
- Page 44 NOTE: If the selected port is configured as a CAS Profile, the following parameters will not be copied: Port Name, TCP Port Alias, IPv4 Port Alias, IPv6 Port Alias and Power (merged outlets). To reset one or more serial ports to their factory configuration: Select Ports - Serial Ports. Vertiv™ | Avocent® ACS800/8000 Advanced Console Server Installer/User Guide...
- Page 45 2. Click the checkbox for one or more serial ports you want to reset to their factory configuration, then click the Reset To Factory button. NOTE: Serial ports are set to the CAS Profile and disabled in the factory configuration. Multi-Session Menu An administrator can enable or disable the Multi-Session Menu.
- Page 46 Select a speed from the Default Speed on Auto Discovery Failure drop-down menu and Probe Speed List. d. Click Save. 3. To add a new probe or match string or delete an existing string, perform the following steps. a. Select Probe Strings or Match Strings. Vertiv™ | Avocent® ACS800/8000 Advanced Console Server Installer/User Guide...
- Page 47 b. To add a string, click Add, enter a new string in the New Probe String or New Match String field and click Save. c. To delete a string, select the checkbox for the string and click Delete. 4. Click Save. To configure the input/output strings used by auto answer: Select Ports - CAS Profile - Auto Answer.
- Page 48 2. Enter the Action Name, URL, POST Data, Username and Password in the appropriate fields and use the drop- down menu to select GET or POST as the HTTP Method for each RESTful option. Click Save when finished. When configuring actions, the following context variables can be used. Vertiv™ | Avocent® ACS800/8000 Advanced Console Server Installer/User Guide...
- Page 49 Table 3.16 Context Variables Descriptions CONTEXT VARIABLE DESCRIPTION $PORT Identifies the serial port (1-48) when the menu is invoked. $PORTNAME The name of the port. $IPPORTALIAS The IPv4 alias of the port. $TCPPORTALIAS The TCP (Telnet port) alias of the port. $ACSHOSTNAME The host name of the console server. $ACSIPADDR The IP address of the console server.
- Page 50 3. Enter the name and phone number used to perform the callback in the appropriate fields and click Save. To configure PPP OTP users for ports with the Dial-in Profile: Select Ports - Dial-In Profile - Secure Dial-In - PPP OTP Users. Vertiv™ | Avocent® ACS800/8000 Advanced Console Server Installer/User Guide...
- Page 51 2. Click Add. 3. Enter the username and passphrase in the appropriate fields and click Save. NOTE: This PPP OTP user will establish PPP connection after being successfully authenticated. To configure EAP-TLS as PPP authentication for ports with the Dial-in Profile: Select Ports - Auxiliary Ports.
-
Page 52: Pluggable Devices
Configure the event that will trigger the establishment of the connection: DCD Regards or Always. 3.3.8 Pluggable devices The console server supports a variety of pluggable devices connected to its USB ports. Some models also support a single SD card in the SD card slot. Vertiv™ | Avocent® ACS800/8000 Advanced Console Server Installer/User Guide... -
Page 53: Authentication
NOTE: When a pluggable device is not in the current list of supported pluggable devices, the console server may attempt to configure the device with standard settings, allowing it to work normally. Also, when a pluggable device is not listed in the internal database, the Device Info column may show no text at all or show different text based on the type of card. - Page 54 Confirm Secret field. 5. Enter the desired number of seconds for server time-out in the Timeout field. 6. Enter the desired number of retries in the Retries field. Vertiv™ | Avocent® ACS800/8000 Advanced Console Server Installer/User Guide...
-
Page 55: Users Accounts And User Groups
7. If you select the Enable Service-Type attribute to specify the authorization group checkbox, enter the authorization group name for each of the following Service Types: Login, Framed, Callback Login, Callback Framed, Outbound and Administrative. 8. Click Save. To configure a TACACS+ authentication server: Select Authentication - Authentication Servers - TACACS+. - Page 56 Available appliance access rights are: • View Appliance Information • Disconnect Sessions • Reboot Appliance • Appliance Flash Upgrade and Reboot Appliance Vertiv™ | Avocent® ACS800/8000 Advanced Console Server Installer/User Guide...
- Page 57 • Configure Appliance Settings • Configure User Accounts • Backup/Restore Configuration • Shell Access • Transfer Files To add new users: Click Users - Local Accounts - User Names. The User Names screen is displayed with a list of all users. 2.
- Page 58 NOTE: The Appliance Access Rights screen for the admin and appliance-admin user groups is read-only and cannot be changed. Unchecking any box and clicking Save will result in an error message. The console server will maintain all rights selected. Vertiv™ | Avocent® ACS800/8000 Advanced Console Server Installer/User Guide...
- Page 59 appliance-admin group Appliance-admin user group members have access to the serial ports and power management options, unless that access is restricted by the security profile. Members of the group also share all of the appliance access rights as admin except for Configure User Accounts and Shell Access, which are permanently disabled for this group.
- Page 60 Add button. You can remove any targets from the box on the right by double-clicking on the target or by selecting the target and clicking the Remove button. 6. Select the desired access rights. Vertiv™ | Avocent® ACS800/8000 Advanced Console Server Installer/User Guide...
- Page 61 7. Click Save. The Serial screen will appear and show the serial target devices you have authorized for use by the user group with configured permission(s). 8. Edit the access rights by selecting the checkbox next to one or more of the target names in the list as needed and click Edit.
- Page 62 In the console server, configure new authorization groups RADIUS_1 and RADIUS_2, and configure the access rights for these groups. In the Radius server, configure the user regina with the following attribute: FramedFilterID = group_name=RADIUS_1,RADIUS_2; -or- Vertiv™ | Avocent® ACS800/8000 Advanced Console Server Installer/User Guide...
-
Page 63: Event Notifications
FramedFilterID = RADIUS_1,RADIUS_2; -or- FramedFilterID = RADIUS_1; FramedFilterID += RADIUS_2; Then, configure the user special with the following attribute: FramedFilterID = group_name=admin; During the authentication phase, the console server will receive the attribute FramedFilterID from the RADIUS server. The user regina belongs to authorization group RADIUS_1 and RADIUS_2 and the user special belongs to authorization group admin. - Page 64 (destination) of the buffering. Segment size, which is specified in kilobytes, determines the size of each data buffering file saved. Spare segments determines how many additional historical buffering files of segment size are retained and named with suffix .1, .2 etc. Vertiv™ | Avocent® ACS800/8000 Advanced Console Server Installer/User Guide...
-
Page 65: Power Management
To configure data buffering: Select Events and Logs - Data Buffering. 2. Enter the segment size in kilobytes and spare segments in the Local Data Buffering Settings section. 3. In the NFS Data Buffering Settings section, enter the following information: NFS Server, NFS Path, Segment Size (Kbytes) and Spare Segments. - Page 66 Select the checkbox next to the PDU you want to upgrade and click the Upgrade Firmware button. NOTE: You can upgrade the firmware for multiple PDUs at the same time for Avocent PM PDUs and Vertiv (MPH2, MPH and MPX with RPC2 cards installed) PDUs only. If upgrading PDUs in a daisy chain, select only the first PDU in the chain as the rest of the PDUs in the chain will be upgraded automatically.
- Page 67 5. Once the upgrade has started, click Finish. A message stating the upgrade has successfully started will display. The PDU Overview page displays the upgrade status. The PDU reboots when the upgrade is complete. To view a PDU’s information and manage outlets: Select Power Management - PDUs.
- Page 68 By selecting the Network PDUs node, an administrator can add new Network PDUs or edit configuration of current ones. The following functionalities are supported for Network PDUs:Power Control (turn on, turn off and cycle/reboot) outlets, rename the PDU and rename the outlets Vertiv™ | Avocent® ACS800/8000 Advanced Console Server Installer/User Guide...
-
Page 69: Sensors
To add a network PDU: Select Power Management – Network PDUs. 2. Click Add. 3. Enter the IP address of the network PDU. 4. Select the PDU type. 5. Enter the interval to poll the PDU for the status of the outlets. 6. - Page 70 2. Click the number associated with the position of the sensor to open the settings page. 3. Enter the name and location of the sensor and use the drop-down menu to select the sensor type. Vertiv™ | Avocent® ACS800/8000 Advanced Console Server Installer/User Guide...
-
Page 71: Active Sessions
4. A Digital In sensor can be configured to generate an event by configuring the Alarm parameter. Use the drop- down menu to select Alarm when open, Alarm when closed or to disable the alarm. Digital Out sensors The ACS800 Advanced Console System supports two digital outputs. The digital outputs are remote-controlled relay ports that can be used to open or close an electric circuit. -
Page 72: Web Ui Overview For Regular Users
Click Outlet Groups to manage groups of outlets on connected PDUs. Click UPS to monitor and PDUs Outlet control connected UPS devices. Groups Change Password Change your own password. Vertiv™ | Avocent® ACS800/8000 Advanced Console Server Installer/User Guide... -
Page 73: Appendices
APPENDICES Appendix A: Technical Specifications Table A.1 Technical Specifications for the ACS8000 Advanced Console System Hardware CATEGORY VALUE General Information Dual Core ARM Cortex-A9 @ 766MHz Memory 1GB DDR3L / 16GB eMMC FLASH • Two dual media 1000Base-TX Copper/1Gbps SFP Fiber ports •... - Page 74 20% to 80% relative humidity (non-condensing) across the operating temperature range Dimensions Height x Width x 1.3 x 8.38 x 7.16 in ( 3.302 x 21.2852 x 18.1864 cm) Depth Weight 3.8 pounds (1.72365 kg) Vertiv™ | Avocent® ACS800/8000 Advanced Console Server Installer/User Guide...
-
Page 75: Appendix B: Zero-Touch Provisioning
Appendix B: Zero-touch provisioning The zero-touch provisioning feature is an extension of the console server's BootP configuration retrieval and is a method for deploying many console servers into an environment. You will need a valid DHCP server and TFTP server to use zero-touch provisioning. - Page 76 After creating the setup file, it must be copied to a TFTP server. The following example shows what to enter in your system to copy the files to your server and then verify that the console server can download the file. Copying the Setup File to a TFTP server: Vertiv™ | Avocent® ACS800/8000 Advanced Console Server Installer/User Guide...
- Page 77 Example: tftpd-hpa Default TFTP root directory /var/lib/tftpboot ~$ sudo cp zerotouch.setup /var/lib/tftpboot B.4 Obtaining the setup file After obtaining the IP addresses for both the console server and the TFTP server where you uploaded the setup file, the zero-touch provisioning process will attempt to download the setup file. Once the console server downloads the setup file, it will use the information contained in the file to obtain the image and/or process the configuration of the console server.
- Page 78 From the sidebar of the web UI, click System - Security - Security Profile. 2. Under the Bootp Configuration Retrieval heading, check the boxes to enable Bootp and enable Live Configuration Retrieval. Vertiv™ | Avocent® ACS800/8000 Advanced Console Server Installer/User Guide...
- Page 79 3. Use the drop-down to select eth0 as the Bootp Interface. 4. Click Save. 5. From the sidebar of the web UI, click Monitoring - Zero-touch Log then click Clear Log. To enable zero-touch provisioning from the CLI: Log in to the console server as the root user. 2.
-
Page 80: Appendix C: Bootp Configuration Retrieval
Appendix C: Bootp Configuration Retrieval You can set your console server to be reconfigured during boot or at IP renewal. To generate configuration to be retrieved: Click System Tools - Save Configuration and save the configuration to either an FTP site or locally. -or- Use the list_configuration command to get the CLI template scripts, edit the configuration of the console server and save it as a text file. -
Page 81: Appendix D: Recovering A Console System Password
5. The console server will boot into single-user mode. Type passwd and press Enter. 6. Enter the new password and confirm. 7. Type reboot and let the console server boot normally. Vertiv™ | Avocent® ACS800/8000 Advanced Console Server Installer/User Guide... -
Page 82: Appendix E: Ssh Setup Allowing Rsa Keypair Authentication Instead Of A Username/Password
Appendix E: SSH Setup Allowing RSA Keypair Authentication Instead of a Username/Password To set up a client Linux system to access the ACS800/8000 Advanced Console System: On the console server, create a new admin user. For example: acsadmin. 2. Add the new user to the admin and shell-login-profile groups. 3. - Page 83 This page intentionally left blank Vertiv™ | Avocent® ACS800/8000 Advanced Console Server Installer/User Guide...
-
Page 84: Appendix F: Port Information For Communication With The Dsview Software
Appendix F: Port Information for Communication with the DSView Software The following ports on an Avocent® ACS800/8000 Advanced Console Server can accept connections from the DSView management software: • TCP port 3502 (https) • TCP port 3871 (adsap2) • UDP port 3211 (aidp) •... -
Page 85: Appendix G: Accessing A Console System With A Dsview Software Installation Via Dial-Up
8. Select DSView Settings - Dial-up - IP Addresses. 9. Click Generate Automatically to set the IP address automatically, or enter the PPP Local IP address and Appliance IP address manually. Vertiv™ | Avocent® ACS800/8000 Advanced Console Server Installer/User Guide... - Page 86 10. Select DSView Settings - Dial-up and click Save. 11. To configure a console server to receive the dial-up connection within the DSView software: 12. In a Units view window containing appliances, select the ACS 800/8000 you want to configure. 13.
-
Page 87: Appendix H: Internal Modem
ATDT7678900<CR> Instructs the modem to dial the number 7678900 and attempt to connect to the remote device. ATS0=2<CR> Enables auto answer option. When the modem detects a ring, it will attempt to answer after two rings. Vertiv™ | Avocent® ACS800/8000 Advanced Console Server Installer/User Guide... - Page 88 Table H.2 Basic AT Commands COMMAND DESCRIPTION ATA/ Repeat the previous command. Answer. ATB0 CCITT operation at 300 or 1200 bps. ATB1 Bell operation at 300 or 1200 bps (default). Dial. ATD0-9 Dial the DTMF digits 0 to 9. ATDA-D Dial the DTMF digits A, B, C and D.
- Page 89 Selects asynchronous operation in normal mode (allows speed buffering and flow control but no error correction). AT&V Displays modem’s current configuration. When this command is entered, the modem will display its current command and register settings. AT%C0 Disables data compression. Vertiv™ | Avocent® ACS800/8000 Advanced Console Server Installer/User Guide...
- Page 90 Table H.2 Basic AT Commands (continued) COMMAND DESCRIPTION AT%C1 Enables MNP 5 data compression. AT%C2 Enables V.42 bis data compression (sets S46 bit 1). AT%C3 Enables V.42 bis and MNP 5 data compression (default). AT%E0 Disables line quality monitor and auto-retrain. AT%E1 Enables line quality monitor and auto-retrain.
- Page 91 (Q0) or not issued (Q1). The Xn, Wn commands and register S95 determines which result code format the modem will display to indicate the type of connection established. There are more than 300 codes. The most commonly used are listed in the table below. Vertiv™ | Avocent® ACS800/8000 Advanced Console Server Installer/User Guide...
- Page 92 Table H.6 Basic Result Code Listing NUMERIC VERBOSE DESCRIPTION The modem has received and acknowledged the command. CONNECT Connection made at 300bps or extended result codes are off (X0). RING An incoming ring signal has been detected. NO CARRIER This result code reflects either an intended disconnect or a failure to complete a connection. ERROR An invalid command was issued to the modem.
- Page 93 “RING.” In order for this feature to work properly, the telephone line connected to the modem must subscribe to caller ID service offered by the local telephone company. A sample of the displayed information is shown below: RING DATE = 0513 Vertiv™ | Avocent® ACS800/8000 Advanced Console Server Installer/User Guide...
- Page 94 TIME = 1346 NMBR = 408 767 8900 NAME = RADICOM RESEARCH RING The CID information can either be presented formatted as shown previously or unformatted. The +VCID and +VRID commands control the modem CID option. Table H.8 Caller ID Information COMMAND PARAMETER DESCRIPTION...
-
Page 95: Appendix I: Regulatory Information Concerning The Analog Modem Installed In This Product
US:AAAEQ##Txxxx. The digits represented by ## are the REN without a decimal point (e.g., 03 is a REN of 0.3). For earlier products, the REN is separately shown on the label. Vertiv™ | Avocent® ACS800/8000 Advanced Console Server Installer/User Guide... - Page 96 4. If this equipment causes harm to the telephone network, the telephone company will notify you in advance that temporary discontinuance of service may be required. But if advance notice isn't practical, the telephone company will notify the customer as soon as possible. Also, you will be advised of your right to file a complaint with the FCC if you believe it is necessary.
- Page 97 8. For correct operation, total of the RN’s of all devices connected to a single line at any time should not exceed 5. I.6 Japan Requirements The modem conforms to (JATE) Japan Approval Institute for Telecommunications Equipment: MT5692SMI – JATE Approval A09-0123001 Vertiv™ | Avocent® ACS800/8000 Advanced Console Server Installer/User Guide...
- Page 98 This page intentionally left blank Vertiv™ | Avocent® ACS800/8000 Advanced Console Server Installer/User Guide...
- Page 99 Vertiv™ | Avocent® ACS800/8000 Advanced Console Server Installer/User Guide...
- Page 100 VertivCo.com | Vertiv Headquarters, 1050 Dearborn Drive, Columbus, OH, 43085, USA © 2018 Vertiv Co. All rights reserved. Vertiv and the Vertiv logo are trademarks or registered trademarks of Vertiv Co. All other names and logos referred to are trade names, trademarks or registered trademarks of their respective owners.
Need help?
Do you have a question about the Avocent ACS8000 and is the answer not in the manual?
Questions and answers