Table of Contents
Advertisement
Quick Links
Advertisement
Table of Contents

Related Manuals for Pari LC series


Summary of Contents for Pari LC series
- Page 1 LC Family ©2016 PARI GmbH Spezialisten für effektive Inhalation, 022D0103-O 06/16...
-
Page 3: Table Of Contents
– 3 – Instructions for use Information as of: 2016-02. All rights reserved. Technical and design changes and printing errors reserved. Principle shown in illustrations. IMPORTANT INFORMATION.......... General................Information about the instructions for use ......Structure of safety instructions ......... Treatment of babies, children and anyone who requires assistance ................ - Page 4 – 4 – MISCELLANEOUS ............Disposal................Technical data ..............Explanation of symbols ............ Contact ................
-
Page 5: Important Information
If these instructions for use are lost, you can request another copy from PARI GmbH [see: Contact, page 23]. The instruc- tions for use for some products can be retrieved on the internet in both German and English. Simply visit: www.pari.com (on the respective product page). 1.3 Structure of safety instructions... -
Page 6: Treatment Of Babies, Children And Anyone Who Requires Assistance
(tracheostoma) Tracheostomised patients cannot use the mouthpiece to inhale and therefore need the PARI TRACHEO SET with a special tracheostoma mask for an inhalation session. When the tracheostoma mask is used, the inspiratory valve must not be attached to the nebuliser. -
Page 7: Hygiene
– 7 – 1.6 Hygiene Observe the following hygiene instructions: – Do not use product components unless they have been thoroughly cleaned and dried. Contamination and residual moisture encourage the growth of bacteria, which increases the risk of infection. – Before every use and cleaning, wash your hands thoroughly. -
Page 8: Product Description
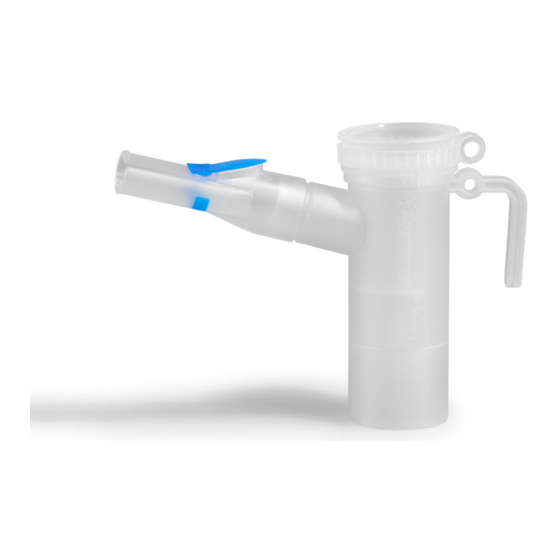
– 8 – PRODUCT DESCRIPTION 2.1 Components Check that all components of your PARI product are contained in your package. If anything is missing, please notify the dealer from whom you purchased the PARI product immediately. (1) Nebuliser lower section... -
Page 9: Intended Purpose
(depending on the quantity of medication), but in no case more than 20 minutes. Only original PARI compressors and PARI accessories must be used. PARI GmbH cannot be held liable for damage caused by using PARI nebulisers with compressors or accessories from other manufacturers. Please read and follow the instructions for use of the com- pressor and of the accessories you are using. -
Page 10: Product Variants And Combinations
– 10 – 2.5 Product variants and combinations The nebulisers of the PARI LC family can be operated with all PARI compressors that are available on the market. The nebuliser is used for treatment of the airways in adults and children aged approx. 4 years and older. A special baby mask with baby bend must be used for treating children and infants who are not yet able to inhale using the mouthpiece. -
Page 11: Inhalation
– 11 – INHALATION 3.1 Assembling the nebuliser CAUTION Check all nebuliser components and the accessories before each use. Replace any broken, misshapen or seriously discoloured parts. Please also follow the instructions for as- sembly given below. Damaged components and/or an in- correctly assembled nebuliser may impair functioning of the nebuliser and thus treatment as well. -
Page 12: Filling With Medication
– 12 – Using with a mouthpiece • Fit the mouthpiece onto the nebuliser. Using with a child mask • Attach the child mask to the nebuliser. When using a mask, make sure that the expiratory valve plate is pressed out so you can exhale freely during an inhalation session. - Page 13 – 13 – • Pour the quantity of medication prescribed by your doctor into the nebuliser nozzle attach- ment. Info: Ensure that the medica- tion is filled no higher than the upper scale marking (max. level 8 ml). Overfilling can greatly impair the nebulisation of medication.
-
Page 14: Performing The Inhalation
– 14 – 3.3 Performing the inhalation Before starting the treatment, ensure that all parts are firmly connected to each other. Perform the treatment until the aerosol is used up (indicated by a change in the sound of the nebuliser). Several drops of medication will remain in the nebuliser after the treatment has ended. -
Page 15: Cleaning And Disinfection At Home
– 15 – CLEANING AND DISINFECTION AT HOME The nebuliser and the accessories used must be cleaned thoroughly after each application and disinfected at least once a day. The connection tube cannot be cleaned or disinfected. 4.1 Preparation • Detach the tubing from the nebuliser. •... -
Page 16: Cleaning
– 16 – 4.3 Cleaning • Place all disassembled com- ponents in warm tap water with a little dishwashing liquid for at least 5 min. If necessary, use a clean brush to remove loose dirt (the brush must be re- served exclusively for this pur- pose). - Page 17 – 17 – In boiling water • Place all the individual parts in boiling water for at least 5 minutes. Use a clean pot and fresh water with reduced calcium content, if possible. Plastic will melt if it comes into contact with the hot base of the pot.
- Page 18 – 18 – With a microwave disinfector Microwave disinfectors ensure effective disinfection of the product components in a standard commercial microwave oven. Place the product components in the disinfector with enough space between them to allow the steam to reach all surfaces reliably. Maintain the following times when disinfecting: Wattage Disinfection time...
- Page 19 – 19 – CAUTION The product components must not be exposed to microwave radiation unless they are in a microwave disinfector. If they are heated in a microwave oven without the protection of the disinfector, the individual parts will be damaged. Do not use the grill function because this too will damage the individual parts.
- Page 20 – 20 – Chemical cleaning with disinfection Cleaning and disinfection can be carried out in a single cycle using a chemical preparation process. For this, use the clean- ® ing disinfecting agent Bomix plus. To ensure safety when handling chemicals, follow the instruc- tions for use of the disinfecting agent, particularly the accompa- nying safety instructions.
-
Page 21: Visual Inspection
– 21 – 4.5 Visual inspection Inspect all product components after each cleaning and disinfection. Replace any broken, misshapen or seriously discoloured parts. 4.6 Drying and storage • Place all parts on a dry, clean and absorbent surface and let them dry completely. - Page 22 All product components can be disposed of with domestic waste unless this is prohibited by the disposal regulations pre- vailing in the respective member countries. 5.2 Technical data Aerosol data according to DIN EN 13544-1 is available on re- quest from PARI GmbH. Operating gases Air, oxygen Minimum flow 3.0 l/min.
- Page 23 – 23 – 5.3 Explanation of symbols The following symbols can be found on the product and/or the packaging: Manufacturer The product satisfies the basic requirements as set forth in Appendix I of Directive 93/42/EEC concerning medical devices. Please follow the instructions for use. Order no.
- Page 24 – 24 –...
- Page 26 PARI GmbH Moosstrasse 3 82319 Starnberg • Germany Tel.: +49 (0) 81 51-2 79 0 Fax: +49 (0) 81 51-2 79 101 E-Mail: info@pari.de • www.pari.com...
Need help?
Do you have a question about the LC series and is the answer not in the manual?
Questions and answers