Minelab CTX 3030 Manual
Hide thumbs
Also See for CTX 3030:
- Quick start manual ,
- Instruction manual (75 pages) ,
- Getting started manual (57 pages)
Table of Contents
Advertisement
Congratulations on purchasing
your Minelab
Metal detecting is a fascinating and
rewarding activity enjoyed by people
all over the world. By getting to know
your CTX 3030 you can become one of
the many successful detectorists who
combine their passion for the outdoors
with the excitement of discovering
valuable coins, relics, gold and jewellery
on a regular basis.
CTX 3030 is Minelab's most
technologically advanced detector,
incorporating the unique Full Band
Spectrum 2 (FBS 2) Technology. Its sleek,
sturdy design, innovative control panel,
clear LCD, robust lightweight coil and
comprehensive targeting options set it
apart from any other detector available
today. The Wireless Audio Receiver
Module (WARM) facilitates the use of
wireless speaker or headphones.
metal detector!
CTX 3030 also allows you to download
and upload CTX 3030 settings, User
Modes and Discrimination Patterns using
your own Personal Computer (PC).
CTX 3030 will locate valuable metal
objects in a variety of mineralized ground
conditions, including extremely salty
soils, sea water, wet beach sand and
highly magnetic ground conditions. New
functionality allows you to customise your
CTX 3030 to your specific requirements.
This manual is designed to help both
the beginner and expert treasure hunter
obtain the best performance with their
CTX 3030.
Minelab wishes you every success with
your CTX 3030!
1
Advertisement
Table of Contents

Related Manuals for Minelab CTX 3030


Summary of Contents for Minelab CTX 3030
-
Page 1: Contents
CTX 3030 settings, User all over the world. By getting to know Modes and Discrimination Patterns using your CTX 3030 you can become one of your own Personal Computer (PC). the many successful detectorists who CTX 3030 will locate valuable metal... -
Page 2: Table Of Contents
Contents Contents....................2 Detector.Parts..................4 Assembly....................5 Attach the Coil to the Lower Shaft ..............5 Attach the Lower Shaft to the Chassis .............6 Attach the Control Box ...................6 Attach the Armrest ....................7 Attach the Headphones ..................7 Disconnect the Coil ....................7 Adjust.the.Detector.for.Comfortable.Detecting......8 Holding the Detector ....................8 Adjust the Armrest Strap..................8 Adjust the Position of the Armrest ..............8... -
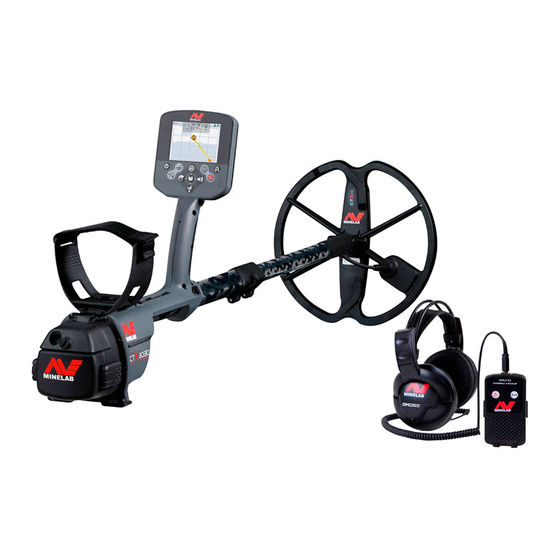
Page 3: Detector.parts
Detector Parts Headphones Module Battery Cover/ Compartment Latches Velcro Strap Armrest Control Box Bulkhead Armrest Lock Control Box Handle WARM Control Pod USB Connector Chassis Chassis Cam Lock Lower Shaft Yoke Coil Connector Coil... -
Page 4: Assembly
Assembly Attach the Coil to the Lower Shaft 5. Insert the bolt through the lower shaft and the bracket on top of the coil. 1. Remove the nut, bolt and washers from the coil. 2. Plug the two rubber washers into the holes on either side of the lower shaft. -
Page 5: Attach The Lower Shaft To The Chassis
Attach the Lower Shaft to the Attach the Control Box Chassis 1. Ensure the latches on the control box are released and place the battery pack into 1. Release the chassis cam lock by pulling the cover. Position the battery cover onto the lever away from the shaft. -
Page 6: Attach The Armrest
Attach the Armrest Attach the Headphones 1. Thread the Velcro strap through the 1. Plug the headphone jack into the armrest, with the Velcro side facing up. headphone module located above the battery compartment. The headphones 2. Slide the armrest onto the rail on top of may be plugged or unplugged at any the chassis. -
Page 7: Adjust.the.detector.for.comfortable.detecting
Adjust the Detector for Comfortable Detecting Adjust the Armrest Strap For comfortable detecting it is important to take the time to adjust the detector 1. Loosen the Velcro strap by lifting the top correctly. edge. Holding the Detector 2. Tighten the strap until your arm is secure in the armrest. -
Page 8: Adjust The Length Of The Shafts
Adjust the Length of the Shafts The lower shaft can be adjusted to any length between fully extended and fully retracted. 1. Adjust the lower shaft to the correct length and secure the cam lock to hold it in place. A correct shaft length will allow you to swing the coil over the ground without uncomfortably stretching or stooping. -
Page 9: Adjust The Angle Of The Coil
Adjust the Angle of the Coil 1. Loosen the bolt that connects the lower shaft to the coil. It should be loose enough to allow the coil to be moved for adjustment, but tight enough that the coil can hold its position. 2. -
Page 10: Battery.packs
Battery Packs Insert the Battery Pack into the The CTX 3030 is supplied with two types of battery pack: Battery Compartment 1. A replaceable cell pack, which accepts 1. Ensure latches on the control box eight AA batteries including alkaline... -
Page 11: Remove The Battery Pack From The Battery Compartment
Remove the Battery Pack from the Battery Compartment 1. Ensure that the detector is turned off before removing the battery pack. 2. Rest the detector on a flat surface and release the latches on both sides of the control box. 3. -
Page 12: Recharge The Li-Ion Battery Pack With The Car Charger
Do not throw the battery or impact it in any way. The Lithium-ion battery is specifically designed for the CTX 3030 and is Do not short-circuit the battery. not compatible with non-CTX 3030 Do not use the battery if it is damaged detectors. -
Page 13: Replace The 'Aa' Batteries
Replace the ‘AA’ Batteries 1. Remove the battery pack from the battery compartment (x-ref ). 2. Remove the used batteries from the battery pack. 3. Place 8 x ‘AA’ cell alkaline batteries into the battery pack ensuring that the + and –... -
Page 14: Turn.on.and.go
3030 was operating in the Smartfind The detector will begin with an animation Detect screen when turned off, this screen will appear when CTX 3030 is turned back and tune, after which the Smartfind Detect screen will appear and CTX 3030 is... -
Page 15: Compliance.information
Any changes or modifications not installation. expressively approved by Minelab Electronics Pty Ltd could void the user’s This equipment generates, uses and can authority to operate this equipment. radiate radio frequency energy and, if...
Need help?
Do you have a question about the CTX 3030 and is the answer not in the manual?
Questions and answers