
Subscribe to Our Youtube Channel
Related Manuals for Power One AURORA MICRO-0.25-I-OUTD-US-208/240


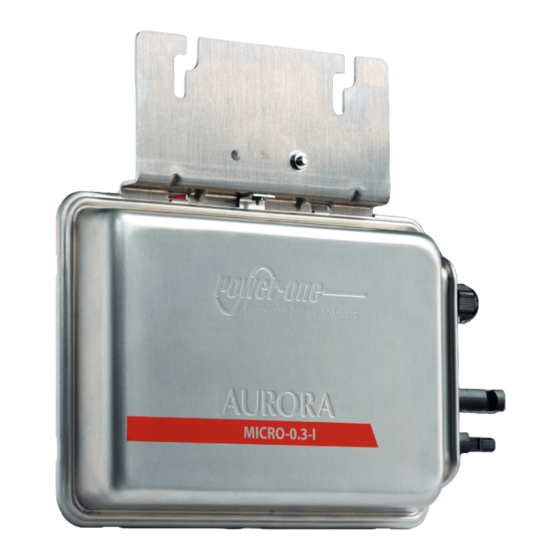
Summary of Contents for Power One AURORA MICRO-0.25-I-OUTD-US-208/240
- Page 1 THE MANUAL: MICRO Model Number: MICRO-0.25-I-OUTD-US-208/240 MICRO-0.3-I-OUTD-US-208/240...
- Page 2 AURORA MICRO ® Grid Tied Inverters MICRO-0.25/0.3-I-OUTD-US-208/240 Technical Manual...
- Page 3 Page 2 of 76 MICRO-0.25/0.3-I-OUTD-US-208/240 BCG.00612_AB Copyright © 2013 Power-One Renewable Energy Solutions LLC. All rights reserved. No part of this document may be reproduced in any form or by any means without the prior written permission of Power-One Renewable Energy Solutions LLC. Power-One Renewable Energy Solutions LLC makes no representations, express or implied, with respect to this document or any of the equipment and/or software it may describe;...
- Page 4 Page 3 of 76 MICRO-0.25/0.3-I-OUTD-US-208/240 BCG.00612_AB Table of Revisions Revision Author Date Approved by Description of Number Modification Tech docs 12/6/12 BCG.00612, New release BCM.00138 Tech docs 2/4/13 BCG.00612, New data sheet, BCM.00138 new label, modify overcurrent table 3-1...
-
Page 5: Table Of Contents
Page 4 of 76 MICRO-0.25/0.3-I-OUTD-US-208/240 BCG.00612_AB Contents ....................................6 PART 1 INTRODUCTION AND SAFETY ........................5 NTRODUCTION ......................................10 AFETY ................................. 20 YSTEM NTEGRATION ................................. 22 PART 2 UNPACK AND SELECT INSTALLATION LOCATION ................21 ENERAL ONDITIONS ............................. 24 ELECT NSTALLATION OCATION AC C... - Page 6 Page 5 of 76 MICRO-0.25/0.3-I-OUTD-US-208/240 BCG.00612_AB Technical Manual PART 1 INTRODUCTION AND SAFETY...
- Page 7 Page 6 of 76 Part 1 MICRO-0.25/0.3-I-OUTD-US-208/240 BCG.00612_AB Introduction and Safety INTRODUCTION This manual contains important instructions for models indicated on the front cover that shall be followed during installation and maintenance of the inverter. THE INSTALLER MUST READ THIS DOCUMENT IN ITS ENTIRETY BEFORE INSTALLING OR COMMISSIONING THIS EQUIPMENT.
-
Page 8: Introduction Introduction And Safety
Page 7 of 76 Part 1 MICRO-0.25/0.3-I-OUTD-US-208/240 BCG.00612_AB Introduction and Safety Output power Model number Table 1-1: Inverter models available 250 Watts MICRO-0.25-I-OUTD-US-208/240 300 Watts MICRO-0.3-I-OUTD-US-208/240 1.1.4 AMEPLATE The nameplate shown below is affixed to the inverter and provides the following information: Table 1-2: Product nameplate Certification Model name... - Page 9 Page 8 of 76 Part 1 MICRO-0.25/0.3-I-OUTD-US-208/240 BCG.00612_AB Introduction and Safety AC Rating Environmental rating Serial number MAC address 1.1.5 OMMISSIONING Power-One can provide commissioning (initial setup and power up). Please contact Power-One Customer Service at 1-877-261-1374.
- Page 10 Page 9 of 76 Part 1 MICRO-0.25/0.3-I-OUTD-US-208/240 BCG.00612_AB Introduction and Safety 1.1.6 AINTENANCE AND ERVICE The MICRO inverter has no user-serviceable parts. Maintenance and service procedures must comply with the manufacturer's documentation. For more detailed information see Maintenance, Part 6, in this document. 1.1.7 IGURES AND MAGES IN THIS...
-
Page 11: Safety
Page 10 of 76 Part 1 MICRO-0.25/0.3-I-OUTD-US-208/240 BCG.00612_AB Introduction and Safety IMPORTANT SAFETY INSTRUCTIONS! SAVE THESE INSTRUCTIONS – KEEP IN A SAFE PLACE! SAFETY 1.2.1 ARNINGS IN THIS OCUMENT This is a list of special safety symbols used in this manual that highlights potential safety risks and/or useful information. - Page 12 Page 11 of 76 Part 1 MICRO-0.25/0.3-I-OUTD-US-208/240 BCG.00612_AB Introduction and Safety 1.2.1.1 Equipment Safety Warnings In addition to the safety and hazard symbols, the following symbols are also used in this installation guide: System earth conductor (main grounding protective earth, Alternating Current (AC) Value ø...
- Page 13 Page 12 of 76 Part 1 MICRO-0.25/0.3-I-OUTD-US-208/240 BCG.00612_AB Introduction and Safety Simulated utility source Maximum time (sec) at 60 Table 1-3: Voltage and frequency trip limits Hz before cessation of Condition current to the simulated Voltage (V) Frequency (Hz) utility V<...
- Page 14 Page 13 of 76 Part 1 MICRO-0.25/0.3-I-OUTD-US-208/240 BCG.00612_AB Introduction and Safety 1.2.1.3 Assembly Warnings Prior to installation, inspect the unit to ensure absence of any transport or handling damage, which could affect insulation integrity or safety clearances; failure to do so could result in safety hazards. Assemble the inverter per the instructions in this manual.
- Page 15 Page 14 of 76 Part 1 MICRO-0.25/0.3-I-OUTD-US-208/240 BCG.00612_AB Introduction and Safety 1.2.2 PPROPRIATE USAGE Power-One accepts NO liability for damage of any kind that may arise from incorrect or careless operation. The equipment must not be used in ways that do not fall within the intended field of use.
- Page 16 Page 15 of 76 Part 1 MICRO-0.25/0.3-I-OUTD-US-208/240 BCG.00612_AB Introduction and Safety 1.2.2.4 Improper or Prohibited Use The following actions are dangerous and strictly forbidden under the terms of the warranty: Installing the equipment in environments with flammability conditions or in adverse/constrained environmental conditions (temperature and humidity).
- Page 17 Page 16 of 76 Part 1 MICRO-0.25/0.3-I-OUTD-US-208/240 BCG.00612_AB Introduction and Safety 1.2.3 AFETY NSTRUCTIONS Warning – These servicing instructions are for use by qualified personnel only. To reduce the risk of electric shock, do not perform any servicing other than that specified in the operating instructions.
- Page 18 Page 17 of 76 Part 1 MICRO-0.25/0.3-I-OUTD-US-208/240 BCG.00612_AB Introduction and Safety The instructions given in the manual do not replace the safety devices and technical data for installation and operation mounted on the product. They do not replace the safety regulations enforced in the country of installation and common sense rules.
- Page 19 Page 18 of 76 Part 1 MICRO-0.25/0.3-I-OUTD-US-208/240 BCG.00612_AB Introduction and Safety 1.2.4 OCATION OF AFETY LABELS Please note the location of the safety notices on the AURORA MICRO inverter. These and the product nameplates are for notification and protection. The labels and plates attached to the equipment must NOT be removed, damaged, hidden, etc. They Figure 1-1: Safety label location must be cleaned regularly and kept visible at all times.
- Page 20 Page 19 of 76 Part 1 MICRO-0.25/0.3-I-OUTD-US-208/240 BCG.00612_AB Introduction and Safety 1.2.1 THER ABELS In addition to the safety label and product nameplate,there is one identification label on the inverter. A duplicate label is attached in a plastic bag as shown below and will be used later to fill in the “system map”...
-
Page 21: System Integration
Page 20 of 76 Part 1 MICRO-0.25/0.3-I-OUTD-US-208/240 BCG.00612_AB Introduction and Safety SYSTEM INTEGRATION This system is composed of a group of MICRO inverters that convert direct electric current from a photovoltaic module into alternating electric current and feeds it into the electric grid. Photovoltaic modules transform energy from the sun into direct current (DC) electrical energy. - Page 22 Page 21 of 76 MICRO-0.25/0.3-I-OUTD-US-208/240 BCG.00612_AB Technical Manual PART 2 UNPACK AND SELECT INSTALLATION LOCATION...
- Page 23 Page 22 of 76 Part 2 MICRO-0.25/0.3-I-OUTD-US-208/240 BCG.00612_AB Unpack and Select Installation Location GENERAL CONDITIONS Some specifications are not applicable to small equipment or components. 2.1.1 RANSPORT AND ANDLING Transportation of the equipment, especially by road, must be carried out by suitable ways and means for protecting the components (in particular, the electronic components) from violent shocks, humidity, vibration, etc.
- Page 24 Page 23 of 76 Part 2 MICRO-0.25/0.3-I-OUTD-US-208/240 BCG.00612_AB Unpack and Select Installation Location Table 2-1: List of components supplied Code Description AC-TRUNK SPOOL-41 inches-50 plugs AC cable (4 conductors): 10 AWG Plug (connector) pitch 41” AC-TRUNK SPOOL-67 inches-32 plugs AC cable (4 conductors): 10 AWG Plug (connector) pitch 67”...
-
Page 25: Select Installation Location
Page 24 of 76 Part 2 MICRO-0.25/0.3-I-OUTD-US-208/240 BCG.00612_AB Unpack and Select Installation Location SELECT INSTALLATION LOCATION 2.2.1 VERALL IMENSIONS The following figure shows the recommended minimum clearances around the inverter. The overall dimensions are expressed in millimeters (mm) and inches (in). Figure 2-1: Overall dimensions of MICRO inverter... - Page 26 Page 25 of 76 Part 2 MICRO-0.25/0.3-I-OUTD-US-208/240 BCG.00612_AB Unpack and Select Installation Location 2.2.2 ENERAL NSTALLATION ONDITIONS Installation of the equipment is carried out based on the system design and the place in which the equipment is installed. The installation is done by qualified installers and/or licensed electrician according to the applicable local code regulations (National Electric Code (NEC), Canadian Electric Code (CEC) and other local codes).
- Page 27 Page 26 of 76 Part 2 MICRO-0.25/0.3-I-OUTD-US-208/240 BCG.00612_AB Unpack and Select Installation Location 2.2.5 NSTALLATION OSITION When choosing the place of installation, comply with the following conditions: Install only on structures specifically conceived for photovoltaic modules (supplied by installation technicians). Install MICRO inverter underneath the photovoltaic modules so that they work in the shade.
- Page 28 Page 27 of 76 Part 2 MICRO-0.25/0.3-I-OUTD-US-208/240 BCG.00612_AB Unpack and Select Installation Location Any maintenance or replacement of the device could require the technician to dismount the photovoltaic module mounted on the top of the MICRO inverter. This condition must be accounted for during the installation ensuring that the safety distances are correct for normal control and maintenance operations.
-
Page 29: Choice Of Ac Cable
Page 28 of 76 Part 2 MICRO-0.25/0.3-I-OUTD-US-208/240 BCG.00612_AB CHOICE OF AC CABLE Unpack and Select Installation Location The AC cable is shipped on a reel with the connectors pre-mounted. The available spacing between connectors is: 41”, 6 7 ”, a n d 8 1 ”. The installer is responsible for choosing the AC cable model with the correct spacing on the basis of the orientation (shown below) and type of photovoltaic modules. - Page 30 Page 29 of 76 Part 2 MICRO-0.25/0.3-I-OUTD-US-208/240 BCG.00612_AB Unpack and Select Installation Location AC-Trunk Spool – 41 inches Power-One Cable Item 50 plugs * Ideal for 60-cell, 72-cell, 96-cell PV modules Figure 2-5: Vertical orientation of the photovoltaic modules Note: The AC-TRUNK SPOOL may contain a number of connectors indicated by the number of plugs in the part number.
- Page 31 Page 30 of 76 MICRO-0.25/0.3-I-OUTD-US-208/240 BCG.00612_AB Technical Manual PART 3 MOUNTING AND WIRING...
- Page 32 Page 31 of 76 Part 3 MICRO-0.25/0.3-I-OUTD-US-208/240 BCG.00612_AB Mounting and Wiring ASSEMBLY DIAGRAM Figure 3-1: Graphical representation of assembly instructions...
-
Page 33: Conditions
Page 32 of 76 Part 3 MICRO-0.25/0.3-I-OUTD-US-208/240 BCG.00612_AB ASSEMBLY INSTRUCTIONS Mounting and Wiring 1. Run the AC cable along the frame structure provided for installing the photovoltaic modules. The cable must be compatible with the expected installation conditions, particularly concerning the number of modules and their orientation (portrait or landscape). - Page 34 Page 33 of 76 Part 3 MICRO-0.25/0.3-I-OUTD-US-208/240 BCG.00612_AB Mounting and Wiring Equipment grounding conductor coupling all the MICRO inverters: The conductor must have a minimum cross section of 6 AWG (8AWG in conduits). Figure 3-2: Equipment grounding conductor coupling all the inverters...
- Page 35 Page 34 of 76 Part 3 MICRO-0.25/0.3-I-OUTD-US-208/240 BCG.00612_AB Mounting and Wiring The conductor linking the assembly to the grounding distribution structure must be at least Individual earth conductors for each MICRO inverter: 6 AWG. • The conductor bonding the MICRO inverter to the structure must have a minimum cross section of 8 AWG (maximum length 1m).
- Page 36 Page 35 of 76 Part 3 MICRO-0.25/0.3-I-OUTD-US-208/240 BCG.00612_AB Mounting and Wiring 4. Fasten the AC-TRUNK cable to the frame with cable ties. Each connector is provided with two guides for ideal fastening. Cable ties are not supplied with the inverter or AC-TRUNK cable. Use cable ties that are rated for use in the installation location.
-
Page 37: Diagram
Page 36 of 76 Part 3 MICRO-0.25/0.3-I-OUTD-US-208/240 BCG.00612_AB Mounting and Wiring Fit the appropriate AC-TRUNK END CAP on the unused ends of the AC-TRUNK cable. Connect the AC-TRUNK cable/s coming from the MICRO inverters to the junction box or to the AC distribution panel 8. - Page 38 Page 37 of 76 Part 3 MICRO-0.25/0.3-I-OUTD-US-208/240 BCG.00612_AB Mounting and Wiring 9. Plug the DC cables into the corresponding inputs on the MICRO inverters and install the photovoltaic modules. The recommended installation entails keeping the MICRO inverters underneath the photovoltaic modules, having them operate in the shade. Direct sunlight could cause elevated temperatures and consequently derating.
- Page 39 Page 38 of 76 Part 3 MICRO-0.25/0.3-I-OUTD-US-208/240 BCG.00612_AB 3.2.1 AC-TRUNK END CAP Mounting and Wiring NSTALLING THE The unused ends of the AC-TRUNK cable must be terminated with the proper end. The following is necessary for properly installing the cap: Fit the ring nut and gasket around the cross section of the cable to terminate.
- Page 40 Page 39 of 76 Part 3 MICRO-0.25/0.3-I-OUTD-US-208/240 BCG.00612_AB Mounting and Wiring The figures below illustrate the use of the AC-trunk unlock tool. Figure 3-4: Disconnection of the MICRO inverter AC cable Figure 3-5: Removing the AC trunk plug cap...
-
Page 41: Wiring Details
Page 40 of 76 Part 3 MICRO-0.25/0.3-I-OUTD-US-208/240 BCG.00612_AB Mounting and Wiring WIRING DETAILS 3.3.1 ROTECTION WITCH DISCONNECT SWITCH To protect each AC connection line of the MICRO inverter, it is required to install a device for protection against overcurrent with the following characteristics: Table 3-1: Overcurrent device recommended characteristics Protection breaker rating... - Page 42 Page 41 of 76 Part 3 MICRO-0.25/0.3-I-OUTD-US-208/240 BCG.00612_AB Mounting and Wiring 3.3.2 DIFFERENTIAL PROTECTION DOWNSTREAM OF THE INVERTER Aurora Power-One inverters with a high frequency transformer are equipped with an isolation transformer for each of the DC/DC converters which operate at high frequency (switch-over frequency of the converter).
-
Page 43: Connection To The Ac Distribution Grid
Page 42 of 76 Part 3 MICRO-0.25/0.3-I-OUTD-US-208/240 BCG.00612_AB Mounting and Wiring CONNECTION TO THE AC DISTRIBUTION GRID (AC SIDE) To prevent electrical hazards, all the connection operations must be carried out with the disconnect switch downstream of the inverter (grid side) open and locked. -
Page 44: Wiring Of Ac Cable
Page 43 of 76 Part 3 MICRO-0.25/0.3-I-OUTD-US-208/240 BCG.00612_AB Mounting and Wiring WIRING OF AC CABLE The installation must be carried out with the equipment disconnected from the grid (power disconnect switch open). Power-One AC cables from the MICRO inverters have four conductors with different colors to identify the function of each conductor: Table 3-2: Wiring of AC Cable Pay special attention and ensure not to reverse the phase with the neutral! - Page 45 Page 44 of 76 MICRO-0.25/0.3-I-OUTD-US-208/240 BCG.00612_AB Technical Manual PART 4 OPERATIONS GUIDE...
-
Page 46: Display And Keypad
Page 45 of 76 Part 4 MICRO-0.25/0.3-I-OUTD-US-208/240 BCG.00612_AB Operations Guide GENERAL CONDITIONS One of the first rules for preventing damage to the equipment and to the operator is to have a thorough knowledge of the operations. It is necessary to read the AURORA CDD Instruction Manual before commissioning the MICRO inverter. - Page 47 Page 46 of 76 Part 4 MICRO-0.25/0.3-I-OUTD-US-208/240 BCG.00612_AB Operations Guide 4.2.2 ESCRIPTION OF THE EYPAD On the right side of CDD device are four buttons used to control the various functions visualized on the display. The UP and DOWN buttons are used to move around inside a menu or to increase/decrease the settable values.
- Page 48 Page 47 of 76 Part 4 MICRO-0.25/0.3-I-OUTD-US-208/240 BCG.00612_AB Operations Guide 4.2.3 EMOTE ANAGEMENT The CDD device is equipped with an Ethernet port and a Wi-Fi network interface controller to connect to a local network or Internet. The system can be managed and monitored from a PC or Smartphone with internet access if the device is registered at the Power-One portal (AURORA VISION web portal).
-
Page 49: Commissioning
Page 48 of 76 Part 4 MICRO-0.25/0.3-I-OUTD-US-208/240 BCG.00612_AB Operations Guide COMMISSIONING Before checking the operation of the equipment, it is necessary to have a thorough knowledge of the instruments described above and the functions that have been enabled in the installation The MICRO inverter operates automatically without the aid of a controller. - Page 50 Page 49 of 76 Part 4 MICRO-0.25/0.3-I-OUTD-US-208/240 BCG.00612_AB Operations Guide The steps to take for configuring the CDD, acquiring the MICRO inverters in the system and registering at the “AURORA VISION” portal are described in the AURORA CDD Instruction Manual. Please refer to the Operations Guide, Part 4, of the AURORA CDD Instruction Manual to complete the commissioning of the MICRO inverter.
- Page 51 Page 50 of 76 MICRO-0.25/0.3-I-OUTD-US-208/240 BCG.00612_AB Technical Manual PART 5 TROUBLESHOOTING...
- Page 52 Page 51 of 76 Part 5 MICRO-0.25/0.3-I-OUTD-US-208-240 BCG.00612_AB Troubleshooting Guide ALARM MESSAGES GENERATED BY THE MICRO INVERTER The equipment is capable of communicating errors/warnings via radio to the associated CDD device. Any messages received and related codes can be checked on the display for the CDD device. To understand and address warning (Wxxx) or error (Exxx) messages generated by the MICRO inverters, in the installation and displayed on the CDD display, refer to the table shown below.
- Page 53 Page 52 of 76 Part 5 MICRO-0.25/0.3-I-OUTD-US-208-240 BCG.00612_AB Troubleshooting Guide Alarm Code Cause Solution Messages displayed High internal temperature recorded by the Verify installation conditions OverTemp E014 inverter. This parameter depends in part on (exposure to sunlight) and check that air the power that the inverter must supply, as flow MICRO...
- Page 54 Page 53 of 76 Part 5 MICRO-0.25/0.3-I-OUTD-US-208-240 BCG.00612_AB Troubleshooting Guide Alarm Code Cause Solution Messages displayed a) The alarm may occur during inverter ini- a) The alarm will automatically reset upon Internal E024 tialization and is caused by the initialization connection of the inverter to the grid, and no Error of communication between the CDD and...
- Page 55 Page 54 of 76 Part 5 MICRO-0.25/0.3-I-OUTD-US-208-240 BCG.00612_AB Troubleshooting Guide Alarm Code Cause Solution Messages displayed Internal fault of the booster circuit inverter Contact Power-One Service. Vbulk UV W011 The alarm is generated when the CDD Consider a new installation position that Comm W025 device does not receive messages from the...
-
Page 56: Verification Of Ground Leakage
Page 55 of 76 Part 5 MICRO-0.25/0.3-I-OUTD-US-208-240 BCG.00612_AB Troubleshooting Guide VERIFICATION OF GROUND LEAKAGE In the presence of anomalies or report of ground fault, there may be a ground leakage from the photovoltaic module. To check this, measure the voltage between the positive pole and ground and between the negative pole and ground using a voltmeter. -
Page 57: Measuring The Insulation Resistance Of Photovoltaic Module
Page 56 of 76 Part 5 MICRO-0.25/0.3-I-OUTD-US-208-240 BCG.00612_AB 5.2.2 Troubleshooting Guide EHAVIOR OF A YSTEM WITH EAKAGE If the voltage measured between one of the two poles and ground does not tend to 0V and stabilizes on a value, there is a ground leakage from the photovoltaic module. Example: When the measurement is made between positive pole and ground, on a photovoltaic module with Voc=37V, a voltage of 7V is measured. - Page 58 Page 57 of 76 Part 5 MICRO-0.25/0.3-I-OUTD-US-208-240 BCG.00612_AB Troubleshooting Guide Once the short-circuit has been made, measure the insulation resistance (Riso) using a megohmmeter positioned between the two shorted poles and ground (of the inverter). If the measured insulation resistance is less than 1Kohm the inverter does not connect to the grid due to a low insulation of photovoltaic module respect to ground.
-
Page 59: The Power -0
Page 58 of 76 Part 5 MICRO-0.25/0.3-I-OUTD-US-208-240 BCG.00612_AB Troubleshooting Guide THE POWER-0NE SERVICE CALL Call Power-One Technical Support at 1-877-261-1374 and provide the following information. AURORA model? Serial number? Week of production? What signals are shown on the display? NOTE: information above is available from the CCD. - Page 60 Page 59 of 76 MICRO-0.25/0.3-I-OUTD-US-208/240 BCG.00612_AB Technical Manual PART 6 MAINTENANCE GUIDE...
- Page 61 Page 60 of 76 Part 6 MICRO-0.25/0.3-I-OUTD-US-208/240 BCG.00612_AB Maintenance Guide GENERAL CONDITIONS Maintenance operations must be carried out by authorized personnel assigned to carry out this work. Maintenance operations must be carried out with the equipment disconnected from the grid (power switch open) and the photovoltaic modules obscured or isolated, unless otherwise indicated.
- Page 62 Page 61 of 76 Part 6 MICRO-0.25/0.3-I-OUTD-US-208/240 BCG.00612_AB Maintenance Guide Table 6- 1: Routine Maintenance Do not attempt to dismantle the equipment or make any internal repairs! With a view to preserving the integrity of their safety and insulation, AURORA MICRO inverters are not designed to allow internal repairs.
-
Page 63: Storage And Dismantling
Page 62 of 76 Part 6 MICRO-0.25/0.3-I-OUTD-US-208/240 BCG.00612_AB Maintenance Guide STORAGE AND DISMANTLING 6.2.1 TORAGE OF THE QUIPMENT OR ROLONGED If the equipment is not used immediately or is stored for long periods, check that it is correctly packed. The equipment must be stored in well-ventilated indoor areas that do not have characteristics that might damage the components of the equipment. - Page 64 Page 63 of 76 MICRO-0.25/0.3-I-OUTD-US-208/240 BCG.00612_AB Technical Manual PART 7 APPENDIX...
-
Page 65: Technical Data Appendix
Page 64 of 76 Part 7 MICRO-0.25/0.3-I-OUTD-US-208/240 BCG.00612_AB TECHNICAL DATA Appendix... - Page 66 Page 65 of 76 Part 7 MICRO-0.25/0.3-I-OUTD-US-208/240 BCG.00612_AB Appendix 7.1.1 FFICIENCY URVES Graphs of the efficiency curves of all the models of inverter described in this manual are shown below. The efficiency curves are linked to technical parameters that are continually being developed and improved and should therefore is considered approximate.
- Page 67 Page 66 of 76 Part 7 MICRO-0.25/0.3-I-OUTD-US-208/240 BCG.00612_AB Appendix Figure 7-2: MICRO-0.3-I-OUTD-208/240 efficiency curve 7.1.2 OWER ERATING In order to allow inverter operation in safe thermal and electrical conditions, the unit automatically reduces the value of the power fed into the grid. Power derating can take place due to adverse environmental conditions or due to unsuitable input voltage values.
- Page 68 Page 67 of 76 Part 7 MICRO-0.25/0.3-I-OUTD-US-208/240 BCG.00612_AB Appendix Figure 7-3: MICRO-0.25-I-OUTD-208/240 temperature derating curve Figure 7-4: MICRO-0.3-I-OUTD-208/240 temperature derating curve...
- Page 69 Page 68 of 76 Part 7 MICRO-0.25/0.3-I-OUTD-US-208/240 BCG.00612_AB Appendix 7.1.2.2 Power Reduction Due To the Input Voltage The graphs show the automatic reduction of supplied power when input voltage values are too high or too low. Figure 7-5: MICRO-0.25-I-OUTD-208/240 voltage derating curve @ Tamb up to 65⁰C Figure 7-6: MICRO-0.25-I-OUTD-208/240 voltage derating curve @ Tamb up to 75⁰C...
- Page 70 Page 69 of 76 Part 7 MICRO-0.25/0.3-I-OUTD-US-208/240 BCG.00612_AB Appendix Figure 7-7: MICRO-0.3-I-OUTD-208/240 voltage derating curve @ Tamb up to 65⁰C Figure 7-8: MICRO-0.3-I-OUTD-208/240 voltage derating curve @ Tamb up to 75⁰C...
- Page 71 Page 70 of 76 Part 7 MICRO-0.25/0.3-I-OUTD-US-208/240 BCG.00612_AB Appendix 7.1.1 LOCK IRING IAGRAM The diagram below summarizes the layout of the MICRO inverter. The main blocks are the DC-DC input converter (the “boost” section) and the DC-AC output inverter. Both work at a high switching frequency, are small and relatively light.
- Page 72 Page 71 of 76 Part 7 MICRO-0.25/0.3-I-OUTD-US-208/240 BCG.00612_AB Appendix Figure 7-9: Topographic Diagram...
- Page 73 Page 72 of 76 Part 7 MICRO-0.25/0.3-I-OUTD-US-208/240 BCG.00612_AB Appendix Figure 7-10: Wiring diagram – 208Vac three phase * *IMPORTANT: If several Aurora MICRO inverters are installed in a three-phase AC GRID, it is recommended to distribute the inverters between the phases in order to reduce the power unbalances between the phases. Always refer to the local standards.
- Page 74 Page 73 of 76 Part 7 MICRO-0.25/0.3-I-OUTD-US-208/240 BCG.00612_AB Appendix Figure 7-11: Wiring diagram – 240Vac split phase...
- Page 75 Page 74 of 76 Part 7 MICRO-0.25/0.3-I-OUTD-US-208/240 BCG.00612_AB Appendix 7.1.1 UNCTIONALITY OF THE QUIPMENT The MICRO inverters are monitored remotely through an advanced communications system based Data transmission and control on a wireless connection and the CDD device. In addition to local monitoring of the system, it is possible to have remote data visualization through an internet access to Power-One’s AURORA®...
-
Page 76: Template For Map Of Micro Inverter Installation
Page 75 of 76 Part 7 MICRO-0.25/0.3-I-OUTD-US-208/240 BCG.00612_AB TEMPLATE FOR MAP OF MICRO INVERTER INSTALLATION Appendix... -
Page 77: Index Of Tables And Figures
Page 76 of 76 Part 7 MICRO-0.25/0.3-I-OUTD-US-208/240 BCG.00612_AB INDEX OF TABLES AND FIGURES Appendix Table 1-1: Inverter models available..........................7 Table 1-2: Product nameplate ............................7 Table 1-3: Voltage and frequency trip limits ......................12 Figure 1-1: Safety label location ............................18 Figure 1-2: Identification label for adhering to system map ................ - Page 78 www.power-one.com Aurora Power Service 877-261-1374 ® Aurora ® Power Service France 00 800 00 28 76 72 Aurora ® Power Service Germany 0800-2200211 Aurora ® Power Service Italy 00 800 00 28 76 72 Aurora ® Power Service Spain 00 800 00 28 76 72 Aurora ®...
Need help?
Do you have a question about the AURORA MICRO-0.25-I-OUTD-US-208/240 and is the answer not in the manual?
Questions and answers