Table of Contents
Advertisement
Sorensen
SORENSEN
Division of Elgar
9250 Brown Dee
San Diego, CA,
1-800-525-20.
Tel: (858)
Fax: (85
'3
Email:
©1986 by Sorensen, Division of Elgar Electronics Corporation
This document contains information proprietary to Sorensen, Elgar Electronics Corporation. The information
contained herein is not to be duplicated or transferred in any manner without prior written permission from Sorensen.
June 1986
DCR-B SERIES
500 -Watt
Power Supplies
Instruction Man
10-408
20-258
40-1
60-
Document No. 589338 Rev E
Advertisement
Table of Contents

Related Manuals for Sorensen DCR10-40B


Summary of Contents for Sorensen DCR10-40B
- Page 1 ©1986 by Sorensen, Division of Elgar Electronics Corporation This document contains information proprietary to Sorensen, Elgar Electronics Corporation. The information contained herein is not to be duplicated or transferred in any manner without prior written permission from Sorensen. June 1986...
- Page 2 Buyer returns the defective product in the original, or equivalent, shipping container; if, upon examination of such product by Sorensen it is disclosed that, in fact, a defect in materials and/or workmanship does exist, that the defect in the product was not caused by improper conditions, misuse, or negligence;...
-
Page 3: Table Of Contents
TABLE OF CONTENTS INTRODUCTION Page SECTION 1 INTRODUCTION •..•.•...•..•...•..•...•..DESCRIPTION ..•...••....••..•.•... 1.2 .1 General ........1.2 .2 Automatic Cross o ver •••••••••••••••••••••••••• Remote Sensing ....• ....1. 2 .3 ......• .. 1.2.4 Series Operation . Parallel O p eration •... - Page 4 TABLE OF CONTENTS (Cont'd ) SECTI O N 3 Page OPERA 'l'ION CURRENT MODE OPERATION......Resistance Programming •••••••••••••••••••••.. 3 -9 3.3.1 Signal Programming ......3-10 3.3.2 Alternate Current Pro g rammin g Method •••••••• 3-10 3.3.3 PARALLEL OPERATION ••••••••••••••••••••••••••••••••• 3-12 3.
- Page 5 'l'ABLE OF CO.NT�NTS ( Cont'd) MAINTENANCE Page SECTION 5 GENERAL ..•...•.•..••...•..•..•....PERIODIC SERVICING ..•..•.. �.� ...••..5. 2 TROUBLESHOOTING •..•...•...••..CALIBRATION ....•.•..•..••..•..5.4.1 Current Mode Section, Limit Settings •••..PERFORMANCE 1.'ESTING •••••••••••••••••••••••••••••••• 5.5.1 Voltag· e Mode Regulation and Ripple. • • • . . . • • • . . 5 .5 •.
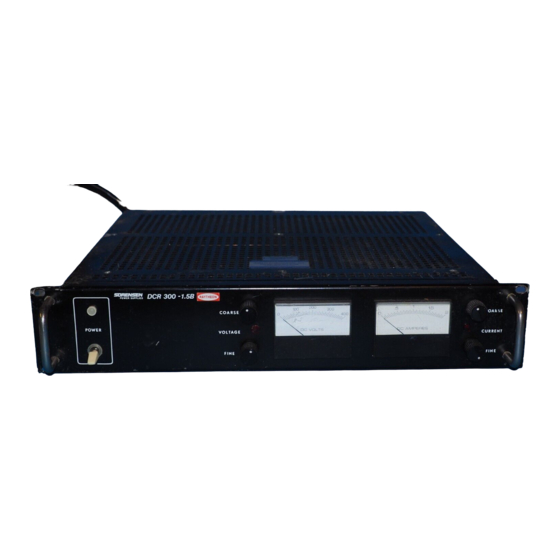
- Page 6 LIST OF ILLUSTRATIONS Page Title Figure. DCR -B Controls and Indicators ••••••••.••••.•••••.••••••••••. Control PCB Barrier Strip Connections ••••••• � ••••••••••••••• Ren1otc Sensing Connections •••.•.•••••••••••••.•••••••.•••••. Illustr ation of Load Lead Resistance (Remote Sensing) ••••••.. Voltage Mode Programming Connections ••••••••••.•••• •••••••• · 3 -5 3 - 7 Current Mode Programming Connections ••.••.••••••••••...
- Page 7 LIST OF TABLES Title Pa g e Table 1- 4 Specifications ..........3 -1 Ft•ont Panel Controls and Indicators •••••••••••.•••••••••••.••...
-
Page 8: Introduction
The system output is taken across a terminal pair at rear terminal strip TB2 or from the binding posts on the front panel of the supply. A variety of Sorensen power supply application notes are available through your These notes detail many hook-up configurations Sorensen Service Representative. -
Page 10: Optional Modifications
components are protected by the unit circuit breaker. Control circuitry is pro tected by a fuse· on the rear. In the· event of an overvoltage condition at the output, such as a failure in the power supply or an externally induced condition, an overvoltage electronic crow bar is actuated by an integral OVP sensing circuit. - Page 11 Table 1-1 Specifications DCR-B SPECIFICATIONS 500-WATT SERIES INPUT POWER Constant Constant OUTPUT Voltage Current OUTPUT POWER Voltage Current REMOTE SIGNAL Range Power IMPEDANCE Ripple Ripple TEMPCO (Typical) PROGRAMMING (Volt In/ Efficiency (Vac) (Aac) Factor Voltage Current (Ade) (PARO) (PARO) V olt Out) Note 3 Note 4 (Typ.) 120Hz j lkHz lOkHz...
-
Page 12: Installation
If it is determined that the unit is damaged, the carrier should be notified immediately. Repair problems should be directed to the nearest Sorensen representative, or to the factory. INITIAL INSPECTION 2. 2 Proceed as follows to inspect for damage incurred during shipment: Inspect panel and chassis for scratches, dents and chips. - Page 14 SECTION 3 OPERATION GENERAL This section provides basic operating instructions, -and details the methods by which DCR-B power supplies may be adapted to their more common applications including remote sensing, remote programming, and series and parallel operation. 3-1, Table identifies the operating controls shown in Figure and describes their functions.
- Page 15 Table 3-1 Front Panel Controls and Indicators FUNCTION CONTROL/INDICATOR A white light connected across the primary of POWER indicator input transformer T2. _ _Illuminates when the (DSl) POWER switch is in the position. unit ampere switch used to connect 250-volt, POWER swit.ch or disconnect input line voltage.
- Page 16 - - - - .,... Remo te Shut down : Sink l mA to Regula tor Common - Internal Current Shunt, Positive.- - - - - - - - - - - - - Approx. 0.4V for rated output. Internal Current Shunt, Negative.- - - - - - - - - - - -- - CURRENT CONTROL Current Programming: Resistance:...
- Page 18 For this reason, it is recommended that remote sensing be avoided, or damage. that the external line drop not exceed 1 volt per load line on the 150 to 600 Vdc models. Note that a heavy pulse load can act the same as a momentary load short, and may damage the amplifier under remote sense conditions.
-
Page 19: Resistance Programming
+ SENSE .0150 '---------• A + OUT WIRE RESISTANCE - - - -..1 5V L O ST , ,, LOAD = 10A OU TPU T -- -- - DCR-B R = 5 � 50 .3V VOL TS A TO B = 50 ,.__ 1 OA / .o,sn... - Page 20 abrupt changes in programming resistance, make before break switching should be used. Figure 3-5 Voltage Mode Programming Connections To adapt unit to resistance programming operation, proceed as follows: Set unit power to OFF. Remove link between terminals 5 and 6, and connect a programming re sistor between terminals 4 and 5 (Figure 3-5).
-
Page 23: Signal Pro G Rammin G
CAUTION If resistance programming is to be discontinued, set POWER switch to OFF, remove programming device, and reconnect link between terminals 7 and 8. 3.3.2 Signal Programming Current Mode The procedure for adapting a DCR-B unit to current mode signal programming is identical to that for current mode resistance programming ·except that the signal source, ( 488 DAP or equivalent) rather than a programming resistor, is connected across terminals 8 and 9. - Page 24 1£8 DAP CONTROLLER OR EQ.UI VALENT + OUT - OUT 3900 SIGNAL SOURCE DCR-B (488 OAP OR EQUIVALENT) 1000 RI .. 3900, I /4W, 2"/4, I 00 PPM R2 -= I 00 fl , 1 /2W, TR I MPOT, CERMET, I 00 PPM OR BETTER 1N6263 DIODE , CRI =...
-
Page 25: Parallel Operation
Reconnect the signal source connections removed in step 7. 11 . Turn the signal source and the DCR - B power ON. Set the signal source for 400 mV output. V ary the signal source output slightly until the rated full scale de out (e.g., DCR-40-13B may require put current of the DCR-B is obtained. -
Page 26: Master/ Slave Parallelin G
in load will be supplied by the second unit up to its current limit setting. Regu lation, therefore, will be the sum of the regulations of the units plus the dif ference in the voltage settings. UNIT 1 UNIT 2 LOAD For remote sensing, connect both unit + and - terminals directly to the load... -
Page 27: Series Opera Tio
Set master unit POWER switch to ON, and then set the slave unit POW ER switch to on. . Adjust control R53 (on Control PCB) to balance the output currents be tween the paralleled units. Note that the units should be adjusted for equal output currents using the heaviest load (i.e. -
Page 28: Direct Series Connections
With no load connected, set each unit to its desired output voltage level, and appropriate current limiting value. Set the POWER switch of each unit to OFF. Interconnect units as shown in Figure 3-10. CAUTION Rectifiers (and heat sinks where required) must be connected across the output terminats of each unit as shown in the figure. -
Page 29: Master/ Slave Connections
3.5.2 Master/Slave Connection (Figure 3-11) The voltage range of a DCR-B power supply system can be increased by series -connecting units up to a total rated output of 200 Vdc (150/300/600 volt models, two in series) in a master/slave configuration. Two 40 volt supplies thus connected provide O to 80 volt range capability with voltage programming neces... - Page 30 295K *For 10 volt units, terminal 3 of the slave unit is connected directly to the plus sense terminal of the master unit. Table 3-3 Recommended Rectifiers, Series Operation Sorensen Heats ink;';-;' ; Model Mfr.-Ty:ee Part No. Dim. Inches (mm)
-
Page 31: Unit Shutdown Circuit
With POWER switches OFF, connect each unit to an appropriate input power source (115/208/220/2 3 0 Vac). All units in the system can be connected through common ac line OFF /ON. switch. Proceed as follows: Set the COARSE and FINE CURRENT controls of each unit fully clock wise . -
Page 32: Cautions
. Adjust R3 slowly counterclockwise until the OVP trips. Leave R3 in this position. Set unit power to OFF, and turn front panel voltage control counter clockwise away from the trip point. Apply unit power and adjust the supply outp_ u t voltage to the desired operating level. - Page 34 r-------------------------------------- 7 +16V VARIABLE REFERENCE -6. 2V r--+I REFERENCE SUPPLY -12. 4V I C3 ICJ/QI (ETC.) -16V RESET RAMP C, V. ERROR . . h CIRCUIT GENERATOR AMPLI Fl ER Q3/Rl3 Rl 5/C6 I C2 C. V. MODE TURN-ON I NOi CA TOR CIRCUIT Q6/Q8 COMPARATOR...
-
Page 35: Theory Of Opehation
BLOCK DIAGRAM ANALYSIS (Figure 4-2) The ac input voltage is first applied to CR7 (SCR), which is in series with power transformer Tl. CR7 functions with the control circuits to form a feedback loop . which prevents a change in output voltage when either the line or load changes . To accomplish this, the control circuits issue a phase adjusted firing p ulse to CR 7 These circuits continuously once during each half cycle of the input ac voltage. -
Page 36: Voltage Mode Section
ABSORBED INPUT VOLTAGE VOLTAGE PASSING STAGE: ---r � CONTROL Figure 4-3 Passing Stage Principle To illustrate circuit operation, assume an increase in the T2 (Figure 6-4) supply output. Pin 2 of !Cl will become more negative, and the output at pin 6 more positive, tending to turn Ql off. -
Page 37: Current Mode Section
Pin 4 of IC2 is at virtual de ground since pin The main error amplifier is IC2. is at ground (+sense). · Thus the . c urrent through· R25 can be varied from O This current, through R26, programs t he supply to the desired to 1 milliampere. -
Page 38: Turn-On And Shut-Down Circuits
The comparator consists of Q4/Q5, CRl0, R16, and Rl 7. Comparator Q4/Q5 com pares the de signal from either the voltage or current mode amplifier (applied to QS) with the ramp generator voltage. The varying output of Q4 (across Rl 7) establishes. -
Page 39: Overvoltage Protector
Overvoltage Protector 4.4.8 The OVP consists of a fast response silicon controlled rectifier (SCR). crowbar. A reference voltage (+12V) is generated by zener CR3 and R4. This reference voltage is compared to the output voltage in a bridge circuit, by the ratio of Rl to R2 plus R3 (adjust pot). -
Page 40: General
In addition, Figures 6-2 and 6-3 physically locate the components referred to in the text. Any questions per taining to r:-epair should be directed to the nearest Sorensen representative* or to the factory. Include the model and serial numbers in any correspondence. -
Page 41: Current Mode Section, Limit Settings
5 .4.1 Current Mode Section, Limit Settings Set unit POWER switch to OFF. Short output terminals and set CUR RENT control to 100% and VOLTAGE control to 50%. Set potentiometer R54 on the PCB to about 20% rotation. Set POWER switch to ON and adjust R54 to the limit stated in specifications Table 5 -3, upper limit set point. -
Page 42: Performance 1.'Esting
OSCILLOSCOPE DC OUTPUT VOLTAGE OUTPUT :::, 11,1 ::c a:: CURRENT Figure 5-1 Performance Test Setup 5. 5 PERFORMANCE TESTING Sensitive instruments like the DCR-B require rigorous testing methods if a true performance evaluation is to be made. Wherever possible, twisted leads should be used with test equipment to reduce stray pickup. -
Page 43: Current Mode Kegulation
Use an autotransformer with a current rating that exceeds the maximum unit input current called out in the unit specifications. NOTE Input devices such as autotransformers_ or line regulators c:an distort the input suffi wave ciently to adversely affect performance measure ments. -
Page 44: Hi-Pot Test Procedure
Set unit POWER switch to ON. Adjust COARSE VOLTAGE control for rated output, and COARSE CURRENT control fully clockwise. Apply half load, and then abruptly apply full load (or switch from full 3 . . load to half load). Return to steady state operation should occur with See Table 5-3 for typical transient dev... - Page 45 If it is essential to use the high potential test method, please contact the factory for information on special precautions that should be taken. CAUTION Sorensen Company cannot be held liable for any malfunctions resulting from the application of a high potential test (greater than 100V).
-
Page 46: Drawings And Parts Lists
Description; Basic item, its value and electrical characteristics. 6.2.4 Sorensen P /N ; The number to be used when ordering parts. Call Sorensen at 1-800-525-2024, or order directly from: SORENSEN Sales & Technical Support 9250 Brown Deer Road San Diego, CA 92121-2294... - Page 47 R•2 �9 FROM -� OUTPUT FILTER :1V OROP ------------------------, • TO Tl jcoMPARATORj IRAMP GENI jPuLSE G£NI "' {Poi"t"l " (Pofot8) f+-----tJ----ttt----- lil-ZOV QS-b {Point Cl i2i< .. . ,,, . 5600 lsrART uPI (Poinl 0) Q2-� I '. cu + r------------ IPo,nt!J f---L----4-----��...
- Page 48 Table 6-1 Replaceable Parts List DCR-lJ PCB Assembly Circuit Circuit Circuit Sorensen Sorensen Sorensen symbol p escriµtion Part Number Symbol Description Part Number Part Numbei- Symbol Description Diodes Resistors (ohms, 1/2 watt !10%: unless noted) Capacitors (Uf unless noted) 586055-122...
- Page 49 "' c... )> t/'I -< 'ti► � (/1 Ol Ill �-< ..., "' < - "' \JI I � I � Figure 6-2 PCB Component Location Diagram Rev B (6/84)
- Page 50 CAB etc. I---- --- Figure 6 -3 Compo nent Layou t, Typica l Assem bly 6 -5 Rev B (6/84 )
- Page 51 �r Ji>/ C.C. '" f S"AO CR2. os1 11 ti ., .., � J, J3-/ JI-I Jl-2 +SENSE �SENSE. s, 1 1 � • I.,:, .. ! � SCl-/£MA TIC 588300 J4-8 JZ.-7 . , " "'I ".' "'J; 2"'1 .
- Page 55 " ·C.RI - CL� � , ll . . � J � TO-O VT ,� , s o o "? � • ,o w O � - - - JI- I -.S E N & c J3-/ -- -7 JI• � .+SENSE PCB SCHEMATIC 588300 J2:..__...
- Page 56 II � t CR2. Cl-[}1 ► 10 W � 1 � fK -.+- roJUT TOr� 1500 "' '"' � "> J3-/ ·- +SENSE -SEtlSE. ----,/ J,· 8 ' " l f Jl-1 J1-2. � R � • , : . , , :J tr "...
- Page 57 ,,, , 1� � YO > O UT ,so o TO-r- o = � ,o w � , J?r/ -- -7 � � Jl-2. -SEN5E ,,,.NSE PCB 5(/.IEMATIC 588300 J2-7 I'------. ':' I ': � � � �I � iiSO -2•...
- Page 58 T2.. C R < "' OS� "' __ _ � •v-1 ., ., � "' J�d JI- I J1-z -St;N�i'e +�!N$1e. PCB SCHE.MATIC 588300 Jl..•7 "' � N -:i 1 -, , t � ' ·"' �B S€EN0T t!4 � TB t c••...
- Page 59 Table 6-2 Replaceable Parts List DCR-B Main Assembly, 500 Watt Series /��11¢¼,¾i DCR-B Model Sorensen Circuit ���i fi ... ,,. Par t No. Description Symbol Capacitors ( uF unless noted) 0 .1, 600V 24-2110-1 3 0.01, 600V 24-2110-7 32,000, 15V...
- Page 60 Table 6-2 (Cont'd) Replaceable Parts List DCR-B Main Assembly, 500 Series Watt ���,�,, DC R -B Model ftfa�;/4��¼¾7 Sorensen Circuit Part No. Description Symbol Diode s (Cont'd) S1 2 58'/565-2 .588080-2 2N5445 587382-2 1Nl184A 587393-2 1N1202A 58'/566-3 3S14 587566-5 3S18...
- Page 61 Table 6-2' (Cont'd) Replaceable Parts List DCR-B Main Assembly, 500 Watt Series DCR-B Model /4'fa���;4fe%1 Sorensen Circuit Part No. Description Symbol Filter Choke 588208-1 588208-2 588209-1 588209-2 588209-3 588229-1 588209-4 588207-1 588181-1 RFI ( Optional) Panel Meters Voltmeter, 0-12V 94-579-1...
- Page 62 Table 6-2 ( Cont'd) Replaceable Parts List DCR-B Main Assembly, 500 Watt Series V���;/4�fa¾I DCR-B Model Sorensen Circuit Part No. Description Symbol d ���l�d'� Resistors (Cont'd) 27-807 5, 50W, 5% 20, 50W, 5% 27-1041 27-842 75, sow, 5% sow, 27-875...
- Page 63 Table 6-2 ( Cont'd) Replaceable Parts List DCR-B Main Assembly, 500 Watt Series DCR-B Model v���1/lft/4%7 Sorensen Circuit Part No. Description Symbol C$ff�,, ... ,, 4-951 Post, Binding, Black Not Used 4-951 Post, Binding, Black Not Used Miscellaneous 42-274 Control Knobs (4)
- Page 64 -@=]--: AS$Y:;e93c6•t �"-I- /--, ..C589308-l REV F n, ::r�-1 ---, -¥- 1.T1-1 ,._..,, 180.Jl • C'<-3 ,NS2.-t2.8 ° c;: ; rq-· '] � -�- L-- - -----�i ---------�"' l� I 2N:!.�22A A,7'53 '--..�o--..-OuT ------0, . � (SEE TABLE 6-3) ,.T,-3 C589335 Rev H Figure 6-12...
- Page 65 Table 6-3 Replaceable Parts List DCR-B OVP OVP Model 13/3/#?��1 Sorense n Circuit Part No. Description Symbol Capacitors ( uF unless noted) 24-2015-13 0.1, 250V 24-2037-15 0.47m, 100V 586048-1 150, 50V Diodes 587565-2 587565-2 588101-15 1N5242B 588101-9 1N753/1N5234B 587565-2 587571-5 1N4587 1057662-1 SCR, 68-6083...
- Page 66 f4321 P.S. SHUTDOWN PLJh8 INPUT-6FT M> LG. COROWIMOLO 3 PRONG ""' """" ..""°0 N """"" , 'l','Z5��:/,' o-1se Notoc Sllde-,ad 0P"0 n available Note· All d. imensions are . . in inches (mm) Dr�wing Figure 6-13 DCR-B Outline 6-21 Rev D (9/85)
Need help?
Do you have a question about the DCR10-40B and is the answer not in the manual?
Questions and answers