
Subscribe to Our Youtube Channel
Related Manuals for NEC ITX-3370-1(BK)TEL


Summary of Contents for NEC ITX-3370-1(BK)TEL
- Page 1 ITX-3370-1(BK)TEL ITX-3370-1W(BK)TEL IP Multimedia Phone for Android User Guide...
- Page 2 WARNING Please do not use a different power adaptor with devices as it may cause damage to the products and void the manufacturer warranty. FCC Statement This equipment has been tested and found to comply with the limits for a Class B digital device, pursuant to part 15 of the FCC Rules.
- Page 3 CE DECLARATION OF CONFORMITY CE DECLARATION OF CONFORMITY This transmitter complies with the essential requirements and provisions of directives 2014/53/EU, This transmitter complies with the essential requirements and provisions of directives 2014/53/EU, This transmitter complies with the essential requirements and provisions of directives 2014/53/EU, 2014/30/EU, 2015/35/EU and subsequent amendments, according to standards 2014/30/EU, 2015/35/EU and subsequent amendments, according to standards ETSI EN 300 328 V2.1.1 (2016-11);...
- Page 4 20 cm between the radiator and your body. CE Authentication Hereby, we declares that the radio equipment declares that the radio equipment ITX-3370-1(BK)TEL/ITX-3370-1W (BK)TEL 1W (BK)TELis in compliance with Directive 2014/53/EU. P a g e ITX-3370 User Guide Version 1.0.1.12...
- Page 5 GNU GPL INFORMATION ITX-3370-1(BK)TEL/ITX-3370-1W (BK)TEL firmware contains third-party software licensed under the GNU General Public License (GPL). We use software under the specific terms of the GPL. Please see the GNU General Public License (GPL) for the exact terms and conditions of the license.
-
Page 6: Table Of Contents
Table of Content DOCUMENT PURPOSE ....................13 WELCOME ........................14 PRODUCT OVERVIEW ....................15 Feature Highlights ........................... 15 ITX-3370 Technical Specifications ....................16 GETTING STARTED ..................... 18 Equipment Packaging ........................18 ITX-3370 Phone Setup ........................18 Using the Phone Stand ......................19 Using the Slots for Wall Mounting ..................... - Page 7 Use the Status Bar .......................... 35 Notifications in Status Bar ....................... 38 System Settings in Status Bar ....................40 Use the ITX-3370 Keys ........................41 Keypad Shortcut Functions ...................... 41 Use the On-Screen Keyboard ......................42 Use the Message Waiting Indicator ....................44 MAKE PHONE CALLS ....................
- Page 8 Missed Call ............................. 64 DND (Do Not Disturb) ........................65 Voicemail/Message Waiting Indication ..................... 66 Call Forward ........................... 67 Call Features ..........................69 CONTACT ........................72 Local Contacts ..........................72 Add Single Contacts ........................72 Import/Export Contacts ........................73 Download Contacts ......................... 75 Search Contacts ..........................
- Page 9 Call History Details ........................88 FILE MANAGER ......................89 Files Operations..........................89 Copy and Paste Files ....................... 89 Move Files ..........................90 Send Files ..........................91 Delete Files ..........................92 Rename a File ......................... 92 File Categories ..........................93 GS MARKET ......................... 94 CAMERA ........................
- Page 10 EHS Headset ..........................111 USB Headset ..........................112 USB .............................. 113 SD Card ............................114 Table of Tables Table 1: ITX-3370 Features in a Glance ....................15 Table 2: ITX-3370 Technical Specifications ..................... 16 Table 3: Equipment Packaging ....................... 18 Table 4: ITX-3370 Front View .........................
- Page 11 Figure 18: ITX-3370 Switch Idle Screens ....................33 Figure 19: Set up Home Idle Screen ...................... 34 Figure 20: Add an Idle Screen ........................ 35 Figure 21: Delete an Idle Screen ......................35 Figure 22: ITX-3370 Top Status Bar ....................... 36 Figure 23: Status Bar - More Options .....................
-
Page 12: Page
Figure 61: Missed Call Screen ....................... 65 Figure 62: Enable/Disable DND ......................66 Figure 63: Retrieve Voicemail ........................ 67 Figure 64: Unconditional Call Forward ....................67 Figure 65: Call Forward – Unconditional ....................68 Figure 66: Call Forward - Time Based ....................68 Figure 67: Call Forward - Busy/No Answer/DND .................. - Page 13 Figure 104: ITX-3370 Browser Menu Options ..................101 Figure 105: Open New Window in Browser ..................102 Figure 106: ITX-3370 Web Browser-Bookmarks ................... 102 Figure 107: ITX-3370 Connect to Wi-Fi ....................106 Figure 108: ITX-3370 Connect to Wi-Fi-Show Advanced Options ............106 Figure 109: Wi-Fi - Add network ......................
-
Page 14: Document Purpose
DOCUMENT PURPOSE This document describes how to configure the ITX-3370-1(BK)TEL/ITX-3370-1W (BK)TEL (we call it ITX-3370 for short) via phone's LCD menu and web UI menu to fully manipulate phone's features. The intended audiences of this document are VoIP administrators. To learn the basic functions of ITX-3370, please check the latest “ITX-3370 Administration Guide”. -
Page 15: Welcome
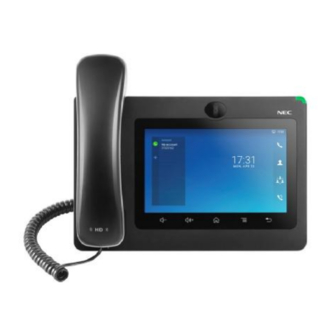
WELCOME Thank you for purchasing ITX-3370-1(BK)TEL, ITX-3370-1W(BK)TEL, we call it ITX-3370 for short, IP Multimedia Phone Android which combines 16-line video phone with multi-platformvideoconferencing solution and the functionality of an Android tablet to offer an all-in-one communicationssolution. The phone features a 7” 1024x600 capacitive touch screen TFT LCD,Mega pixel camera, dual Gigabit portswith PoE/PoE+, HD audio and video, integratedWi-Fi (802.11a/b/g/n) -
Page 16: Product Overview
5GHz Wi-Fi (802.11a/b/g/n), PoE/PoE+, Bluetooth 4.0+EDR, USB, SD, HDMI, EHS with Plantronics headsets support · 7" (1024x600) capacitive (5 points) touch screen TFT LCD, mega ITX-3370-1(BK)TEL pixel CMOS sensor camera with privacy shutter ITX-3370-1W(BK)TEL · HD wideband audio, full-duplex Hands-free speakerphone with HD... -
Page 17: Itx-3370 Technical Specifications
ITX-3370 Technical Specifications The following table resumes all the technical specifications including the protocols / standards supported, voice codecs, telephony features, languages and upgrade/provisioning settings for the phone ITX-3370. Table 2: ITX-3370 Technical Specifications SIP RFC3261, TCP/IP/UDP, RTP/RTCP, HTTP/HTTPS, ARP, ICMP, DNS (A Protocols/Standards record, SRV, NAPTR), DHCP, PPPoE, SSH, TFTP, NTP, STUN, SIMPLE, ®... - Page 18 Yes, HD handset and speakerphone with support for wideband audio HD Audio Yes, integrated stand with multiple adjustable angles. Wall mountable Base Stand Layer 2 QoS (802.1Q, 802.1p) and Layer 3 (ToS, DiffServ, MPLS) QoS User administrator level passwords, MD5 and MD5-sess based Security authentication, 256-bit AES encrypted configuration file, TLS, SRTP, HTTPS,...
-
Page 19: Getting Started
GETTING STARTED This chapter provides basic installation instructions including the list of the packaging contents and also information for obtaining the best performance with the ITX-3370. Equipment Packaging Table 3: Equipment Packaging ITX-3370 · 1 x ITX-3370 Main Case · 1 x Handset ·... -
Page 20: Using The Phone Stand
Using the Phone Stand The ITX-3370 has a built-in phone stand. To use it, pull out the phone stand handle on the back of the phone. Adjust the angle as preferred and make sure the phone stands still on the desktop Using the Slots for Wall Mounting 1. -
Page 21: Figure 3: Itx-3370 Back / Side View
Figure 3: ITX-3370 Back / Side View P a g e | 20 ITX-3370 User Guide Version 1.0.1.12... -
Page 22: Description Of The Itx-3370
Description of the ITX-3370 Front View Figure 4: ITX-3370 Front Table 4: ITX-3370 Front View Item Name Description Mega pixel front camera. The angle can be adjusted, and the camera Front Camera can be blocked by scrolling up/down the wheel on the back of the camera. -
Page 23: Back View
Back View Figure 5: ITX-3370 Back View Table 5: ITX-3370 Back View Item Name Description Camera Adjusting Wheel Scroll up/down to adjust the camera angle. Phone Stand (built-in) Adjust the phone stand angle to place the phone on the desk. the phone on the desk. -
Page 24: Side View
Side View Figure 6: ITX-3370 Side View Table 6: ITX-3370 Side View Item Name Description HDMI Port Connect display device to the HDMI port via HDMI cable. SD Card Port Connect SD storage device to the SD Card Slot. 3.5mm Headset Port Connect 3.5mm headset. -
Page 25: Using The Slots For Wall Mounting
4. Connect the 12V DC output plug to the power jack on the phone; plug the power adapter into an electrical outlet. If PoE switch is used in step 3, this step could be skipped; The LCD will display the booting up screen or firmware upgrading information. Before continuing, please wait for the main screen display to show up. -
Page 26: Connecting The Itx-3370
Connecting the ITX-3370 To setup your ITX-3370, please follow the steps below: 6. Connect the handset and main phone case with the phone cord; 7. Connect the LAN port of the phone to the RJ-45 socket of a hub/switch or a router (LAN side of the router) using the Ethernet cable;... -
Page 27: Getting To Know Itx-3370
GETTING TO KNOW ITX-3370 Use the Touchscreen When the phone boots up in HOME screen, the LCD will display as below. A registered account is shown in the following figure and users might need register their own account to have the account status displayed. -
Page 28: Figure 9: Itx-3370 Onscreen Menu
Figure 11: ITX-3370 Onscreen Menu To fully manipulate the ITX-3370 capacitive touch screen, use your fingers to operate the following on the ITX-3370 icons, buttons, menu items, onscreen keyboard etc. Figure 12: ITX-3370 Finger Gestures on the Touch Screen P a g e | 27 ITX-3370 User Guide Version 1.0.1.12... -
Page 29: Use The Desktop
· Slightly touch the screen with fingertip to initiate menu, options or applications. For example, to select items on the screen (e.g., setting options, apps etc.); to press onscreen buttons (e.g., "End" or "Options" softkey during the call); to type letters and symbols using the onscreen keyboard. ·... -
Page 30: Add Widget To Desktop
Figure 13: ITX-3370 Desktop Menu · Desktop page Add, delete or edit desktop pages, set Home page and change the screen sequence. · Wallpaper Select wallpaper from Local gallery or from the available system Wallpapers · Widgets Add widgets to the desktop by touching and holding the widget from the widget menu. ·... -
Page 31: Manage Desktop Items
Figure Figure 14: Add Widget to the Desktop Manage Desktop Items On the ITX-3370 desktop, users could tap on the desktop items to manage shortcuts and widgets. The rs could tap on the desktop items to manage shortcuts and widgets. The rs could tap on the desktop items to manage shortcuts and widgets. -
Page 32: Figure 14: Resize Digital Clock Widget
· Certain widgets such as Clock can be resized on the desktop. To resize a widget, touch and press the widget for about 2 seconds. Then lift your finger from the screen. This will bring up the white frame as shown in [ ]. -
Page 33: Set Wallpapers
Note: Deletingan application icon will systematically pop up a window asking the permission touninstall the application from the screen. Press ok to uninstall or press cancel to abort. Set Wallpapers On the ITX-3370 desktop, touch and press on an empty spot for about 2 seconds or users could press menu key and select "Wallpaper"... -
Page 34: Idle Screen
Figure Figure 19: ITX-3370 Recent Applications Users could use the thread manager to do the following: Users could use the thread manager to do the following: · Slide the running thread to the left or right to stop the application. Slide the running thread to the left or right to stop the application. -
Page 35: Set Up Idle Screen
Set Up Idle Screen · Set home screen Follow the steps below to set up the HOME screen. Follow the steps below to set up the HOME screen. 1. ITX-3370 is up and running on idle screen. 2. Press the MENU button . -
Page 36: Use The Status Bar
Figure 22: Add an Idle Screen Ø Delete idle screen. Tap on to delet the Idle screen. to delet the Idle screen. Please make sure the apps, shortcuts or widgets on the idle Please make sure the apps, shortcuts or widgets on the idle screen are removed first. - Page 37 Figure 24: ITX-3370 Top Status Bar For more options on the Status Bar (brightness, call forward, Hotspot…) users can pull down the status bar twice, or once with two fingers. Figure 25: Status Bar - More Options The running process and notifications will show up in the list. For example, the following figures indicate that there is a notification for an available Wi-Fi network.
- Page 38 Figure 26: ITX-3370 Top Status Bar – Notification · Tap on the notification message to view the details. · Slide the notification message to the left or the right side to remove it. For more information about specific features in the notification bars, you can press the bottom right of the feature in question.
-
Page 39: Notifications In Status Bar
Figure Figure 28: ITX-3370 Top status Bar – Wi-Fi Notifications in Status Bar The following table describes the icons used on the status bar for notification purpose. The following table describes the icons used on the status bar for notification purpose. Table 7 7: ITX-3370 Status Bar Notification Icons Network connected via Ethernet cable. - Page 40 Wi-Fi network is available. Fi network is available. Wi-Fi is enabled and connected. Fi is enabled and connected. Onscreen keyboard is activated. Onscreen keyboard is activated. Bluetooth is enabled but Bluetooth is enabled but not connected. Bluetooth is enabled and Bluetooth is enabled and connected.
-
Page 41: System Settings In Status Bar
The phone is powered up using PoE. The phone is powered up using PoE. Call forward is set up. Call forward is set up. PPPoE is connected. PPPoE is connected. PPPoE is not PPPoE is not connected. Warning message. Warning message. System Settings in Status Bar Slide down the top status bar and select Slide down the top status bar and select System Settings. -
Page 42: Use The Itx-3370Keys
Use the ITX-3370Keys Figure 30: ITX-3370 Keys Table 8: ITX-3370 Keys Volume Down Tap to turn down the call volume and media volume. Tap to turn down the call volume and media volume. Volume Up Tap to turn up the call volume and media volume. Tap to turn up the call volume and media volume. -
Page 43: Use The On-Screen Keyboard
1. Download the firmware file to PC and save it in SD card firmware file to PC and save it in SD card. 2. Insert the SD card to ITX-3370. 3. Power cycle the ITX-3370 and the 5 LCD keys on the bottom of the screen will light up the 5 LCD keys on the bottom of the screen will light up the 5 LCD keys on the bottom of the screen will light up. - Page 44 · English Keyboard This is the default keyboard on ITX ITX-3370. Figure 31: ITX ITX-3370 Onscreen Keyboard - English Keyboard To switch input between lowercase and upperca To switch input between lowercase and uppercase, tap on (lowercase) or (uppercase). (uppercase). Figure 32: ITX-3370 3370 Onscreen Keyboard - Lowercase and Uppercase ·...
-
Page 45: Use The Message Waiting Indicator
Tap on to access more symbols. to access more symbols. Figure Figure 34: English Keyboard - More Symbols Note: · To configure keyboard and input options, go to To configure keyboard and input options, go to SettingsàBasicàLanguage & Keyboard Language & Keyboard Keyboard &... -
Page 46: Make Phone Calls
MAKE PHONE CALLS Register SIP Accounts The ITX-3370 supports up to 16 independent SIP accounts. Each account can have separate SIP servers, usernames and NAT configurations. Account Status On the idle screen, the account widget shows the account name, and registration status. ·... -
Page 47: Configure Sip Account
Configure SIP Account To register a SIP account, users can access users can access phone's LCD menuàSettingsàAdvanced Advanced àAccount Settings Or users could log in the ITX-3370 web GUI web GUIàAccount page to fill in the necessary registration information, page to fill in the necessary registration information, i.e., Account active, Account name, SIP Server, SIP User ID, SIP Authentic ID, SIP Authentic Password, i.e., Account active, Account name, SIP Server, SIP User ID, SIP Authentic ID, SIP Authentic Password, i.e., Account active, Account name, SIP Server, SIP User ID, SIP Authentic ID, SIP Authentic Password,... -
Page 48: Dial A Number Directly
Figure 37: Disable Video Call Feature on Dial Screen Dial a Number Directly Use the methods mentioned above to open dial screen [Figure 36: ITX-3370 Dial Screen] Select the account to dial out on the left panel of the dial screen. The selected account will be displayed in green Enter the digits to be dialed out using the keypad. -
Page 49: Redial
Redial Users can dial out the last dialed number if there is dialed call log, using the same SIP account making the Users can dial out the last dialed number if there is dialed call log, using the same SIP account making the Users can dial out the last dialed number if there is dialed call log, using the same SIP account making the call last time. -
Page 50: Answer A Call
Figure 39: ITX-3370 Call History Answer a Call Single Incoming Call · When the phone is in idle and there is an incoming audio call, the phone will show the call screen as below. Tap on "Answer" softkey to answer the call via speaker or pick up the handset the answer the call. - Page 51 If set to "Original proportion", the phone displays video in its original proportion. If the video display proportion is different from the one of the phone, the phone will stretch or compress video to display it. If set to "Equal proportional cutting", the phone will cut video to meet its own display proportion. If set to "Proportional add black edge", the phone will display video in its original proportion, if still exists spare space, the phone will add black edge on it.
-
Page 52: Multiple Calls/Call Waiting
Figure 43: Single Incoming Call – Preview-2 Multiple Calls/Call Waiting 1. When there is another incoming call during active call, users will hear a call waiting tone, with the LCD displaying the caller name and ID for the incoming call. In the prompt window, it shows new incoming call from "Jack"... -
Page 53: Call Progress Status
Call Progress Status During an active call if Home Button is pressed, the phone will go back to the home screen and the call-in-progress status will be shown on the ITX-3370 status bar, once clicking the bar it will go back to call screen. -
Page 54: Call Recording
Call Recording 1. During the call, users could record the conversation to During the call, users could record the conversation to the phone by tapping on "More" the phone by tapping on "More"à"Start Recording" on the call screen. 2. If need to stop the recording, tap on "More" p the recording, tap on "More"à"Stop Recording"... -
Page 55: Turn On Video During Audio Call
Turn on Video during Audio Call Users could establish audio call first and then turn on video or accept video request during the call if the other party supports video call as well. · Turn on video during audio call During an active audio call, on the call screen, tap on "More"... -
Page 56: Switch Audio Channel During Call
If the ITX-3370 receives video request during the audio call, a message "Do you want to accept video?" receives video request during the audio call, a message "Do you want to accept video?" receives video request during the audio call, a message "Do you want to accept video?" will be prompted. -
Page 57: Call Transfer
Call Transfer A call can be transferred to another party during the call. The A call can be transferred to another party during the call. The ITX-3370 supports blind transfer and supports blind transfer and attended transfer. Blind Transfer 1. During the active call, tap on "More" softkey. During the active call, tap on "More"... -
Page 58: Attended Transfer
Attended Transfer ITX-3370 supports attended transfer: 1. During the active call, tap on "More" softkey. Select "Transfer" to bring up transfer screen. 2. Select transfer mode as "Attended" by tapping on the mode selection area (see figure below). Figure 53: Attended Transfer 3. -
Page 59: Figure 54: Attended Transfer
Figure 54: Attended Transfer - Transferring 5. After transfer target answers the call, the following screen will be shown up. If the user simply hangs up or taps on “End” soft key, the call wil be transferred, and ITX-3370 will hang up the call. If the user taps on "Split"... - Page 60 7. During the active call, tap More then New Call to make the second call. This will place the current call on hold. 8. The second call establishes after the call is answered. 9. During the active call, tap on "More" softkey. 10.
-
Page 61: 7-Way Conference
7-Way Conference The ITX-3370 supports up to 7-way audio conferencing. Initiate Conference There are three ways to initiate a conference call. · Initiating conference from dial screen 1. Bring up the dial screen using one of the methods described previously [Figure 36: ITX-3370 Dial Screen] 2. - Page 62 Figure 58: Add Conference Members from Dial Screen Add Conference Members from Dial Screen 2 4. Using the same method add the other members then press Using the same method add the other members then press “Audio Call” for an Audio conference or for an Audio conference or “Video Call”...
- Page 63 Figure 59: ITX-3370 Conference Screen If there are calls on hold, they will show up when adding member to the conference. Users could then tap on the call to add it to the conference directly. Figure 60: ITX-3370 Conference - Add Existing Call to Conference 3.
-
Page 64: Remove Party From Conference
Figure Figure 61: 3-Way Conference Call Established Remove Party from Conference To remove a party from the conference: To remove a party from the conference: 1. Tap on the participant icon of the user you want to remove of the user you want to remove. The below window will show up giving the The below window will show up giving the possibility to Mute enablevideo Enlarge or hang up. -
Page 65: End Conference
End Conference To end the conference, tap on to disconnect all the parties from the conference. to disconnect all the parties from the conference. ITX ITX-3370 will hang up the call. If the remote party hangs up the call itself, it will be disconnected from the conference but other up the call. -
Page 66: Dnd (Do Not Disturb)
Figure 63: Missed Call Screen Users can tap on the missed call entry to access the missed call log. To close the missed call screen and Users can tap on the missed call entry to access the missed call log. To close the missed call screen and Users can tap on the missed call entry to access the missed call log. -
Page 67: Voicemail/Message Waiting Indication
Figure 64: Enable/Disable DND Note: · When the phone is in an active call, turning on/off DND won't affect the current active When the phone is in an active call, turning on/off DND won't affect the current active When the phone is in an active call, turning on/off DND won't affect the current active call. It will take effect starting from the next incoming call. -
Page 68: Call Forward
Figure 65: Retrieve Voicemail For each account, the Voicemail User ID can be set up under web GUIàAccount XàCall Settings: "Voice Mail Access Number". This is the number that will be dialed out to access voicemail message when tapping on the account in Voice Mail screen. Call Forward Call forward feature can be set up from ITX-3370 LCD or web GUI. - Page 69 · From Web GUI Log in ITX-3370 web GUI and go to AccountpageàCall Settings. By default, Call Forward feature is set to "None". The Call Forward feature options are: Ø Unconditional Forward: All the incoming calls will be forwarded to the number set up in "All To" field.
-
Page 70: Call Features
Figure 69: Call Forward - Busy/No Answer/DND Call Features The ITX-3370 supports traditional and advanced telephony features including caller ID, caller ID with caller Name, call waiting, call forward etc. Before using the following feature codes, please make sure "Enable Call Features"... - Page 71 Force Codec (per call) · Dial *02 followed by the preferred codec code and the phone number. · The phone will be forced to use this codec during the call. · Codec code: PCMU: 7110 PCMA: 7111 G726-32: 72632 G722: 722 iLBC: 7201 For example, if the user would like to use PCMA to call phone number 334455, enter *027111334455.
- Page 72 Force Audio Calling (per call) · Dial *83 followed by the phone number to send the audio call. Force Video Calling (per call) · Dial *84 followed by the phone number to send the video call. Busy Call Forward. To set up busy call forward: ·...
-
Page 73: Contact
CONTACT The ITX-3370 supports local, LDAP and BroadWorks Xsi Contacts. supports local, LDAP and BroadWorks Xsi Contacts. To access ITX-3370contacts, on the phone the phone’s idle screen, tap on icon on the right panel panel.The following figure shows Contacts on the ITX-3370 3370. -
Page 74: Import/Export Contacts
Figure 71: ITX-3370 Contacts - Add New Contact Note: When typing a number using dial pad, “Add to contacts” button will appear as displayed on following picture, to add a new entry to your contacts list if the input number does not match any entry in your contacts. - Page 75 1. Open Contacts. 2. Tap on More on the upper right the upper right corner of the Contacts screen. 3. Select "Import contacts" to bring up " to bring up the dialog below. 4. Fill in the import options and scroll down to the bottom of the screen. Fill in the import options and scroll down to the bottom of the screen.
-
Page 76: Download Contacts
Figure Figure 74: ITX-3370 Contacts - Export Contacts Download Contacts The ITX-3370 supports downloading XML phonebook from a remote HTTP/TFTP supports downloading XML phonebook from a remote HTTP/TFTP/HTTPS /HTTPS server to local Contacts. When downloading the phonebook, the Contacts. When downloading the phonebook, the ITX-3370 sends request to the HTT sends request to the HTTP/TFTP/HTTPS server looking for file phonebook.xml. -
Page 77: Search Contacts
Figure 75 75: ITX-3370 Contacts - Download Contacts Search Contacts 1. Open Contacts. 2. Tap on the search field 3. Enter a contact's name or a number to search. The search number to search. The search result will be automatically updated and result will be automatically updated and displayed when entering the key words. -
Page 78: Use Contacts
Use Contacts Once the contacts are added, users could navigate in the contacts list Once the contacts are added, users could navigate in the contacts list to make a call to make a call and manage the contacts furthermore. Make a Call to Contacts Scroll up/down to find the contact in the list and tap on Scroll up/down to find the contact in the list and tap on to call this contact. -
Page 79: Edit Contacts
There are two other methods to add contacts to favorites. to add contacts to favorites. · Directly pressing on the contactand contactand tap on to add the contact to favorite. · Tapping on “Favorites”on the Contacts screen “Favorites”on the Contacts screen to navigate to favorites category and tap on tap on select the contacts to be added to favorites select the contacts to be added to favorites then tap on... -
Page 80: Share Contacts Via Bluetooth
Share Contacts Via Bluetooth Users can share a single contact or a batch of contacts. Refer to the following steps to do so: share a single contact or a batch of contacts. Refer to the following steps to do so: share a single contact or a batch of contacts. -
Page 81: Add Contacts To Group
Figure Figure 79: ITX-3370 Contacts - Add New Group Add contacts to Group To add contacts to a group, tap on the group then tap on To add contacts to a group, tap on the group then tap on , check the contacts to be added to the , check the contacts to be added to the group and press Note:... - Page 82 Figure 80: ITX-3370 Contacts - Storage Status Note: Users could increase the number of maximum contacts storage to more than 1000 contacts on ITX-3370. Users may access the phone through SSH and change the P value P1688 to another number (<=10000) to increase the default contacts storage.
-
Page 83: Harassment Interception
HARASSMENT INTERCEPTION The ITX-3370 has blacklist support for users to manage incoming calls. To access blacklist, tap on “Settings” icon then under “Features”, access “Harassment Interception”. Blocked Contacts The blocked Contacts are the contacts that were added to the blacklist, the ITX-3370 will block any calls coming from these contacts.To show the blocked contacts tap on Blacklist from the Harassment Interception page. -
Page 84: Delete Block History
Figure 82: Block History Delete Block History 1. In the block history, tap on the recycle bin icon , tap on the recycle bin icon 2. Confirm the deletion of the complete blocking Confirm the deletion of the complete blocking record by pressing “OK” Edit Blacklist Tap on Blacklist under the Harassment Interception Menu to show the blacklisted contacts Tap on Blacklist under the Harassment Interception Menu to show the blacklisted contacts... - Page 85 Figure 83: ITX-3370 Blacklist - Add Number to Blacklist 2. The following figure shows manually addingnumber to blacklist. Once Manually add option is selected, a window will be prompted for users to enter the phone number in the first field and name/note in the second field (optional).
-
Page 86: Intercept Anonymous Calls
· Edit Blacklist 1. In the blacklist, touch and press the entry for about 2 seconds a prompt allowing changing the name/note is displayed 2. Change the name/note. 3. Tap on OK once done. · Delete Blacklist Users can Delete/unblock contacts from the black list using two methods: 1. -
Page 87: Call History
CALL HISTORY The ITX-3370 supports local and BroadWorks Xsi Call history. supports local and BroadWorks Xsi Call history. Tap on idle screen on idle screen to access Call history. The following figure shows the call history on the The following figure shows the call history on the ITX-3370. Figure 86: ITX-3370 Call History Local Call History There are four different categories in the local call history. -
Page 88: Dial Out From Call History
Dial Out from Call History Tap on one of the call history entry to call this number directly. The phone will use the same account as the Tap on one of the call history entry to call this number directly. The phone will use the same account as the Tap on one of the call history entry to call this number directly. -
Page 89: Call History Details
Call History Details For each call history entry, users could tap on For each call history entry, users could tap on the entry to access the details. Figure Figure 88: ITX-3370 Call History - Details The following operations could be done: The following operations could be done: ·... -
Page 90: File Manager
FILE MANAGER File Manageris a tool that allows users to delete, move, copy File Manageris a tool that allows users to delete, move, copy/past, send and rename files. It helps users to /past, send and rename files. It helps users to access and manage files in local storage as well as external storage devices (e.g, SD card/USB flash access and manage files in local storage as well as external storage devices (e.g, SD card/USB flash access and manage files in local storage as well as external storage devices (e.g, SD card/USB flash... -
Page 91: Move Files
Figure 90: Paste File Move Files The steps to move a file are similar to similar to the steps to copy/paste a file. The difference is once the file is copy/paste a file. The difference is once the file is moved, the file will not be kept in the source folder. -
Page 92: Send Files
1. Press on the top right corner of the screen and select the files to move op right corner of the screen and select the files to move 2. Tap on to move the files selected to move the files selected 3. -
Page 93: Delete Files
Delete Files 1. Open file manager and navigate to the directory of the file to b Open file manager and navigate to the directory of the file to be deleted. Touch and press on the file for . Touch and press on the file for about 2 seconds until more options appear more options appear. -
Page 94: File Categories
Figure 94: Rename File File Categories The file manager will categorize the files stored on local/external storage based on the type of files. The available categories are · All: gives access to all internal storage files as well as external storage devices ·... -
Page 95: Gs Market
GS MARKET The ITX-3370 supports extensive amount of 3 supports extensive amount of 3 party Android applications. Users could install those party Android applications. Users could install those applications from the built-in GS Market. If Google Play application is installed from GS Market, users in GS Market. -
Page 96: Camera
CAMERA The ITX-3370 has built-in Camera to support taking pictures and recording videos. Users can also use the in Camera to support taking pictures and recording videos. Users can also use the in Camera to support taking pictures and recording videos. Users can also use the camera during SIP video calls as well as video calls via 3rd party applications. -
Page 97: Angle Adjustment
4. To view the last recorded videos, s To view the last recorded videos, swipe from right to left on camera screen. Angle Adjustment On the back of the ITX-3370 camera, users could scroll the wheel up/down to adjust the camera angle. If camera, users could scroll the wheel up/down to adjust the camera angle. - Page 98 Figure 98:Edit picture Note: Videos cannot be edited from the gallery · Gallerypage To access the Gallery, open the camera click on the circular key on the right top corner of the camera sceen. Figure 99: Access to the Gallery P a g e | 97 ITX-3370 User Guide...
- Page 99 Figure 100:ITX-3370 Gallery On this page from the upper left corner, users can sort the pictures and videos by Album, Location or Time. · View pictures Access one group of pictures and videosand select "Grid View" or "Filmstrip View" from upper left corner of the screen to set view mode of the pictures.
-
Page 100: Screensaver
· Take picture/video Tap on on the upper right of the on the upper right of the Gallery pageto start taking pictures or videos using the to start taking pictures or videos using the ITX-3370 built-in camera. · Select multiple pictures Touch and press on one of the pictures for about 2 seconds until the picture is highlighted press on one of the pictures for about 2 seconds until the picture is highlighted press on one of the pictures for about 2 seconds until the picture is highlighted in blue. - Page 101 Figure 103: Use Network Images Click on Use network images and set the path of the remote screensaver folder. Figure 104: Network Image Path P a g e | 100 ITX-3370 User Guide Version 1.0.1.12...
-
Page 102: Browser
BROWSER ITX-3370 browser could be used in a similar way as a PC browser could be used in a similar way as a PC-based web browser. Users can open web pages, open web pages, bookmarks, view history, search …etc. Tap etc. - Page 103 · To open a new window, tap on icon on the right side of the tab. Figure 107: Open New Window in Browser · To open Bookmarks, History and Saved Pages, tap the icon on the upper right of the Browser. Figure 108: ITX-3370 Web Browser-Bookmarks P a g e | 102...
-
Page 104: Actionurl
ACTIONURL ITX-3370 supports ActionURL module, and it is used to set the URL for various kinds of phone events on phone web GUI, and when the corresponding event occurs on the phone, phone will send the configured URL to SIP server. To use ActionURL module, users need to know the supported events in this module, and also added the dynamic variables of the supported events on phone web GUI. -
Page 105: Connecting Itx-3370 To Gds3710 Door System
CONNECTING ITX-3370 TO GDS3710 DOOR SYSTEM The ITX-3370 offers a powerful integration with GDS3710 Door System and allows users to open the door, initiates call to the GDS3710 and gets real time audio/video stream. The ITX-3370 can be connected with the GDS3710 in two different ways, either using peering mode (without a SIP server) or through a SIP server. -
Page 106: Connect To Network And Devices
CONNECT TO NETWORK AND DEVICES CONNECT TO NETWORK AND DEVICES The ITX-3370 supports a variety of network connections (Ethernet, Wi supports a variety of network connections (Ethernet, Wi-Fi) and device connections, Fi) and device connections, including EHS headset (Plantronics), USB, SD card and Bluetooth device. Users can connect the lantronics), USB, SD card and Bluetooth device. - Page 107 3. Touch Network. 4. Touch Wi-Fi Settings. 5. A list of Wi-Fi networks will be displayed as scanning result. Tap on the SSID and enter the correct password information to connect to the selected Wi-Fi network. 6. The phone will start connecting to the Wi-Fi. The status bar will show Wi-Fi signal strength. 7.
-
Page 108: Wi-Fi Settings Shortcut
9. If there is a need to modify the saved Wi-Fi network setting, the end user should tap and long press the SSID bar in the Wi-Fi setting page. The system will pop up a prompt and then users need to tap on “Modify Network”. -
Page 109: Bluetooth
-Or- Press the letter under Wi-Fi icon this will show the list of the Wi Fi icon this will show the list of the Wi-Fi networks detected.Press “More Settings” .Press “More Settings” to access the Wi-Fi settings. Figure Figure 113: Wi-Fi Shortcut - Wi-Fi List Bluetooth Bluetooth is a proprietary, open wireless technology standard for exchanging data over short distances Bluetooth is a proprietary, open wireless technology standard for exchanging data over short distances... -
Page 110: Pair Itx-3370 With A Bluetooth Device
6 digits of the phone’s Bluetooth MAC address. The device name will be visible to other devices when connecting them. Follow the steps below to change the name: 1. Go to ITX-3370's SettingsàBasicàBluetooth 2. Turn on Bluetooth. 3. Select Additional settings. 4. -
Page 111: Unpair A Bluetooth Device
Figure 114: ITX-3370 Bluetooth - Paired Device Unpair a Bluetooth Device 1. In the Bluetooth settings, tap on button corresponding to the Bluetooth device. 2. SelectUnpair. Bluetooth Settings Shortcut User can enter the Bluetooth settings by sliding the Status Bar, then long Press on the Bluetooth icon. Figure 115: Bluetooth Settings Shortcut P a g e | 110... -
Page 112: Ehs Headset
-Or- Press the letter under Bluetooth icon this will show the list of the paired devices. Press “More Settings” to access the Bluetooth settings. Figure 116: Bluetooth Setting shortcut 2 EHS Headset The ITX-3370 supports normal RJ9 headset and EHS headset. To use Plantronics EHS headset: 1. -
Page 113: Usb Headset
USB Headset The ITX-3370supports USB Headset, once the headset plugged, it will be detected automatically, and the following icon will be shown on the top right of the status bar, this means a USB headset is connected. Figure 118: USB Headset Connected In the calling page, user can press on the USB headset button (shown in figure below) to enable USB headset. -
Page 114: Usb
Figure 120 120: Switch Between Speaker and USB mode The ITX-3370 supports USB connection with USB storage devices. To connect and access USB storage supports USB connection with USB storage devices. To connect and access USB storage supports USB connection with USB storage devices. To connect and access USB storage device: 1. -
Page 115: Sd Card
Figure 121: USB Storage Device Connected to : USB Storage Device Connected to ITX-3370 SD Card 1. Insert your SD card into SD Card slot at the back of Insert your SD card into SD Card slot at the back of ITX-3370. Please make sure the SD Card is .
Need help?
Do you have a question about the ITX-3370-1(BK)TEL and is the answer not in the manual?
Questions and answers